Tag Archives: Fannie Farmer

Biscuits and Sausage Gravy

Biscuits and Sausage Gravy, a traditional American breakfast dish

My first brush with a variation of biscuits and sausage gravy was something kindly called sh$t on a shingle, or creamed chipped beef on toast.   I couldn’t understand how anyone had a disparaging word to say about this wonderful dish.  It was amazing!  Creamy gravy, salty beef and crunchy toast.  Keep your breakfast pancakes, this was awesome!

Then, I had biscuits and sausage gravy.   Combine a white gravy with my favorite breakfast meat and you have me at “gravy”.    Let’s be clear, there’s not a single redeeming value about this dish.  Sure, you could try to say you are getting “calcium” from the milk in the gravy.  I use that justification for ice cream and milkshakes.  However, let’s be real, this is a fairly empty calorie carbohydrate extravaganza.   It’s up there with a doughnut for breakfast.  Maybe a bagel with cream cheese.  You get the drift.  Not health food.

Biscuits and gravy have a storied history in America.  The morning meal was terribly important, but, the meal needed to be economical.  A meal that used flour, milk and scant meat was very well received. It kept people full for a day of hard labor in the field. It may have also been a small sign of rebellion, as it was entirely different from anything the British ate for breakfast. I picked recipes from the 1896 Boston Cooking-School Cook Book by Fannie Farmer.  They mirrored other recipes and had exact measurements.  The instructions were sometimes lacking and the ingredients weren’t necessarily listed in the order they were used.  However, I love seeing the differences in preparation.  Now, when you make pie crust or biscuits, you are admonished to keep everything cold, or the biscuits won’t be flaky.  Mrs. Farmer makes no such admonishment.  It just wasn’t an option during her time.  Mrs. Farmer was more concerned about the  oven being “hot”.   If the biscuits were baked “too slow”, Mrs. Farmer warned that “the gas will escape before it has done its work”.

She has 3 versions of baking powder biscuits in her cookbook:  Baking Powder Biscuit I, Baking Powder Biscuit II and “Emergency Biscuit”.    I chose to work off of Biscuit I, as I didn’t have an emergency that a biscuit would solve.  It also used lard and butter, versus just butter, which was good enough for me.  I like the combination of the two fats, as they each add something different to the biscuit. Butter adds a flakiness as it melts and lard adds tenderness. I also interpreted a “hot oven” to be 425 degrees Fahrenheit.   I can’t really say that I was impressed by the biscuits.  They were very serviceable.  They had a great crunch on the outside and were tender inside.  However, they didn’t rise really high.  Maybe that’s a modern convention.  Maybe the oven needed to be hotter.  Maybe, as an American, I’m used to biscuits that are just too big.  I don’t know. They tasted wonderful, they just lacked in presentation.  So, be warned.  I passed it off as “how they ate back then”.  No one cared and there wasn’t a drop left. They were very good, just a little plain.

The sausage gravy is a different story.  Why does it have to be soooo drab?  Fat, flour, milk, salt, pepper and bits of sausage. So bland, albeit delicious.  But, what if it could be better?  So, I decided to break the mold.  I used onion.  I know, gasp.  I then added cognac.  That’s a pearl clutching ingredient there.  Look, this recipe can be fancied up.  The cognac adds a warm layer of flavor that compliments the sausage perfectly.  Your kitchen will smell amazing.  I am using a small amount to deglaze the pan, nothing too boozy.  You are free to leave these out for a more “pure” experience.

Biscuits and Sausage Gravy
Inspired by Baking Powder Biscuits I and White Sauce I from Fannie Farmer’s 1896 Boston Cooking-School Cook Book
Serves 6
Prep and Cook Time: 30-40 minutes

Biscuits
2 cups all purpose flour
4 teaspoons baking powder
1 teaspoon salt
1 tablespoon lard (or vegetable shortening)
2 tablespoons butter, divided
3/4 cup milk

Sausage Gravy
1 pound ground breakfast sausage
1 small onion, finely diced
1 tablespoon cognac
2 tablespoons flour
1 cup milk
1/4 teaspoon salt
1/4 teaspoon black pepper

For the biscuits:

Preheat oven to 425 degrees Fahrenheit.

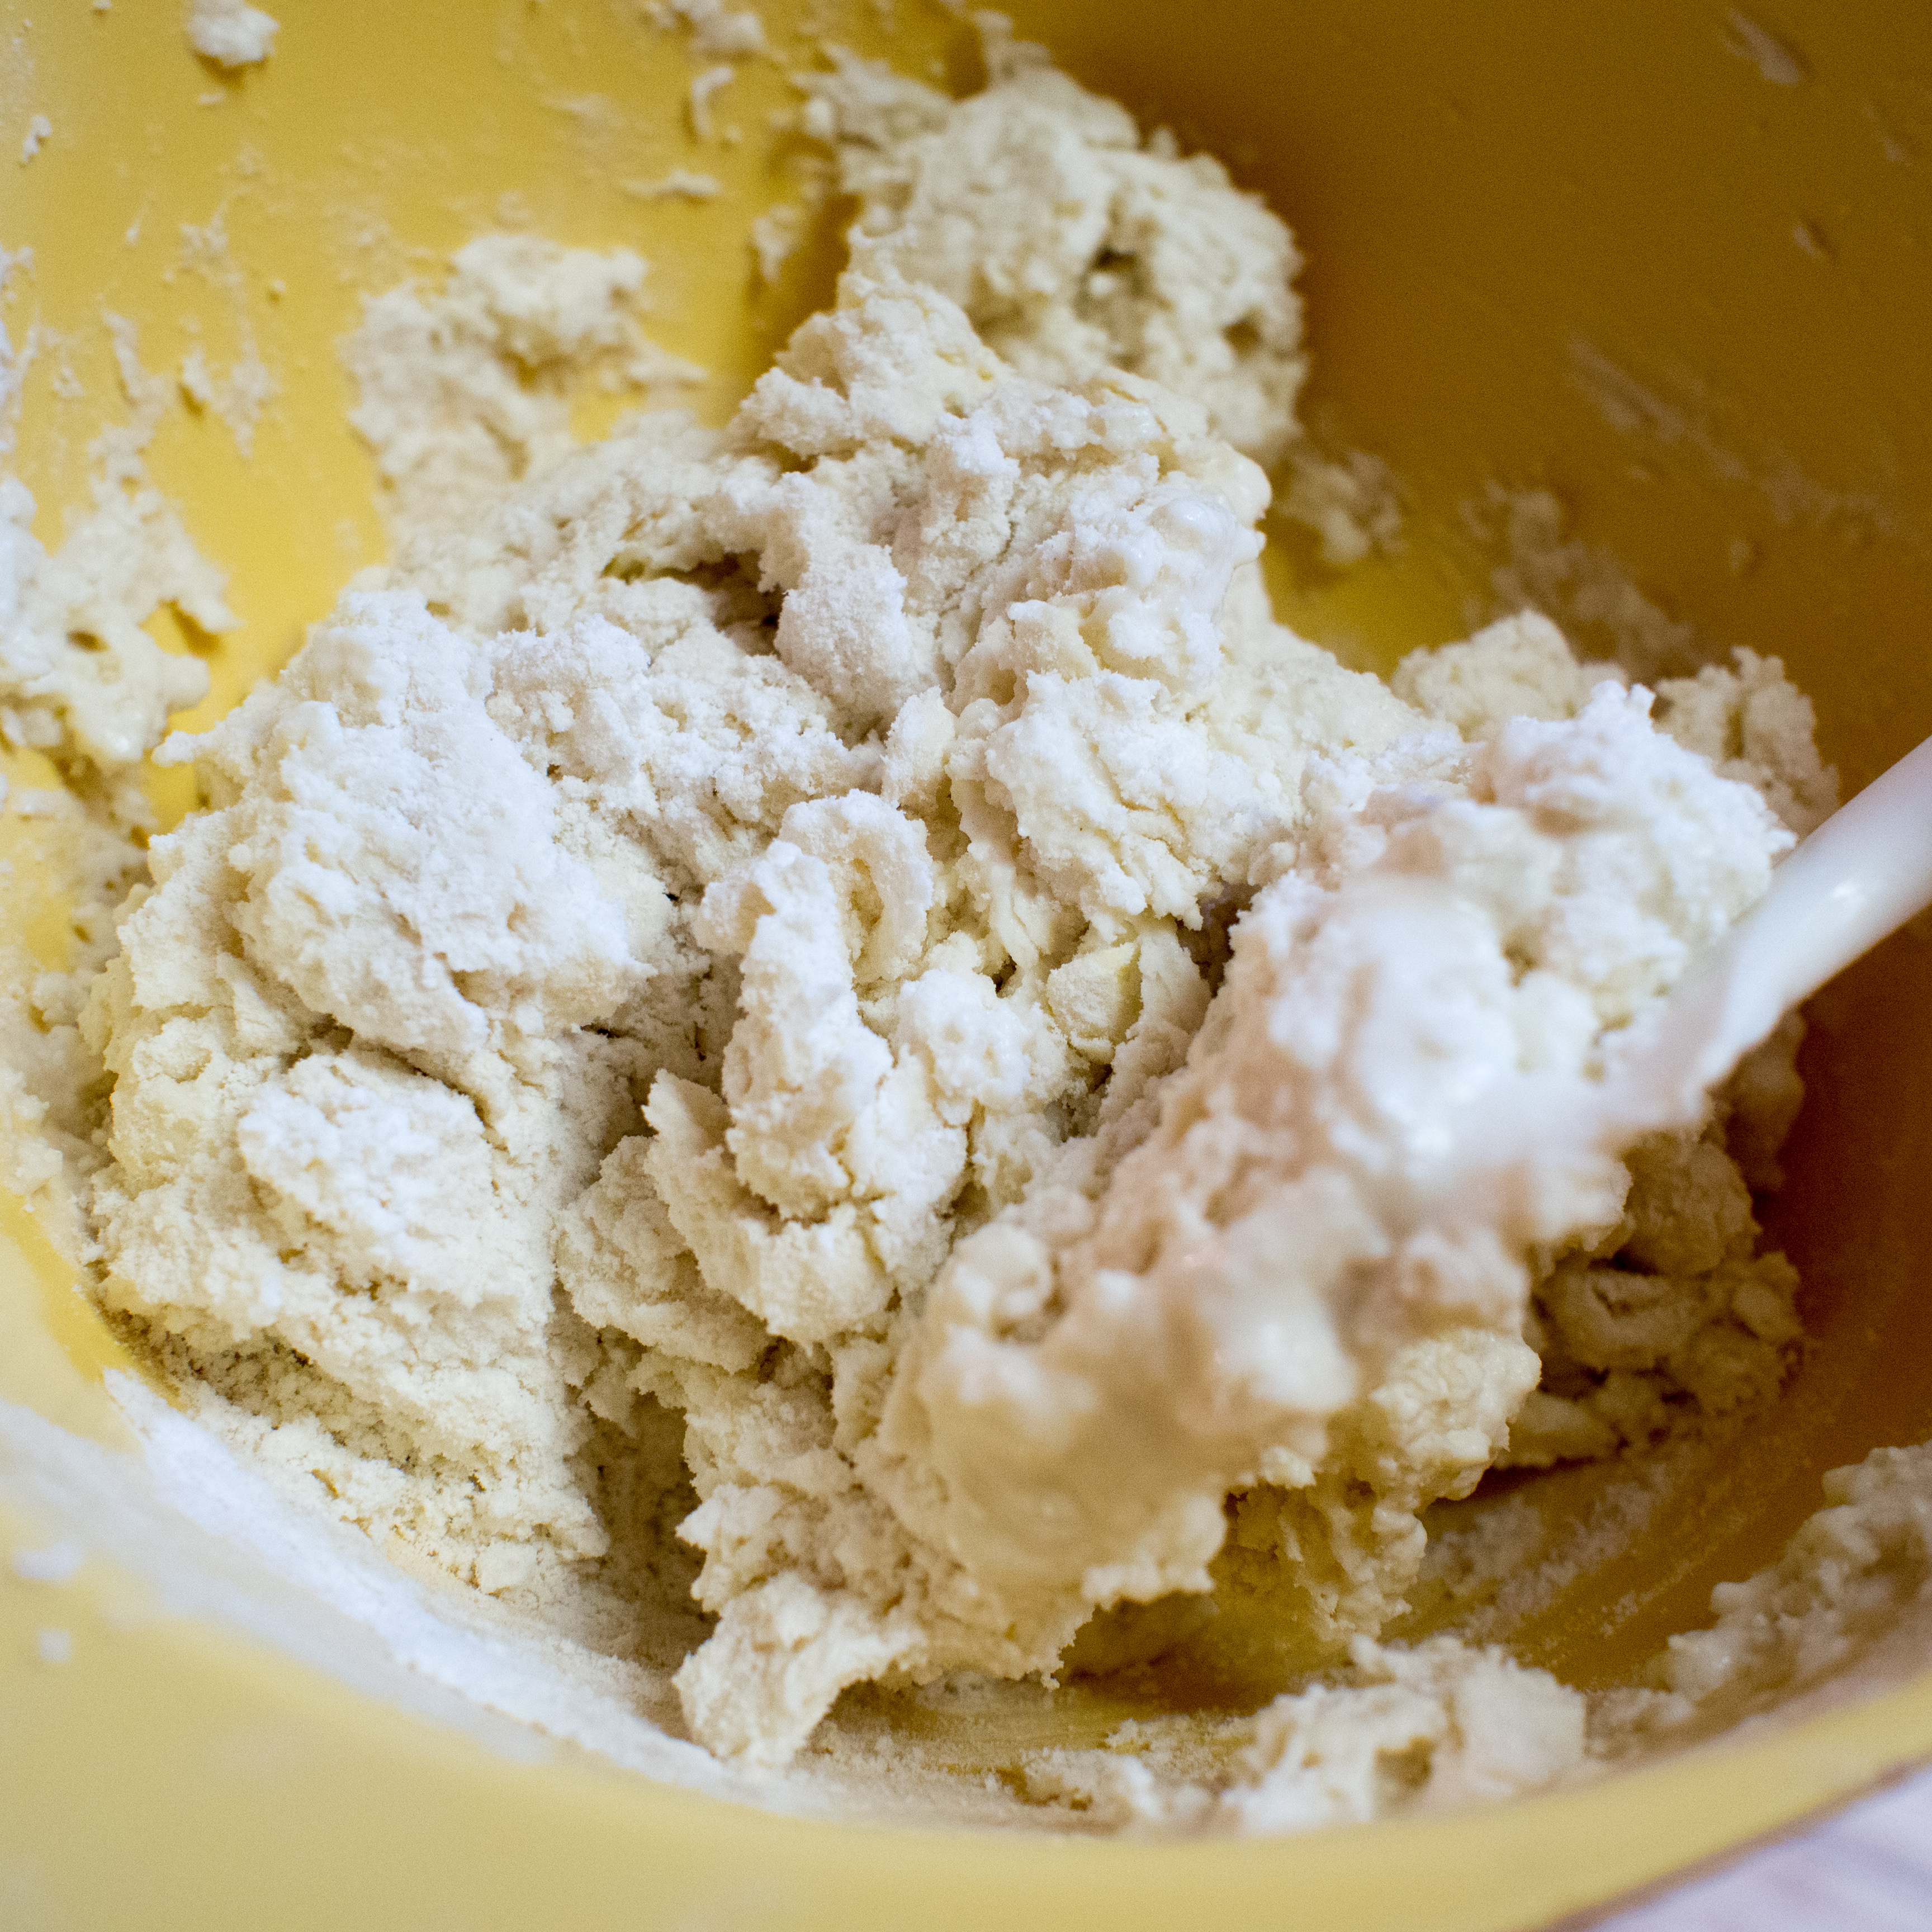
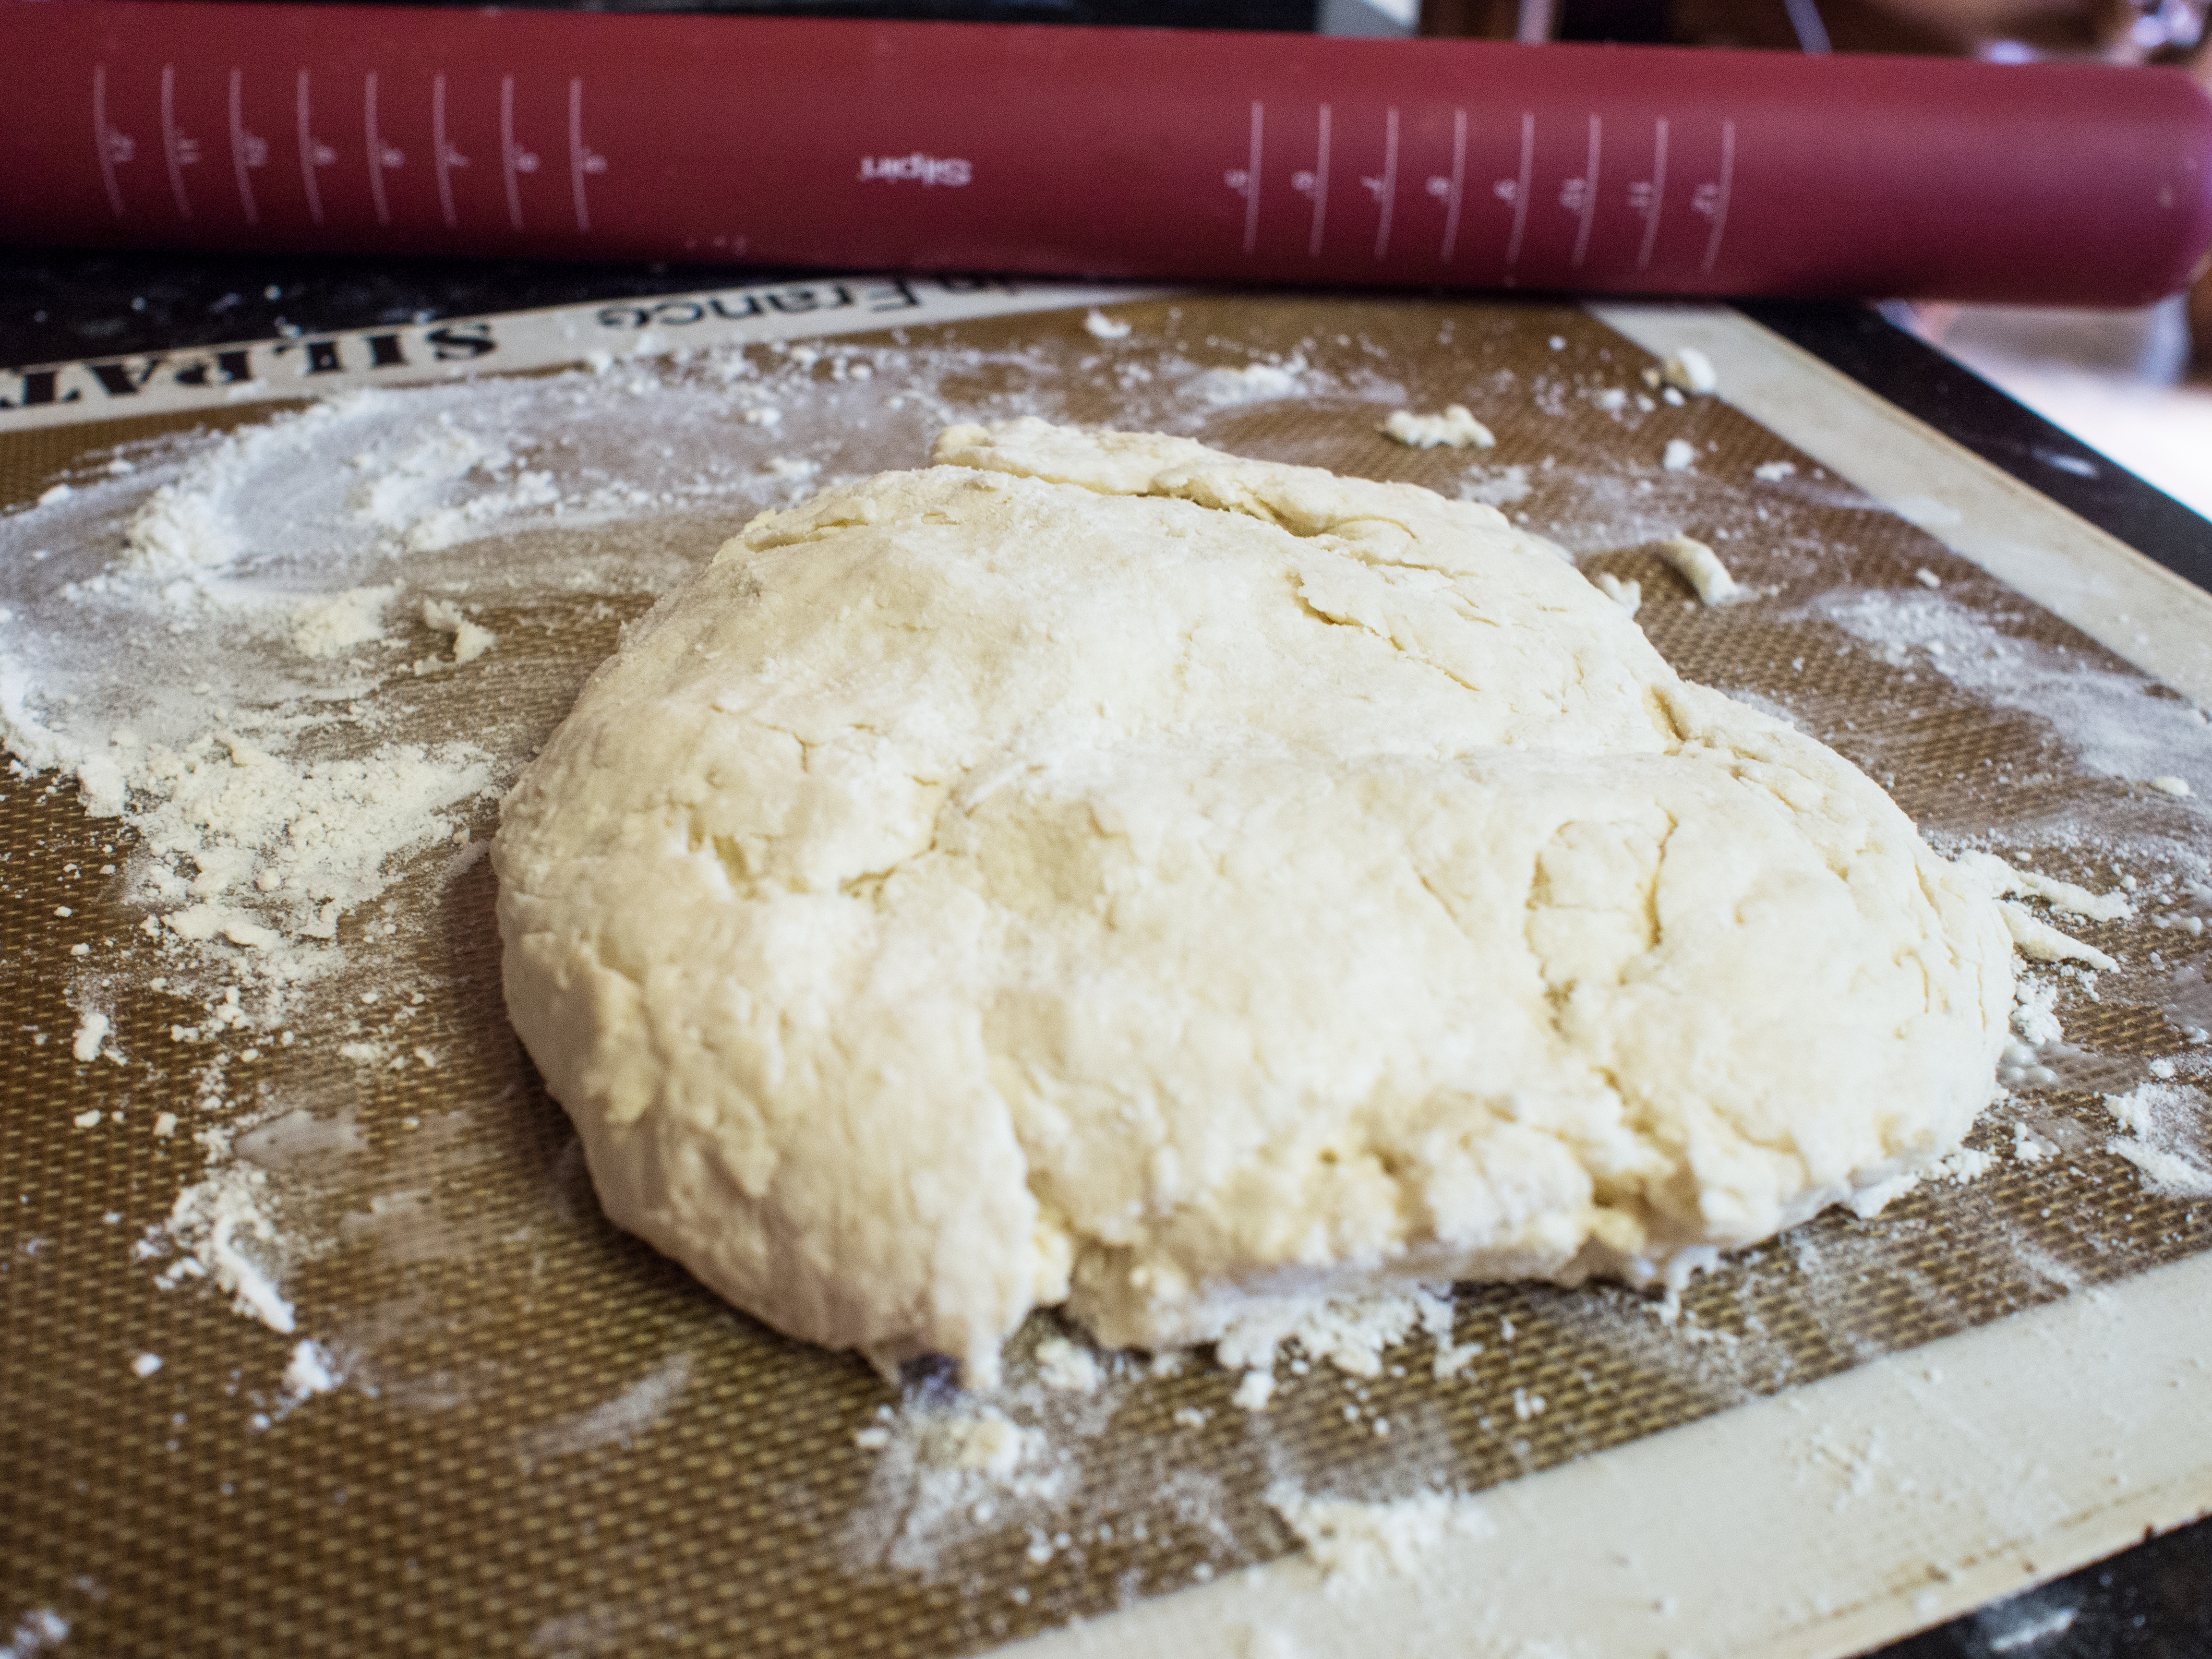
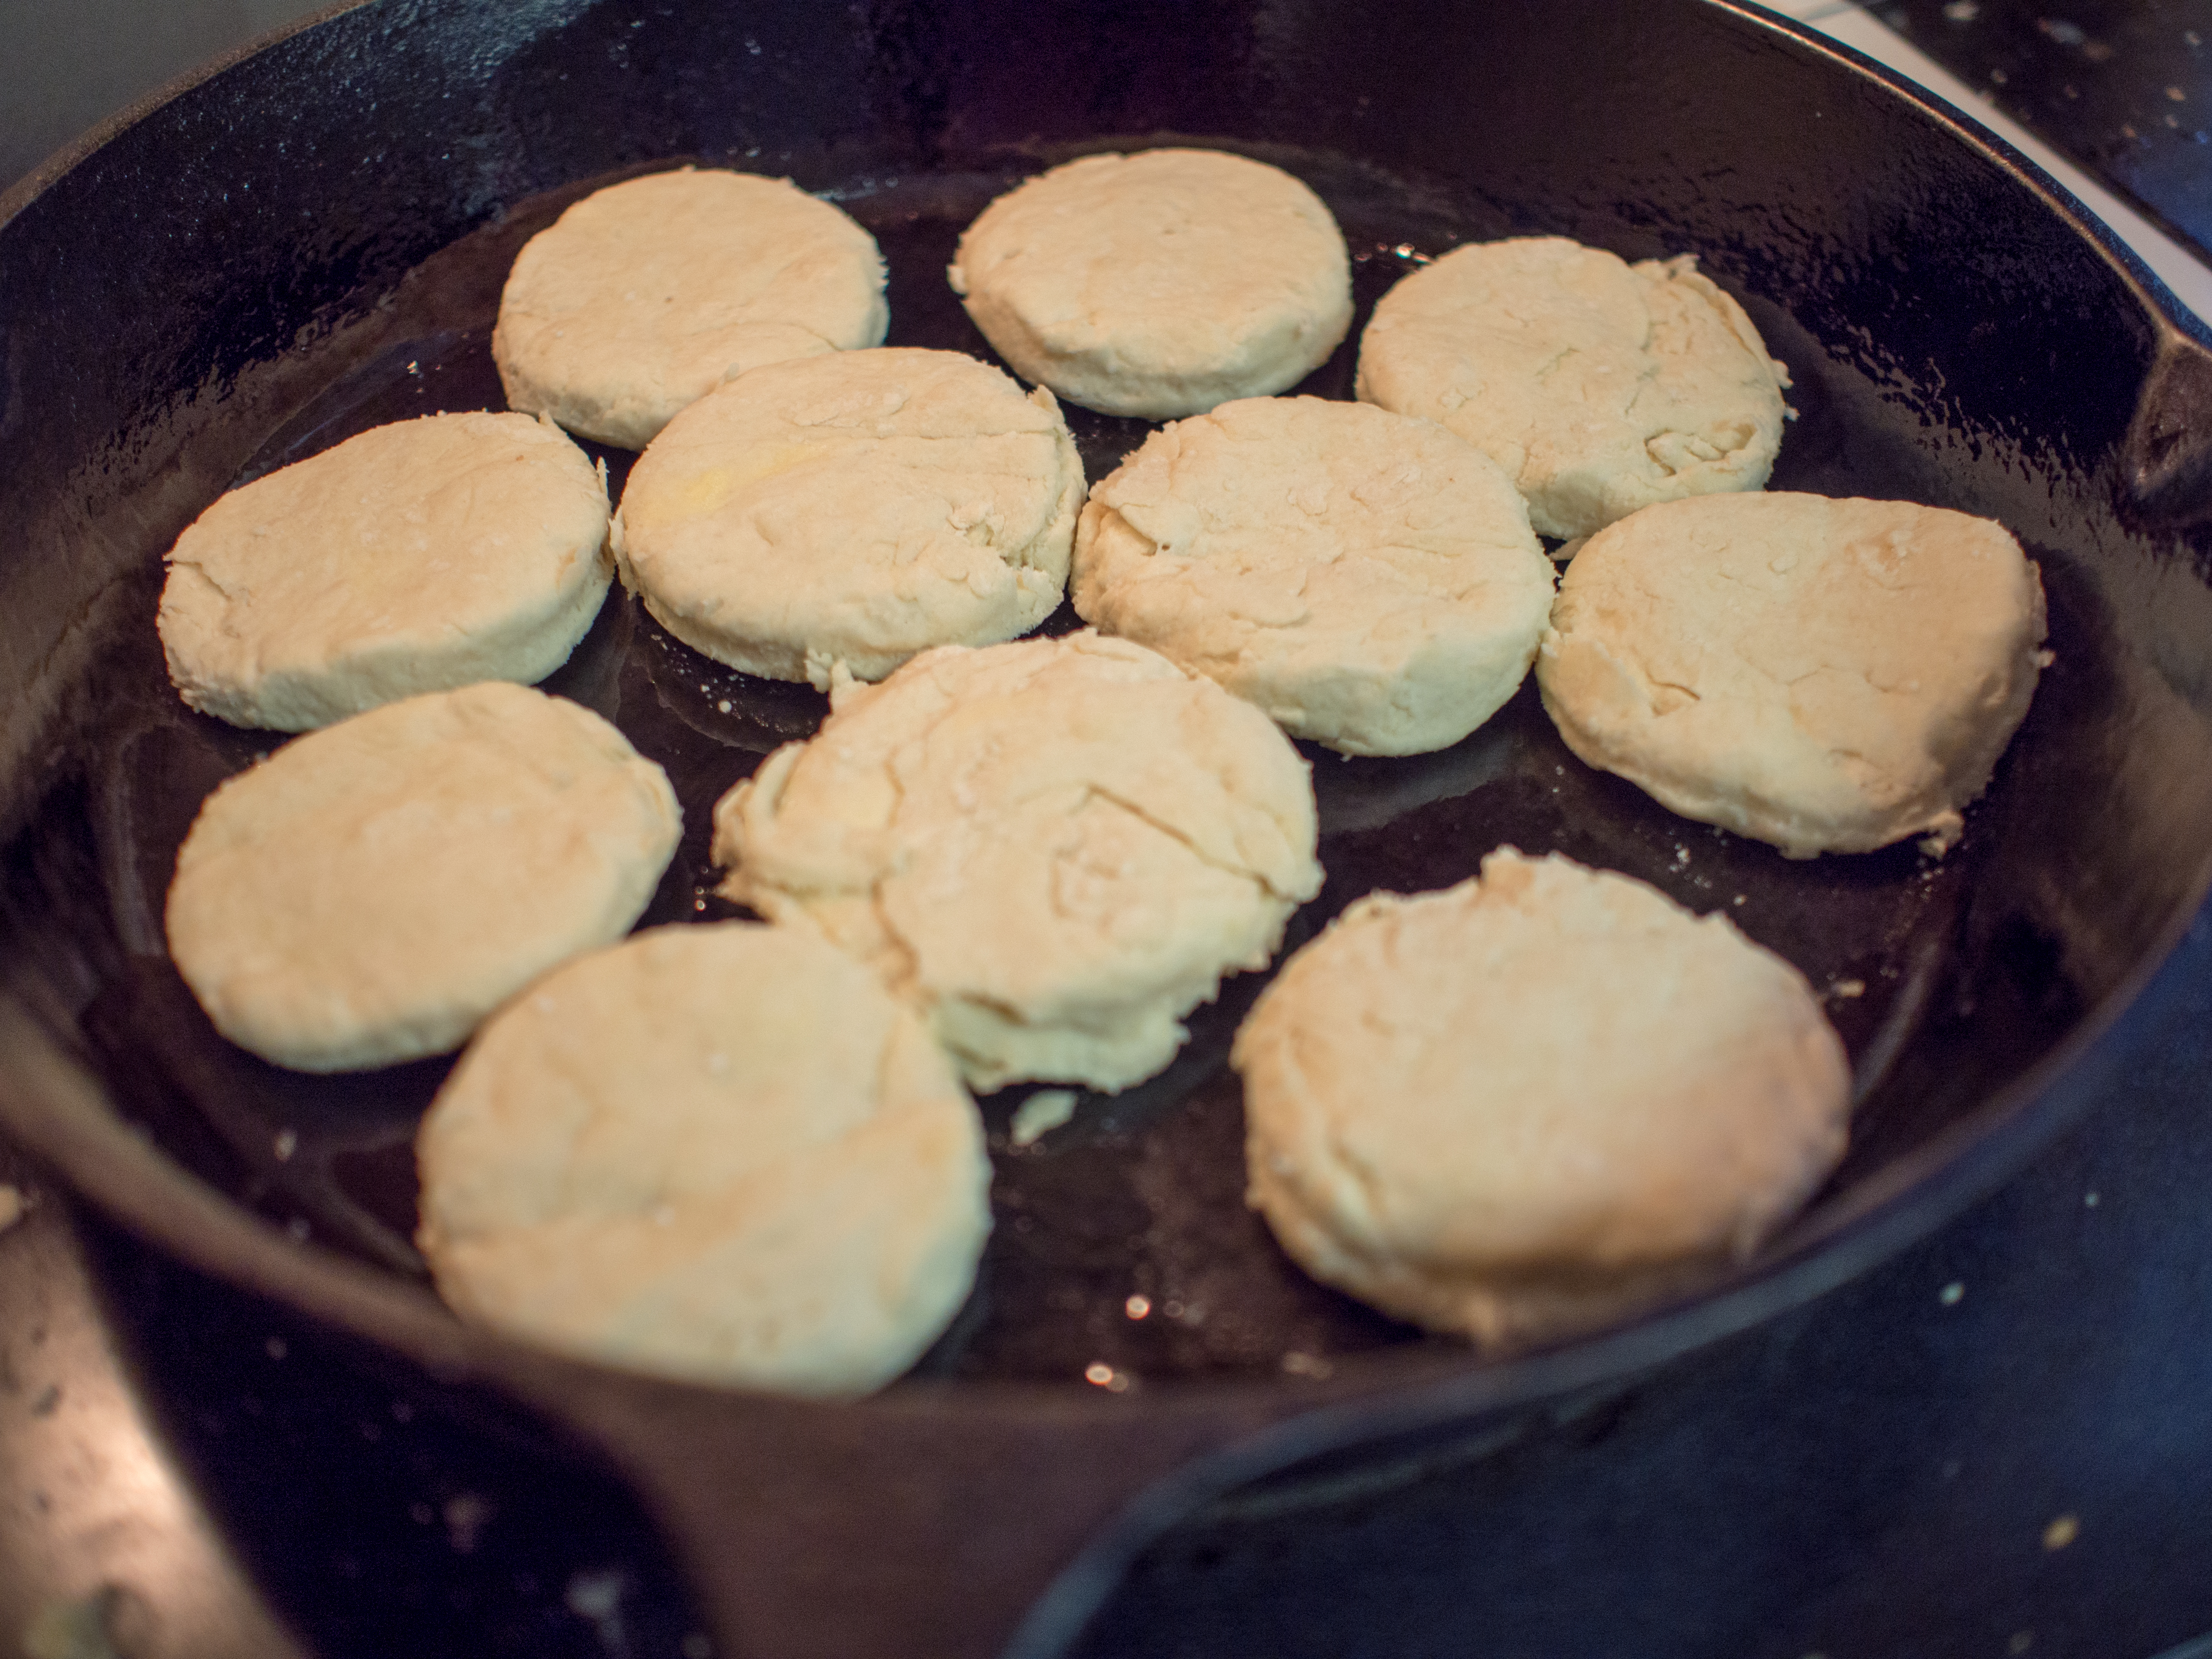
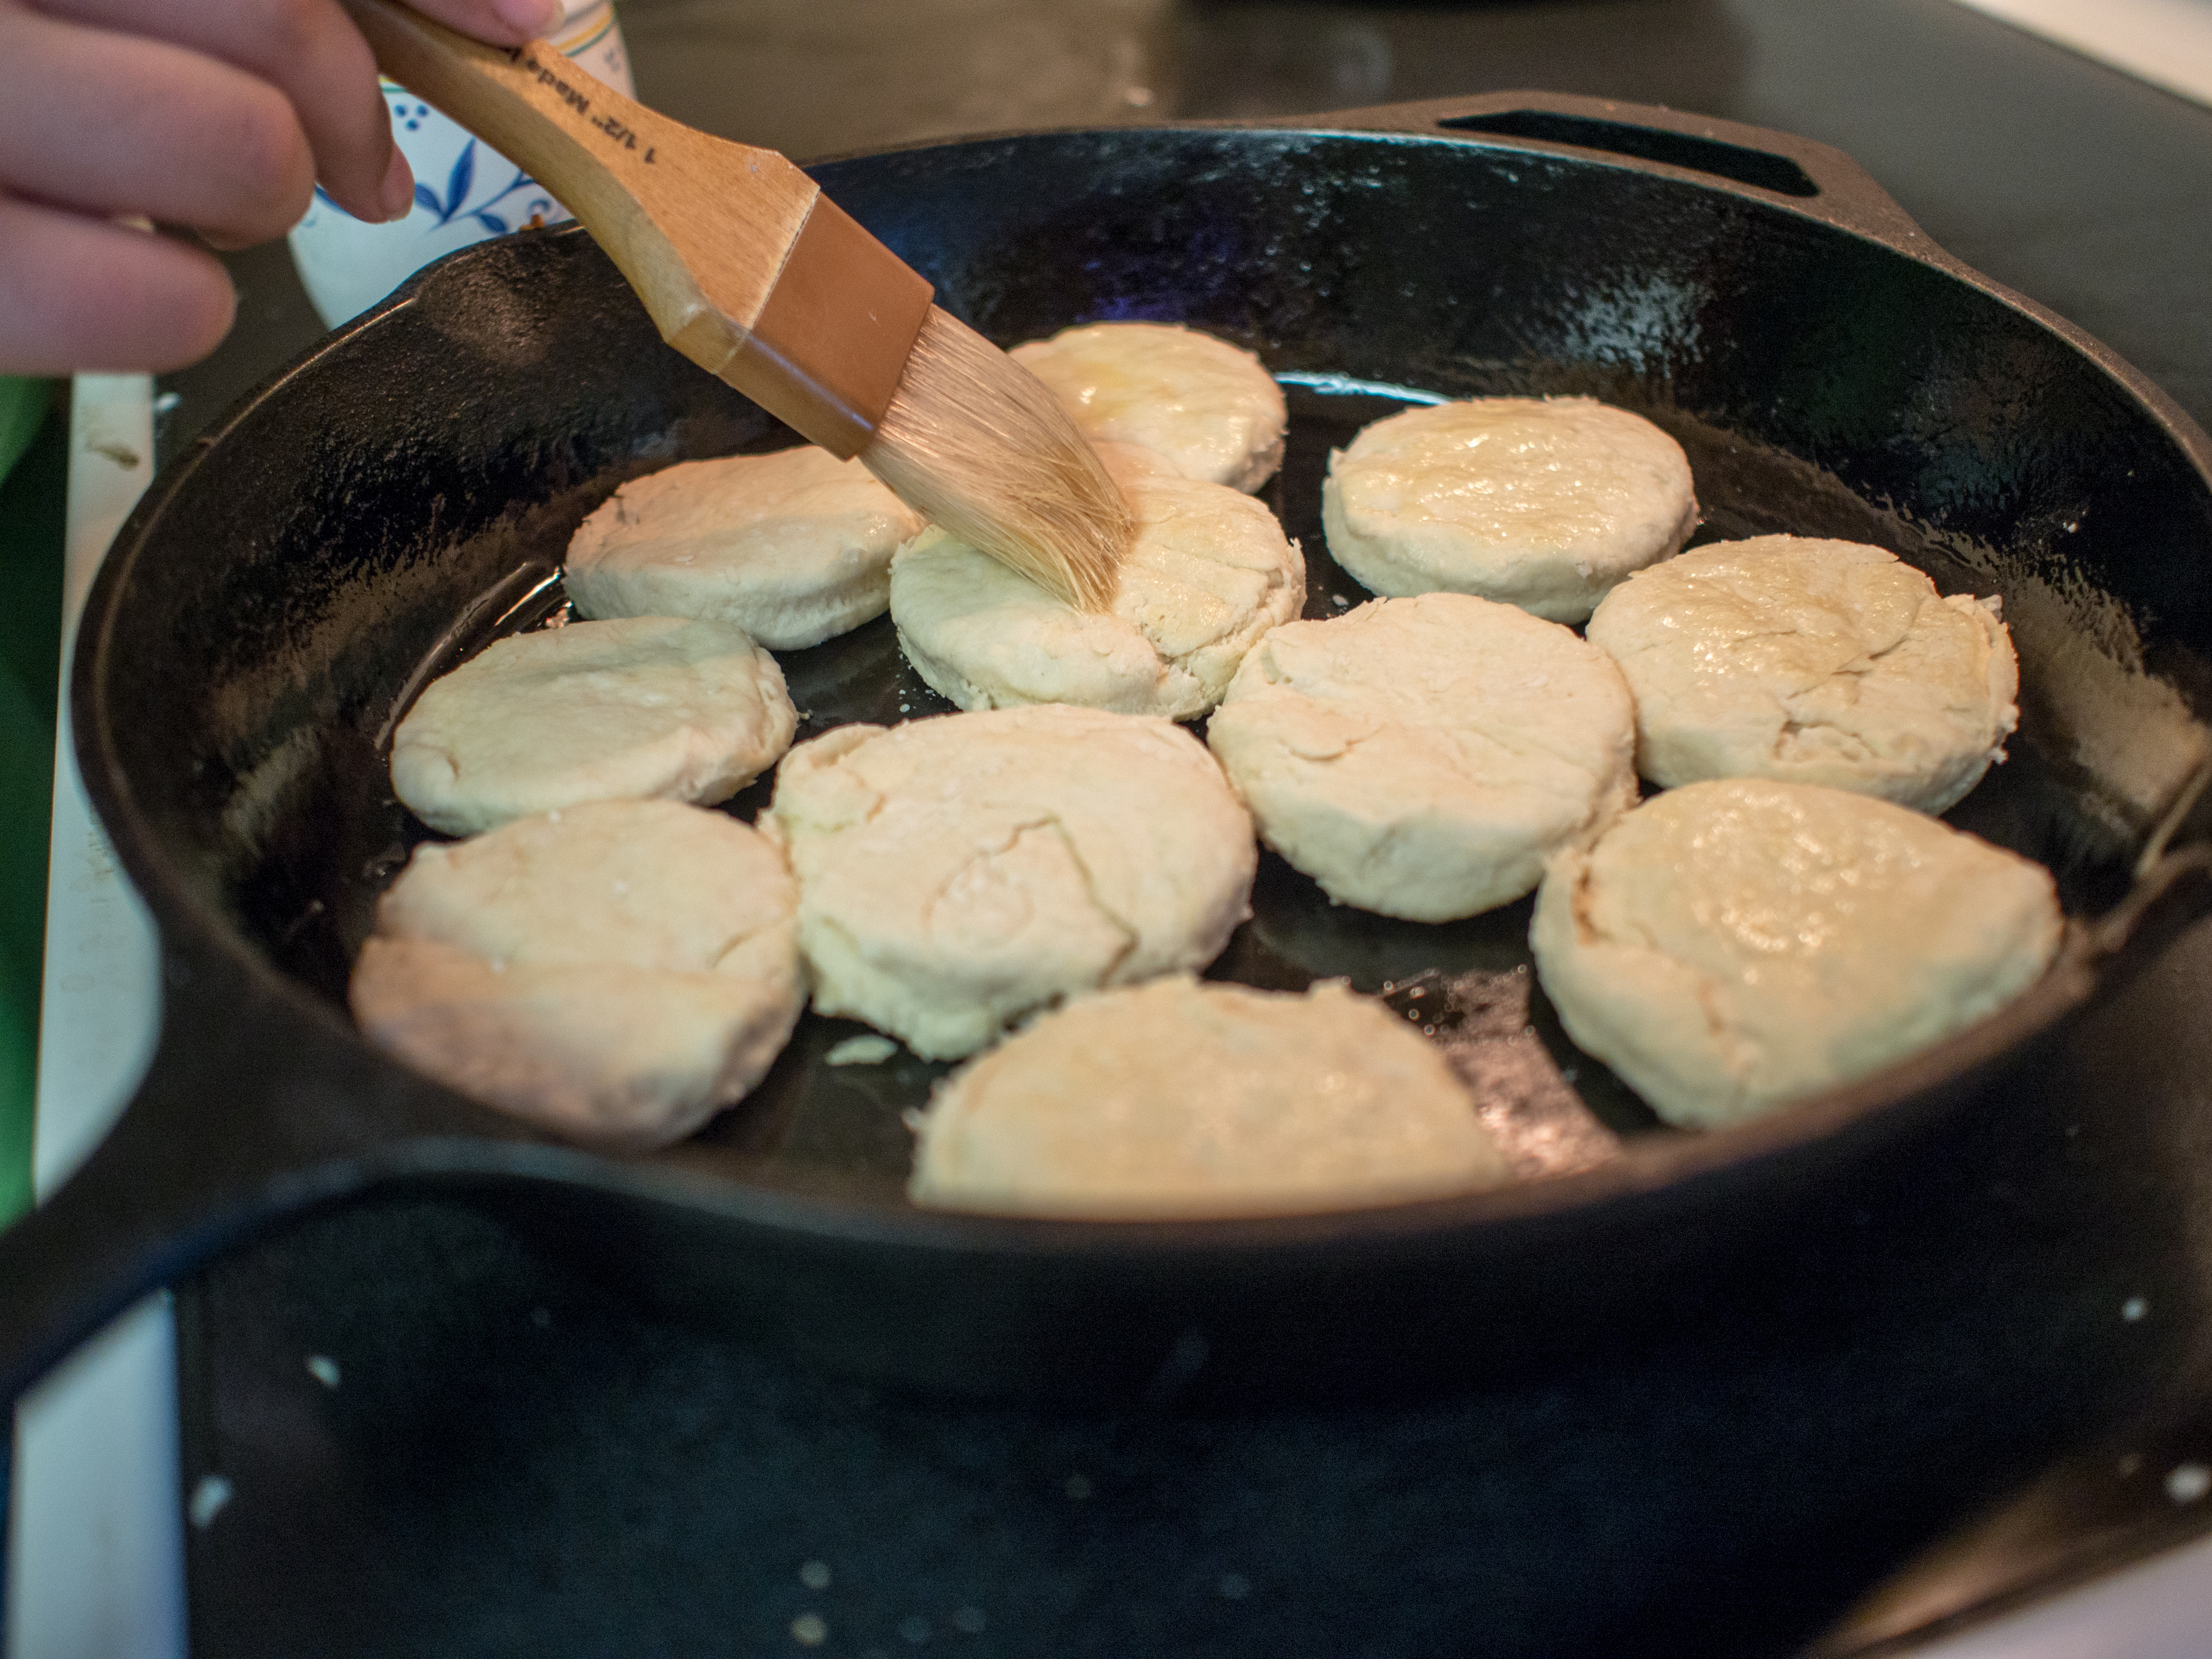
Mix dry ingredients together and sift twice. Work 1 tablespoon of butter and the lard into flour mixture with tips of fingers; add milk gradually while mixing with a knife. The amount of liquid needed to bring the dough together may vary depending on the flour. Place dough on a floured surface, pat and roll lightly to one-half inch thickness. Cut dough with biscuit cutter. Place biscuits on buttered pan, and melt the remaining butter and brush on the tops of the biscuits. For a crunchy surface use a cast iron pan. Bake for 10-14 minutes.

For the sausage gravy:

Over medium heat, brown the sausage and cook until thoroughly done. Remove sausage from pan. Sauté the onions in the sausage drippings until translucent. Add butter if more fat is needed. Deglaze pan with cognac. Add flour to the pan and cook until the raw flour taste is gone, about 1-2 minutes. Do not let the flour brown. Whisk in the milk and bring the mixture to a slow bubble. If the mixture becomes too thick, add more milk. Season with salt and pepper and return sausage to the pan. Serve over biscuits. Traditionally, this dish is served with scrambled eggs.

OLYMPUS DIGITAL CAMERA

OLYMPUS DIGITAL CAMERA

OLYMPUS DIGITAL CAMERA

OLYMPUS DIGITAL CAMERA

OLYMPUS DIGITAL CAMERA

OLYMPUS DIGITAL CAMERA

Strawberry Shortcake

OLYMPUS DIGITAL CAMERA

I have a love/hate relationship with Strawberry Shortcake.  I generally have a “no fruit”  dessert policy, save apple and pumpkin pie.    Why waste my few precious carb calories on a dessert with no chocolate?  Seems like madness, truly.

The other thing is, well, I thought shortcake sort of sucked.  It’s either made with that yellow spongy crap that I now realize is the yellow spongy cake that makes up a Twinkie.  Well played, Hostess.  Tell people that all they have to do is spray whipped cream into these yellow dimpled cake shells and top with strawberries.  Voilà!  Strawberry “shortcake”!  Or, it’s made with cut up store bought Angel Food Cake.  Ugh.

A few years ago I had a berry shortcake at a small restaurant in Annapolis called “O’Leary’s”.  Honestly, the other desserts looked terrible.  “Terrible” being defined as a dessert “containing chocolate that was contaminated with fruit”.   Is there a rule that raspberries must be in a chocolate dessert?  Anyway, it was an order of last resort.   My low expectations were exceeded when a lovely confection was placed in front of me.  A tender, yet crispy biscuit split and oozing thick whipped cream topped with berries of all colors.  What was this?  Where was the Angel Food or bland yellow cake?  Instead, I got an actual “shortcake” and it was amazing.  Despite it being really good, I had no desire at the time to make it because of the whole lack of chocolate thing.

So, I’m reading the Wall Street Journal the other day and come across an article about how the French are up in arms about whether an establishment can be called a “restaurant” when it doesn’t actually cook all of the food served.  Some of the food, gasp, is frozen and prepared off site.

http://online.wsj.com/article/SB10001424127887323398204578488990597549094.html0597549094.html

This article brought me back to my shortcake experience, and other brushes with mass produced food being used in a “restaurant”.  The “semi-homemade” take on strawberry shortcake is far removed from the real dessert.  The same could be said for dry chocolate cake or waxy “New York Style” cheesecake.  Most desserts at restaurants are so lackluster.  They pretty much taste like they came from Costco, Restaurant Depot, or some other mass production facility.   I was very sad to learn that Molten Chocolate Cake dessert can be microwaved in a minute and served.  Sigh.

One time, at Outback Steakhouse, my plate came out with a plastic bag on it.  Inside the bag were my veggies, freshly microwaved, I presume.    Honestly, it’s why I cook.   I know where my stuff comes from and who made it.

So, inspired by some of the most esteemed names in French Cooking saying they had to preserve the French Cuisine, I wanted to make a real, authentic shortcake.  My small attempt to rescue the true shortcake from the “dessert shell” purgatory it’s currently in.   On the plus side, there are plenty of old recipes.  On the minus side, they are all different.   Of course they are!!!

First of all, shortcake is not so named because the cake is short.  It’s because a fat inhibits the flour from forming long structures.   Adding a fat (in this case two, butter and shortening) creates the “short” part of the shortcake.    Shortcake also got a boost of lightness from the advent of chemical leaveners like baking soda and baking powder.    Traditional English shortcakes made without chemical leavening are extremely dense.

I think it’s amazing that a classic dessert is built around the humble strawberry.  A fruit that, realistically, was only available for a very few weeks every year.   Strawberries are fragile and they have a short harvest season.  Despite the restricted availability of strawberries during her time, Fannie Farmer has no fewer than 3 dessert recipes for just Strawberry Short Cake in just one of her cookbooks.  She also has one for “Fruit Short Cake”, which, according to Mrs. Farmer may also include strawberries.  The dessert called for the strawberry  to be paired with a quick cooking “shortcake”.  Originally, whipped cream was not part of the dessert.   Just a sweetened shortcake, strawberries, sugar and butter.  By the mid-1800s, whipped cream became integrated into the recipe.

While any berry could be used, the dessert is synonymous with strawberries.  You can certainly make a “raspberry shortcake”, but let’s just say they didn’t name a doll “Raspberry Shortcake”. This is certainly a classic summer recipe.  And, really, making the shortcake is very easy.  Make the whole dessert and really, you won’t be disappointed.

I love cooking from extremely old, some would say “historic” cookbook.  I feel a bit like an archeologist trying to recreate the exact dish the author did over a hundred years ago!  I picked a very traditional recipe from Fannie Farmer’s Boston Cooking School Cook Book called:  Rich Strawberry Short Cake, she credits a “Hotel Pastry Cook” with the recipe.

Rich Strawberry Short Cake

2 cups of flour
1/4 cup of sugar
4 teaspoons baking powder
1/2 teaspoon salt
1/8 teaspoon nutmeg
1/3 cup butter (about 5 1/3 tablespoons butter, diced)
1 1/4 tablespoons lard or vegetable shortening
1 egg, well beaten
2/3 cup of milk
1 pint strawberries, washed and quartered with tops removed
Sugar
1 quart heavy whipping cream

Heat oven to 425 degrees Fahrenheit. Lightly grease 12 inch cast iron skillet with lard.

Mix dry ingredients and sift twice. Work in butter and lard to the flour mixture, until mixture appears crumbly. Add egg and milk. Stir until the dry ingredients are moistened. You may need to add a bit more milk if there is still a lot of dry flour. Place mixture in the cast iron skillet, and use your hands to spread mixture into the pan. (Tip, oil hands first!) Bake until the bottom is lightly browned and a slight crust is apparent when the shortcake is touched, about 12 minutes.

While the shortcake is baking, sprinkle enough sugar on the strawberries to sweeten the fruit and slightly macerate, about 1-2 tablespoons, depending on the strawberries.

Whip the cream until stiff peaks are formed. If sweet whipped cream is preferred, add a tablespoon of sugar to the cream while it is being whipped. A bit of vanilla extract (a teaspoon) can be added too.

Split shortcake, add whipped cream and strawberries layered with the shortcake, and serve.

OLYMPUS DIGITAL CAMERA

OLYMPUS DIGITAL CAMERA

OLYMPUS DIGITAL CAMERA

OLYMPUS DIGITAL CAMERA

DIY- Coleslaw

OLYMPUS DIGITAL CAMERA

Coleslaw, as we know it in all of its creamy goodness is a mid 18th century invention, as this is when mayonnaise was invented.  Fannie Farmer recommends coleslaw in her cookbook Food and Cookery for the Sick and Convalescent (1904).  The recipe was simple:  select a heavy cabbage, remove the tough outer leaves, quarter the cabbage, slice thinly, soak in cold water, drain, dry and mix with cream salad dressing.  James Beard devotes nearly 4 whole pages to various coleslaw recipes in his American Cookery.  Now?  Coleslaw is relegated to a plastic container on a shelf surrounded by other picnic salads.  So, so sad.

What barbecue feast would be complete without this accompaniment? It’s simultaneously cool, crunchy, creamy, sweet and sour. It hits all the high notes of summer outdoor eating fare. Most people just pick up a tub from the deli or supermarket. But why? Why?!?!

Walk away from the deli counter. Go over to the vegetable section of the store. I believe it’s called the “produce” section. I have always wondered why. Anyway, grab a nice looking head of cabbage. Splurge on a carrot or two. Want more crunch? Add celery. Want more color? Add red cabbage (I didn’t in the recipe below, but you totally could). You are now three ingredients away from coleslaw and you likely have the other three ingredients at home: Italian Dressing, mayonnaise, and sugar. Slice the cabbage and celery, peel the carrots and mix. Done. Coleslaw.

It’s that easy. And, I firmly believe what you make will taste better and be cheaper per pound than what you would buy at the deli counter! Again, it’s completely customizable. Want onion? Add it. Want less mayo more vinegar? Add more dressing, less mayo. Like less dressing? Cut it down. Coleslaw, your way!!! No more buyer’s remorse on coleslaw. And the veggies will be crisp!! Not limp and, well, awful.

Coleslaw
Serves 4-6 people

1 head of cabbage
2 carrots, peeled into ribbons or strands
2 stalks of celery, sliced thin (optional)
1/2 cup of your favorite mayonnaise
1/4 cup of your favorite Italian dressing
1-2 tablespoons sugar (to taste)
Cracked pepper (optional)

Remove the tough outer leaves of the cabbage.  Quarter and slice thin.  If you would like really crisp cabbage, place in cold water and soak for 30 minutes or until crisp.

Put the cabbage, carrots and celery in a large bowl. In a separate bowl, combine the mayonnaise and Italian dressing. Add one tablespoon of the sugar to the mayonnaise mix. Taste and adjust the ratio of mayonnaise to dressing as needed. Add the remaining sugar if needed. Pour the mayonnaise mixture into the cabbage mixture and combine. Add pepper, if desired. Refrigerate until needed. Take care not to refrigerate too long, as the cabbage will go limp.

One caveat, if you decide to use purple cabbage, mixing ahead will lead to a purple colored dressing. Leave it out of the mix until closer to serving time.

OLYMPUS DIGITAL CAMERA

Pie or Pastry Crust

OLYMPUS DIGITAL CAMERA

Behold my flaky layers!

There’s nothing that seems to scare the crap out of people more than flour, salt, solid fat (butter, lard, shortening), and cold water.  In other words, pastry.   When I bring pies to places people cannot believe I have made my own pie crust.  It’s like a bucket list item:  Climbed Everest, Visited Easter Island, made own Pie Crust.  Done.

The Food Industrial Complex has made people so complacent that most don’t see the need to make their own crust.  Just unroll the crust from the refrigerated section of your grocery store and BAM! pie crust.  But is it really?  Gummy, lacking any snap or palpable flakey layers, is it really pie crust?  Or something lesser.  Let’s look at the competition.

Pillsbury Rolled Pie Crust ingredient list:

Wheat Starch, Lard Partially Hydrogenated, with BHA and, BHT To Protect Flavor, Wheat Flour Bleached, Water, Sugar, Rice Flour, Salt, Xanthan Gum, Potassium Sorbate Preservative, Sodium Propionate Preservative, Citric Acid, Color(s), with Yellow 5 and, Red 40

My ingredients?  Seriously: flour, sugar, butter, lard, salt and cold water.  No competition.  I’m not even sure what Wheat Starch is and why it is the largest ingredient on the list.  Flour is a distant third.  What’s wrong with their ingredients that they need to add food coloring?  Oh, that’s right, there’s no butter to give the “pie crust” a warm golden color.

The competition is rather sad.  A pale imitation of real pie crust.  In The 1892 Boston Cooking School Cook Book by Fannie Farmer (yes, she was a real person), there is an entire chapter dedicated to pastry.   In this chapter Fannie Farmer divides pastry by duty.  Puff pastry was suitable for rims and upper crusts of pies, vol-au-vents, patties, rissoles, bouchees, cheese straws, and tarts.  But is never for lower crusts!!  Puff pastry is made exclusively with butter, according to Mrs. Farmer.   Plain paste, with a mix of lard and butter, was more suitable for lower crusts.  James Beard detailed various pastry in 9 pages of his American Cookery published in 1972.    Today, sadly, most people don’t make pies much less pie crust.   After reading these books, it is easy to see why.  The first few sentences of Mr. Beard’s introduction are flat out intimidating:

Flaky, tender pie crust must have a delicate balance of fat and flour and not too much liquid.  For this reason, measure the ingredients carefully. Too much flour can make a tough crust; too much fat, a greasy crumbly crust; and too much liquid will in turn require more flour and result in a tough crust.

But persevere!  Look at the Pillsbury ingredients.  There are no liquids.  What do you think you have there?  A tough, non-flaky mess.  That is your competition.   If your dough is “tough”, seriously, who’s going to know?  Few people expect a flaky crust anymore because most are used to the industrial stuff.  That’s the worse that happens.  You make a crust with no preservatives that is still better than what you can roll out of a package.  Fear not!

The recipe is super easy and if you have a food processor, it’s laughably easy.  You will scoff at yourself for ever being too intimidated to try.

My goal here is to get you to make a great crust.  Give it a go, so to speak.  You don’t have the time?   Is 10 minutes too long?  If you take out the time it takes to assemble the ingredients, it takes 2 minutes, tops to actually “make” the crust.  Then it rests.  Then you roll it out.  Done.  I make mine the day before I need to make the pie.

This recipe is adapted from Paula Deen’s Perfect Pie Crust.  It is a sweet, but not too sweet crust and very aptly named.

Perfect Pie Crust

2 1/2 cups all purpose flour
1/4 teaspoon fine salt
3 tablespoons granulated white sugar
1/4 cup lard, very cold (may substitute vegetable shortening)
12 tablespoons butter, very cold and cubed
1/4-1/2 cup ice water

Hand mixing directions:

Sift the flour, salt and sugar together in a large mixing bowl. Work the lard into the flour mixture with your hands. Work quickly so that the lard doesn’t get too warm. Add the cold butter and quickly work into the mixture until the flour is crumbly, like coarse cornmeal. Add the ice water slowly until the mixture comes together, forming a dough. Gently shape the dough into a ball. Divide the ball into two, shape into disks, wrap each disk in plastic wrap, and refrigerate for at least 30 minutes prior to use.

Food processor directions:

Place the flour, salt and sugar in the processing bowl, pulse until combined and aerated. Add the lard in pieces and pulse until incorporated. Add the cubes of butter a few at a time, pulsing between additions until the additions are incorporated. Slowly drizzle the water into the bowl and pulse. Stop adding water when the dough comes together in the bowl. Turn the dough out on a floured surface, gently shape into a ball, and divide the ball into two disks. Wrap each disk in plastic wrap and refrigerate for 30 minutes prior to use.

It’s really that easy.  Use for almost any recipe that requires a crust.  This recipe makes two 9 inch pie crusts.

OLYMPUS DIGITAL CAMERA

Not the course meal like texture already developing.

OLYMPUS DIGITAL CAMERA

OLYMPUS DIGITAL CAMERA

Beef Stew

The first encounter I recall with beef stew is eating a bowl of Dinty Moore Beef Stew.  It was a cherished childhood memory.   Why make Beef Stew when it was just so handy to open a can? Well, my husband and I tried of night a childhood favorites.  Let’s just say, Chef Boyardee Ravioli and Dinty Moore Beef Stew don’t taste as good as I remember.   There’s a reason I moved away from processed foods.

There are many recipes for beef stew in older cookbooks, although most refer to stewing a large piece of meat, usually studded or slitted with seasoning.  Around the mid to late 1800, “stew” seems to begin to resemble something of its modern day incarnation in various recipe books.

In reviewing many of the recipes, the one that stuck out most to me was Fannie Farmer’s from her Boston Cooking-School Cook Book.    While it lacked any sort of spice ingredients, it had an interesting twist.  Modern stews call for the addition of stock or wine as the deglazing and liquid source for the stew.  In other words, it can be a two step process of making a stock, then making a stew.  Fannie’s method is more economical as she throws the bones in during cooking and removes them prior to thickening the sauce.  In other words, she makes the stock, while cooking the stew.  To me, this was genius!  I always have too much or too little stock.  Then there’s the problem of stock storage.  Sure, I freeze stock that I make, but that takes up space and has to be thawed.   Fannie’s method is economical and much less work and clean up!  So, I took bits of her recipe and bits of the recipe from The Lady’s Receipt Book by Eliza Leslie in 1847 with the modern addition of mushrooms to create a very simple beef stew.  With a small amount of up front time, the stew mostly sat in the oven for cooking, leaving me plenty of time to do other things on a lazy Sunday.

Beef Stew

2 pounds stew meat, cubed

Flour sufficient for dredging meat

Salt

Pepper

1/4 leftover bacon grease or any high heat tolerant oil/fat (lard, canola, etc.)

1 cup carrots, sliced thin

1/2 onion, small dice

2 celery stalks, sliced thin

1/4 teaspoon nutmeg

1 teaspoon thyme

8 ounces sliced mushrooms

Water

Beef bones ( I used 4 bones of about 3 inch diameter)

4 cups potatoes, diced.

I know these ingredients don’t really look like much, but this is a really simple recipe and you don’t need to measure much.  Pat the beef dry.  Sprinkle beef with flour, salt and pepper.    You want the beef to be covered with flour.  For the salt and pepper, there really shouldn’t be more than a teaspoon of each needed.  The salt and pepper are included at this point to really to flavor the liquid of the stew and can be adjusted later.

OLYMPUS DIGITAL CAMERA

Floured and seasoned beef added to the hot fat

Heat fat or oil in dutch oven (I used a 5 quart one) over medium high heat.  Saute beef until browned and leaving bits of browned flour on the pan.

Remove from pan and add carrots, onion and celery.

OLYMPUS DIGITAL CAMERA

Cook until partially softened.  Add mushrooms, nutmeg and thyme.  Cook until pan is deglazed.  You may need to add a bit of salt to help the process along if the vegetables are not releasing their liquid.  Once the pan is deglazed, return meat to the pan and add water sufficient to cover.  Stir to distribute the flour that is on the meat throughout the liquid. The liquid should start to turn brown and slightly thicken.  Add bones and additional water if needed to mostly cover the ingredients.  Seal tightly with lid and cook at 350 degrees until the meat is tender.  The amount of time varies depending on what the butcher thought was “beef stew” meat and whether the meat was pastured or not.  2-3 hours would be a good guess.

Allow enough time prior to the finishing of the stew to parboil the potatoes (about  5 minutes).  After removing the bones, add the partially cooked potatoes to the stew for 15 minutes of cooking with the stew.

Now, I didn’t feel the need to thicken the stew at the end of cooking, but if you want to, you can add 1/4 cup flour (slurried with some water to prevent lumps) and cook until thickened.

OLYMPUS DIGITAL CAMERA

I didn’t think I would like the nutmeg, but honestly, it kind of worked.  Mace was the other ingredient suggested for stew in the older cookbooks. I couldn’t find any, but now I’m curious to see if I can and try it!