Category Archives: Vegetable Side

Grilled Vegetables

http://dawnoffood.com

I shop at a variety of venues:  farmer’s markets, Whole Foods, and local chain grocery stores.  During my shopping trips, I am constantly amazed at the prices in the prepared food section.   Pasta salads and cooked vegetables boggle my mind.  I realize that the stores are charging for the labor, but around $8 a pound for “grilled” vegetables?  From the prepared food aisle, I can see the produce aisle where the same vegetables are $1.99 a pound!!! Zucchini and Squash are sometimes even less. It’s not like the prepared food aisle is selling organic, free range, pastured eggplants, right? Who’s on the grill?  Bobby Flay?!?! And, is there really a grill in the grocery store?  Or are we dealing with “grill pan” vegetables?

So many questions, but honestly, I don’t care.  For way less than the prepared food aisle grocery store would charge, grilled vegetables are seriously, no big.  So, the next time you are contemplating buying these in the store, just stop.  Don’t be that person.  Seriously, it may take 10-15 minutes out of your life, but it will taste better and cost you much less.

Our grill had been out of commission after what we affectionately call “fire #2”.  The gas tubing had rusted through in a few minor spots and when combined with particularly fatty pork chops, well, let’s just say there’s a reason to keep the fire extinguisher close at hand while cooking.  We cleaned everything up, got new tubing and recommissioned our amazing grill.  During Spring, Summer and Fall, if it can be grilled, it will be grilled. Cooking is quick and clean up is relatively easy (assuming a fire free experience, of course!).

The key to great grilling is to preheat the grill for a bit.  I usually preheat for about 5-10 minutes at high, then turn down the heat to medium to cook. I know, I use propane.  Gasp.  The horror!! Not PROPANE!!!  There is something very effortless about flipping a knob and instantly having heat. I just don’t have time during the week for charcoal. Do I think charcoal is better?  Yes. But, I’m not cooking for the Michelin guide reviewers. I’m cooking for my husband and two kids. They can deal with propane.

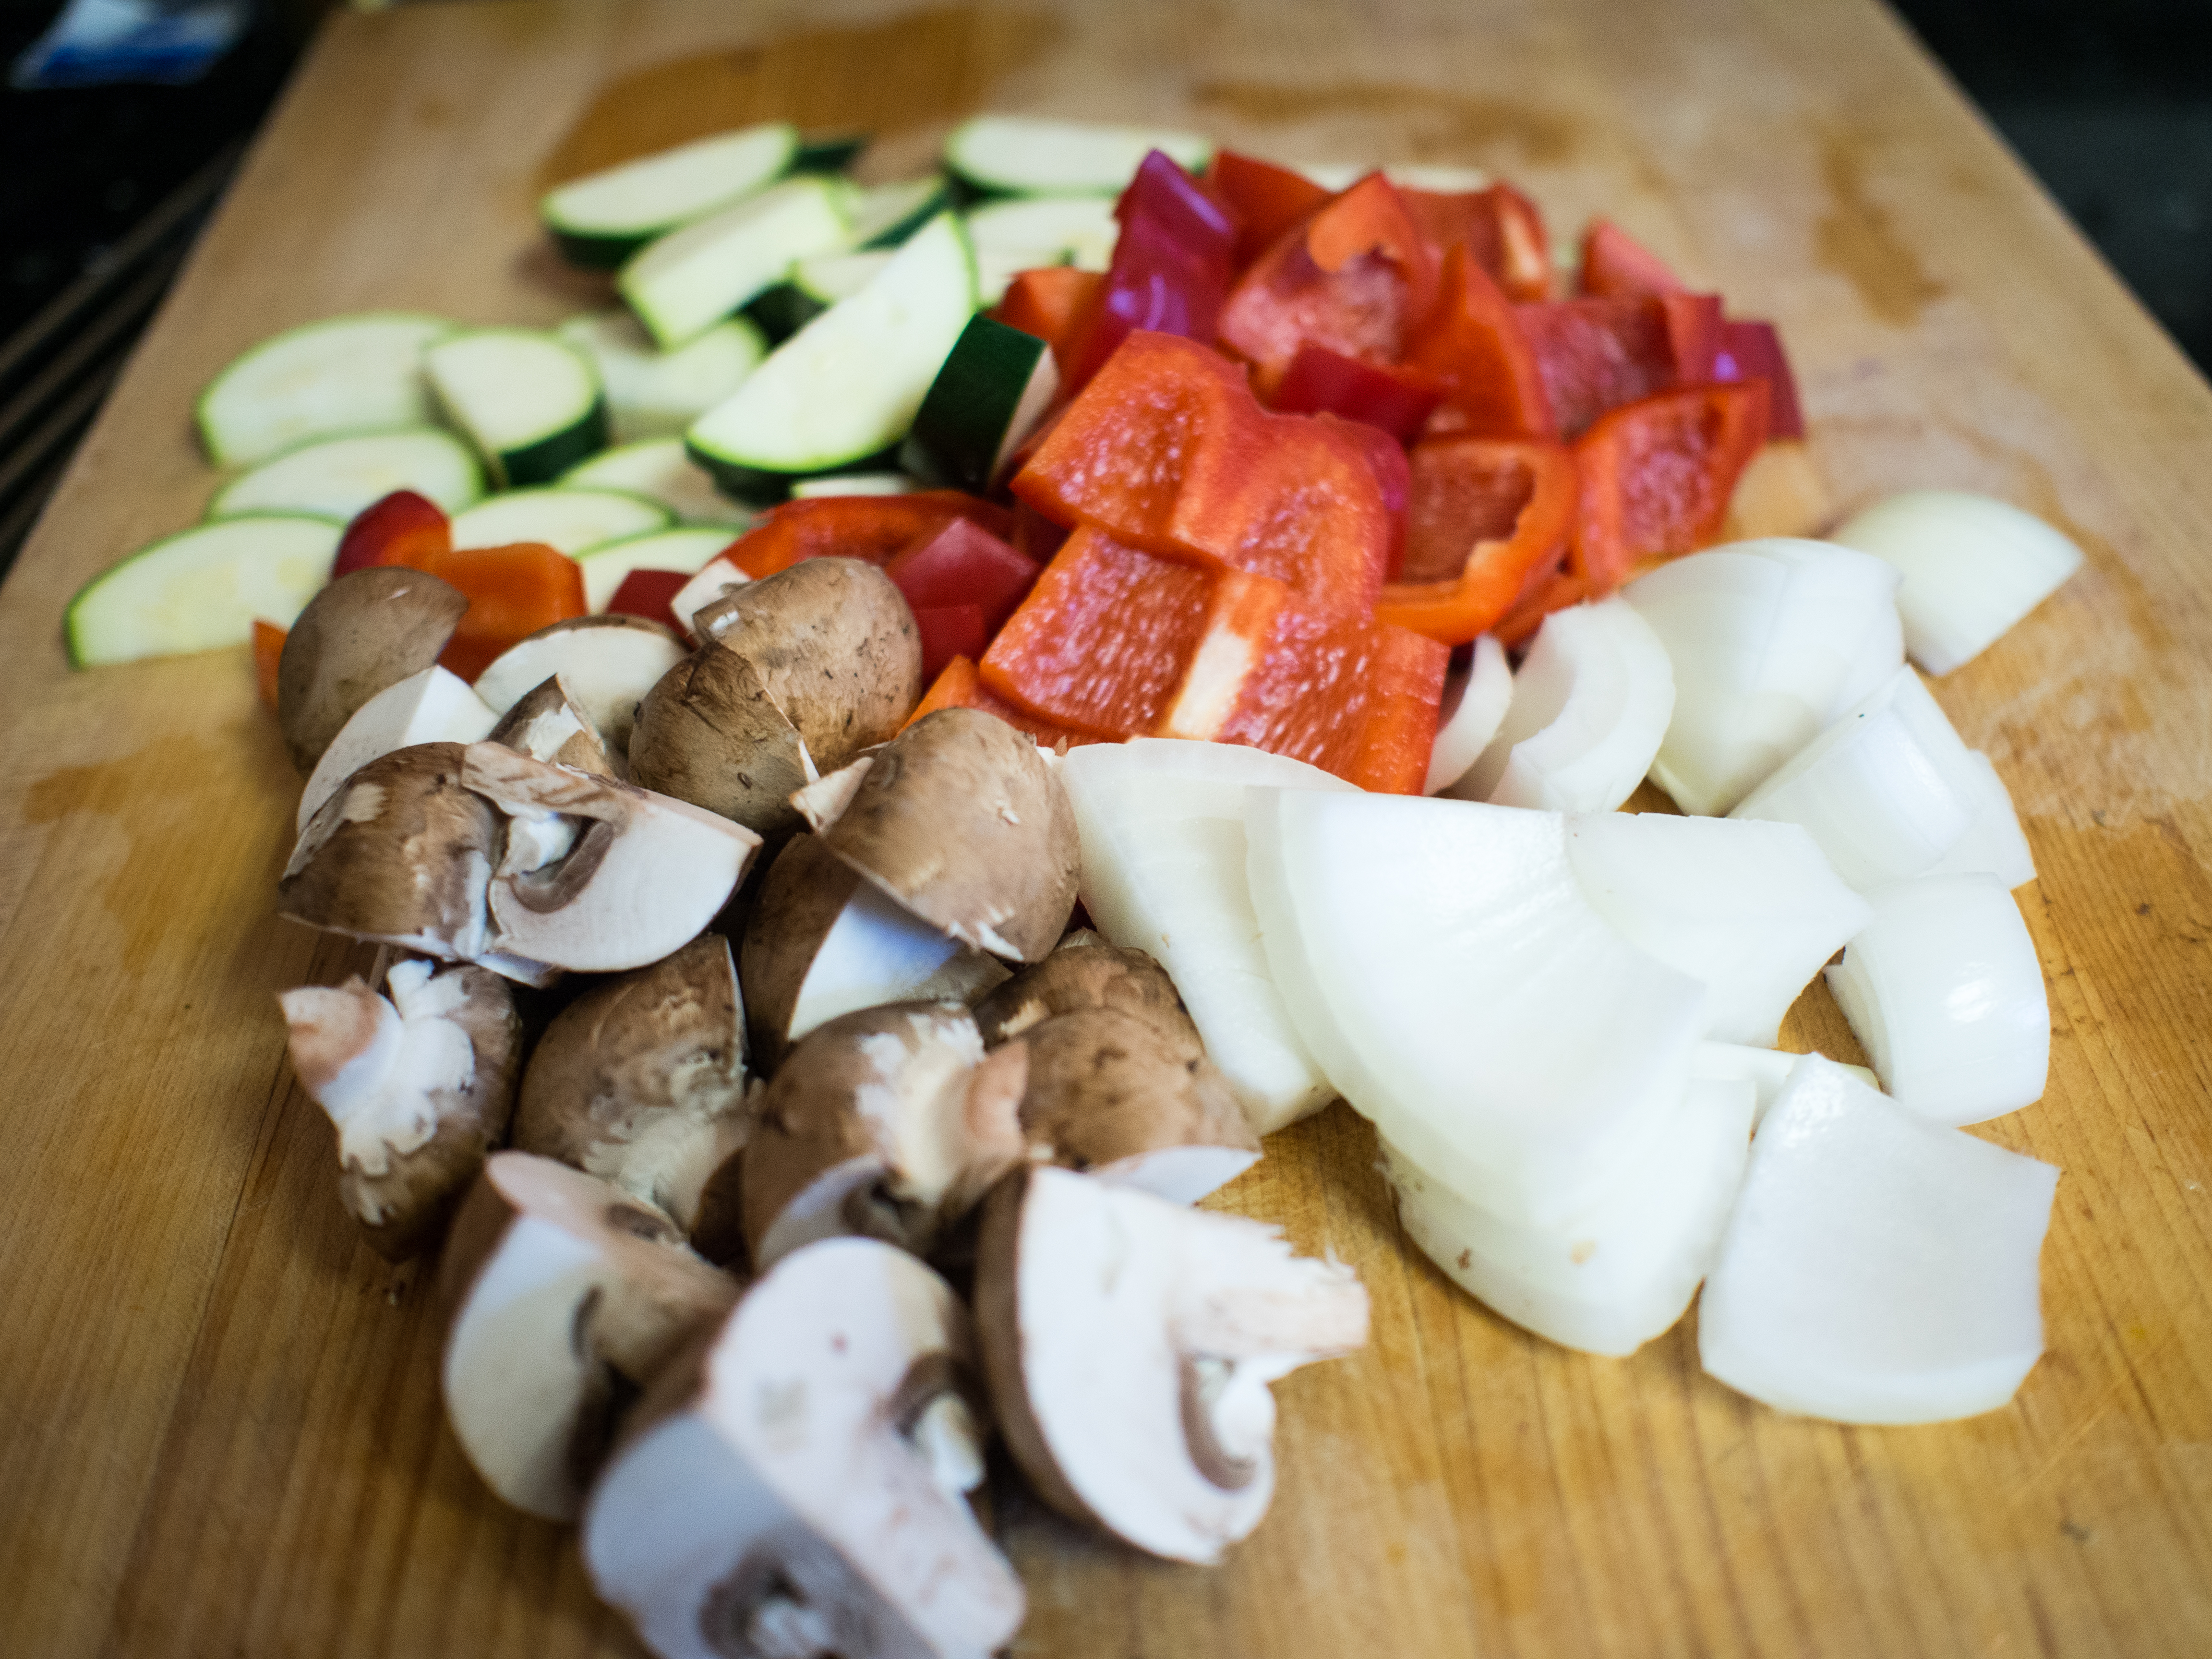
Grilling vegetables should be big enough to not fall through the grates. If you have smaller vegetables, you’ll need a wire grate type contraption. Eggplants, squash and peppers are rather perfect for the grill, but you have to cut them thick enough and wide enough to avoid fall through. I leave the skin on because it seems to keep everything in place pretty well. The skin also doesn’t really taste bad when grilled.  You or your guests can remove the skin if they do not feel like eating it.
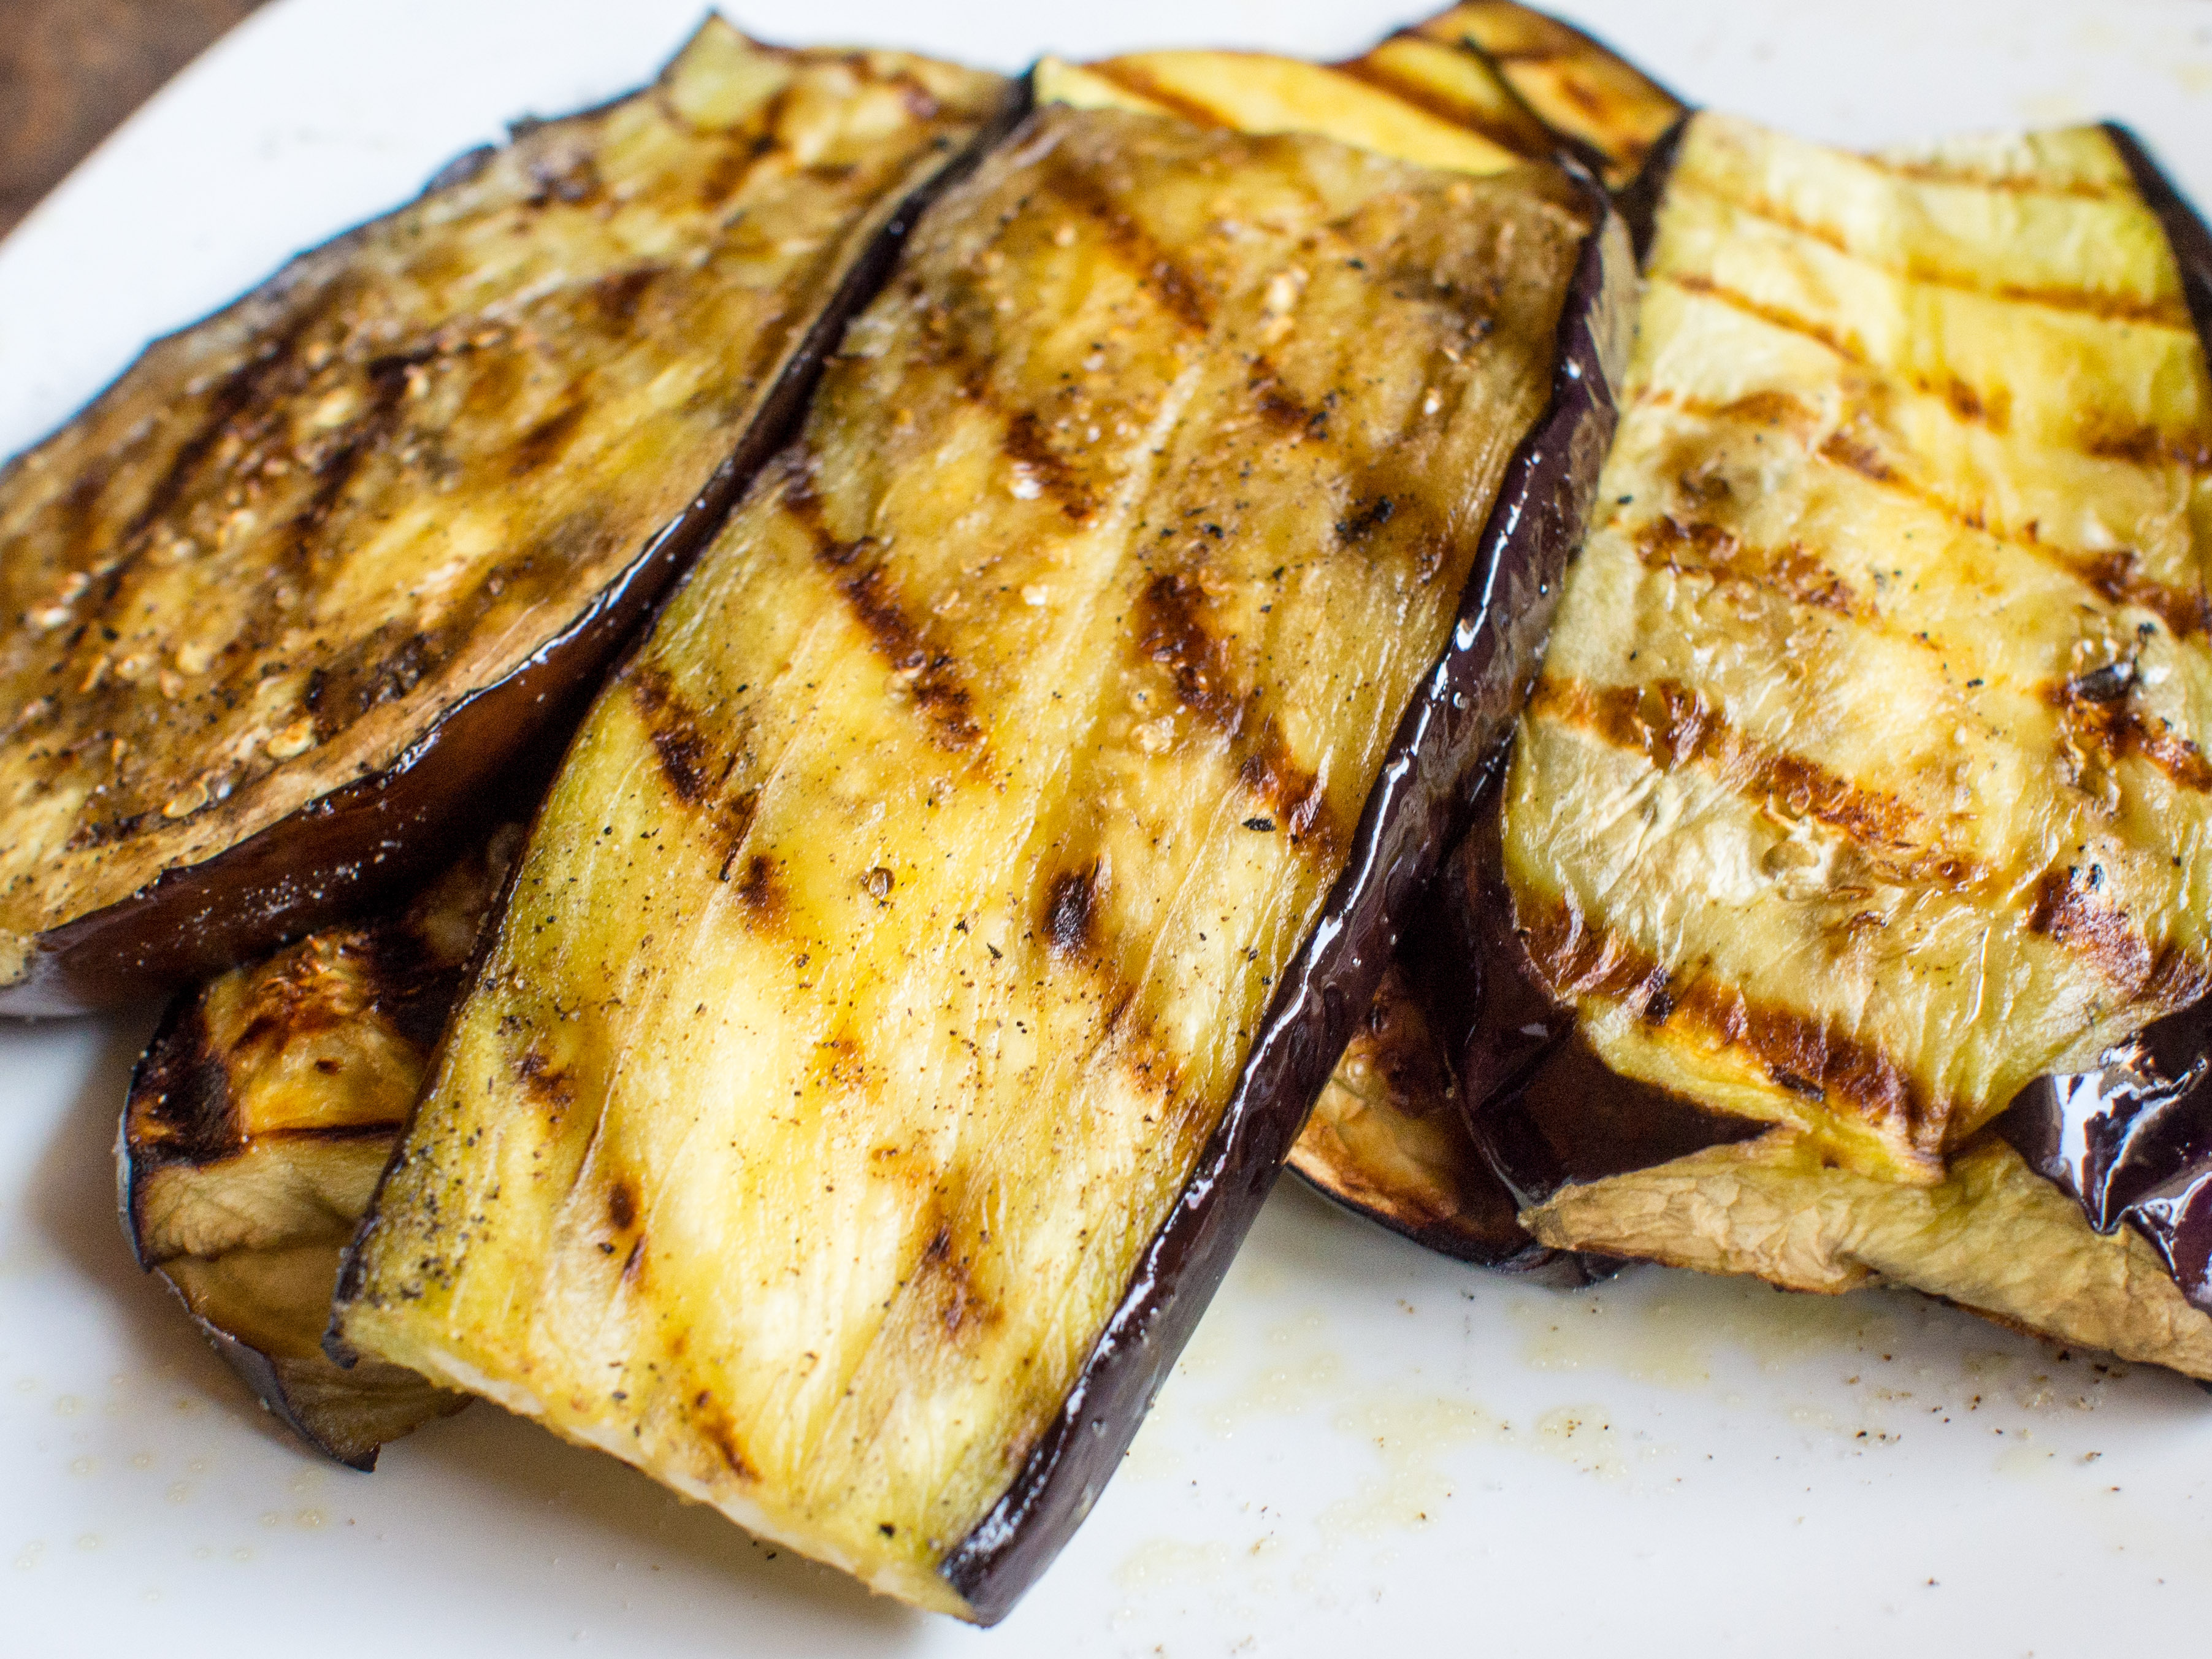
http://dawnoffood.com

Grilled Vegetables
Serves approximately 4 as a side

2 pounds Eggplant, sliced longways (may use other vegetables)
olive oil
Salt and Pepper to taste

Preheat grill to about 500 degrees.

Generously coat slices with olive oil on both sides. Salt and Pepper to Taste.

Turn heat down slightly. Place eggplant slices on grill for about 3 minutes. Check to make sure there is no burning. Flip vegetables over (I use tongs) for another 3-4 minutes, until the eggplant is cooked through with grill marks. Check occasionally to avoid burning. Remove from grill and serve.

Seriously.  It’s that easy.

Cauliflower “Mac and Cheese”

http://dawnoffood.com

I miss pasta. I really, really, really do.   Really, really good mac and cheese that is homemade is so luscious, rich, thick and, well, sinful.

Does this recipe replicate it? Eh. It’s rich and it’s creamy. But is cauliflower ever going to be confused with quality pasta? No. On the other hand, there’s no bloat from carb overloading and no out of control blood sugar responses. All things considered, this is an amazing vegetable side dish!! You’ve got a ton of cauliflower in a form that people will eat. Two pounds of frozen cauliflower barely escapes a dinner with four diners. Crazy for cauliflower. Honestly, we love this dish. I make this all the time. It’s quick, the ingredients are available year ’round, and even the kids eat it!

Also, it uses up some random items that I always have laying around: shredded cheese and sour cream. Taco night never seems to use all these items up.

Some caveats about this recipe. I make real mac and cheese and feel that this recipe should be no different. Take your low fat cheese, your Greek yogurt, your low fat yogurt, chicken stock and whatever other “lighteners” you have and don’t put them in here. You have already subbed out the pasta. Live a little and splurge.  Seriously.

Also, keep in mind that the sauce is covering two pounds of cauliflower. Cauliflower is very, very wet. Especially when baked. It’s the opposite of pasta, instead of absorbing sauce, the cauliflower will be adding water to the sauce.  So, this sauce will be very thick and rather over spiced. If you were to try a bit of the sauce, you would immediately think: too much salt, the woman is crazy. Oh, wait, the cayenne just hit!! Now it’s too spicy. And too thick. Don’t think those things until you’ve baked the whole concoction. If you cut back on the spices, your dish will be incredibly bland. If you waiver on the sauce and think it needs to be a touch thinner, it will won’t be thick and creamy at finish. It’s a delicate balance that will only reveal its perfection at the very end.

Cauliflower “Mac” and Cheese
Serves 6

2 pounds frozen cauliflower florets
1/3 cup water
6 tablespoons butter
1/4 cup flour
1 cup whole milk
1 teaspoon salt
1/8 teaspoon cayenne
1/4 mustard powder
1/2 cup sour cream
1 cup shredded Monterey Jack and Cheddar Cheese, plus additional for topping

Preheat oven to 375 degrees Fahrenheit. Butter a 2 to 2 1/2 quart baking dish and set aside.

Place the cauliflower and water in a saucepan and cook the cauliflower until it’s not frozen anymore. You don’t want the cauliflower to be too soft because it is being cooked again in the oven. Thoroughly drain the water out of the pan.

In a small sauce pan, melt butter over medium heat. Add flour and stir for about 1-2 minutes. Add the milk and stir until really thick. Add the salt, cayenne, and mustard powder. Stir until well incorporated, and remove from heat. Add the sour cream and stir well. Add the cheese and stir until melted through.

I suppose at this point, I should tell you to pour the sauce over the cauliflower and stir well. It’s bad enough to clean the sauce out of the small pan, why make more work and have to clean it out of the cauliflower pan too? So, I put the cauliflower in the greased baking dish and pour the sauce over the cauliflower there. I then stir the mixture together until well blended and add cheese for the topping.

Cook until bubbling and the cheese is melted and just starting to brown.

Cauliflower Mac and Cheese

Cauliflower Mac and Cheese

Cauliflower Mac and Cheese

Cheesy Cauliflower Patties

http://dawnoffood.com

The low carb craze has made superstars out of some vegetables that at best were used to torture children in a previous life.  Kale.  Seriously.  Kale.  The only way kale is good is when it is cooked for a very long time in a ham hock gravy or in Kale and Andouille Soup.  There, I said it.  Kale becomes tolerable when cooked within an inch of its life and paired with a smoked pork product.

The next vegetable up for abuse is the poor man’s broccoli, cauliflower.  Cauliflower is tolerable when you add a signficant amount of dairy products to the mix.  I’ve made cauliflower puree, which can double as a quasi mashed potato substitute.   Cheesy cauliflower patties are now starting to trend, which would be the logical progression.  When I was a kid, my mom would make potato pancakes out of left over mashed potatoes.  After fending off dinosaur attacks, of course.  So, why not try to make fried patties out of cauliflower?  Well, cauliflower has no starch.  It also contains a lot of water.  You need a lot of help to make these suckers stick together.  This “help” likely defeats the purpose of choosing cauliflower, because it either adds carbs or gluten.  On the plus side, it’s probably far more healthy than what you were going to eat, even with the add-ins.

I saw purple cauliflower in the store and thought that maybe such a cool color would inspire the kids to give the dish a try.  My daughter did try it and didn’t really like it. Son and husband really liked it, as long as I didn’t try to say it was something that it wasn’t.  In other words, these were very good cheesy cauliflower patties.

As you can see above, I subbed the patties out for English muffins in Eggs Benedict.  These were really good.  A savory, cheesy bottom that you didn’t have to fight with, complimented the poached egg and Canadian bacon really well.  As a bonus, no need for asparagus, there was already plenty of veg on the plate!

The other time I used it, it was a vegetable for dinner.


http://dawnoffood.com

The patty served as a very nice compliment for my steak dish! I liked it and would make it again.  Definitely a different take and something to shake up the veggie routine in our house.  As a bonus, very easy to make!

Cheesy Cauliflower Patties
Makes about 6-8 Patties

6 cups roasted cauliflower florets (approximately)
1/2 cup easily meltable cheese (I used Monterrey Jack)
1/4 cup panko or bread crumbs
1 egg
Salt and Pepper to taste
1/4 cup butter or coconut oil (or vegetable oil)

Place all ingredients, except the butter, into food processor. Pulse until the cauliflower is coarsely ground. Remove mixture from processor and form into patties. The smaller and thinner the patties, the more likely they are to maintain their shape.

In a heavy bottomed skillet, over medium heat, melt the butter. When the butter just starts to foam, add the patties, careful not to crowd. When the patties are browned, carefully flip and cook until the other side is browned as well. About 3 minutes each side. Serve as desired.

Note:  I roasted the florets at 375 degrees fahrenheit in olive oil, sprinkled with salt and pepper for about 25 minutes, turning once.

http://dawnoffood.com

http://dawnoffood.com

http://dawnoffood.com


Pass the Prosciutto- Thanksgiving Stuffing Featuring Parma Ham

Pass the Prosciutto

Yes, you can make stuffing with no bread and have it look this awesome!

Sponsored Post

There are few holidays that really excite me food-wise as Thanksgiving. First of all, you have the tradition. You can go full bore and serve exactly what the pilgrims ate, or you can do the modern classical Thanksgiving: Turkey, stuffing, various potatoes, token green veg, rolls and pumpkin pie. It’s a virtual carbohydrate bonanza! Over the years, however, various dietary needs have arisen and several beloved family members have been diagnosed with diabetes. The traditional Thanksgiving meal is a disaster for your typical diabetic. Instead of “going without”, I am all about making something equally good from more low carb friendly fare.

My most favorite dish on the Thanksgiving table is stuffing. As a kid, there was nothing better than the box of Stove Top Stuffing, amended with sausage and mushrooms and placed on the table. Nothing. Sure, I can laugh now, but back then, you angled to get a seat by the stuffing.  Stuffing by its very nature, however, is a high carb endeavor.

So, I started looking at all the stuffings from the yesteryear for inspiration.  Stuffings with sage or chestnuts or oysters! Oh my! So much to try. So I stumbled upon the recipe below quite by accident. I wanted a touch of richness, a bit of history, and a whole bunch of easy.  One of my go to ingredients when I’m looking for rich and clearly special is Prosciutto di Parma.  It gives a fantastic, complex, flavor without the excess, and rather random amount of fat and smoke that bacon brings.

Initially, I came up with a stuffing with sausage, chicken livers, oysters, prosciutto di parma, seasonings and bread crumbs. There wasn’t a single drop of stuffing left. Everyone ate every last bit and wanted more.  However, the carb count was likely crazy high.  So, I had to turn my focus to the low carb version.   Then, I got an assignment that asked me to concentrate on gluten free cooking that included the amazing Prosciutto di Parma, or parma ham. Could I adapt the my high carb, gluten riddled recipe recipe? Would it work? These questions kept me up at night.

First, my philosophy for low carb is not to make a thin imitation. While you’ll never convince me that pureed cauliflower is mashed potatoes, the dish is really quite good in its own right.   And, more importantly, I don’t miss the potatoes.   My goal for this dish was: good and you don’t miss the original.  How can you go wrong with Prosciutto di Parma, sausage and oysters.  Right?

Let me caution: this stuffing is full bodied and full fat. It’s a go big or go home type stuffing. Everyone who has tried this stuffing in either high carb or low carb form have raved about it. Some people have declined to try it due to the ingredients.   Chicken livers and oysters can lead some to take a pass. More for me, honestly.

The technique I use is really rather unique. I was making the stuffing and decided to take a short cut. I didn’t want whole oysters or pieces of chicken livers in my stuffing for texture reasons, so I figured I would just chop them for a bit in the processor, because, well, isn’t that what it’s for? I quickly learned there’s no level of “a bit” that doesn’t turn the livers or oysters into liquid. So, instead of minced shellfish or livers, I had a lovely red puree.  However, I wasn’t wasting my money by not using the livers or oysters, so I included them in the stuffing. Because these overtly odd ingredients didn’t appear in the stuffing, people were more inclined to try it. And, by extension, love it! Huzzah!  I just got back from Williamsburg, so that celebratory phrase stays!

So, dear reader, I am giving you my famous stuffing recipe. My kids cried that I was using a recipe from the secret family recipe book.  But I will share this one.  Kick the boxed stuffing habit and make your own stuffing.  It will be miles better than anything from a box.  You can make it ahead too! And, depending on the version below you choose, you can actually label this a vegetable side.  You’ll get the joke when you read the ingredients.

Sausage and Oyster Stuffing
Serves: Thanksgiving Crowd (10 or so, easily doubled if you need more)
Prep Time: 15-25 minutes, depending on version made
Cook Time: 30-40 minutes

Note: Low carb/Gluten free version requires cooked cauliflower, see Cuban Rice and Beans for full prep instructions.

5 chicken livers
6 oysters, shucked
1/3 cup bacon drippings, lard or other high temperature suitable oil
1/2 pound Prosciutto (parma ham), medium dice
1 pound sage sausage
2 cups finely chopped onion
1 cup finely chopped celery
1 cup sliced mushrooms
2 cloves of garlic, minced
1 teaspoon sage, rubbed
4 tablespoons unsalted butter

Low Carb/Gluten Free Version:
1 large head of cauliflower, cut into florets, roasted at 375 degrees for about 15 minutes until soft and slightly brown, chopped fine

“Regular Version”:
4 cups bread crumbs (gluten free, if needed)

2 hard boiled eggs, coarsely chopped
Salt and Pepper to taste

Place chicken livers and oysters in the container of the food processor and process thoroughly. Cover and set aside in the refrigerator.

Heat fat over medium heat in a large skillet. And prosciutto and sausage and cook until the sausage is cooked through and both are rendered of fat. Add the onions, celery and mushrooms and cook until the onions and celery are translucent and the mushrooms have lost some of their liquid. Add the garlic and saute until soft. Add the sage and liver mixture. Cook until the mixture is no longer reddish. Add the butter, cauliflower or bread crumbs, eggs and salt and pepper. Place in an oven dish, cover and refrigerate. To serve, heat in a 350 degree oven until the top is brown and the stuffing is warmed through.

Follow Parma Ham on Twitter for a chance to win $50 worth of the world’s most famous ham. Click on the banner below to participate. This post is a collaboration between the blogger and Parma Ham. 

Win Parma Ham

Pass the Prosciutto

Pass the Prosciutto

Pass the Prosciutto

Pass the Prosciutto

Cauliflower Mashed Potatoes

Cauliflower Mashed Potatoes

Being a fairly low carb person, there are certain foods I desperately miss.   Would I love a plate of French Fries?  Yup.  Pizza?  You bet.  Stuffing?  Yes, a million times.  Crackers with my cheese?  Of course!  Bun with my hamburger?  Oy.

Mashed Potatoes?  Not really.  I’m not a potato fan, unless they are completely fried crisp. Then, ok!  I’m mostly in it for the crispy outside shell.  Steak fries?  Pass.  My husband, on the other hand is part Irish and LOVES potatoes.  He’s having to get extremely serious about being low carb because his lack of seriousness has had some health consequences.  So, he reluctantly joins the low carb bandwagon.

I had heard about fake mashed potatoes.  But honestly, the thought of cauliflower really didn’t appeal to me.  Sure, it’s beautiful when raw.  That’s about where my affinity ends.  I’ve used it as a rice substitute, but it’s pretty swamped with strong flavors and more there for filler.  In this recipe, cauliflower is the star.  The. Star.

I tried a ton of recipes and some lacked the heft or texture of mashed potatoes.  Some were just runny.  Others worked better, but really didn’t take advantage of the blank canvas.  I tried to up the flavor here and add really good texture as well.

Cauliflower is wet.  Very, very wet.  And in this recipe we steam it, adding more water to the process.  So, without something more, you’ll have a very thin mixture with just pureed cauliflower.  I used a combination of cream cheese and butter to really give the dish more substance.  I also could have roasted garlic and added it to the puree, but I liked the convenience of granulated garlic.  It added flavor without any additional moisture.

This recipe comes extremely close to garlic mashed potatoes.  My kids ate it up until I told them it wasn’t mashed potatoes, then it became a pariah on the plate.  But really, it stands on its own as a great dish.  No need to fool anyone, just say it’s pureed cauliflower.  Unless they are minors.  Then it’s mashed potatoes.  As an extra bonus, it’s mashed potatoes that are quicker and easier to make then real mashed potatoes!

Your mileage my vary on this dish.  I used 1 really large head of cauliflower.

Cauliflower Mashed Potatoes
Serves 4-6, as a side dish
Prep Time: 5 minutes
Cook Time: 20 minutes

1 large head of cauliflower, heavy stalks removed, cut into florets
3 tablespoons of cream cheese, divided
3 tablespoons of butter, divided (I used European Style, which has more fat content)
3/4 teaspoon granulated garlic, divided
Salt and Pepper

Steam cauliflower until soft. I used a steamer insert and placed it over boiling water and it took about 13 minutes.

Place one third of the cauliflower into a food processor (if yours can take more, great, mine couldn’t). Add 1 tablespoon cream cheese, 1 tablespoon butter, and 1/4 teaspoon granulated garlic to the food processor. Puree until the consistency desired and there are no remaining chunks of cauliflower. Place in a serving bowl and cover. Repeat process until the cauliflower is all pureed. Salt and Pepper to taste and serve.

Cauliflower Mashed Potatoes Cauliflower Mashed Potatoes Cauliflower Mashed Potatoes

Roasted Veg

OLYMPUS DIGITAL CAMERA

Now that it’s summer, my kids and I commute together to work, because their summer camp is at my work.  Convenient, no?  

Kinda.  My commute is long.  35 miles long, one way.  It’s a rather boring, tree lined, “almost” interstate.  “Excitement” during my commute is my son making sure to point out all the road kill while my daughter yells “gross!!!”.  Alternatively, excitement can be had by me trying to find a radio station that isn’t “boring” or inappropriate for children under 11 years old.

Good times.  Times to cherish, or so I’m told.

I only partially kid, as my kids and I have wonderful conversations.  For example, we love to discuss the merits of autotune and whether a song is plagued by it.  Although, there may have been tears involved in the Katy Perry discussion. Katy would never autotune!

Anyway….on our way home, when I don’t have something pre-planned for dinner, I get to take everyone to the grocery store.   Joy!

As we are walking around the store, I come upon the large display of pre-made foods.  Row after row of buffets filled with items like salads, soup, meat entrees and vegetables. All for an astounding $8.99 per pound! Most stores have these “convenience foods”, but I walk by it.  The illusion of homemade without the work, I suppose. I just marvel because the ingredients that go into these items are conveniently located in the store for much, much less.  I try not to be judge-y. Lots of people don’t know how to cook, and this has to be better than something in a box. Plus, I know weeknights are hectic, high stress, and minimal time. Items like this help busy moms and dads put dinner on the table. But, I stopped at the tray marked “roasted eggplant”.  Really?  $8.99 USD for “roasted eggplant”?   The eggplants were only $1.99 a pound! There’s hardly any effort involved in “roasting”. Thus, a blog idea was born. Do not pay for roasted eggplant!! Except, my kids would never agree to roasted eggplant.  Lucky for me, my store had some beautiful, locally grown yellow and green pan patty squash.  So, pan patty squash would have to be a substitute.   They may not outright rebel against something so pretty. As an extra bonus, my husband loves pan patty squash.

You can use this “recipe” on almost any vegetable that you roast.  Even eggplant! To fancy it up, you could grate parmesan cheese on top just prior to serving. I’ve cut the vegetables in chunks, you could do thick slices as well. Whatever shape you like!

When you see how easy this is, you will never pay for roasted veggies again! You can totally do this!

Roasted Pan Patty Squash

Pan Patty Squash
Olive Oil (or any other oil of your choice)
Salt
Pepper

Preheat oven to 350 Degrees Fahrenheit.

Consistently cut squash to 1 – 1 1/2 inch pieces. Place pieces on a baking sheet. Drizzle olive oil over the squash and salt and pepper. Using your hands, mix the squash so that it is well coated by the oil.

Bake for about 7-9 minutes, check the oven to see if the bottom of the pieces have turned brown, if so, use a metal spatula and flip them over. Do the same for the other side. Total time would be about 15-20 minutes, depending on the size vegetable pieces and the accuracy of your oven. Remove from the pan serve.

OLYMPUS DIGITAL CAMERA

OLYMPUS DIGITAL CAMERA


Kebabs

OLYMPUS DIGITAL CAMERA

It’s 6 o’clock on a weekday evening.  Little ones are looking up at you like they haven’t eaten in days.  You have a couple of random vegetables (not enough for an entire side dish, of course!), an onion, and a meat.  What do you do?  What do you do?!?!

Kabab ’em.   Dinner is ready in a snap and there’s hardly any clean up.  Plus, who doesn’t like food on a spear?  Deadly weapon and food conduit?  Awesome.  Kebabs are super easy and fun. Extremely kid friendly. Except for the whole they could poke their eye out part. Take the food off the spear for children who are unable to handle sharp weapons, of course.

I could give you a huge marinade and tell you to boil it together and cool it off, then place your meat in it.  I could.  But I won’t.  I used a bottle of organic Italian dressing on my beef.  Any sirloin steak or “London Broil” will do.  The beef need not be fancy or expensive.  You could also do boneless chicken meat, or shrimp as well.

For the veg, just cut into rather substantial pieces, so that they stay on your kabob spear.

For grilling, the key is to heat the grill up before you start.  I have a propane grill (in addition to my charcoal smokers) that I use all summer.  Love it.  The lack of dishes to clean and the fact that the heat is located outside and not in the house is just so convenient.

To this simple dish, I’ve added a sauce.  The sauce is also simple, but really strong to pair with the beef, so it is purely a “dip” and not a pouring sauce, if that makes sense. In another life, the sauce could totally replace a certain steak sauce that begins with an “A” and ends with a “1”. The sauce was inspired by a recipe on the food network that looked way to vinegary to me: (http://www.foodnetwork.com/recipes/porterhouse-with-balsamic-steak-sauce-recipe/index.html) You might ask why I used port. I’m part of a wine club and every Christmas I get a bottle of port. I have no idea what to do with the port, so I cook with it. If I think I can get away with it in a recipe, in it goes. It totally works here.


Beef and Vegetable Kebabs
Serves 4
Prep time: about 20 minutes
Cook time: about 20 minutes for sauce and kebabs

1 pound beef sirloin or “London Broil”, 1 inch cubes
1 cup Italian Dressing
1 zucchini, halved and thick sliced
1 red pepper, large dice (any color, really)
1 onion, large cut
4 ounces of mushrooms, halved
1/2 cup olive oil
1 teaspoon salt
1 teaspoon ground black pepper

Kebab Sauce
1/3 cup balsamic vinegar
1/3 cup port
2/3 cup ketchup
1/4 cup honey
2 tablespoons minced onion
2 tablespoons Worcestershire sauce
1 tablespoon dijon mustard
1/4 teaspoon allspice
salt, pepper and sugar, to taste

Marinate the beef in the Italian dressing for at least 8 hours.

Preheat Grill

Skewer the beef, zucchini, mushrooms and onions in an alternating pattern on a skewer. Combine the olive oil, salt and pepper. Brush on skewers.

In a small sauce pan over medium heat, combine the balsamic vinegar, port, ketchup, honey, onion, Worcestershire sauce, mustard and allspice. Stir until well combine. Let simmer for about 10 minutes. Taste and adjust to your liking with salt, pepper and sugar.

Place the skewers on the grill for about 4 minutes. Turn over. Cook until the meat is at a food safe temperature, approximately 4-6 more minutes. This depends on the size of the steak cube and the temperature of the grill. Remove from grill and serve with sauce.

OLYMPUS DIGITAL CAMERA

OLYMPUS DIGITAL CAMERA

OLYMPUS DIGITAL CAMERA

OLYMPUS DIGITAL CAMERA

OLYMPUS DIGITAL CAMERA


Baked Beans

OLYMPUS DIGITAL CAMERA

Very few things complete a hot dog and hamburger cook out like baked beans.  Which, to me, is odd.  I mean, it’s clearly hot outside.  Nearly all the other sides are cold, like coleslaw, potato salad, lettuce based salads, sliced fruit, etc.  Drinks like beer, soda, margaritas, and mojitos are cold.  And inevitably there will be baked beans somewhere on the table spread.  The beans are baked in a supremely sugary and molasses infused sauce for a fairly long time, given their small size. How does that fit with coleslaw and potato salad?  It’s like “which of these things do not belong here”.  Yet, it does.  And great beans can be sublime.  Sweet, smokey, salty all in one bite. Try to top that potato salad!!

Boston Baked Beans are the quintessential historical bean dish.  The beans used for this dish were indigenous to the North American and transported to the “old world” in the 16th century. French Cassoulet was developed quickly there after.   In the colonies, the beans were cooked with salt pork, molasses, sugar and water.  The beans were baked for many hours in an earthen pot. “Beantown” (aka Boston) was aptly named due to the popularity of “Boston Baked Beans”.

Now?  Pop open a can and warm it up in a sauce pan.  Done.  “Baked beans”.    And why not?  Who wants to have a hot oven going for hours during the summer?   Who wants to soak beans for hours on end (if you can remember to, I forget that step and have to do the “quick soak”)? I care!!

There are many variations of doctored canned baked beans.  But, no matter how much you doctor a recipe for baked beans, the earthiness seems to get lost to a wan can taste.  I think it has something to do with the sauce in the beans.  It lacks spice.  Oomph.  Body.  My mom has a recipe that she got from somewhere called “Braggin’ Baked Beans”.  This recipe is the best of the doctored bean recipes I have tasted. I’ve tried making traditional baked beans. No one really likes those anymore. I’ve tried and tried. So, I decided to do a hybrid. My recipe combines historical ingredients with decidedly newer ingredients.  I wanted to add spice to the sweetness.  I wanted bold flavors in what could otherwise be a blandish dish. Also, I try to avoid BPA and bean cans and baked bean cans can contain a lining that uses BPA. BPA is a chemical that is suspected of causing hormone disruption in humans. I have two small humans and don’t want their hormones disrupted at all. By substituting plain beans for baked beans, I can use beans from manufacturers that avoid BPA.

Baked Beans

2-3 tablespoons of olive oil
1 pound chorizo sausage, removed from its casing (or any other hot pork sausage)
1 large Vidalia Onion, chopped
1 jalapeño pepper, minced
2 cans of navy beans, rinsed and drained (about 15-16 ounces, can sizes tend to vary)
1 can of black beans, rinsed and drained (about 15-16 ounces, can sizes can vary)
1 cup ketchup
1/3 cup molasses
1/3 cup course grained mustard
1 teaspoon chili powder
1/2 cup firmly packed brown sugar
Salt and pepper
4 thick slab slices of bacon

Preheat the oven to 350 degrees fahrenheit.

Heat the oil in a dutch oven (I used my handy 5 quart) over medium heat. Cook the sausage, onion, and jalapeño pepper, until the sausage is cooked through. If there is a lot of liquid, drain. If not, add the beans, ketchup, molasses, mustard, chili powder, and brown sugar. Stir until well combined. Adjust seasonings, as needed, with salt and pepper. Place bacon on top. Bake covered for 30 minutes and uncovered until desired thickness (30 minutes or so). As you can see above, I like a really thick sauce, you can certainly leave it thinner with no loss of taste.

OLYMPUS DIGITAL CAMERA

OLYMPUS DIGITAL CAMERA

OLYMPUS DIGITAL CAMERA

OLYMPUS DIGITAL CAMERA

Broccoli Au Gratin

OLYMPUS DIGITAL CAMERA

When I started this blog, I had no idea there was food that was nearly impossible to photograph looking good. Coq au vin, Creamed Spinach and Ropa Vieja quickly taught me this lesson. The photos aren’t great. They don’t make it on Foodgawker or Tastespotting. They just aren’t pretty. They are fantastic to eat. Amazing, really. But, comparing a picture of Ropa Vieja and, say, a beautiful chocolate chip cookie, I can tell you which one will look better.

I’ve read where other bloggers have promised not to make food that is hard to photograph. I have no such rules. My goal is good food that is easily made. The photos will try to capture my enthusiasm for the subject. I’m no photographer. If you’ve seen my photos at all, you’ve seen that. The best I can say is that I try. Really, really hard.

Broccoli Au Gratin. Broccoli baked in a creamy sauce with cheese. Admit it, it’s not going to look good. It will taste great, however.

My husband and I went on an awesome date night and chose to patronize a famous steakhouse restaurant. We had the creamed spinach and the broccoli au gratin for sides with our steak.   Why Broccoli Au Gratin?  Well, really, is there a bad “au gratin”? Something cooked in a creamy sauce topped with a cheese topping? Very few things wouldn’t improve under such conditions!!

So, I wanted to try to make the dish when I got home because it was really good!  Plus, we eat broccoli three to four times a week. Steamed, with some butter, salt and pepper. Three.  Times.  A.  Week.  This would certainly shake that routine up!!

Au Gratin is a French term that translates into the words “to scrape or grate”, likely a reference to the cheese or bread use as a topping for the dish. I believe the New Orleans chefs like Emeril have elevated these creamy dishes with the addition of heat. Cream and cayenne are just made for each other. The heaviness seems to abate a touch when you add unexpected flavors.

This dish is derived in part from Emeril Lagasse’s Broccoli and Cauliflower Au Gratin’s Recipe ( http://www.foodnetwork.com/recipes/emeril-lagasse/broccoli-and-cauliflower-au-gratin-recipe/index.html)

Broccoli Au Gratin
Serves 6-8
Prep Time: 20 minutes
Total Time: 50-60 minutes

1 cup water
2 16 ounce bags of broccoli florets
1 stick (8 tablespoons) of unsalted butter
1/2 cup flour
1 teaspoon paprika
1 teaspoon ground mustard
1/4 teaspoon white pepper
1/4 teaspoon ground cayenne pepper
2 teaspoons salt (may need more based on tasting and preference)
4 cups of whole milk (may need more, depending on thickness of sauce)
8 ounces grated cheddar cheese (or a cheddar cheese/monterey jack mixture), divided

Preheat oven to 375 degrees Fahrenheit.

Boil water in medium sauce pan. Add broccoli. Cook until just thawed. You may need to stir several times.  Remove from heat, drain well and set aside. Place in a baking dish (at least 3 quarts).

In a medium sauce pan over medium heat, melt the butter. Add flour to the melted butter and whisk until the raw flour taste is cooked out, about 4 minutes.  The mixture will be a blonde roux. Do not let the mixture brown or the creamy mixture will be the “wrong” color. Whisk in paprika, mustard, peppers and salt. Add milk and stir with a wooden spoon. As the mixture heats and the flour and butter mixture is incorporated with the milk, the milk will thicken. The mixture should be fairly thick, but not too tight. You should be able to stir it.  If the mixture is just too thick, slowly add milk, stir and heat for a bit and repeat that until you get the mixture to the right consistency. Add three quarters of the cheese and stir until melted.

Poor the milk mixture over the broccoli and fold the cream sauce into the broccoli so that the mixture is completely incorporated throughout the baking dish. Top with the remaining cheese, adding more if necessary. Bake until the top is browned and the sides bubble, about 30 minutes.  Let sit for about 15 minutes before serving.
OLYMPUS DIGITAL CAMERA


Blonde Roux

OLYMPUS DIGITAL CAMERA

Thick, but not too thick….

OLYMPUS DIGITAL CAMERA

OLYMPUS DIGITAL CAMERA

Cuban Black Beans and “Rice”

OLYMPUS DIGITAL CAMERA

The three things I miss the most on a low carb diet are bread, pasta and rice. And sugar. And ice cream. Ok, I miss a lot. But when serving the Ropa Vieja, I knew I had to come up with a “rice” like dish. Ropa Vieja with a side of asparagus just, well, sounded so unappealing. So, I researched “rice” dishes.

Cauliflower seems the go to vegetable for starch substitutes. And why not? It’s white, low glycemic, low carb and high fiber. It’s fairly neutral tasting, has some texture, and takes well to other flavors. But when I saw recipes with directions that began with “grate the cauliflower”, I’m out.

Just no.

I’ll grate nutmeg and that’s about it. I have better things to do with my time than to grate a head of cauliflower. But the interesting part to me was that these recipes steamed the bits of cauliflower. Why is that interesting? Well, there were lots of tips included in these recipes to dry the cauliflower bits out. So, the steaming made the vegetable to wet. Go figure.

So, I roasted it. Why? Because if moisture is a problem, that’s a problem oven heat can fix. Two, there’s something very appealing about the slightly charred, nutty, roasted taste of vegetables. Three. You stick it in the oven, jostle the pan a bit during the cooking time, and the veggies are cooked. Just chop finely and you have “rice”. I’m all about simple and easy cooking methods.

My daughter came home from school one day with a recipe for pinto beans. She copied it down from her workbook over the course of a few days to “sneak” it home because she thought it sounded good. How cute is that?!? I told her I was making this dish and she ran and brought me her purloined recipe. So, I used parts of that recipe to make the dish. She was so thrilled she actually ate it! As an extra bonus, I told my husband I was making a black bean and rice dish and asked if he would sample it. He grabbed the offered spoon, ate it and said it was great! I replied, “Really? You were tricked by the cauliflower?” His eyes flew open and he went to the dish and shrugged and said, “I guess so!”

Put this dish in the rotation!!

So, here you go. A lower carb version of Cuban Black Beans and Rice.

Cuban Black Beans and Rice
Serves 4-5

“Rice”
1 head of cauliflower
1/4 olive oil (or any neutral oil)
1 teaspoon salt
1 teaspoon of pepper

Black Beans

1/4 cup of olive oil
1 green pepper, diced
1/2 jalapeño pepper, minced
1 medium onion, small dice
2 cloves of garlic, minced
1 teaspoon cumin
1 teaspoon paprika
1 15 ounce can of black beans, drained and rinsed
1-2 tablespoons of olive oil (as needed)
Salt and Pepper

“Rice”

Preheat oven to 375 degrees Fahrenheit

Separate the florets from the stalk of the cauliflower. Place florets on a baking sheet and coat with oil, salt and pepper. Place sheet in oven. During roasting, flip florets occasionally to prevent over browning. Roast until florets are tender and slightly browned, about 20 minutes. Remove from oven, let cool slightly and when you can handle them, chop finely until the pieces are about the size of rice. Set aside.

Black beans

In a saute pan, heat the olive oil over medium heat. When heated, add the peppers and onion. When the onion is translucent, add the garlic. As the garlic softens, add the cumin and the paprika, stir well. Add the black beans and the “rice”. Mix thoroughly. Taste the mixture, if the mixture is too dry, add the olive oil until the texture is appropriate. Season with salt and pepper as needed.

OLYMPUS DIGITAL CAMERA

OLYMPUS DIGITAL CAMERA

OLYMPUS DIGITAL CAMERA

OLYMPUS DIGITAL CAMERA

OLYMPUS DIGITAL CAMERA

OLYMPUS DIGITAL CAMERA