Monthly Archives: February 2014

Sardines

http://dawnoffood.com

This post was a really hard one to do.  Look at those pictures.  Sardines are not really “photogenic”.  However, they are incredibly delicious.  And SOOO simple to make.   I was walking through my local Whole Foods and came across fresh sardines.  $5.99 a pound.  For wild caught, fresh fish.   So, I bought a half a pound and figured why not?  They are incredibly heart healthy, they’ll cook quick for a weeknight appetizer splurge, and it’s about $3.00. I’ll take a chance for $3.

Marinated them in olive oil, garlic, salt, pepper and thyme.  Threw them on a screaming hot grill pan.  At 20 degrees outside, I thought it was a touch cold.  After the thick smoke abated from my “open concept kitchen/dining room/living room”, I decided next time they would cook on the grill.  A scant few minutes later, we had an amazing appetizer.  They were gone in seconds.  To say that tasted amazing would be an understatement.  Again, didn’t look like much, but tasted great.

I was inspired by this recipe and the author’s incredible photos.  While I should have probably left the fish whole for picture purposes, I’m pretty sure the kids wouldn’t have eaten them with the “guts”.

As this is a fish recipe, please be careful to avoid eating the bones. Sardines have bones, and lots of them. Bones can pose a choking hazard.

Grilled Fresh Sardines
Prep Time: 1 hour (marinating)
Cook Time: about 6 minutes

¼ cup olive oil
½ teaspoon fresh thyme
2 cloves of garlic, minced
½ teaspoon salt
½ teaspoon fresh ground black pepper
½ pound sardines, cleaned, tails and heads intact.
finishing salt
lemon wedges to serve

Place the first 5 ingredients in a container and mix together well. Place sardines in container and marinate in the refrigerator for an hour.

Heat grill or grill pan moderately hot. If using grill, these fish are small, use a basket or some other device that won’t allow the fish to go through the grates. Place fish on grill, cooking on each side for about 3 minutes,  until done. Remove from grill, sprinkle with a bit of finishing salt (large crystal salt) and serve with a lemon wedge. Best eaten with hands, picking the fish from the bones. As with any fish, be careful with the bones!

http://dawnoffood.com

Walt Disney World’s Port Orleans French Quarter

http://dawnoffood.com

This post will cover an “on property” resort, namely Disney’s Port Orleans.

There are a few things to know about Walt Disney World before you go.  You can stay “on property” or “off property”.  The choice you make is rather important, as both have their pros and cons.  We stay “on property”.  As a result, we can make restaurant and activity reservations first before other Disney guests.  We also get free transportation to all the parks. If you fly (we are split on this, we have both driven and flown), you really don’t need a car if you stay “on property” and don’t wish to see anything other than Disney Parks.  Disney picks you and your luggage up at the airport, delivers everything and everyone to their hotel,  and then shuttles you around Disney World.  Disney also takes you back to the airport.  Honestly, it’s extremely convenient.

I don’t have much experience staying “off property”, but wanted to mention a few issues you may have.  Besides not being able to make restaurant and activity reservations early, you also have to pay for parking at each park you visit.  This is no small amount.  Also, you have to take the tram in from the parking lot, which eats away at your park time.

Many people believe you pay for this convenience with higher hotel rates.  Yes and no.  You can save on the cost of the rental car and parking staying at Disney.  Also, Disney has three pricing tiers for their resorts:  budget, moderate and deluxe.  Prices range from sub-$100 to over $500 a night.   I’ve stayed at three of the deluxe hotels on the Walt Disney World property:  The Wilderness Lodge, The Animal Kingdom Lodge, and The Polynesian Resort.  My most recent visit had me staying at a moderate resort:  Port Orleans- French Quarter.   As this is my first stay at a moderate resort, I was a little nervous.    The first thing I noticed different was the lack of a balcony.  The rooms are done in a “motel” style, that is the doors are facing outside.

So, there aren’t really balconies.   It’s a small thing overall, but it shrinks the room incredibly.  In the deluxe resorts, we had a balcony and could open the door and sit and enjoy the view.  I was upgraded to the Riverside rooms and while I had a lovely view from my front door, there was really no place from which I could enjoy the view.  If you want to enjoy this view for the moments you enter and leave your room, pay for the upgrade.  If you just want to avoid the “parking lot” view rooms, I’d probably pick the garden view upgrade instead.

Port Orleans French Quarter

I’m usually not a fan of “location tips” because some people have different ideas of what is a bonus and what isn’t.  Also, you can’t really request a room.  You can make a suggestion, but there’s no guarantee that you’ll get it.   The Port Orleans- French Quarter resort is fairly small, so there isn’t a huge difference in locations.  We stayed in Building 6 and it was pretty ideally located to enjoy short walks to the bus stop, main building, pool and parking lot.

The Main Building has a small cafeteria, the Sassagoula Floatworks and Food Factory Food Court, Scat Cat’s Club (drinks only), and a convenience/souvenir store.  There is no formal restaurant here.  The Port Orleans-Riverside has a full service restaurant- Boatright’s Dining Hall, which is a short walk away.

The resort also has a pool, but it was closed for renovations, so I can’t comment too much on the pool.   It looked lovely, but lacked the elaborate theming of the deluxe resort pools.  Being a smaller resort, however, this was expected.

The Room

The room has two queen beds, a small nightstand (incredibly small, really could have been bigger, or added a second one, there’s plenty of room).  For the furniture, there’s a small table with 2 chairs, a dresser with 3 drawers and a refrigerator, a bench and a wall mounted shelf with hooks.    The room has what I would call a “partially open” bathroom.  The sink area is separated from the main area by a curtain.  The toilet and bathtub are in a small separate room.  So, one person could be brushing his teeth in the sink area and another person taking a shower and both afforded privacy.  This set up was very handy with 2 kids and 2 adults sharing a single room.  While the sink area is spacious, the bath area is not.  It worked well for us, but if you are used to large American style master bathrooms, this resort does not have one of those.  It’s very functional, which I liked.

The bedding is a bit odd, but it’s a nod to hygiene.  There’s no comforter or bed spreads, per se.  There are heavy duty white sheets with a heavy blanket between them.  At the bottom of the bed appears to be a runner that might have been made out of the old bedspreads. So, it’s fairly stark.  Again, it’s functional and I don’t have to think about every news program that’s done a black light examination of hotel rooms while trying to sleep with a traditional bedspread.  Clearly, this bedding gets bleached and cleaner than any bedspread likely would.  So, again functional and clean!!

We really, really loved this place.  The theming was fun.  Who doesn’t love bright colors are wrought iron?  A very good homage to a wonderfully eclectic American city.  The staff were amazing, so friendly and very helpful.   The resort was intimate and small, yet quiet.  The busses were timely and we weren’t that far from any of the theme parks.  After staying here, it’s hard to justify paying so much more for a deluxe resort.

http://dawnoffood.com

Love the fun street names: Rue D’Baga!

http://dawnoffood.com

Lamb Shanks

http://dawnoffood.com

At some point during the 1990s, lamb shanks were “it”.  Long simmered with a dark, rich sauce and usually served with white beans.  The dish was everywhere.  Until it wasn’t.  Going through lots of cookbooks from the 1800s and 1900s, I don’t really find this dish until around the 1990s.  Not that it couldn’t have existed, but it wasn’t really wide spread.

The most popular cuts of lamb are “leg” and “chop”.  I am rather partial to the “shoulder” as well, but that’s fairly hard to come by in the regular grocery store.  Chops are crazy expensive, so I usually don’t buy them and truly hate when they are listed on a menu as “lollipop”.  Ugh.  Just no.  The leg is very nice and I cook with this often.  Today, however, I focus on the “shank”.

The shank is part of the animal’s lower leg.    As a result, it does a lot of work making the meat very, very tough.  There are a variety of ways to tackle toughness.  Long, low braising and pressure cooking.  This recipe is adaptable to both.  What I love about this recipe is that there is very little active time.  Most of the time you are hanging out waiting for either heat or pressure to do its thing.  Homework, bill paying and all the rest can be done, which is great for this working mom.  Lamb shanks can be on the table in less than an hour with the pressure cooker, or if I get home early, I can start dinner then set about doing my other mom duties.

As a bonus, lamb shanks also give the impression that someone with extreme culinary skills made the dish, when truly, they are not required.  You can’t really overcook this meat and it’s a very low maintenance recipe.

Lamb Shanks
Serves 4
Prep Time: 15 minutes
Cook Time: 1 ½ hours in conventional oven, 35 minutes, pressure cooker

¼ cup lard, duck fat or bacon drippings (vegetable oil would be fine too)
4 lamb shanks
Salt and Pepper
1 onion, medium dice
3 stalks of celery, medium dice
1 teaspoon salt
¼ teaspoon ground black pepper
4 ounces of mushrooms, sliced
1 teaspoon thyme
2 teaspoons rosemary
4- 5 medium carrots, peeled, large dice.
2 cups chicken broth (brown is preferred)
1 cup red wine (Cabernet -like)

Conventional Oven Instructions:
Preheat oven to 350 degrees Fahrenheit.

In a dutch oven, heat oil over medium high heat. Sprinkle the lamb shanks liberally with salt and pepper. Place heated oil and brown, about 2 minutes a side. Remove to a plate and set aside.

Add onions and celery to the dutch oven. Cook until onions are translucent and celery is soft.  Scrape up any brown bits left over from the meat browning when the onions start to let off some liquid. Add mushrooms, thyme, rosemary and carrots. Cook until the mushrooms have given up some of their liquid. Add the chicken broth and wine and simmer until the alcohol is cooked out. Return the lamb shanks to the pot. Cover the pot and place in the oven to cook for 90-120 minutes, until tender.

Pressure Cooker Instructions:

Please follow your pressure cooker instructions for using your pressure cooker.

As above, heat the cooking fat in the pressure cooker, salt and pepper the shanks and brown them for about 2 minutes on each side.  Add onions and celery to the dutch oven. Cook until onions are translucent and celery is soft. Add mushrooms, thyme and rosemary. Cook until the mushrooms have given up some of their liquid.

Add the chicken broth and wine and simmer until the alcohol is cooked out. Return the lamb shanks to the pot. Make sure the shanks are at the appropriate height level for your pressure cooker. Add the lid to your pressure cooker and cook the shanks on high pressure for 25 minutes. Remove the pressure cooker from the heat and allow to cool down. When safe, remove the lid, add the carrots and return to the heat for another 10 minutes. Remove from heat and allow the pressure to cool down again. When safe, remove the lid and serve.

http://dawnoffood.com

Walt Disney World Deal Tips

http://dawnoffood.com

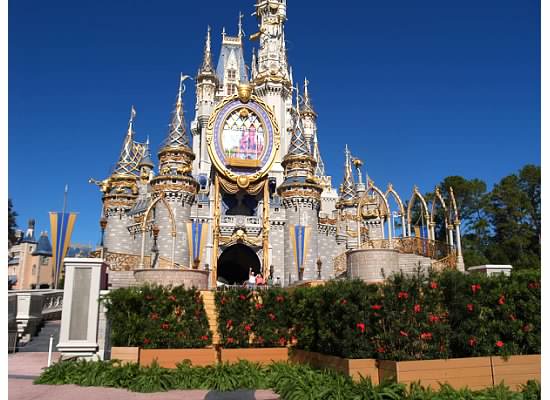
I’m a big Disney fan and love going to Walt Disney World.  So, I thought I would do some blog posts to help people make vacation plans.  I’ve been there a lot and have stayed and eaten in a variety of different places “on property”.  Am I there every day?  No.  I live in Maryland, so it’s not really an option.  However, I’ve got smallish kids and an adventurous palate and we see as much as possible every time we go.  In other words, I’d be a great guide if you want to do lots of stuff and see lots of things.  If you are just moseying around to see the theming of the park, I’m not your gal.  We have been there at the opening and closing of parks. On. The. Same. Day.

Also, I constantly compare rates and deals and examine my options ad nauseum. I use my MBA and law degree to the nth degree to come up with the best deal. I’m that mom.

Using my “that mom” powers, let me explain how maddening the rates are for Disney and how you can really end up paying a lot more for the same vacation depending on when you go, where you stay, and what discount you get.  Discounts can sometimes be hidden on their main webpage, but here is a link to them:  https://disneyworld.disney.go.com/special-offers/

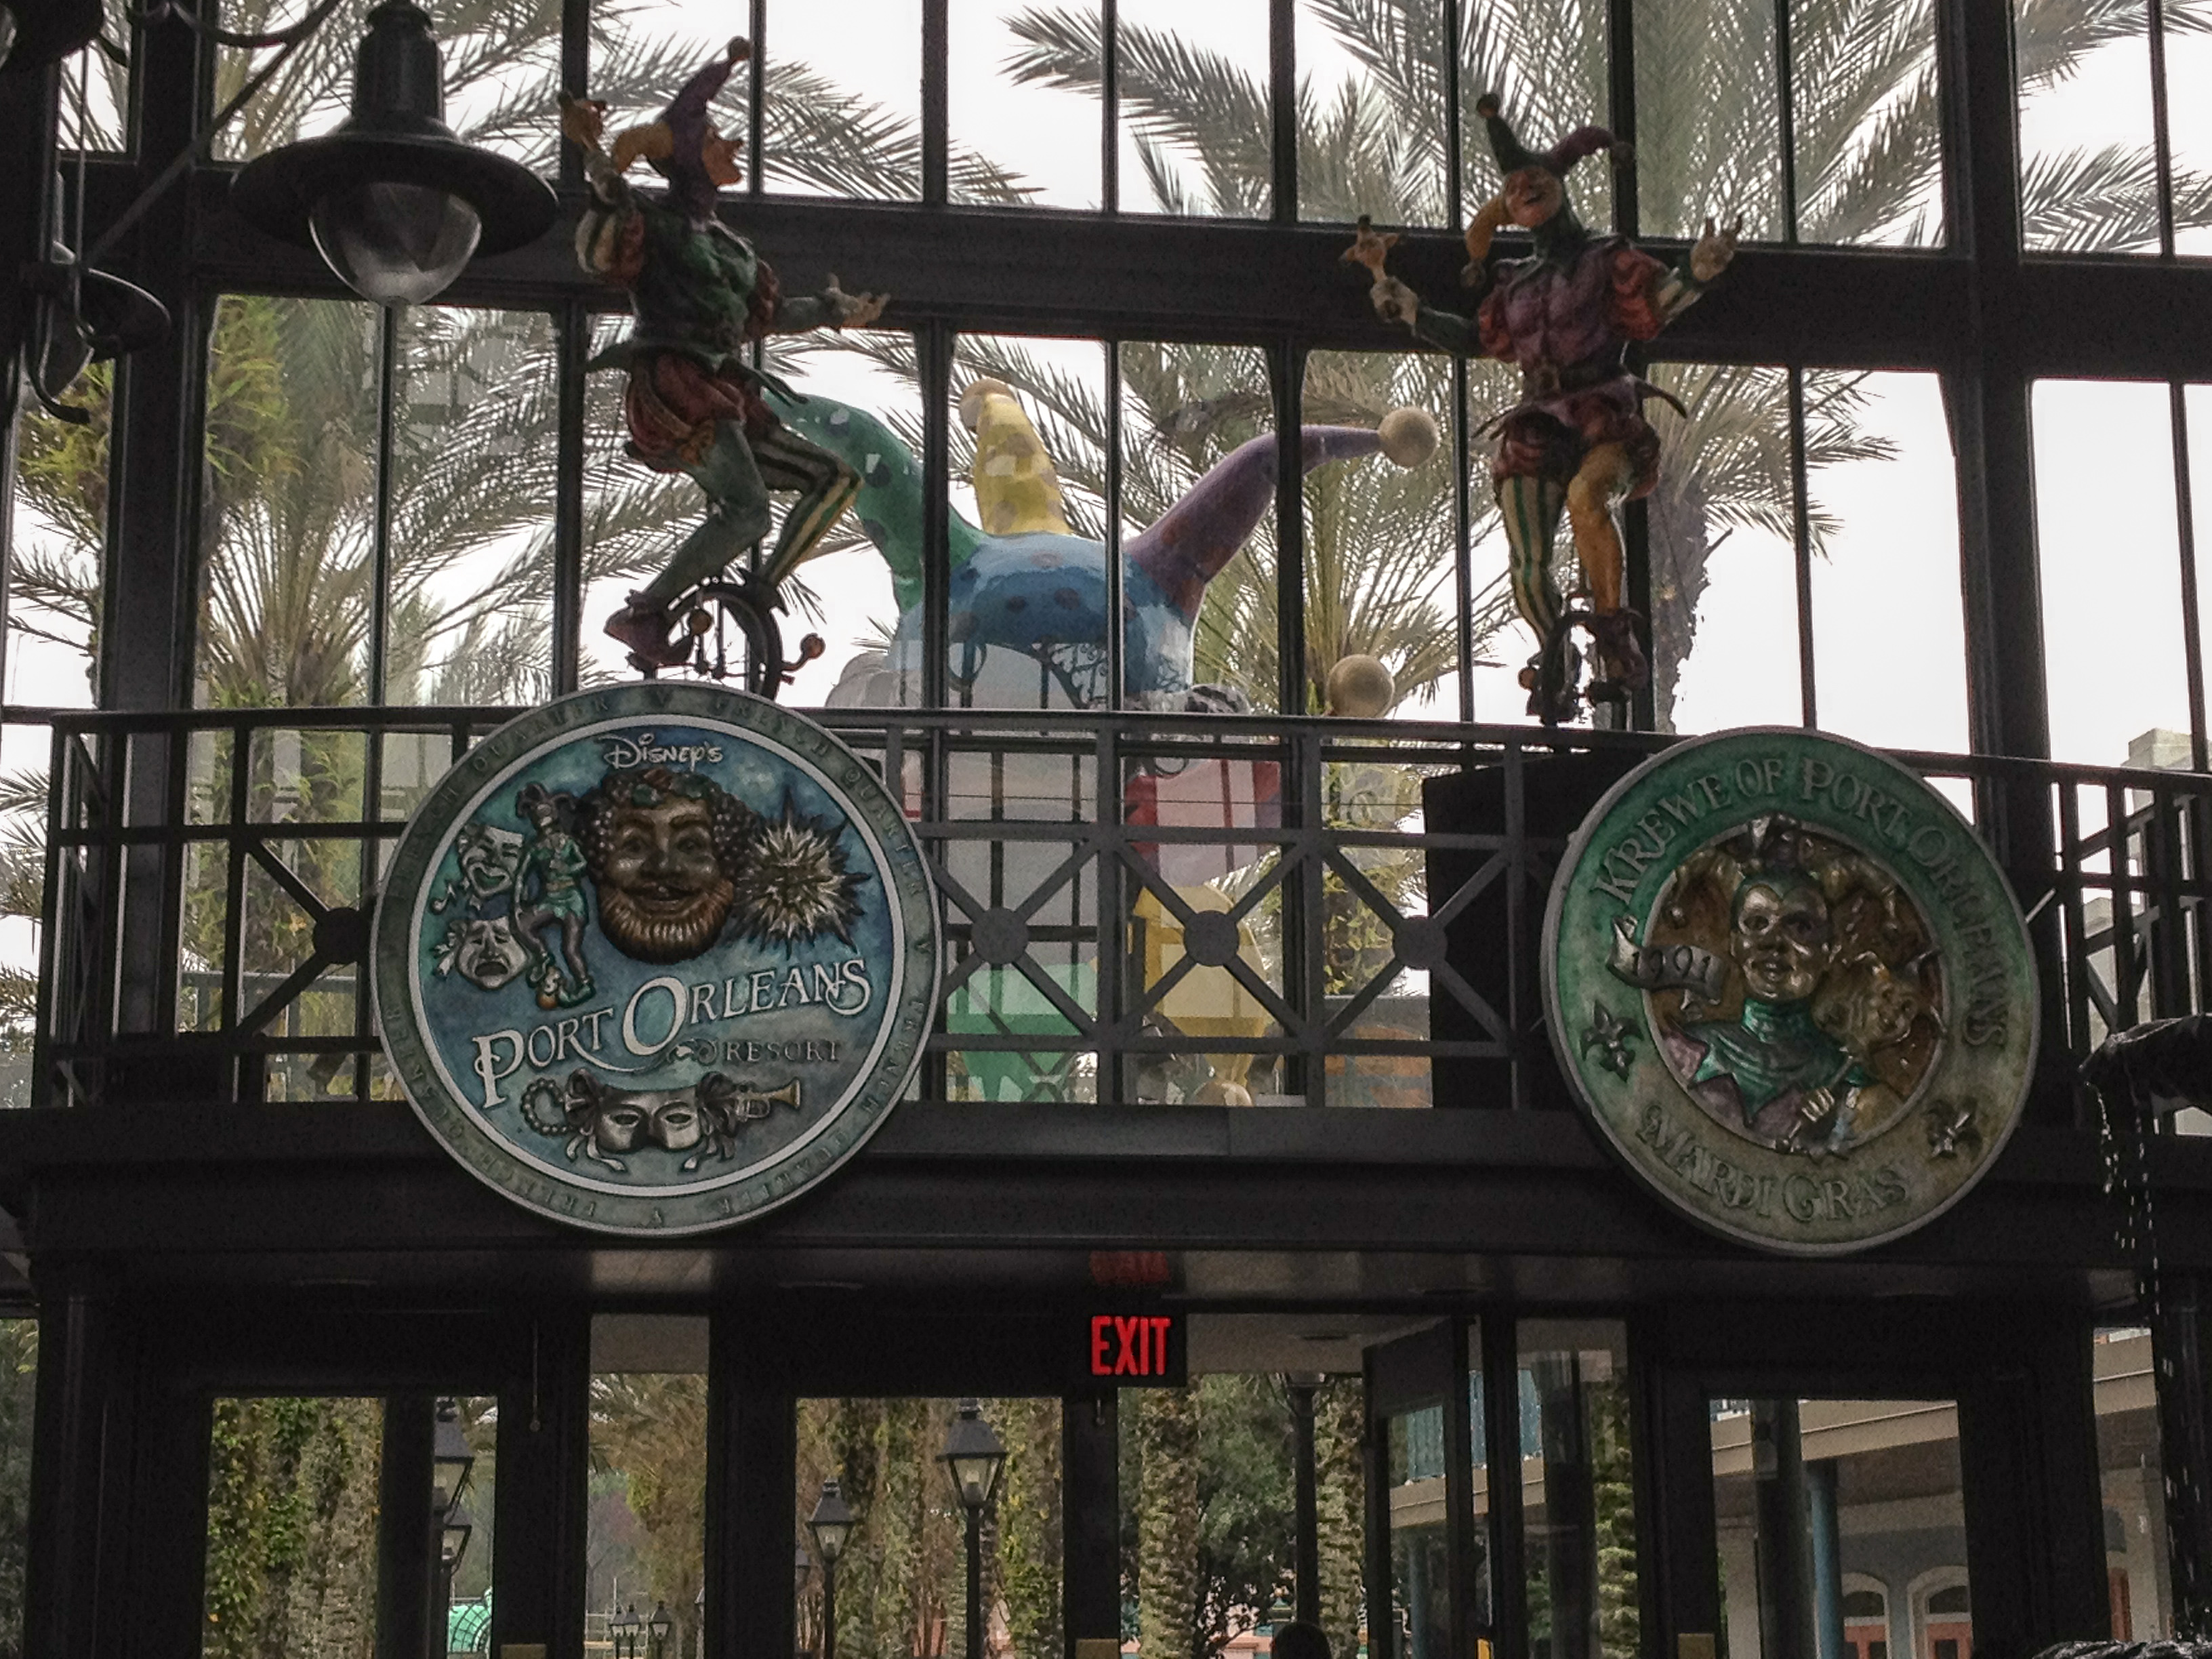
Let’s say you are a family of four: two adults, 1 kid over 10 and 1 kid under 10.  You would be paying for 3 adult meals on the meal plan and 1 kid meal.  Let’s also say you want to stay at the Port Orleans French Quarter.  Using a handy chart from the wonderful people at http://www.mousesavers.com, the 2014 price of a room in the French Quarter with a garden view can vary from the $195 “value” rate to $299 “holiday” rate.  That’s right.  You can pay $100 more a night depending on when you go for the exact same room.  We can go further down the rabbit hole and compare moderate resort prices during value season (weekday) and Holiday Season:

Caribbean Beach: $210 (Water View Value) vs. $318 (Water View Holiday)
Coronado Springs: $232 (Water View) vs. $324 (Water View Holiday)
Port Orleans- Riverside: $196 (Garden View) vs. $299 (Water View Holiday)

To try to appeal to every person, Disney has 3 categories of resort:  budget, moderate and deluxe.  Making the same comparisons in the other resort categories:

For Deluxe:
Animal Kingdom Lodge: $319 (Standard View Value) vs. $555 (Standard View Holiday)
Wilderness Lodge: $325 (Standard View Value) vs. $561 (Standard View Holiday)
Polynesian: $482 (Standard View Value) vs. $760 (Standard View Holiday)

For Value:
Art of Animation: $118 (Standard View Value) vs. $221 (Standard View Holiday)
Pop Century: $106 (Standard View Value) vs. $209 (Standard View Holiday)
All Star Movies: $96 (Standard View Value) vs. $198 (Standard View Holiday)

So, even among resorts in the same tier, the prices can vary wildly!!

Let’s say you are staying for 5 nights/6 days.  You get the 30% off room rates deal.  First of all, that deal may not apply to all resorts, especially popular resorts like the Port Orleans French Quarter.  But, let’s pretend.  So if you get 30% off and go during a value season, let’s round to $60, that’s $300 off.  Not too bad.  If you get Disney Dining free, that’s $194.86 per day savings, if you have 2 adults, a junior and a child! Huge difference, so it pays to look!

The “regular” Disney dining plan is 1 quick service (counter service) meal, 1 sit down meal (table service) and 1 snack a day.  Each meal is an entree and dessert.  If you use your sit down at the buffet, it’s the whole meal.  Doesn’t include tip or alcoholic or speciality beverages (read:  blinky toy containing beverages your kid will want– hide that menu!).

So, it pays to plan your vacation early and see what deals are available when, as the differences are substantial. There are quite a few websites that do the heavy lifting:  mousesavers.com and allears.net are fantastic.  But it takes some jockeying between sites to really get a sense of all the savings you can get.

Also, you have to decide what’s important. Rates vary by season.  Holidays and the Summer are high dollar seasons.  To me, it’s important to ride the rides, which means I have to go when the crowds are the least. For 2014, Disney had determined their “value” seasons (read: time no one goes) to be:

January 9th-February 12th (Excepting MLK weekend)
August 3rd-September 12th

The next lowest crowd time is listed as “Fall” (aka prime hurricane season):

September 13th-November 21st (except Columbus Day weekend)
November 29th- December 11th

There are likely deals offered at this time, from 30% of rooms to free dining. If you can go during these times, you’ll enjoy lower crowds and lower room prices. While the weather can be a bit variable during these times, especially in January, I have found the cost and crowd and cost differential have more than made up for a few chilly days. We’ve encountered 80 degree weather and 40 degree weather.  Also, I hate walking around dying from the heat. I went once in June. Never again. 90-98 degrees, unbearable humidity and crowds and lines everywhere. Not really “fun”. Now, the water resorts during this time were a blast! But, I’m not paying low 4 figures to go down a water slide, am I? Like I said, I’m “that mom”.  We’ve been on Test Track with 5-15 minute waits.  They can go over 2 hours in prime crowd times.

The point of this post is not to tell you every deal or every bit of savings. It’s to tell you, you need to look and compare, as the differences are startling.

post written 2/14/2014, please check with Disney for updated information.

Blueberry Cream Cheese Coffee Cake

Blueberry Cream Cheese Coffee Cake

I’m on a roll with recipes that aren’t really good for you. I had blueberries and cream cheese that needed to be used and thought: what can I do with these items? Around the same time, my son asked for a hiatus from waffles for breakfast. So, despite having the brownies, I figured I would venture into coffee cake land. I love coffee cake, it’s an acceptable cake to eat for breakfast! What made this cake appealing was really the fantastic chunks of cream cheese dotted throughout. The cream cheese adds a sweetness and texture that is so unique and incredibly good to contrast with the tart blueberries.

As always, this recipe is very easy and straightforward. No surprises. I saw this recipe on tasteofhome.com and thought I would give it a go. I added lemon zest and lemon juice for a bit of a bright pop.

My son loved this recipe and my husband said it was amazing! So overall, this was a really big hit.

Blueberry Cream Cheese Coffee Cake
Prep Time: 10 minutes
Cook Time: about 40 minutes

1/4 cup butter, softened
2/3 cup sugar
1 egg
1 teaspoon lemon zest
½ tablespoon lemon juice
1 cup plus 2 tablespoons all-purpose flour, divided
1/2 teaspoon baking powder
1/4 teaspoon salt
1/2 cup milk
1 cup fresh or frozen blueberries
1 package (3 ounces) cream cheese, cubed

TOPPING:
2 tablespoons all-purpose flour
2 tablespoons sugar
1 tablespoon cold butter

Preheat Oven to 375 degrees Fahrenheit. Grease an 8 inch square baking dish.

For batter, in a large bowl, cream butter and sugar until light and
fluffy. Beat in egg, lemon zest and lemon juice. Combine 1 cup flour, baking powder and salt;
gradually add to creamed mixture alternately with milk.

Toss blueberries with remaining 2 tablespoons of flour. Stir blueberries and cream
cheese into creamed mixture (batter will be thick). Transfer to the greased dish.

For topping, in a small bowl, combine flour and sugar. Cut in butter
until crumbly. Sprinkle over batter.

Bake at 375° for 40-45 minutes or until a toothpick inserted near the center comes out clean. Cool on a wire rack.

Blueberry Cream Cheese Coffee Cake

Brownies

Yes, my New Year’s Resolution is fading fast. I have kids and they want snacks. Pineapple, apples and blueberries aren’t cutting it anymore!

Brownies. I joke that there’s no point in cutting brownies because they just end up getting slivered to death in my house. A literal death by 1,000 cuts. It’s no secret that I eat the most. I do. I hide them from my husband and children. I am shameless. Truly. Note in the picture the lack of actual brownies. There’s might be seven there. Couldn’t make it to the picture stage.

dawnoffood.com

In addition to being a brownie addict, I am a bit of a brownie snob.  There is only one type of brownie: fudgey. Take your cakey brownie and go. Don’t try to cover the listless dryness with frosting, it’s a lost cause. People have made their entire careers off of one spectacular brownie recipe (see Maida Heatter). For the longest time I thought the only good brownie came from a mix. Recipe after recipe lead me to the dry, unsatisfactory cake-like brownies I despise. I was partially convinced by Alton Brown that super chemicals unavailable to a lowly home cook made the mix brownies deliciously moist. I held that belief until I came across Maida Heatter and James Beard. Maida’s Palm Beach Brownies are the stuff of legends, and rightly they should be. Crinkly top, moist middle and all over CHOCOLATE. James Beard held little affection for the lowly brownie, but pointed me to an issue I had not considered: eggs. In one sentence, he cleared up the cake vs. fudge issue I had been having. If you spot a brownie recipe with more than 2 eggs, they will be cakey. If not, fudgey. It’s just that simple, most of the time.

Maida Heatter’s recipe teaches that brownies are pretty much eggs, sugar and chocolate. Small amounts of flour for binding and extracts for flavor amp things up a bit, as does a shot of expresso. But, was really sets Heatter’s recipe apart is the amount of sugar. 3 ¾ cups! Holy Crap!   Which might explain how she gets away with 5 eggs and not having a cakey brownie.  But, then I thought of fudge, and pretty much, same thing. Sugar. Lots and lots of it.

So, for me, the perfect recipe will have lots of sugar, 2 eggs and lots of chocolate.  I can’t do so much sugar in a brownie.  I’m by no means a nutrition drill sergeant, I’m doing a blog on brownies, but I have to draw the line somewhere.  3 ¾ cups in 1 pan of brownies is my line.  The recipe is good, trust me.  Really, really good.  But it’s a tad much.

My mom used to make black bottom cupcakes when I was a kid and I loved them.  I’m not that big of a cupcake fan now (read: can’t sliver them and mentally eating a whole cupcake instead of slivers of that amount to the same mass seems gluttonous.).  So, I wanted to recreate the recipe with brownies.    You can make the brownies without the cheesecake topping and they are wonderful.  The cheesecake topping is great, if you like that.  Allegedly, my husband didn’t, but a suspicious number of brownies (whole, not slivered) are missing, indicating otherwise.

Brownies are a rather new invention, probably around the 1900s.   General thought has the creation coinciding with the rise in food science and ready availability of chocolate, refined flour and sugar.    Of course, there is the legend of the Palmer House Brownies, created when a patron asked for a dessert that could be packed up and taken to the Chicago Exposition.  Either way, the brownie is an easily made and transportable dessert.

This recipe was inspired by recipes on Epicurious.com

Black Bottom Brownies

Cream Cheese Topping:

8 ounces cream cheese, room temperature
1 egg
⅓ cup sugar
1 teaspoon vanilla
⅛ teaspoon salt
6 ounces chocolate chips

Brownie Layer:

6 ounces fine-quality bittersweet chocolate, chopped
2 ounces unsweetened chocolate, chopped
3/4 cup unsalted butter
1 1/2 cups sugar
2 teaspoons vanilla
4 large eggs
1 teaspoon salt
1 cup all-purpose flour
1 cup semisweet chocolate chips

Preheat oven to 350 degrees Fahrenheit.

Grease and flour a 8×8 or 9×9 baking pan. Set aside.

Put the cream cheese, egg, sugar, vanilla, and salt together in a mixing bowl. Mix together until well blended. Add the chocolate chips and set aside.

Over medium low heat, melt together the bittersweet chocolate, unsweetened chocolate and butter. The chocolate mixture will be glossy. Remove from heat and whisk in the sugar and vanilla. One by one, whisk in the eggs. After the eggs are incorporated, stir in the salt and flour until completely incorporated. Finally, stir in the flour.

Spread the brownie mix evenly into the baking pan. Top with the cream cheese topping. Bake until a toothpick inserted in the middle of a pan comes out with only a few moist crumbs, 35-45 minutes.

dawnoffood.com

dawnoffood.com

dawnoffood.com