Monthly Archives: March 2013

My Shepherd’s Pie Disaster

OLYMPUS DIGITAL CAMERA

Friends, family (Hi Mom!), I could have posted a wonderful recipe for Shepherd’s Pie with great pictures.  But, it would be lies.  LIES!  This Shepherd’s Pie was a disaster.  Actually, it wasn’t.  It wasn’t a disaster until I added Guinness Beer.  But, let me start from the beginning.

I love Shepherd’s Pie.  The first one I had was at a little restaurant called Galway Bay in Annapolis.  Long before carbs were evil, a dish consisting of ground meat and veggies in gravy covered with mashed potatoes was just awesome.  I could say it was better than pot pie because I wasn’t eating pastry.  Ha!

One of the first recipes my husband and I made together was Cajun Shepherd’s Pie by Paul Prudhomme in his fantastic Louisiana Kitchen.  That recipe was really long and had a ton of ingredients and took us hours to make (not a good call when starting at 6 pm!), but it was fantastic.  I introduced my husband to cajun spicy, which is a wicked combination of white, black and cayenne peppers.  Chicken Big Mamou remains a dish to this day that will live in infamy as the one spicy dish that was just too much for him.    Don’t get me wrong, he ate it, but he did it for “macho” reasons, not because he liked it.  He was sweating bullets and beet red.   My mom made the Chicken Big Mamou and was quick to say, “but I cut the cayenne in half!”.

So, I have a long and fond relationship with Shepherd’s Pie.  Until now.  For St. Patrick’s Day my dear son asked me to make Shepherd’s Pie.  Sounds great!!  Very Irish dish.  I got ground lamb, carrots, onions, celery and potatoes.   And, a bit of Guinness.  Lots of recipes on the internet called for that as the liquid to form the gravy part of the pie.  That was my fatal mistake.

The recipe was progressing so nicely.  The pictures were lovely.  The gravy bubbled up and was the correct consistency.  Then I tried it.  At first is was really good, then it hit you like a bad odor.  What was that awful taste?  I tried again, no surprise, it was still there.  Took it to my husband and before he could get the whole sentence out he sputtered, “honey this is gr…oh God, what’s wrong with it?”.  Exactly.  The Guinness.

So, I could have pretended all was well, changed the recipe from Guinness to “stock” or “water” and gone my merry way.  But no.  If Julia Child can drop a chicken on TV, rinse it off and keep going, so can I.  And that’s what I did.  I rinsed everything off.  Made a new roux, used beef stock and kept going.  Keep Calm and Carry On.  Stiff upper lip and all.  I will even include the pictures.  Fun!  Lesson learned.  Keep Guinness Beer away from the Shepherd’s Pie.
Shepherd’s Pie

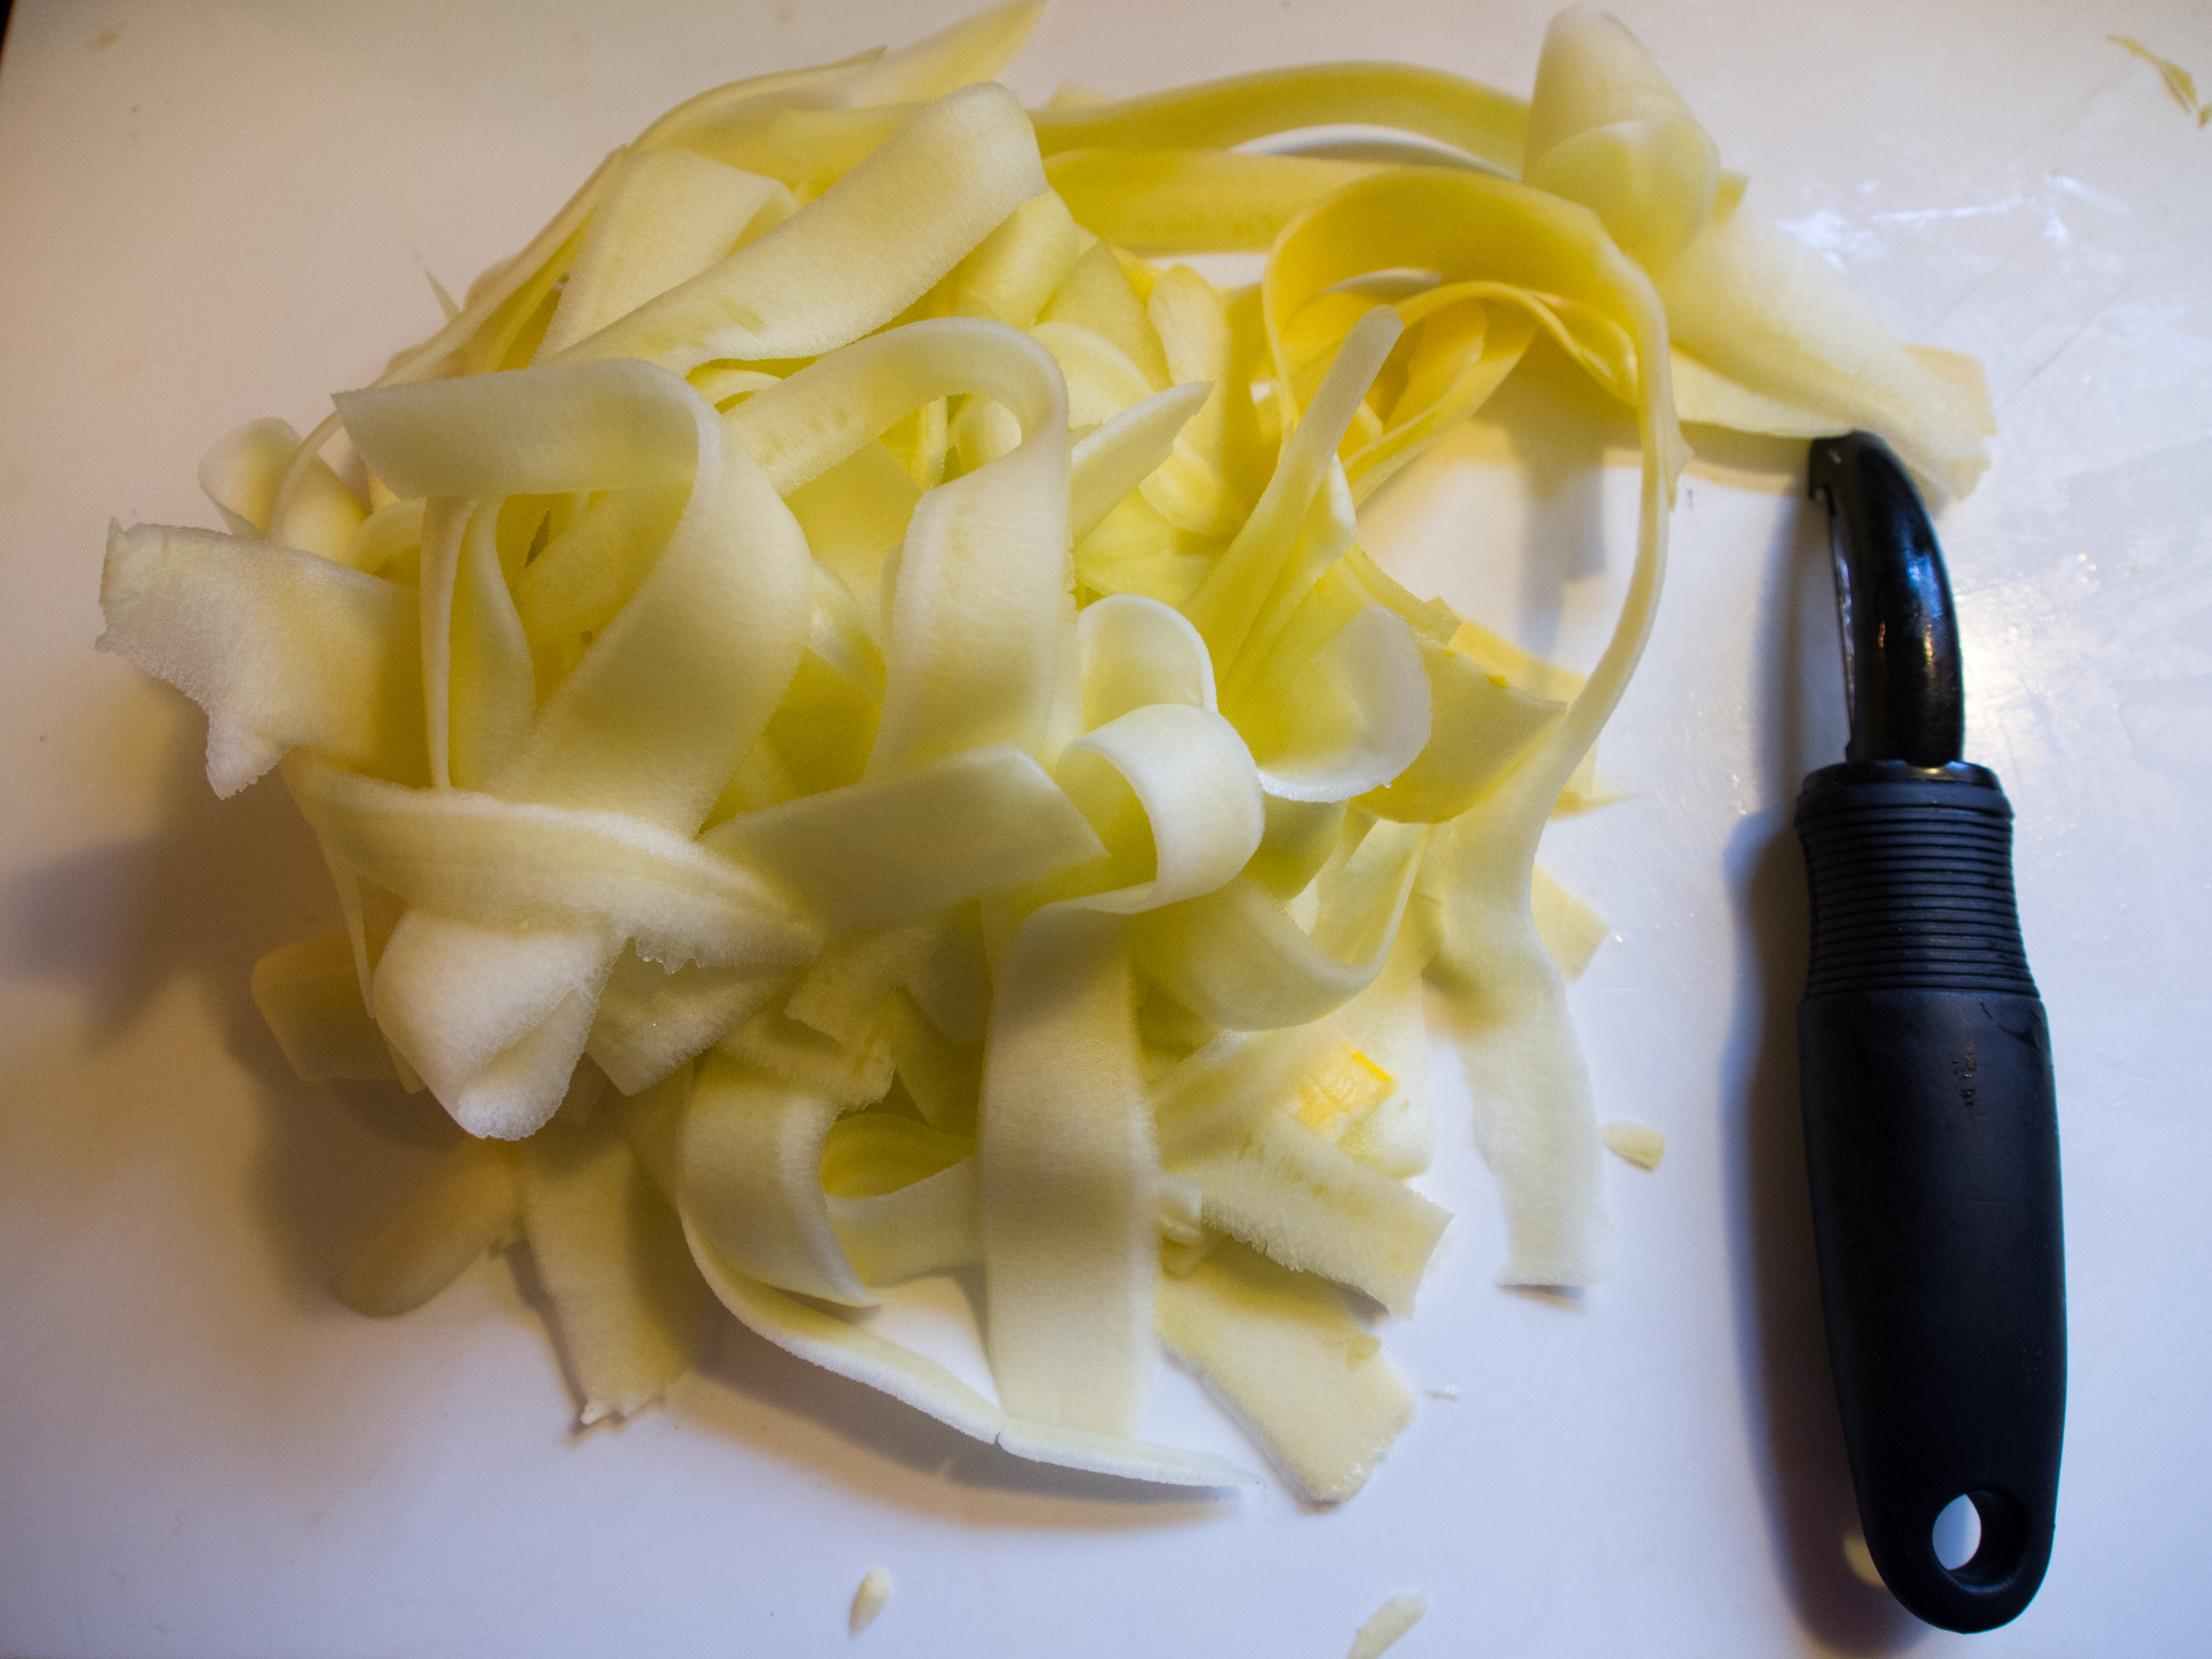
3 lbs yellow or gold potatoes, peeled, diced and covered with water.
2 tablespoons cooking fat (lard, bacon drippings, canola oil, etc.)
2 lbs ground lamb
1 medium onion, diced
4 medium carrots, diced
2 stalks of celery, sliced thin
1/2 teaspoon thyme (dried)
1 teaspoon rosemary (dried)
2 1/2 Tablespoons of flour
2 cups beef stock (or water)
1/2 cup grated Irish Cheddar Cheese
3 Tablespoons butter
1 cup milk (as needed to get mashed potatoes to desired consistency)


Preheat oven to 350 Degrees Fahrenheit.

Bring potatoes to a boil and boil until fork tender.

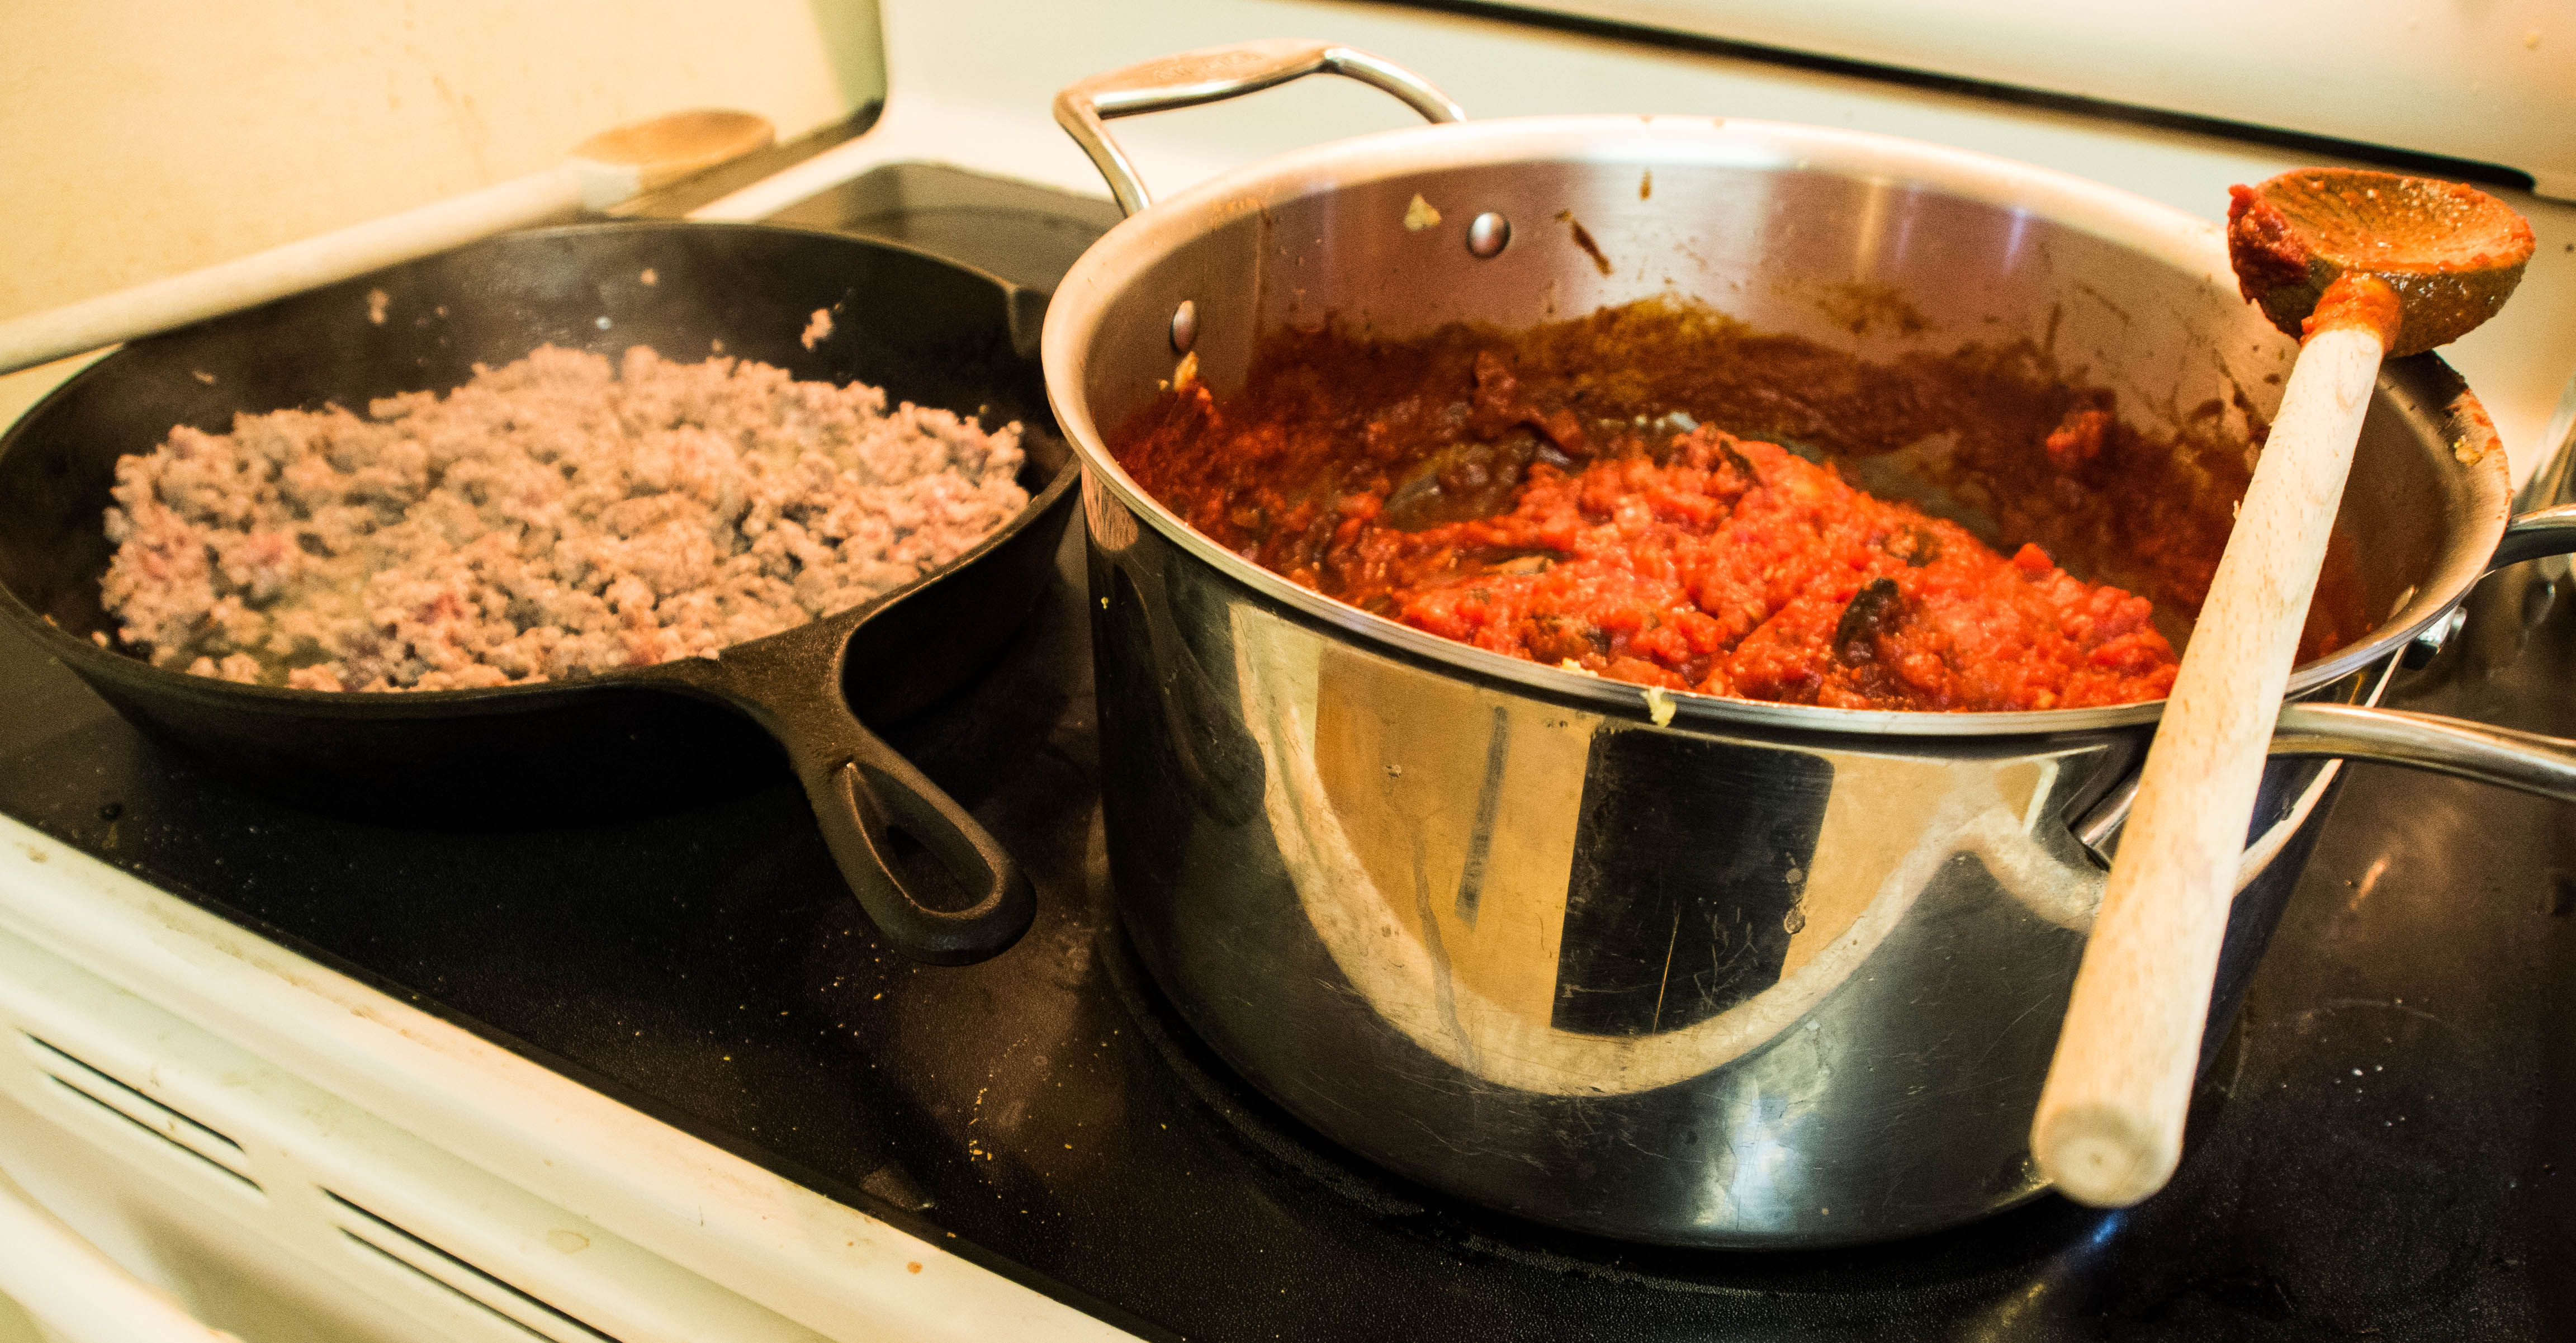
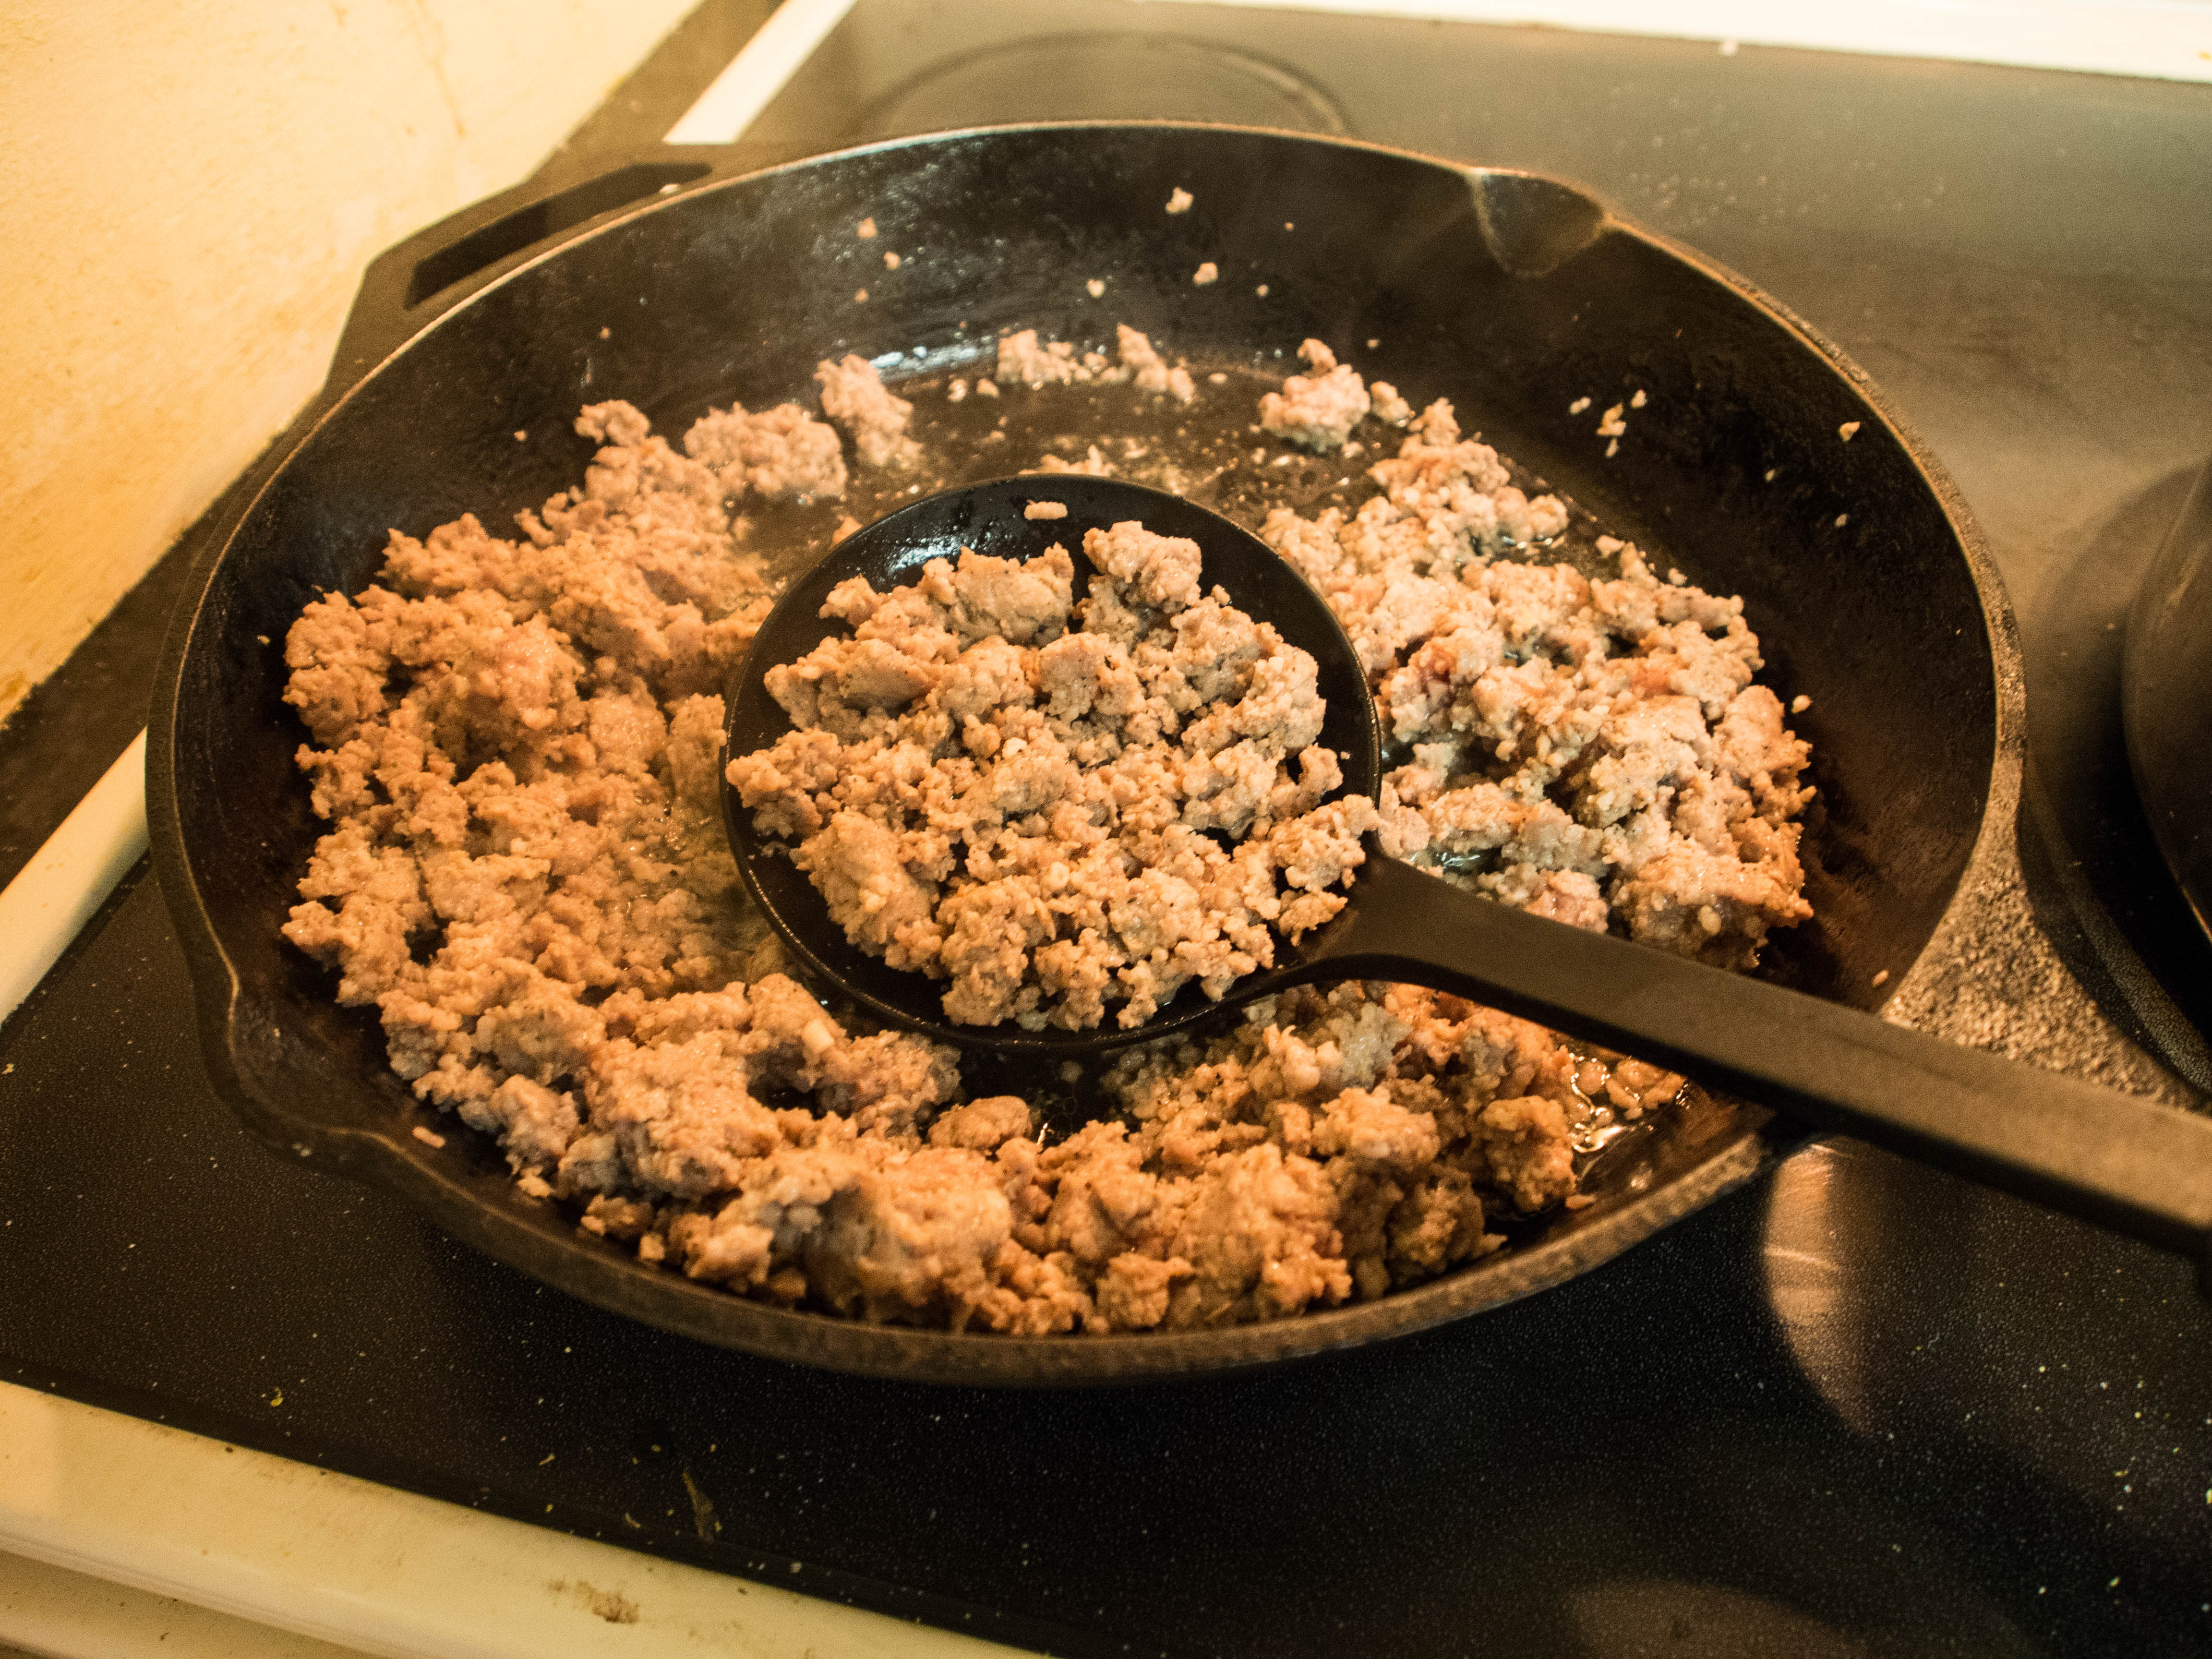
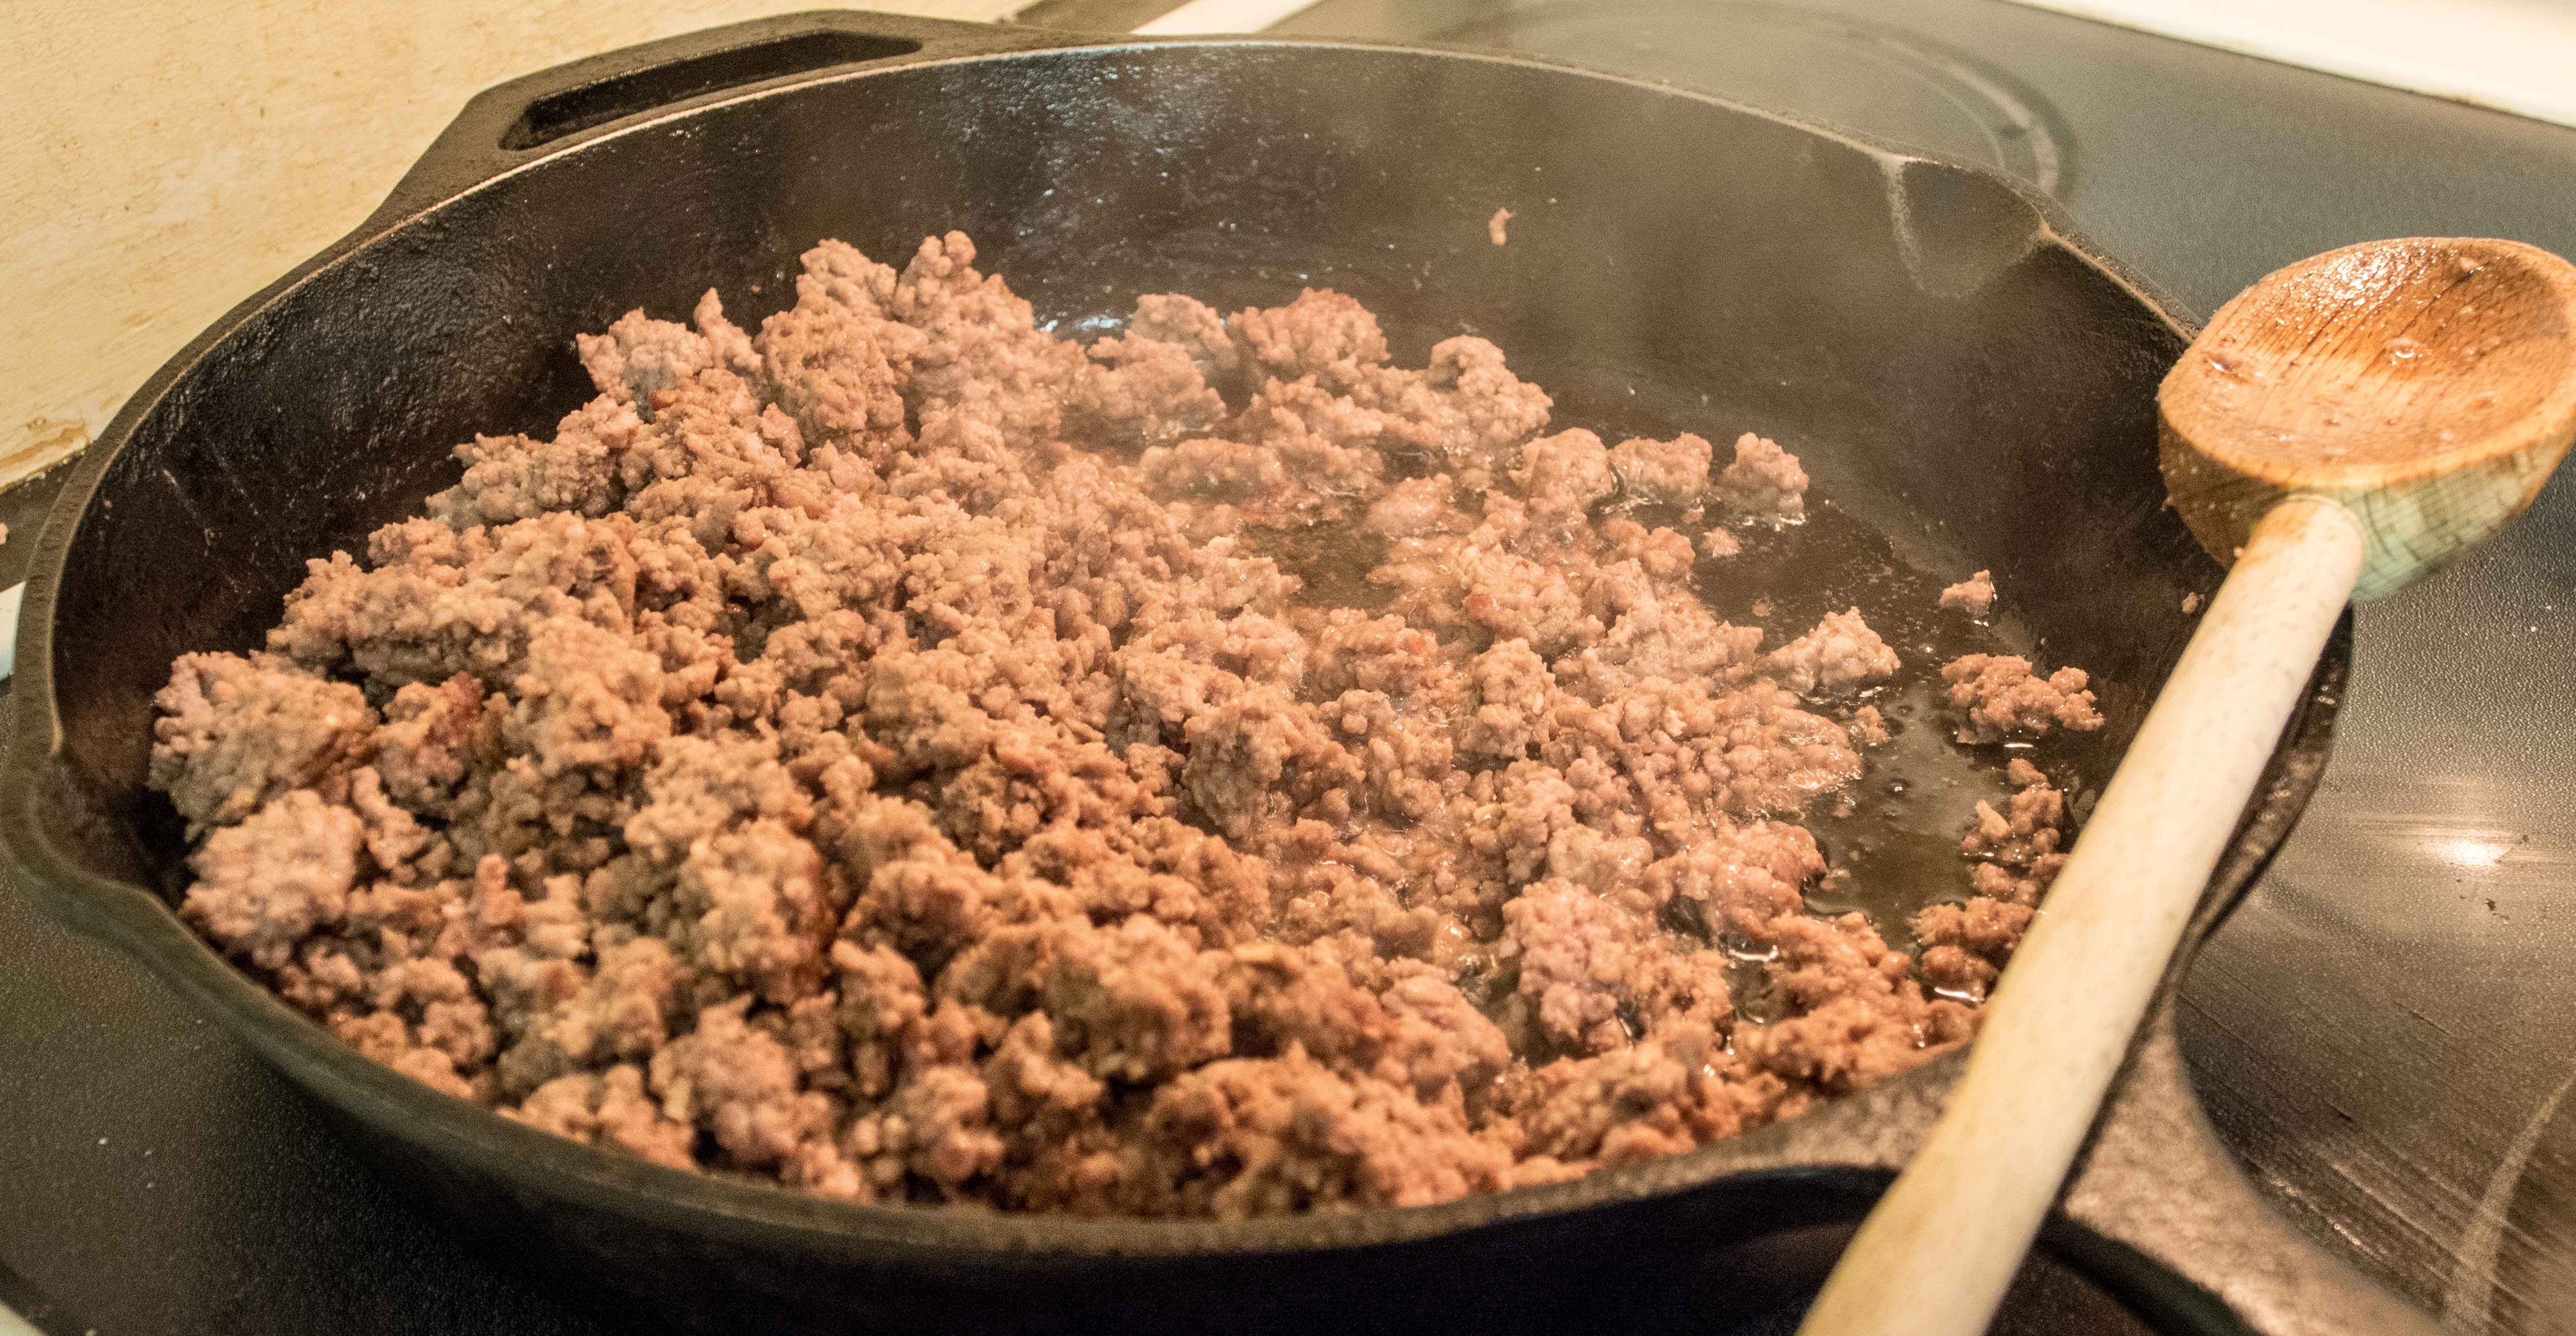
While the potatoes are boiling, heat fat (I use lard) over medium high heat in sauté pan.  Sauté lamb until mostly done.

OLYMPUS DIGITAL CAMERA

Remove from pan and sauté onions, carrots and celery.

OLYMPUS DIGITAL CAMERA

Irish flag!!

OLYMPUS DIGITAL CAMERA

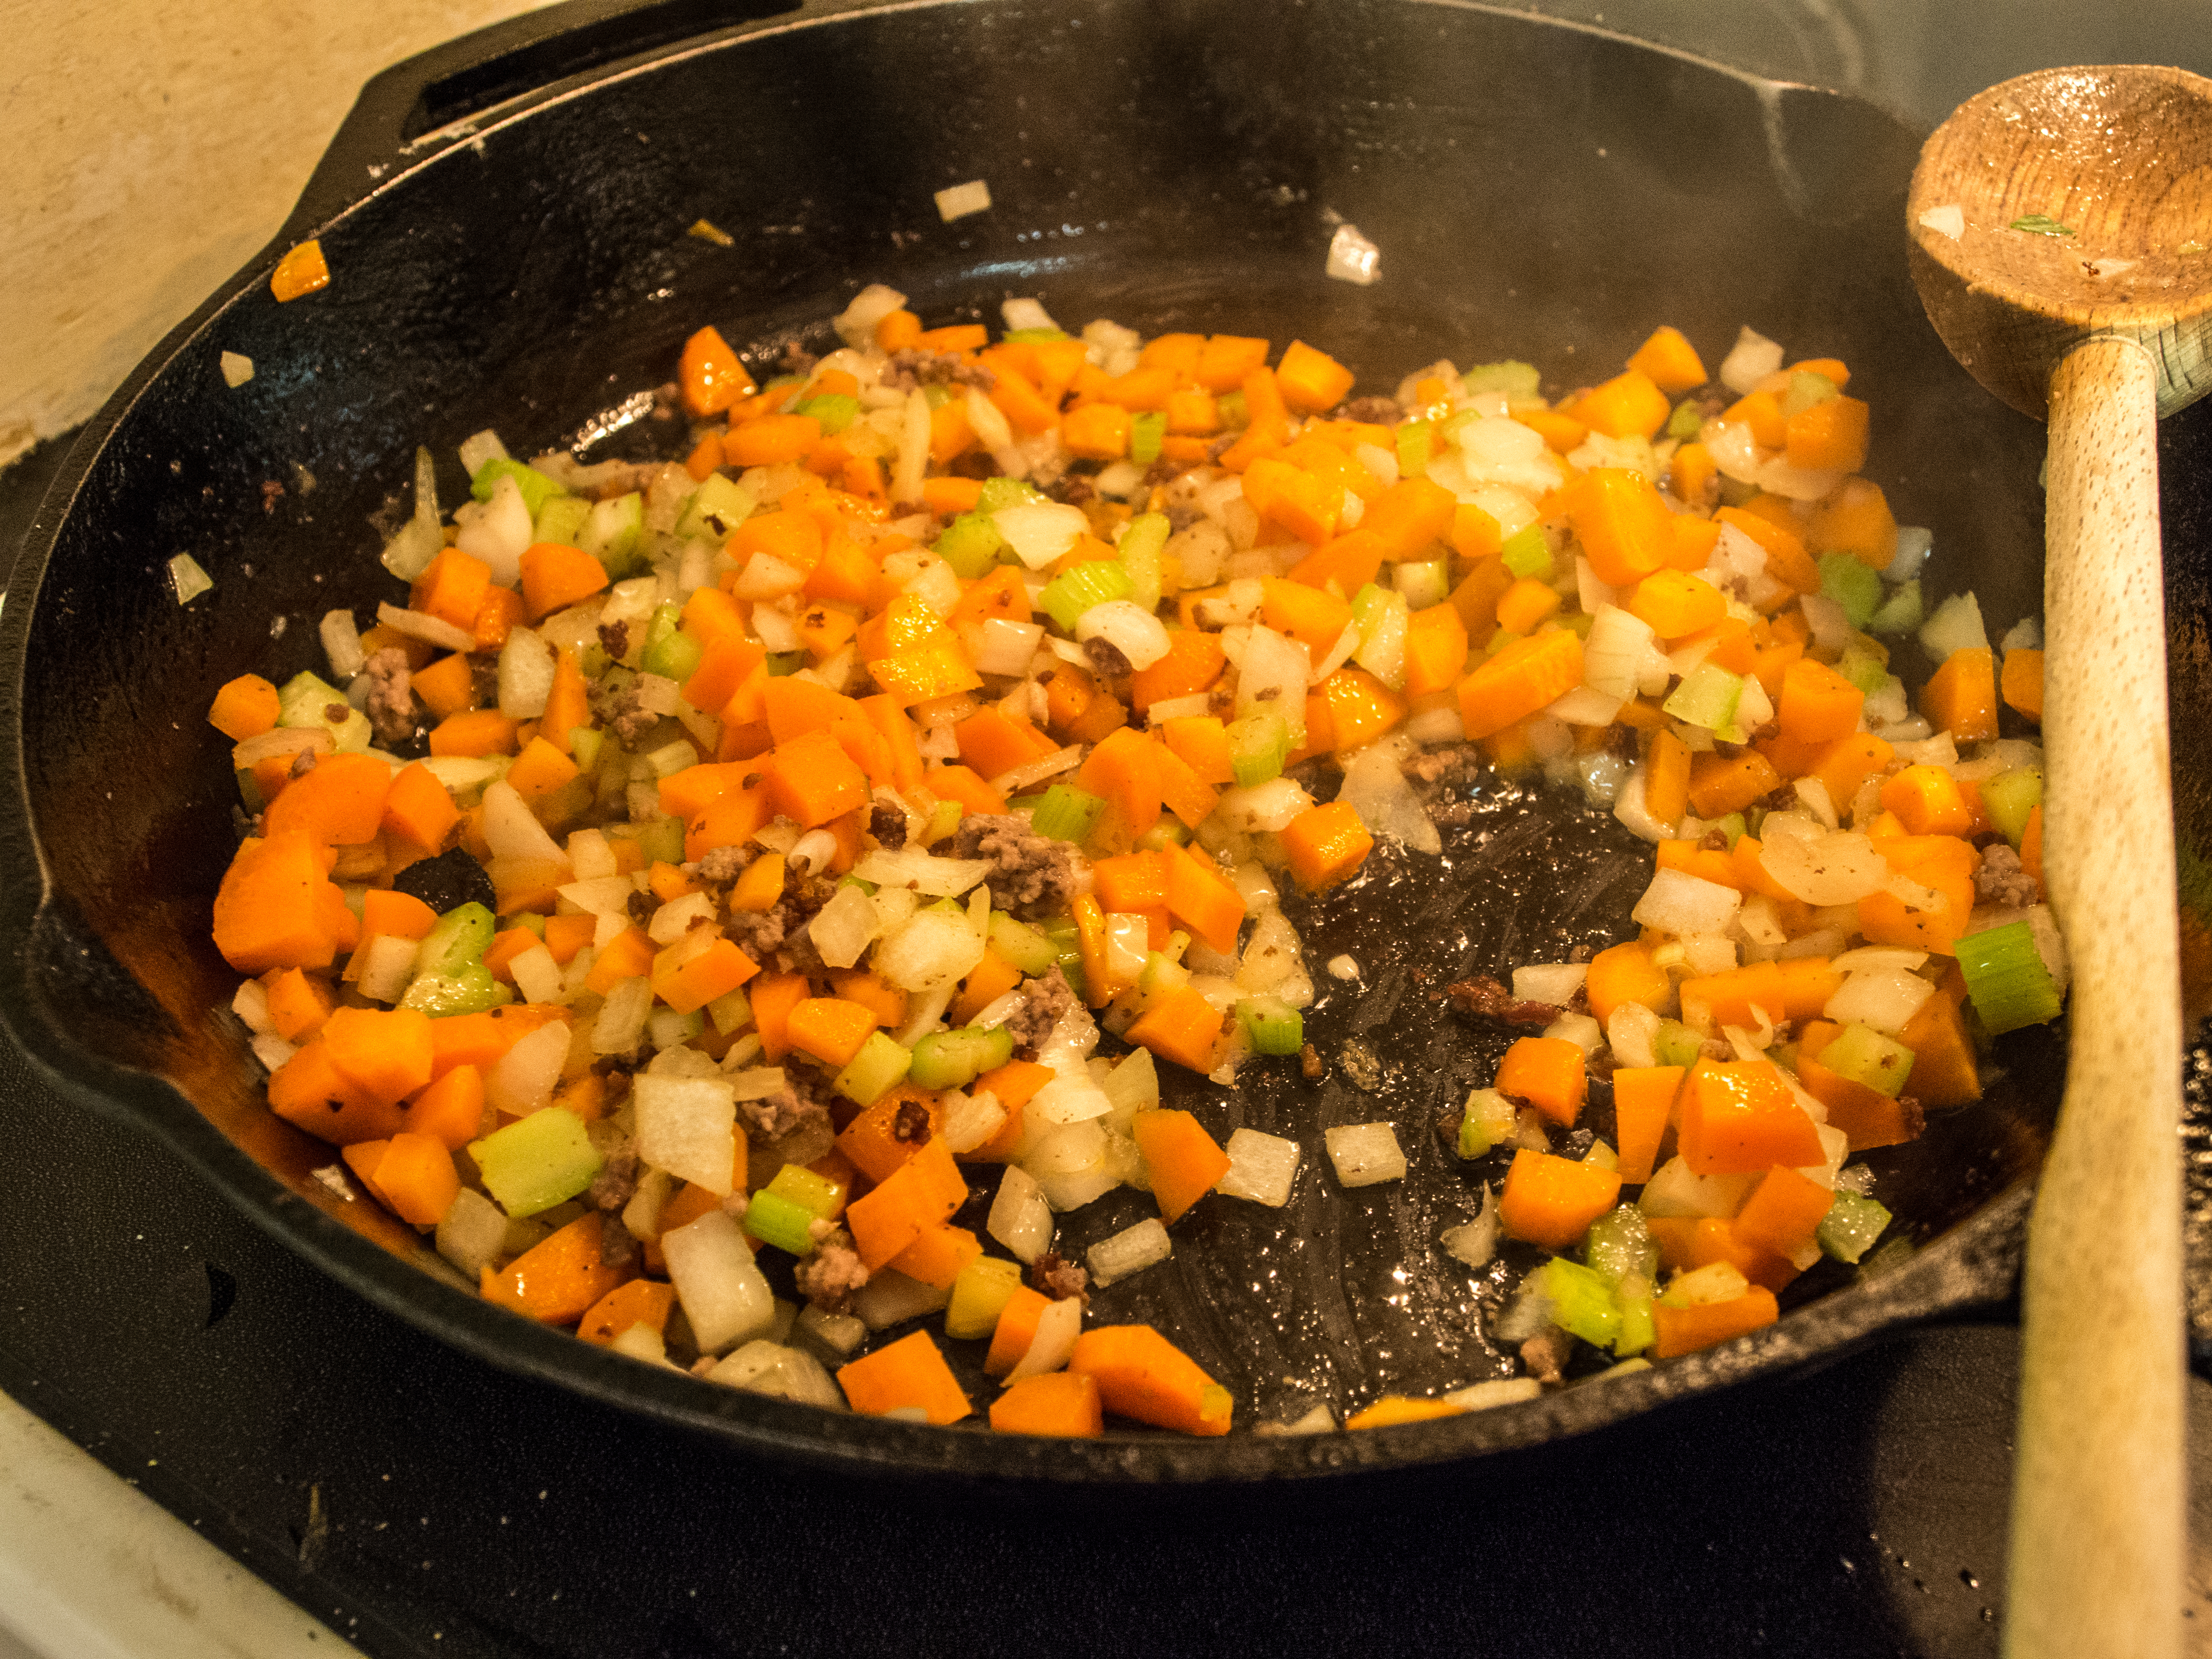
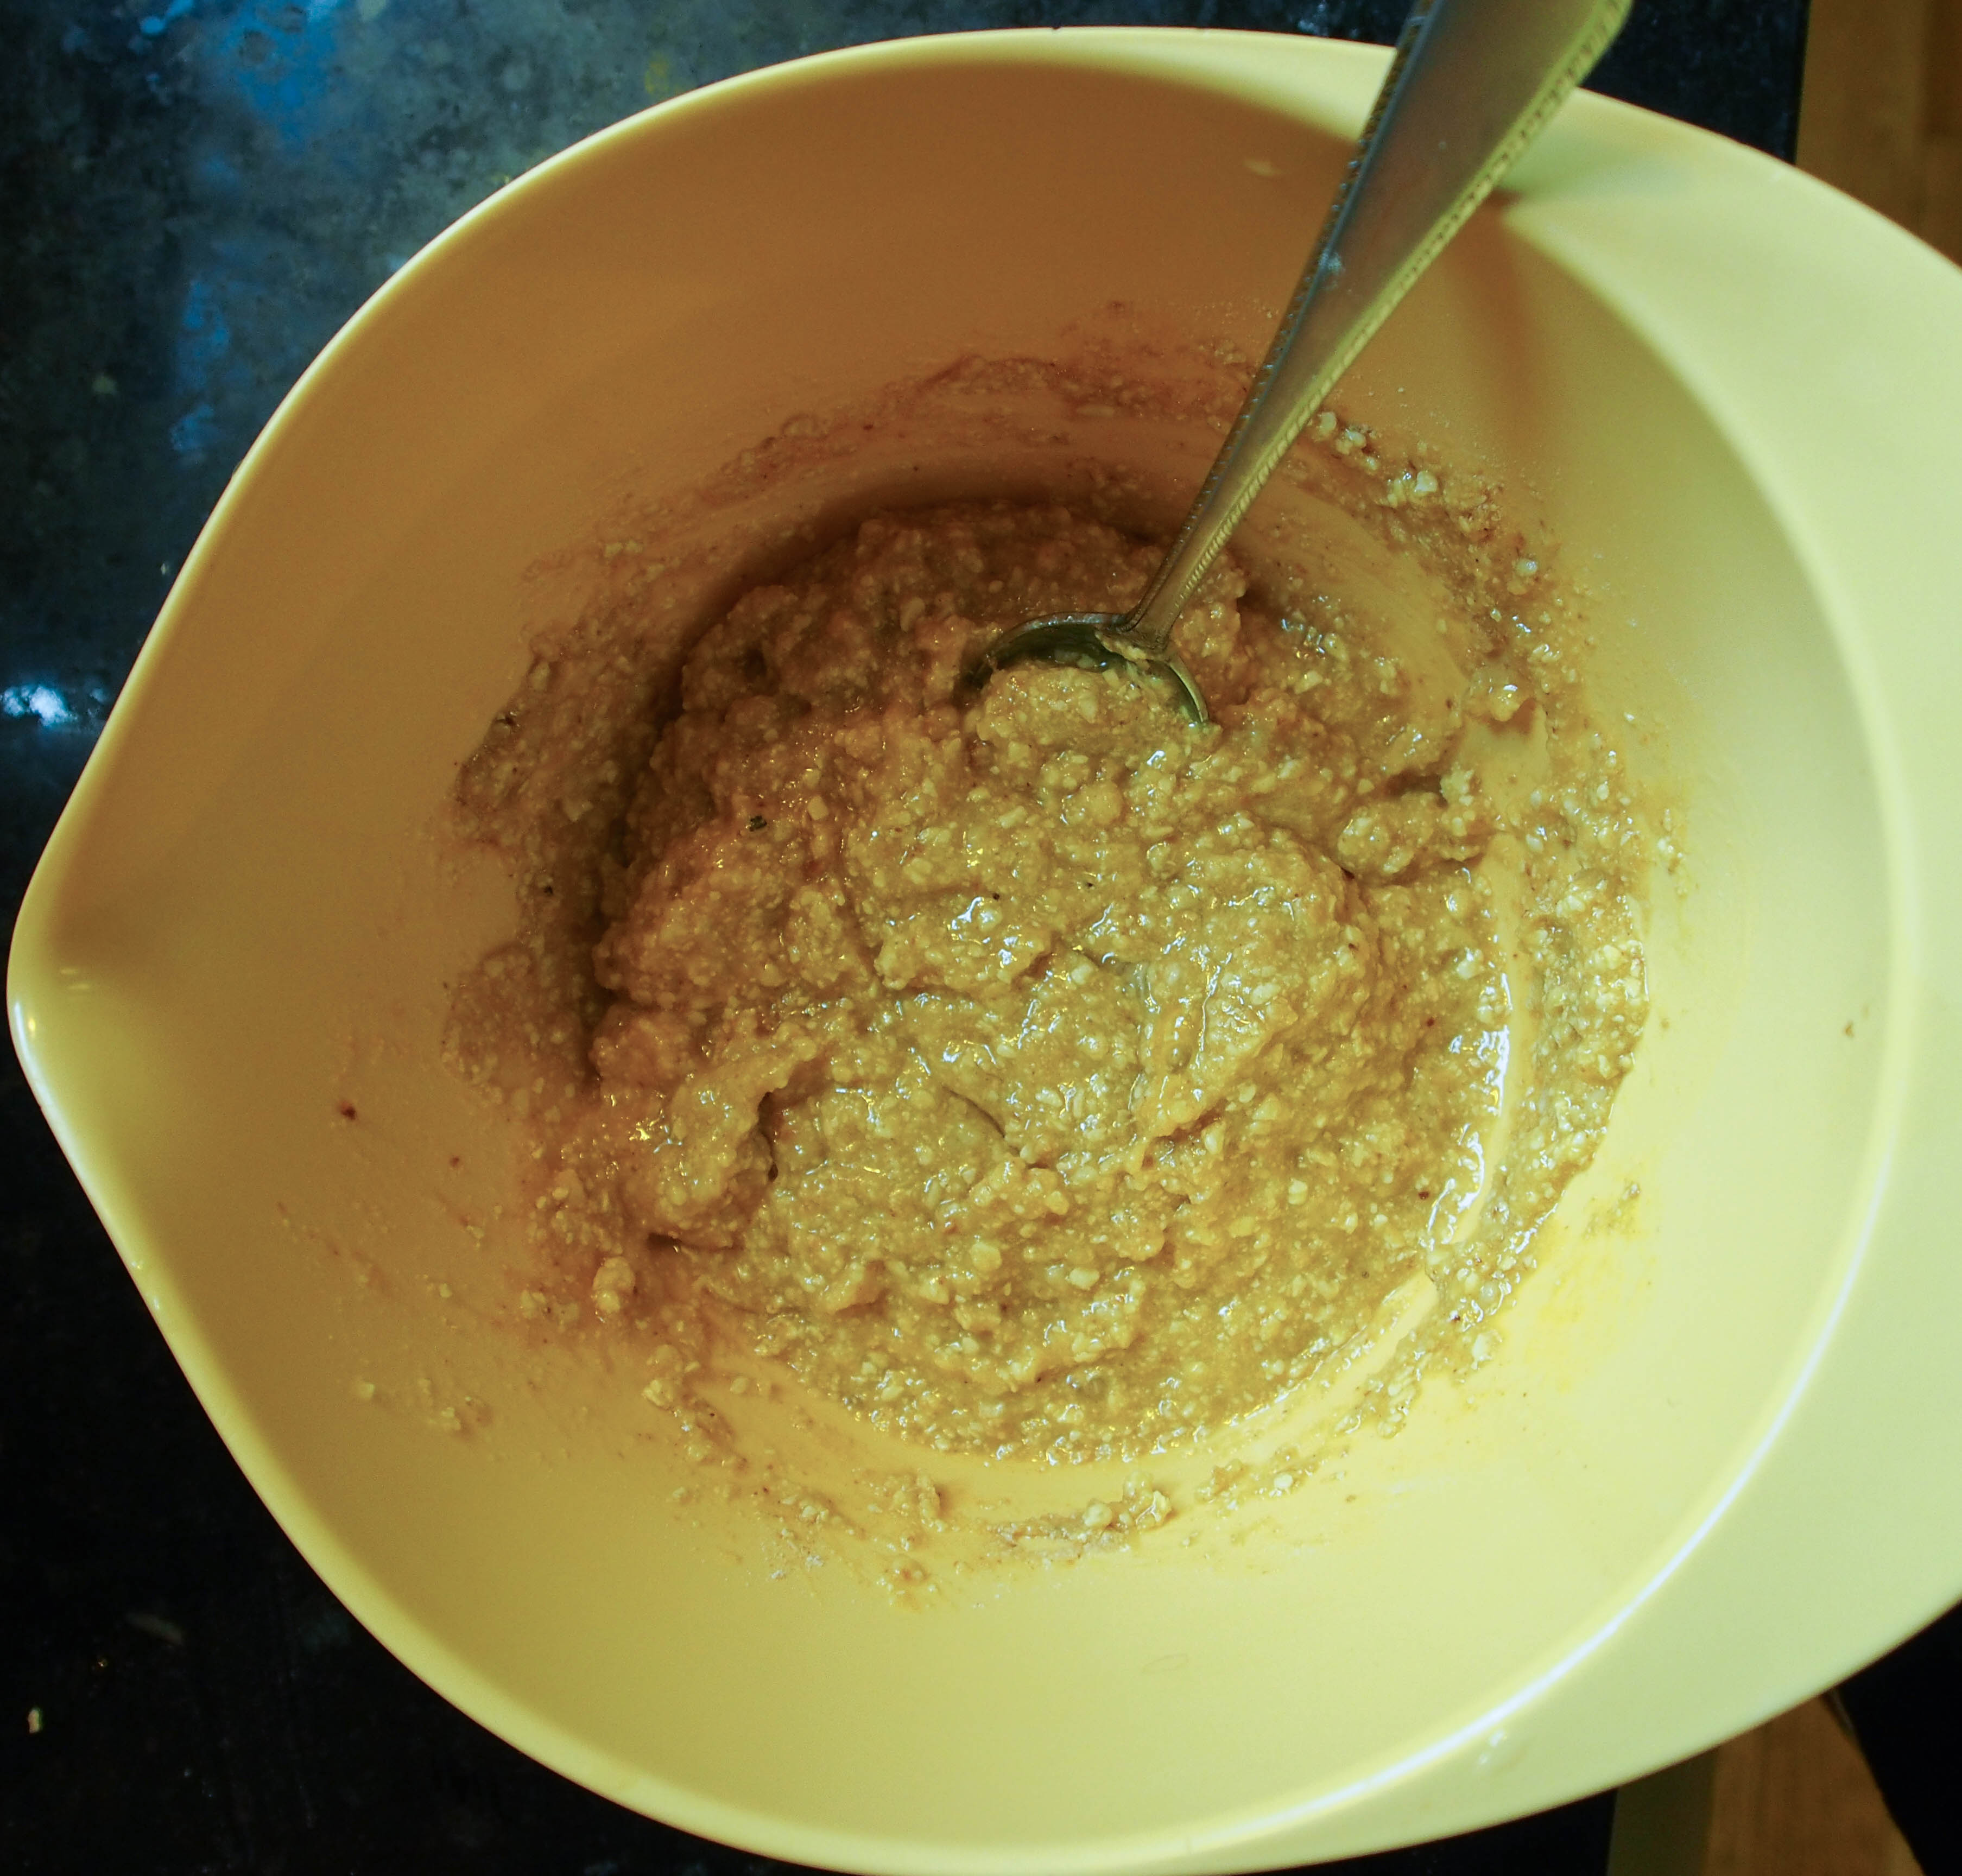
Return lamb to pan, add spices.  Saute until flour is browned and lost its raw flavor.  Add stock slowly.  Stir between additions.  Add enough stock to bring the mixture to the thickness desired.

OLYMPUS DIGITAL CAMERA

Lovely. Tasted awful. The offending ingredient looks on in rapt joy at the destruction wrought.

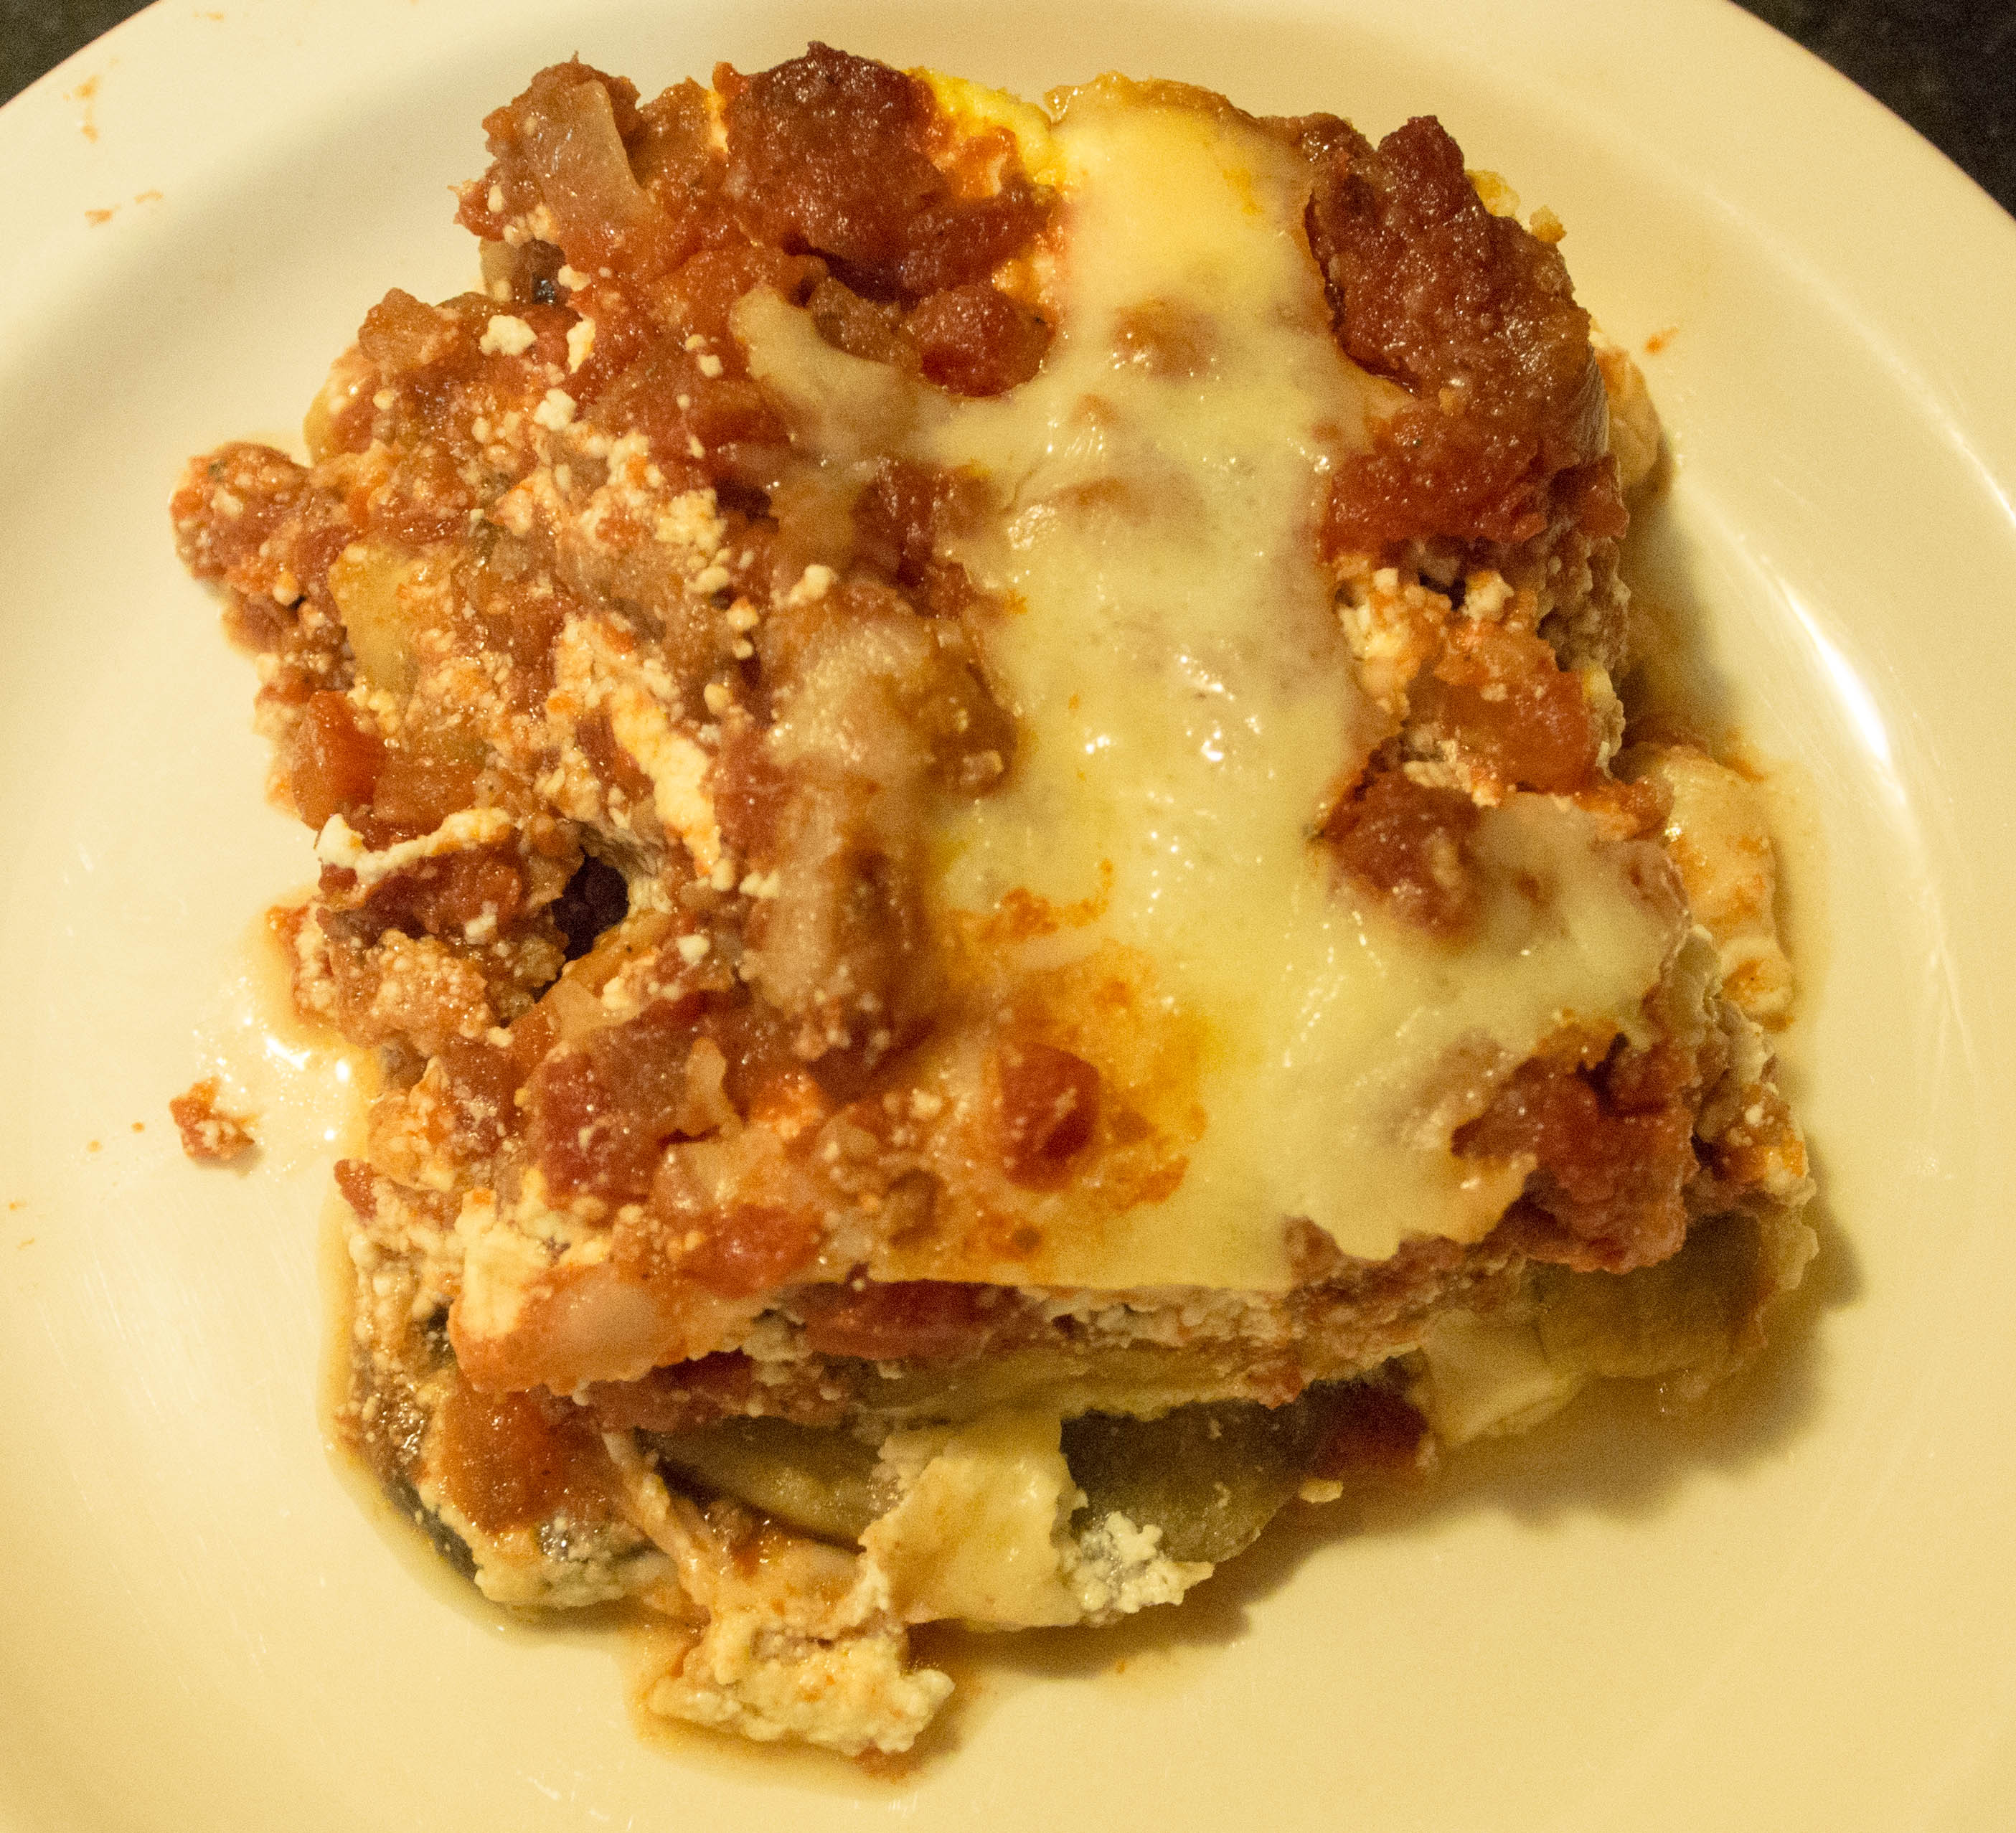
At this point, your Shepherd’s Pie will be lovely.  Mine needed to be rinsed off and started again.  You do not need to do this step!!  I promised a picture, so here it is.  Rinsed off Shepherd’s Pie :

OLYMPUS DIGITAL CAMERA

Place your wonderful meat and veggies sauce in a suitable oven dish.  Remove potatoes, add butter and cheese and mash potatoes.  Add milk until you get the desired consistency.  Place on top of meat mixture.

OLYMPUS DIGITAL CAMERA

OLYMPUS DIGITAL CAMERA

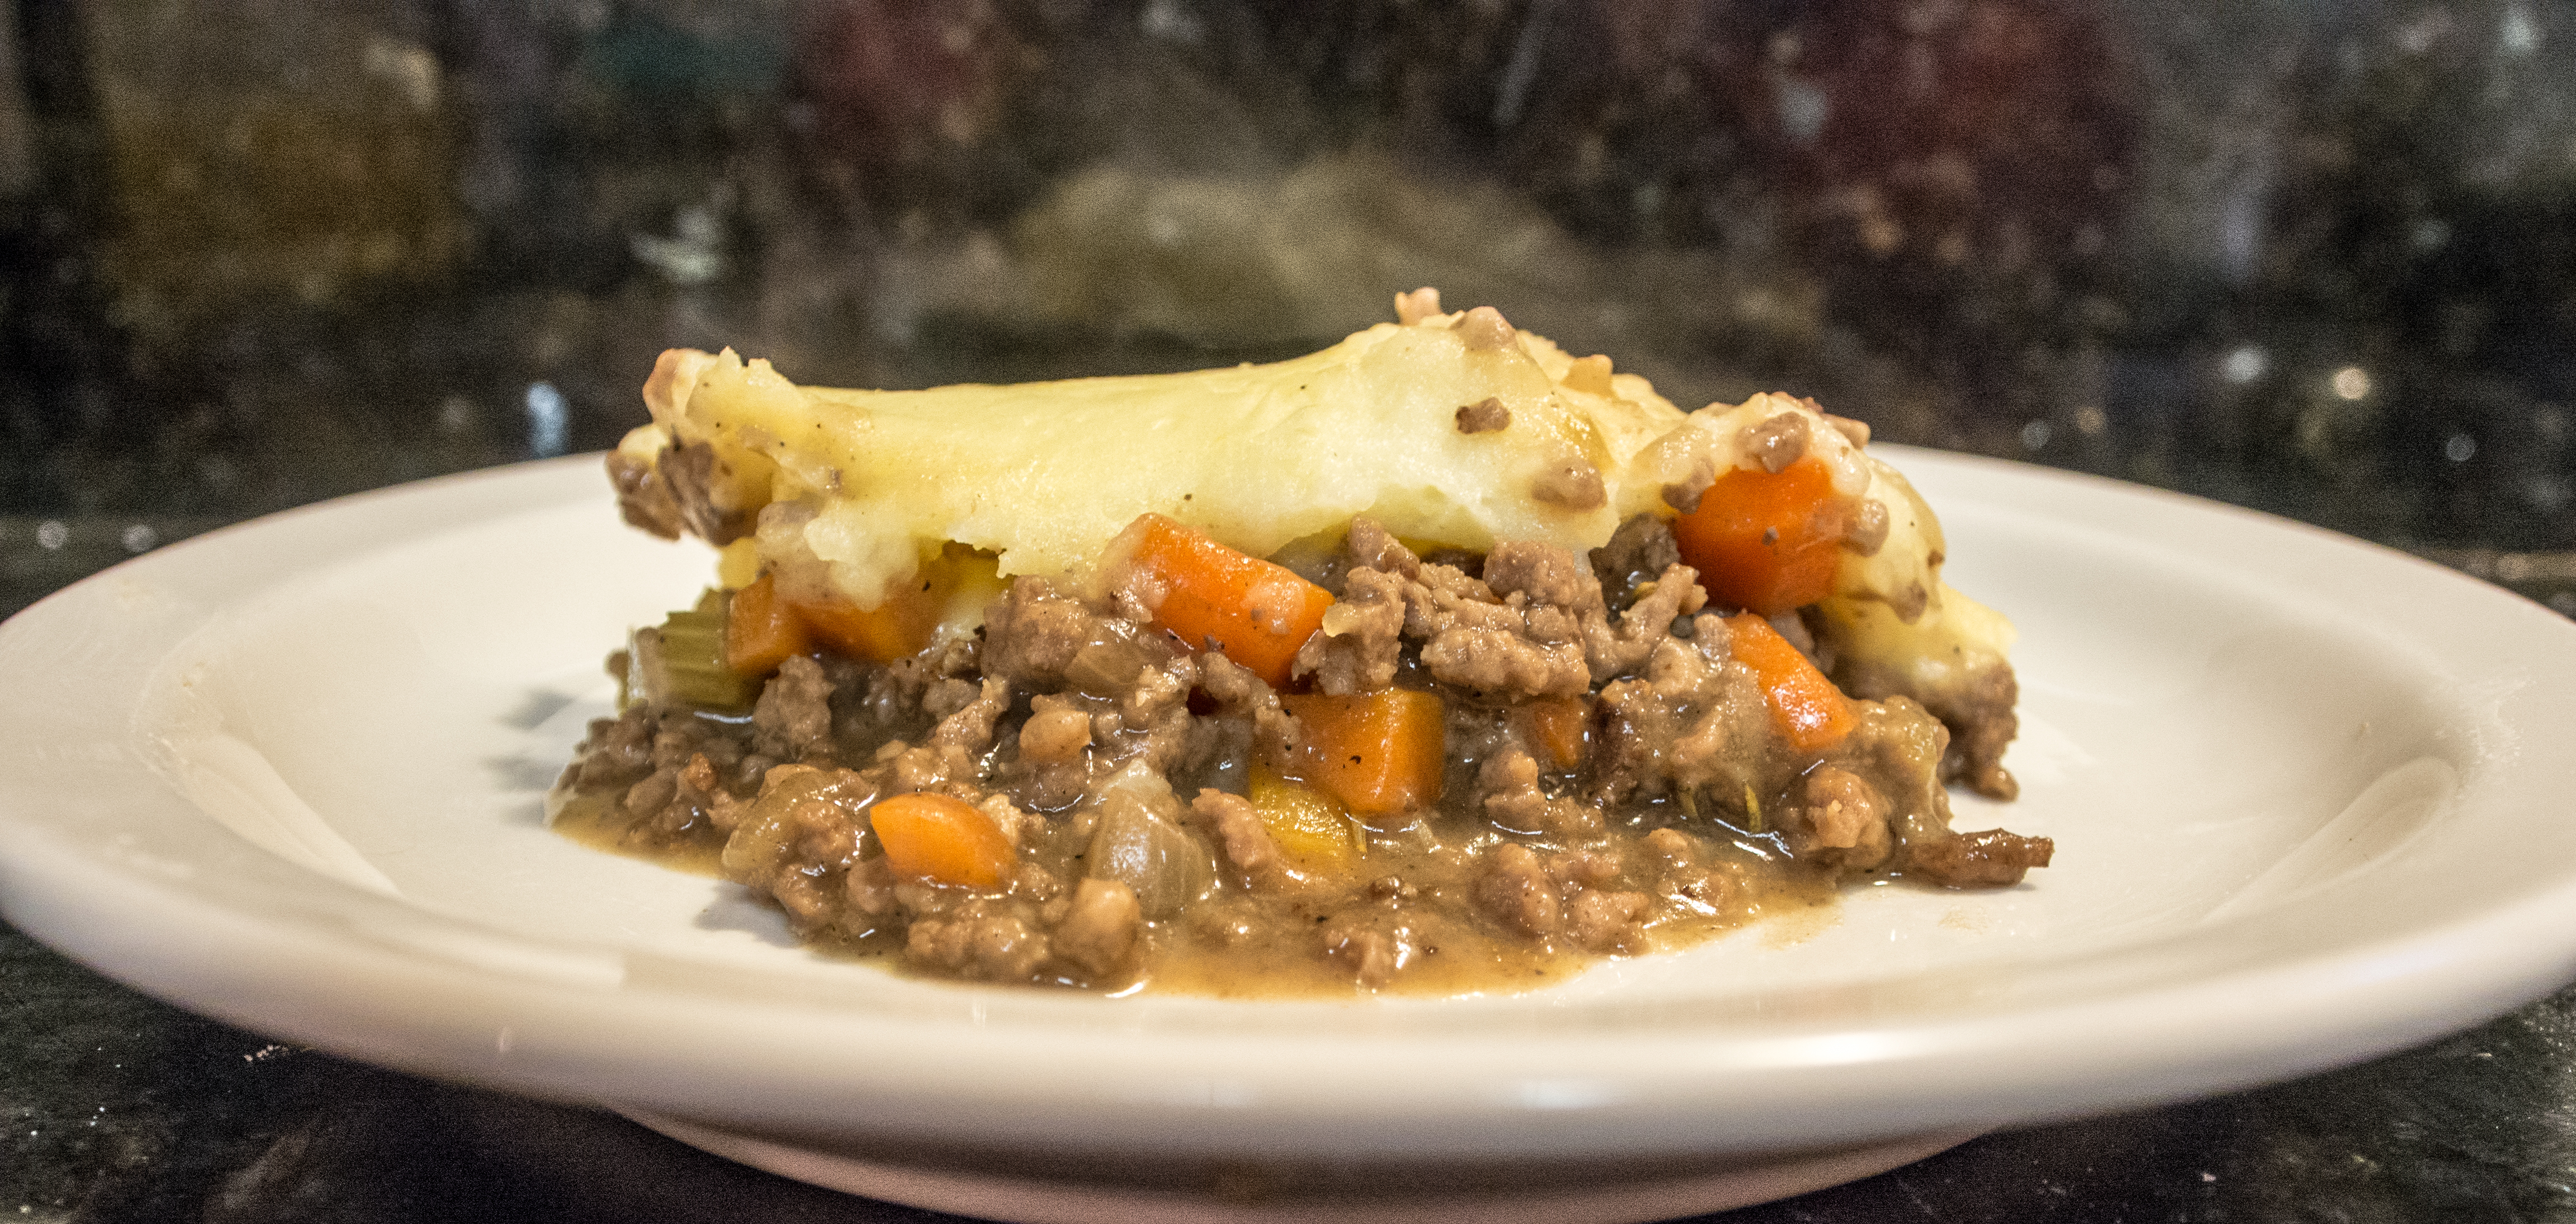
In the end, it was awesome, despite the hiccup!

Place dish in oven and heat through, about 20-30 minutes.  If you want the potatoes browned on top, add additional butter to the top of the dish before baking.

“Spaghetti” with Tomato Sauce and Italian Sausage

OLYMPUS DIGITAL CAMERA


My husband loves pasta.  As you may recall, he’s also diabetic, so he can’t really have it.  So, one day while prepping squash for a dish, I realized that if you keep using the peeler on the squash, it kind of looks like pasta ribbons.  So, I tried it.  I used my peeler on the flesh of the squash and made very pretty ribbons.  I stopped when I reached the seeds of the squash.  I sautéed the  ribbons in butter and a bit of olive oil with salt.  I then used them like pasta with tomato sauce and Italian sausage.

While they don’t taste like pasta, as squash is a bit sweeter, the look and mouth feel was very similar to a wide pasta like pappardelle.  And, as a bonus, the kids got to eat a vegetable!

Tomato sauce has been around since the importation of the tomato to the “old world” in the 1500s.  While at first considered poisonous due to its relation to the nightshade family, eventually the tomato was widely adopted with the Italians leading the way.  My sauce recipe is really simple, please use your favorite sauce, if you have one:  sauté in olive oil 1 medium onion (small dice).  When onion is translucent, add 3 cloves of minced garlic.  Add 1 teaspoon of dried oregano and 1 teaspoon of dried basil and 1 bay leaf.   Sauté until fragrant.  Add 1 33 ounce can of crushed tomatoes and simmer for 30 minutes.   Salt and pepper to taste.  If the sauce is too thin, add a tablespoon of tomato paste and stir.  If it is still too thin, repeat.  For the Italian sausage, I sauté in heated olive oil until almost done and throw into the sauce to finish.

OLYMPUS DIGITAL CAMERA


Chocolate Chip Cookies

OLYMPUS DIGITAL CAMERA

The humble chocolate chip cookie.  The New York Times considers it “perfection” (http://www.nytimes.com/2008/07/09/dining/09chip.html?ref=dining) and published a chocolate chip cookie recipe that was adapted from Jacques Torres.   http://www.nytimes.com/2008/07/09/dining/091crex.html?ref=dining The recipe was interesting for a variety of reasons, but I found it most interesting for the correction to the modern day Toll House Recipe.

The Toll House Cookie recipe was sold by Ruth Wakefield from the Toll House Inn to the Nestle company for a lifetime supply of chocolate chips.    The general story is that one day in the 1930s, Mrs. Wakefield was making “Butter Drop Do” cookies when she substituted  chopped Nestle’s chocolate for Baker’s chocolate. She hoped that the chocolate would melt and turn the entire cookie chocolate. Needless to say, it didn’t.  The rest, they say, is history.  The birth of the Chocolate Chip Cookie.   Now, the recipe she sold to Nestle required the mix to sit overnight in the refrigerator before baking. However, that part didn’t make it onto the back of the chip package. The New York Times tested what happened to the dough and the resulting cookie at various wait times and there were significant taste and texture differences. Let’s be real, no one is going to turn down a fresh cookie out of the oven. They just aren’t. But, I can assure you, the wait is worth it. The cookie takes on a more toffee flavor and is just more substantial.

I’ve made the New York Times recipe. If you have bread and cake flour sitting around, give it a go. It’s a good (albeit) expensive recipe. Most of the time, I don’t have the cake flour handy, so I go with an all purpose flour recipe. Interestingly, I could not find a “butter drop do” recipe that called for chocolate. The one I found called for mace (ironic that I find that spice all over the place now in recipes).

I would like to share one secret. My cookies get a lot of compliments. I’ve given the recipe out and people will come back to me and say that theirs didn’t taste as good as mine, even with the recipe. My kids like to tell people that my secret ingredient is “love”. Yes, it is. But, it is also Bourbon Vanilla Extract. I don’t buy vanilla extract at the store. One day, while watching Paula Deen, she said to make your own vanilla extract. Put split vanilla beans in a glass mason jar. Cover with vodka. Close the lid tightly. Let sit in a dark place. Shake occasionally and in a month or so, you have vanilla extract. I couldn’t believe that was it. So, I visited the food network site. I couldn’t find Paula’s recipe for vanilla extract and looked at the Barefoot Contessa’s: http://www.foodnetwork.com/recipes/ina-garten/vanilla-extract-recipe/index.html Pretty much the same thing. Bourbon in the “Bourbon Vanilla Extract” is used to describe the type of vanilla bean. However, I actually like bourbon better as the alcohol than vodka. So, technically, I use Bourbon Bourbon Vanilla Extract.

I’ve shopped around. For Bourbon Vanilla Extract, you will pay $16 for 8 ounces of quality stuff on Amazon.com. I just bought a 1.75 liter bottle of Maker’s Mark from Costco for $38 plus tax. The same amount of this Bourbon Vanilla would set me back $118 and I’m pretty sure when the label says “water, alcohol, sugar and vanilla bean extractives”, I’m not getting Maker’s Mark quality alcohol. I’m not really sure what sugar is doing in there either. So, mine is Maker’s Mark and Bourbon Vanilla Beans that have steeped several months, per the Barefoot Contessa’s recipe. This one ingredient will separate your chocolate chip cookies from everyone else’s. ESPECIALLY if you let the dough develop overnight.

I adapted my recipe off of the recipe on the supersized package of Ghirardelli 60% chocolate chocolate chips. Some hints:

Have all ingredients at room temperature
Use real butter. I don’t use high fat, European butter, however. Just regular, unsalted butter.
Line your cookie sheets or baking pans with either parchment paper or Silpat.

Chocolate Chip Cookies

Dry Ingredients
2 1/4 cups of all purpose flour
1 teaspoon baking soda
1/2 teaspoon salt

Wet Ingredients
1 cup (2 sticks) butter, softened
3/4 cup sugar
3/4 cup brown sugar
2 teaspoons Bourbon Vanilla
2 large eggs
2 cups bittersweet chocolate chips (I use Ghirardelli 60% Cacao)

Whisk dry ingredients together in a small bowl and set aside.

Butter and sugars just prior to creaming.

Butter and sugars just prior to creaming.

In a large mixing bowl, cream the butter and both sugars together until well combined and creamy.

OLYMPUS DIGITAL CAMERA
Add vanilla and mix on low speed until incorporated. Add each egg separately and mix on low speed until incorporated. Add the dry mixture in three separate additions and blend until incorporated each time. Stir in the chocolate chips.

OLYMPUS DIGITAL CAMERA

Bulkier and drier with the addition of the dry ingredients.

OLYMPUS DIGITAL CAMERA

Cover the dough in plastic wrap and refrigerate for a minimum of 24 hours.  You can leave it in the mixing bowl.  I like to wrap them in logs and freeze the logs I don’t make for later use.  That way, you don’t have dozens of cookies laying around and a fresh batch of cookies is just 12 minutes away!!

OLYMPUS DIGITAL CAMERA

Preheat oven to 375 degrees Fahrenheit.

OLYMPUS DIGITAL CAMERA

Drop a tablespoon of cookie mixture onto a baking sheet covered with either parchment paper or a silicone baking sheet like Silpat. Cook for 9 to 12 minutes, rotating the pan at the halfway mark. Check at the 9 minute mark. Cookies are finished when they are uniformly golden brown.

OLYMPUS DIGITAL CAMERA

Matzo Ball Soup

My husband makes me Pho when I’m sick.  How awesome is he?  From scratch, broth and everything.   In return for his many turns at making Pho, he asked that I make his favorite:  Matzo Ball Soup.


As background, my husband is from New York. Queens, New York.  I am not, I am from the great State of Maryland.  We in the mid-Atlantic have managed to get him to like crabs, oysters, and call “stripers” “rockfish”.  His accent is almost gone, which is sad because it wasn’t really super-pronounced, but it was cute.

He loves Jewish delis and worships the foods contained therein.   I have never been to a Jewish deli.  I never had Matzo Ball Soup until December 2012.  The hubs was so excited to find a real Jewish deli near his work that he brought home a container of Matzo Ball soup last winter for me to try.  It was really, really good.  But as I looked at the ball in the soup and what I remembered a Matzo to be, I couldn’t see how the transformation was completed.  When he came down with a cold, he asked me kindly to make the soup.   How could I say no?  Every time I’m even slightly under the weather, he makes me Pho.  No small undertaking that deserved to be rewarded.

So, I looked through all of my iconic cookbooks and found no reference to this soup.  That happens, as there are some recipes you are just supposed to “know”.  After searching the internet, I came across a recipe from Deb Perelman from Smitten Kitchen  that seemed to be very easy.

First, the stock.  I throw the carcass  of the pastured chicken we had the night before into a 12 quart stock pot.  Along with the carcass (I like that gross word for some reason), I threw a few carrots, two onions, few stalks of celery, few cloves of crushed garlic, couple of bay leaves, 1 teaspoon of thyme, 1/2 teaspoon of tumeric (for color), a small handfull of peppercorns and 2 tablespoons of vinegar into the pot.  I covered with water  (and then some) and let simmer most of the day.

Vinegar?  Did I write that?  Yes, yes I did.  You are putting so much water in the pot, you won’t taste it.  In my 1800s cookbooks, they advise the addition of vinegar to help draw the nutrients from the bones.

OLYMPUS DIGITAL CAMERA

Occasionally during the simmering, you are going to want to skim the broth of the fuzzy white stuff shown above.  Just take a spoon and lightly skim the surface.

Matzo Ball Soup

Matzo Balls
1/2 cup matzo meal
2 eggs, lightly beaten
2 tablespoons reserved chicken fat or duck fat (I had this on hand)
1 teaspoon salt
1/4 teaspoon black pepper
2 tablespoons chicken stock or seltzer

For soup
2 to 3 quarts prepared chicken stock (recipe above)
1 tablespoon of butter
1 carrot, thinly sliced
1 onion, small dice
6 mushrooms, thinly sliced
1 pound of chicken meat (dark preferred), cubed
2 celery stalks, thinly sliced

Now, traditional Matzo Ball soups add a sprig of dill in the recipe with the carrots and Matzo Balls and call it a day.  I, however, am a blank slate with this soup and thought that it seemed awfully carb heavy as written.  So, I added veggies and some of my leftover chicken to the soup to make it more of a “meal” for my beloved patient.  Plus, after all of this work, I didn’t want to have to cook dinner for the kids.

Apparently, what I did is considered defaming this great soup. In my defense, there were no leftovers.

Combine the ingredients for the Matzo Ball together in a small bowl. Cover and place in the refrigerator for at least 30 minutes.

OLYMPUS DIGITAL CAMERA

Bring 4 quarts of well-salted water to a brisk boil in an 8 quart pot.

Reduce heat to allow water to simmer. Thoroughly wet your hands. Form matzo balls grabbing a golf ball sized amount of matzo ball batter into the palm of your wet hands and rolling them loosely into balls. Drop them into the simmering salt water one at a time. Cover the pot and cook them for 30 to 40 minutes.

OLYMPUS DIGITAL CAMERA

OLYMPUS DIGITAL CAMERA

Just about 20 minutes before the matzo balls are ready, bring prepared chicken stock to a simmer with chicken meat, allowing the meat to cook thoroughly. As the chicken is cooking, heat the butter in a medium saute pan and saute the carrot, onion and mushrooms until soft and place in the chicken broth. Ladle some soup and a matzo ball into each bowl and top with a couple snips of dill (if desired). Eat immediately.

OLYMPUS DIGITAL CAMERA

Lasagna

OLYMPUS DIGITAL CAMERA

Wow, what a great blog.  The author says she’s low carb and her first two postings are fried chicken and Chocolate and Cinnamon Babka.  Her fourth is titled “Lasagna”.   I get it.  But, this one is different, I promise.

I’ve avoid carbs for the better part of a decade because I have a tendency to be insulin resistant.  I don’t want to be diabetic.  Low fat diets don’t work for me at all.  My husband was diagnosed with diabetes and made a drastic switch to a low carb diet.  He also has a gluten intolerance, which sort of reinforces the low carb thing.  The one meal he really, really missed was lasagna.  I created this recipe for him.

Before I begin, I want you to understand this is a crazy fussy recipe.  I am not exaggerating.  Lasagna is all about moisture management.  To recreate the water absorbing characteristics of the now missing pasta, one will have to remove as much moisture as possible from all the other ingredients.  If you can do it, you will have an amazing lasagna that is gluten free and no one, and I mean no one, will miss the noodles.   The other warning is that lasagne is not an exact measurement type recipe.  Depending on how heavy you make certain layers, you may need more or less of some ingredients.  In other words, you may have too much sauce, but not enough cheese or vice versa.

The vegetable lasagnas I had in the past were watery messes.  No way you could make one that would cut like the square you see above.  Not a chance.  Plus, they tasted like the vegetables that were in it.  I guess that’s the point, but lasagna should taste like, well lasagna.  Now, if you wanted to make this a vegetarian lasagna, all you would have to do leave out the Italian sausage.

When I began research lasagna, I figured this was an Italian pasta casserole of some sort, or even something from the Greek culture, as Pastitsio is a similar dish.   Little did I know I would find a raging controversy on the issue.  Apparently, there’s a recipe from England in the late 1300s that makes the case that lasagna is an English “invention”.  From July 31, 2003 edition of The Baltimore Sun:

Culinary experts in Britain said they discovered the origins of lasagna while researching medieval dishes in preparation for the Joust festival at Berkeley Castle in Gloucestershire. They said a recipe for the dish was found in The Forme of Cury, a book cooked up by a group of chefs on behalf of King Richard II around 1390.

“We wanted to see if we could find something pre-1390 to link lasagna to Italy, and we haven’t found anything, but Italians still won’t accept it,” said the aptly named Maurice Bacon, the festival’s spokesman. “Italians say, `It can’t be English; it’s always been Italian.’

“Well there was a long time when people thought the world was flat, and when people were told it was round, they said, `No, it’s always been flat.’ Same thing with Italians and lasagna.”

Actually, few people without a stake in crawling out of the basement ranking of world cuisine could blame the Italians. Think lasagna and the dish that comes to mind, at its heart, is pasta, tomato-based sauce and cheese.

But in 1390, tomatoes in English cooking were still 200 years off. The recipe in The Forme of Cury refers to a dish called “loseyns,” which, not surprisingly, did not list tomatoes among the ingredients.

Part of the instructions in 14th-century English: “Take flour of pandemayne and make perof paste with water … drye it harde and seep it in broth. … Take chese and lay it I dishes. … So twise or thryse, and serve it forth.”

Sounds like a non-tomato lasagna to me!  Of course, this might just be the first written recipe for such a dish.  The origins of the name “lasagna” could also be Greek from the word “laganon” meaning “flat sheet of pasta” or from the Latin word “lasanum” meaning “cooking pot”.

Lasagna

3 medium eggplant

Salt, for salting eggplant

2 pounds ricotta cheese

3 tablespoons olive oil

2 onions, diced small

3 cloves of garlic, minced

6 or 7 sliced crimini or baby bella mushrooms (optional)

1 teaspoon salt (or to taste)

1 teaspoon pepper (or to taste)

2 teaspoons of Italian oregano

2 bay leaves

1/4 cup deglazing liquid like red wine, port, beef broth or water

3 28 ounce cans crushed tomatoes

1 pound Italian Sausage, bulk (or removed from casings) (optional)

1 egg yolk

1 pound part skim, low moisture, shredded mozzarella cheese

1 cup grated Parmesan Cheese

1 pound whole milk mozzarella cheese, sliced

The first part of moisture management begins with what is  the pasta substitute:  the eggplant.  First, cut the eggplant into thin rounds.  Not too thin, as they have to stand up to drying in the oven.  Around a 1/4 inch thick.

OLYMPUS DIGITAL CAMERA

Place the rounds on a rack and sprinkle each round with salt. Let sit for 30 minutes.  Flip and repeat.

While your eggplant is sitting, place a cheesecloth, coffee filter or paper towel in a sieve and sit over a bowl.  Put the ricotta in the sieve and let drain in the refrigerator for an hour or until needed.

Put the olive oil in a large, 8 quart sauce pan over medium heat.  When the oil is just hot, add onions and saute until translucent.  Add garlic and the optional mushrooms along with the salt and pepper.  Adding the mushrooms will add moisture, so you really want to cook this mixture down as far as possible, about 20 minutes.  You must keep an eye on it at this point to avoid burning or excessive browning.  Add oregano and bay leaves and continue to saute.  The mushrooms should be greatly reduced in volume before the next step.

Deglaze the pan with your choice of liquid.  I had an open bottle of port, so I used that.  You want to boil this off or down, again as much as possible.  Just prior to running out of liquid, add the canned tomatoes.  Let simmer over medium low heat for about 2 hours.  You want a fairly “dry” sauce.

OLYMPUS DIGITAL CAMERA

Note the rather “dry” look to the sauce

While the sauce is simmering, brown the sausage in a separate pan.  When the sausage is cooked through, drain and add to the tomato sauce.

OLYMPUS DIGITAL CAMERA

While the sauce is simmering and after the eggplant is finished its salt rest, lightly rinse the salt off the eggplant and pat the rounds dry.  Ready two baking sheets with a silicone sheet like Silpat.  Place the rounds on the baking sheets.   I know Silpat is interchangeable with parchment paper, but I didn’t use parchment paper here, so I don’t know whether is would work for the next step.

Preheat the oven to 300 degrees and bake for 20 minutes until well wilted.  Check periodically to ensure no burning and if you are using both sheets at the same time in the oven, make sure to rotate the pans for even cooking.   Flip the rounds over and bake again for the same amount of time.  They should come out looking rather dry and haggard.

OLYMPUS DIGITAL CAMERA

After and Before baking

Remove the eggplant rounds from the baking sheets and place on cooling racks.  While the eggplant rounds are cooling, remove the ricotta from the sieve and place in a separate, clean and dry bowl.  Stir in egg yolk and set aside.

Preheat oven to 350 degrees F.

Ladle a layer of sauce on the bottom of a 9 x 13 pan, or a lasagne pan if you have one.  On top of that layer, place the eggplant rounds, then the ricotta mixture, parmesan cheese and the shredded mozzarella cheese (the whole milk mozzarella is for the top only).  Repeat the layers until you reach the top of the pan.  The last two layers should be sauce, parmesan cheese and the whole milk mozzarella cheese.

OLYMPUS DIGITAL CAMERA

Bake in the oven for about an hour.  Then, let it rest.  The longer it rests, the less of a mess it will be when cut and served.  Lidia Bastianich, grand dame of Italian-American cooking recommends at least an hour wait.  (See http://www.lidiasitaly.com/recipes/detail/701)

Here’s the lasagne at the one hour mark:

OLYMPUS DIGITAL CAMERA

This is a square cut that retains its shape with easily discernable layers.  The eggplant has returned to plump and the whole dish presents as “lasagna” not “vegetable lasagna”.  Fussy, yes, but not hard and worth it.  Especially, if you have been missing lasagne on your low carb diet.

Beef Stew

The first encounter I recall with beef stew is eating a bowl of Dinty Moore Beef Stew.  It was a cherished childhood memory.   Why make Beef Stew when it was just so handy to open a can? Well, my husband and I tried of night a childhood favorites.  Let’s just say, Chef Boyardee Ravioli and Dinty Moore Beef Stew don’t taste as good as I remember.   There’s a reason I moved away from processed foods.

There are many recipes for beef stew in older cookbooks, although most refer to stewing a large piece of meat, usually studded or slitted with seasoning.  Around the mid to late 1800, “stew” seems to begin to resemble something of its modern day incarnation in various recipe books.

In reviewing many of the recipes, the one that stuck out most to me was Fannie Farmer’s from her Boston Cooking-School Cook Book.    While it lacked any sort of spice ingredients, it had an interesting twist.  Modern stews call for the addition of stock or wine as the deglazing and liquid source for the stew.  In other words, it can be a two step process of making a stock, then making a stew.  Fannie’s method is more economical as she throws the bones in during cooking and removes them prior to thickening the sauce.  In other words, she makes the stock, while cooking the stew.  To me, this was genius!  I always have too much or too little stock.  Then there’s the problem of stock storage.  Sure, I freeze stock that I make, but that takes up space and has to be thawed.   Fannie’s method is economical and much less work and clean up!  So, I took bits of her recipe and bits of the recipe from The Lady’s Receipt Book by Eliza Leslie in 1847 with the modern addition of mushrooms to create a very simple beef stew.  With a small amount of up front time, the stew mostly sat in the oven for cooking, leaving me plenty of time to do other things on a lazy Sunday.

Beef Stew

2 pounds stew meat, cubed

Flour sufficient for dredging meat

Salt

Pepper

1/4 leftover bacon grease or any high heat tolerant oil/fat (lard, canola, etc.)

1 cup carrots, sliced thin

1/2 onion, small dice

2 celery stalks, sliced thin

1/4 teaspoon nutmeg

1 teaspoon thyme

8 ounces sliced mushrooms

Water

Beef bones ( I used 4 bones of about 3 inch diameter)

4 cups potatoes, diced.

I know these ingredients don’t really look like much, but this is a really simple recipe and you don’t need to measure much.  Pat the beef dry.  Sprinkle beef with flour, salt and pepper.    You want the beef to be covered with flour.  For the salt and pepper, there really shouldn’t be more than a teaspoon of each needed.  The salt and pepper are included at this point to really to flavor the liquid of the stew and can be adjusted later.

OLYMPUS DIGITAL CAMERA

Floured and seasoned beef added to the hot fat

Heat fat or oil in dutch oven (I used a 5 quart one) over medium high heat.  Saute beef until browned and leaving bits of browned flour on the pan.

Remove from pan and add carrots, onion and celery.

OLYMPUS DIGITAL CAMERA

Cook until partially softened.  Add mushrooms, nutmeg and thyme.  Cook until pan is deglazed.  You may need to add a bit of salt to help the process along if the vegetables are not releasing their liquid.  Once the pan is deglazed, return meat to the pan and add water sufficient to cover.  Stir to distribute the flour that is on the meat throughout the liquid. The liquid should start to turn brown and slightly thicken.  Add bones and additional water if needed to mostly cover the ingredients.  Seal tightly with lid and cook at 350 degrees until the meat is tender.  The amount of time varies depending on what the butcher thought was “beef stew” meat and whether the meat was pastured or not.  2-3 hours would be a good guess.

Allow enough time prior to the finishing of the stew to parboil the potatoes (about  5 minutes).  After removing the bones, add the partially cooked potatoes to the stew for 15 minutes of cooking with the stew.

Now, I didn’t feel the need to thicken the stew at the end of cooking, but if you want to, you can add 1/4 cup flour (slurried with some water to prevent lumps) and cook until thickened.

OLYMPUS DIGITAL CAMERA

I didn’t think I would like the nutmeg, but honestly, it kind of worked.  Mace was the other ingredient suggested for stew in the older cookbooks. I couldn’t find any, but now I’m curious to see if I can and try it!

Chocolate and Cinnamon Babka

OLYMPUS DIGITAL CAMERA

Blog post #2!  Look at me go!  My lovely neighbor Sherron from www.simply-gourmet.com issued a bread throwdown.  Ok, not really.  Sherron is really sweet and would never turn cooking into a competitive sport.  She is part of a group (#twelveloaves) that encourages people to bake bread and submit their experience to share with others.  Sherron made a Pinca, a Croatian Easter bread.  I know, crazy impressive with just the name alone.  However, she went a step further and adapted the bread by making it gluten free.  Wow, right?  Others submitted Italian Easter Bread, Hot Cross Buns and American Irish Soda Bread.  What would I submit and would anyone care?

Before I even begin, I have one small issue.  Bread is my Waterloo.  My mother hated making anything with yeast, so we didn’t.   Not one yeasted roll or bread loaf.  Nada.  My mother has hundreds of cookbooks and reads them all cover to cover.  Any recipe that called for yeast might as well have had arsenic as the first ingredient.  She just wasn’t making it.  I grew up with a very healthy fear of all recipes with yeast in it.

After getting sick of buying bread with inferior and rather scary ingredients, I decided to go out on a limb and get a bread maker.  King Arthur Flour made it sound very easy, and it was.  Dump everything in the bread maker and push a button.  Viola! Bread.  Organic bread for cheap, once you factored out the cost of the bread maker, of course.  Factoring in the bread maker cost and you are looking at a few months before break even.  Challah is my favorite bread to make in the machine.  My kids consider that white bread.  I do pity them when they grow up and realize white bread is something totally different.

Do I stray from the machine?  No.  Not.  Ever.  However, given the lovely pictures and descriptions of the breads submitted, I didn’t think my bread machine bread was going to cut it.   Reading through various recipes, I realized most ingredients for modern breads are recorded by weight, not volume.  Alton Brown did this in his Good Eats show and I turned the channel. Many bakers weigh their ingredients to ensure consistency and success.  This level of precision and scientific interloping causes me fits because I am a cups and teaspoon girl.   Getting the scale out, setting it to zero with a bowl on it and slowly adding the ingredients one at a time takes the joy out of cooking for me.   Too many “things” cluttering up my workspace and putting barricades between me and the food.  The baking process becomes slow and laborious and the constant weighing really takes the expertise of the cook out of it.

Historic cookbooks describe baking bread as among one of the greatest accomplishments a housewife can perform.  Besides making your own yeast from potatoes and hops and dealing with what can only be described as less than consistent yeast and flour inputs, the bakers of yore had to contend with the fire.   That’s right, actual fire.  Now we have instant yeast and an oven that (hopefully) provides a consistent temperature.   We can even buy extremely consistent flours.  Had women of yore had access to SAF yeast, consistent flour blends and an oven, I very much doubt these women would have had to weigh anything.

So, I wasn’t weighing anything, leaving me to find a recipe with ingredients by volume.   I combed all of my old sources of historic recipes and nothing seemed to match the rather seasonal nature of the breads submitted.  I found an Easter Babka recipe that was rooted in Polish tradition and asked my husband if he remembered his very Polish grandparents making Babka for him.  Nope.  Another recipe killer for me was that the recipes I found for said Babka had dried fruits as ingredients.   I dislike dried fruits in my baked goods.  Dislike is a kind word.

But, the word Babka reminded me of one of my favorite Seinfeld episodes:  The Dinner Party.   I am a HUGE Seinfeld fan.  Jerry and Elaine wanted to bring a Chocolate Babka to a dinner party.  The bakery had sold out of the Chocolate Babka and only had a Cinnamon Babka, which Elaine considered the “lesser Babka”.  Hilarity ensued.  So, I decided to make a Chocolate Cinnamon Babka.  One, it has chocolate, two, I heart Seinfeld, and three it kind of (sorta) went with the Easter theme of the #twelveloaves challenge.   Besides, who wouldn’t want to unite the lesser and greater Babkas to create a super Babka!

Also, this recipe exemplifies how I think our cooking should have evolved without the influence of prepackaged “food”.   Here a lovely, simple sweet yeast bread is combined with ingredients far more accessible now.  To pull off Chocolate and Cinnamon Babka successfully, time, patience and quality ingredients are required.   There are no Babka mixes or pop open tubes in the grocery store.  Also, modern conveniences like standardized flour, instant yeast and great chocolate and cinnamon make this dish relatively easy.

Martha Stewart’s receipt for Chocolate and Cinnamon Babka is the easiest to find on the internet.  However, it makes 3 loaves and calls for over 2 lbs of chocolate, the best of course!  Not wanting to spend nearly $30 on just chocolate for a bread that might fail, given my lack of measuring, I wanted to look for something a tad cheaper.  Also, this bread kind of violated almost all of my “low carb” rules.  One could argue that the cinnamon helps regulate the blood sugar, but seriously, this recipe is clearly a splurge.

I found a lovely recipe at purplefoodie.com that Shaheen Peerbhai got from Peter Reinhart’s Artisan Bread Everyday and decided to give it a try:

Chocolate and Cinnamon Babka

Adapted from Shaheen Peerbhai’s purplefoodie.com and Peter Reinhart’s Artisan Breads Everyday

Bread:

2 Tablespoons instant yeast

¾ Cup lukewarm milk

6 Tablespoons butter

6 Tablespoons sugar

1 Teaspoon bourbon vanilla

4 Egg yolks

3 ¾ Cups all purpose flour

1 teaspoon salt

Filling:

1 ½ Cups semisweet chocolate, coarsely processed in a food processor

1 Teaspoon Ground Cinnamon (if you aren’t a huge Cinnamon fan, I’d use 1/2 teaspoon)

¼ Cup butter, melted

½ Teaspoon salt

Combine the yeast and the milk and set aside.

Cream the butter and the sugar in a stand mixing bowl.  Add the vanilla.  Incorporate each egg yolk separately.  Allow 30 seconds to pass before adding each yolk.   Gradually add the flour and the salt.    After the flour and salt are well combined with the other ingredients, add the milk and yeast mixture.  Continue mixing until a soft dough is formed.  Dump the dough on a well floured surface and knead by hand until you have a soft, supple and golden dough.

OLYMPUS DIGITAL CAMERA

Hardly supple.

The original recipe called for 3 ½ cups of flour.  My dough was a sticky, unworkable mess at this point, as you can see.  One of the dangers of going by volume.  But who doesn’t like a dash of danger, right?   I added probably about ½ a cup more to get the dough “soft and supple”.    So, for the recipe above, I increased the amount of flour to 3 ¾ cups of flour.  You may need to add more.  Just the nature of not weighing the ingredients.

OLYMPUS DIGITAL CAMERA

Much better!

Place the dough in a lightly oil bowl and cover with a damp cloth and let it rise for 2 hours.

Just before the end of the rise, combine the chocolate, cinnamon, butter and salt in a small bowl.

Once risen, roll the dough out on a floured surface to a thickness of 1/4th inch think.

Place the chocolate mixture over the dough sheet, creating a smaller chocolate rectangle in the middle of the dough rectangle.

OLYMPUS DIGITAL CAMERA

Roll the dough lengthwise and pinch the seams to keeps chocolate leaks to a minimum.  I cut my log in half and pinched the ends to form two logs.

OLYMPUS DIGITAL CAMERA

You can get really fancy and cut the log into two sections about three quarters of the way through and braid the log.  When I read that in the original instructions, I was like, sure I can, or, I can just cook the log and not make a hot mess out of this thing.  I never mastered braiding inanimate ribbon and now I am supposed to braid soft, yeasty dough?  Nope. Not gonna happen.

Place each log (or the single braided loaf for the over achievers out there) on the baking sheet you intend to use, cover with a damp cloth and let rise again for another 2 hours.

Bake in a 350F degree oven for 15-20 minutes,  turning the baking sheet halfway through the cooking time.

OLYMPUS DIGITAL CAMERA

Simple, but really good!

This bread disappeared.  I had two loaves for less than 24 hours.  It’s that good.  Elaine would not consider it the lesser Babka!

Maryland Fried Chicken

OLYMPUS DIGITAL CAMERA

Welcome to my first blog post!   I love history and cooking and marrying these two loves has led me to some interesting reads.  Namely, very old cookbooks.   Luckily, there is a wonderful program at Michigan State University that has put many old cookbooks online.  Reading them is a revelation.  Cookbooks served many purposes.  Not only were they collections of recipes, but also household cleaning and staff supervision.  Many authors of these historical cookbooks admonish young housewives to make sure they know how to execute the recipes and not be completely dependent on household servants, as you may not always be able to afford servants.

Now, I have no servants.  I’m on no quest like cooking every recipe from a particular cookbook.  What I would like to do is explore American cooking before it became corrupted by what I like to call the “Food Industrial Complex” or “Big Food”.    Processed and “convenience” food have handicapped our ability to feed ourselves wholesome food.   When I see a kid eat a homemade chocolate chip cookie and ask what brand it is, I am heartbroken.  People used to make waffles, bread and cookies. Sure, in our carb and gluten adverse world, these are fairly evil items.  But kids who don’t realize that cookies can be made miss out on the best cookies of all.  Nothing beats a homemade chocolate chip cookie out of the oven.  Nothing.

So, where do I start?   Today, I write about a mystery for the ages.  The mystery goes by many aliases:  Maryland Fried Chicken, Chicken Maryland, Maryland Chicken, and Chicken a la Maryland.   I am from Maryland and whenever I traveled out of state and saw some version of this chicken dish on a menu I was perplexed.  Sure, who hasn’t heard of Kentucky Fried Chicken or Southern Fried Chicken?  My favorite fried chicken is from Popeye’s.  But fried chicken “a la Maryland”?  Usually anything tagged with “Maryland” as a descriptor meant it either had crab or the “Old Bay” seasonings in it.  Frankly, I am probably one of the few people from my home state to really not like “Old Bay”.  But, I digress.

So, I set out to find the origins of Chicken Maryland.  Believe it or not, Chicken Maryland appears in many esteemed cookbooks.  Escoffier’s Ma Cuisine, Fanny Farmer’s The Boston Cooking School Cook Book and James Beard’s American Cookery, all have a version or mention of Chicken Maryland.  I love Beard’s introduction to this apparently, unbeknownst to me, iconoclastic dish:

There are so many recipes for fried chicken, but none is as famous as Chicken Maryland.  Strange as it may seem, no two recipes have any similarity when you compare them.  Furthermore, there is no other American chicken recipe quite so internationally famous as Chicken a la Maryland.

How internationally famous?  Well, it was on the menu for the Titanic the day it sank.  Keep in mind, Farmer wrote her book in 1892, the Titanic sank in 1912, Escoffier’s Ma Cuisine was published in 1934 and Beard’s American Cookery in 1972.

Yet, as a native Marylander I have no idea what Chicken Maryland is.  I asked around and I am not alone.   How sad that an apparently once famous a dish is so forgotten.

After perusing several sources, it seems that Beard is correct, there are tons of versions.  Most, however, coalesce around a general idea.  The chicken is not deep fried, it’s pan fried, the steamed by putting a cover over the pan.  So, the chicken is both fried and steamed.  Now, there is general disagreement as to the frying oil (butter, clarified butter, and “drippings”) and the method of breading.  To further complicate matters, many of these recipes give a guide as to how to make it, but ingredient measures seem to be something the reader is presumed to know.

So, I attempted to resurrect Chicken Maryland or Chicken a la Maryland from the dustbin of history and I must confess, it’s pretty awesome.  Crispy and moist without being overly greasy.  Why this isn’t the preferred method of cooking over deep frying is really quite a mystery.

I like to cook a whole meal instead of just a recipe.  So, to accompany Chicken a la Maryland, I made kale and collard greens (recipe below).

Chicken a la Maryland

My biggest issue with fried chicken is the mess.  There’s leftover oil that I suppose I could strain and reserve for another use.  But that’s really high maintenance and frankly, I don’t make it that often to keep old grease sitting around.  Then there’s the oil splatter all over the stove.  Add to that my insecurity over whether the chicken is actually done, and, let’s just say fried chicken in our house is synonymous with “Popeye’s”.

Chicken a la Maryland answers every one of my issues with fried chicken.  First, there’s no oil and very little mess leftover.  The chicken pieces are also “done” with very little effort or clean up.

In order to avoid multiple, different cooking times, I bought chicken thighs.  They are cheap and stand up well to heat.   You could certainly use any other favorite part and have great results.

2 cups Buttermilk

6 chicken thighs

2 cups flour

1 teaspoon paprika

½ teaspoon salt

½ teaspoon pepper

2 large eggs

2 tablespoons water

2 cups bread crumbs (I used Panko style)

½ stick of butter (clarified butter may be easier to work with)

6 mushrooms, sliced

1 cup heavy cream

Salt and pepper

Place chicken thighs in buttermilk and soak for 2 hours.  Combine flour, paprika, salt and pepper on a large plate. Combine eggs and water in a wide, shallow bowl.  Place bread crumbs on a plate.

Remove chicken from buttermilk and dredge in flour mixture, then egg mixture, then bread crumbs and set aside.

OLYMPUS DIGITAL CAMERA

Melt the butter in a 10 inch heavy cast iron skillet.  When bubbling, add chicken.  Depending on the size of your pan, the chicken may need to be broken up into separate batches.

OLYMPUS DIGITAL CAMERA

Brown both sides of the chicken.  Turn down heat to medium low.  With the chicken positioned skin side up, place a lid on the chicken and let steam for 20 minutes, checking occasionally to make sure the bottoms are not burning.

Remove the chicken. Add mushrooms to the pan and sauté until soft.   Add about 4 tablespoons of flour to create a roux.   Cook until the raw flour taste is removed, but not so much that the roux has darkened.  Add 1 cup of heavy cream to the pan and whisk.  If the cream gravy is too thick, thin with additional cream.  Salt and pepper to taste. Serve chicken with gravy and collard greens.

Notes

  • I think this recipe would be pretty adaptable to gluten free cooking.  Cornstarch could sub for the initial flour coating and used as a thickening agent for the gravy.  Gluten free bread crumbs are readily available as well for the coating.
  • I made this in both a cast iron fry pan and an all clad 4 quart sauté pan.  The cast iron pan yielded much better results.  The butter didn’t burn and neither did the chicken.  If you don’t have cast iron, definitely use clarified butter and be very mindful of the chicken while the pan is covered.  You may want to put the covered pan in the oven at 350° F for the 20 minutes, instead of keeping it on the stove.

Kale and Collard Greens

I wanted to highlight the chicken recipe on this post; however, I made the Kale and Collard Greens first, and as it was cooking, made the chicken.  The meal was all finished at the same time.

Collard Greens and Kale

¼ cup leftover bacon fat (or render 4-5 slices of bacon)

1 medium onion, sliced

2 stalks of celery, chopped fine

2 cloves garlic, minced

1 teaspoon dried thyme (optional)

1 bay leaf

2 cups of water

2 cups of chicken broth

1 bunch of kale

1 bunch of collard greens

Salt and Pepper

In an 8 quart pan, heat bacon grease on medium heat.  When the grease is moderately hot, add onions and celery.  Sauté the vegetables until the onions are translucent and the celery is soft, reduce heat if necessary.

OLYMPUS DIGITAL CAMERA

Once the vegetables are sufficiently soft, reduce heat to low medium and add the garlic, thyme and bay leaf.  Once the garlic and spices and incorporated, but before the garlic burns, add the water and stock and simmer.  While the liquid is simmering, remove the kale and collard leaves from their tough stems and rinse.   Add the greens to the liquid and reduce heat to low, stirring occasionally to wilt the leaves.   Cook until leaves are tender, keeping watch on the liquid level.  Do not allow the water to completely evaporate, add more water during cooking if needed. Prior to serving, salt and pepper to taste.

OLYMPUS DIGITAL CAMERA