Category Archives: Poultry

Hungarian Chicken- Pressure Cooker Edition

One of my favorite dishes growing up was Hungarian Goulash. I LOVED the sauce, even if the tough little pieces of meat were rather off-putting.  The sauce was not really spicy, but super creamy and just plain good.  I work, so I don’t really have time to make rather complicated dishes during the week, especially if they involve meat or sauces that need a long time to cook. However, if a recipe can be quickly made in a pressure cooker, I’m golden. When I googled “pressure cooker chicken” one night as I was staring at 4 leg quarters,  a really interesting recipe came up on Food.com (http://www.food.com/recipe/pressure-cooker-hungarian-chicken-170094)- Hungarian Chicken. I’ve never had goulash with chicken, but have to say it’s much better!  The sauce really pairs well with chicken, there aren’t any complicated ingredients, and it’s a snap to make. Seriously, very easy, but good eats. The classics rarely disappoint. I’ve made a few changes from the inspirational recipe because I love to tinker. Mushrooms really add another layer of flavor and texture to the dish and the creme fraiche isn’t as assertive as the sour cream.   Also I have also served this dish with “zoodles” (zucchini noodles) as well as cauliflower rice and it’s worked well both ways.

While I still have my “old fashioned” pressure cooker, I have to admit that I bought the famed InstantPot when it was on sale at Amazon over Black Friday. If you are queasy about using a pressure cooker, this one is really no different than an other kitchen gadget. Very, very easy to use.

This whole dish comes together in no time and makes a fantastic weeknight dinner.

Hungarian Chicken- Pressure Cooker Edition

  • Servings: 4-6
  • Difficulty: easy
  • Print

A hearty weeknight dish, perfect for a cold winter's day.

Ingredients


Oil to coat the bottom of the pressure cooker
4 chicken leg quarters
1 onion, finely chopped
2 teaspoons paprika
1/2 cup water or chicken broth
15 ounce can of crushed tomatoes
1 teaspoon salt
1/2 cup creme fraiche or sour cream
Pint of white or baby portabella mushrooms, quartered
Oil to coat the bottom of a skillet
8 ounces extra wide egg noodles, cooked, drained.

Directions

  1. Bring to boil one pot of salted water, enough to cook the noodles.
  2. In the pressure cooker, heat the oil until hot, add two of the chicken quarters, skin side down. Just before the skin starts to brown, turn the chicken over. Cook until golden. Remove to a plate.
  3. Add the onion, paprika, and water. Stir to combine. Return the chicken to the pot, add the other two pieces of chicken and the crushed tomatoes. Do not stir.
  4. Lock the lid and set the pressure to high for 12 minutes.
  5. While the chicken is cooking, oil a large skillet. Over medium heat, saute the mushrooms until they are dark brown.
  6. Cook the noodles as directed on the package.
  7. 10 minutes after the pressure cooker has stopped cooking on high heat, release any remaining pressure in a direction not near your face, twist the lid, and open the lid with the lid blocking any steam from your face.
  8. Remove the chicken from the pot. Whisk the creme fraiche until loose and add it to the pot, along with the mushrooms. Drain the noodles. Serve the chicken, covered in sauce, on the noodles.

Chicken with a Thai Peanut Sauce

http://dawnoffood.com

I am really struggling with posts.  I love finding interesting recipes from yesteryear; however, when I post such recipes, my page views go down.  But post something like Pizza Fondue or  Chocolate Chip Waffles and watch my page views skyrocket. Not really shocking, I know.  I want to put mostly healthy fare out in the world, but I’d also like people to actually read my blog.  So, I’ll keep plodding away hoping that for every Chicken Marengo that is a bit of a dud views-wise, but is awesome history wise, there’s a Maryland Fried Chicken that does pretty well.

I have pulled out my trusty pressure cooker again to make this recipe, which was inspired by a recipe I saw at Pressure Cooking Today.  First, I love the simplicity.  Sure, you can brown the chicken thighs, because that is what we are told “adds depth of flavor”, but you could skip it and the 20 minutes it takes to brown the thighs before you pressure cook them. Chicken thighs are just the best. Cheap and they can withstand a bit of overcooking and the rigors of the pressure cooker.  To make this dish low carb, instead of rice, I used finely chopped cauliflower roasted with toasted sesame oil and soy sauce.  My husband loved it.

Chicken with a Thai Peanut Sauce
Serves 4-6

1 – 2 tablespoon toasted sesame oil (or canola)
2 lbs. boneless, skinless chicken thighs, trimmed (about 8)
1/2 cup chicken broth or water
1/4 cup smooth peanut butter
1/4 cup soy sauce (or tamari)
2 tablespoons lime juice
1 tablespoon fish sauce
2 teaspoons grated ginger
1 1/2 teaspoons Sriracha Sauce
1 tablespoon corn starch
2 tablespoons water
Fresh chopped cilantro for Garnish
Salt and Pepper to taste

Heat oil in pressure cooker over medium high heat. Brown chicken in batches. Place browned chicken aside on plate. Drain liquid or oil, leaving about 1 tablespoon behind.

Add broth, peanut butter, soy sauce, lime juice, fish sauce, ginger, and Sriracha Sauce to pressure cooker. Whisk together until well combined. Return Chicken to pressure cooker. Cook chicken for 9 minutes at high pressure. It will take about 10 minutes for your pressure cooker to reach high pressure. After 9 minutes at high pressure, remove pressure cooker from heat. After pressure has fallen significantly, use the quick pressure release. Please consult your pressure cooker instructions, if you have any concerns or questions. Each cooker is different.

In a small bowl, whisk together cornstarch and water. Once the pressure is released, open the pressure cooker carefully (lid facing away from you!) and remove chicken to a plate and cover. Whisk cornstarch mixture into the peanut sauce. Bring sauce to a slight boil. Return chicken to pot to coat with sauce and serve over rice or cauliflower “rice”.

If you don’t have a pressure cooker, you can find a slow cooker version of this recipe here.

Chicken Big Mamou

http://dawnoffood.comI went to graduate school in New Orleans.  New Orleans blew my mind, food wise.   For one of our first food adventures, my mom and I ate at Paul Prudhomme’s K-Paul’s in the French Quarter.  All of the food was so lovely!  I looked at the menu and Chicken Big Mamou stood out as something I wanted to try, but I’m not a spicy food person.  The menu warned that it was a very spicy dish.  My mother scoffed and said that this is a restaurant, they’ll moderate it and make it so that everyone can eat it.

I fell for it and ordered it.  For me, it was inedible.    Beyond spicy.  Torture level hot.  I couldn’t tell you what it tasted like because it just felt like molten lava in my mouth.  My mom traded with me (thanks mom!) and ate it because she loves food spicy.  It was hot for her, but she loved it.  We bought the cookbook and made it at home.  Others had to appreciate how hot a dish can be!!

The men in the house ate it, but it looked like they were having a heart attack:  red faced, pouring sweat and clearly uncomfortable.

So, why make it?  Well, one it’s Mardi Gras season.  I didn’t want to do a shrimp creole or crawfish etouffee.   Two, my husband and son love spicy food.  They make their own hot sauce!  So, back to my enemy.  I looked at the recipe.  My goodness, what a fussy recipe!  Lots and lots of ingredients, and butter.  Lots of steps.  Ugh.  So, I googled it.  Prudhomme had changed the recipe!!   Wrap your head around that.  The recipe on his website is 1/10th the fussiness of the one in his fantastic cookbook.   But in reviewing it,  I was about to make it a lot less fussier.  This has now become an easy (and cheap!) weeknight meal that anyone can add into the rotation.

Don’t misunderstand what I’m going to say here, but while I love Prudhomme, his recipes are maddening.  Extra steps that don’t seem to add much turn homey recipes into complicated, time consuming affairs.  The  spice lists alone are daunting.  I never got the sense that people in the bayou would cook this way.  Maybe they did and I’m totally off base.  But, it just seemed like he was “fancying up” traditional recipes so that food critics would take Louisiana cooking seriously.

So, first he modified the recipe, then I “unfancied” it.  And it is really, really good and very true to the original.  Excellent entertaining dish as well!!

Chicken Big Mamou
Serves 4-6
Prep Time: 15 minutes
Cook Time: 50 minutes (40 are low effort simmering)

3 tablespoons olive oil
3 tablespoons butter
6-8 chicken thighs or legs
2 1/2 tablespoons Paul Prudhomme’s chicken magic, divided (see below for a substitute)
1 cup very finely chopped onions
1 cup very finely chopped celery
3/4 cup very finely chopped bell peppers
1 bay leaf
1 1/2 teaspoons minced garlic
3/4 teaspoon ground red pepper (preferably cayenne, if you want it really hot!!)
2 cups tomato sauce
2 cups chicken stock or water
3/4 cup finely chopped green onions
1/4 cup finely chopped parsley leaves

Heat olive oil and butter over medium heat in a large saute pan. Sprinkle 2 teaspoons of the poultry magic over the chicken pieces. Brown the chicken in the saute pan, about 2 minutes per side. Remove from the pan and set aside. Saute the onions and peppers in the remaining oil, until the onions are translucent. Add oil or butter if needed to prevent the veggies from burning. Add the remaining chicken magic, bay leaf , minced garlic, and cayenne pepper (if you want it really hot!) and cook for about a minute. Add 2 cups of tomato sauce and 2 cups of stock. Return chicken to the pan and simmer for about 40 minutes, until the chicken is cooked through.

Serve over cauliflower “rice”, rice or pasta. Top with the green onions and parsley.

From “Top Secret Recipes“, Paul Prudhomme’s Chicken Magic:
1 1/2 teaspoons salt
1/2 teaspoon paprika
1/4 teaspoon cayenne
1/4 teaspoon onion powder
1/4 teaspoon garlic powder
1/4 teaspoon ground black pepper
1/4 teaspoon dried thyme
1/4 teaspoon dried oregano
1/4 teaspoon rubbed sage
dash cumin

Combine spices.

http://dawnoffood.com

Wild Goose

Wild Goose

My husband has taken up waterfowl hunting, and he loves it.  He brings home at least one goose every time ventures out.  Unlike the geese in the grocery store, these come in slightly battered and scarred by shot.  Also, unlike farmed geese, these are “working geese”.  These aren’t farm animals standing around all day.  These are flying geese!   As a result, the meat tends to be a bit tough and there’s no awesome leftover goose fat.   His hunting buddies relayed to him that the goose legs and thighs were inedible and most of them just use the breast meat.  I determined that this was a personal challenge to me to see if I could make them edible.

About the same time, my wonderful friend Pam gave me a pressure cooker.  There are many kitchen appliances I have used, but a pressure cooker just isn’t one of them.  They’ve always intrigued me.  It’s the opposite of a slow cooker, but with the same result!  You want tender pot roast in an hour?  The pressure cooker is your device.  The price, however, is this slight, remote chance that there could be an explosion if something goes wrong with the cooker.   Besides burns and cuts, we can add explosions to the dangers of cooking!!

So, I thought this my fortuitous acquisition of a pressure cooker at the same time my husband started to come home with these tough little birds couldn’t be a coincidence.

A few years ago, I made a goose recipe from Epicurious.com with Armagnac and Prunes and it was amazing. I know, I know. Prunes. I get it.   But, the pressure cooker dissolves these suckers into nothing and they leave behind a slightly sweet and distinct taste. Really. It is good. No one will know you put prunes in this dish, they will just know it’s awesome. As mentioned above, this goose was too tough to roast outright, so I just could draw flavor inspiration from that recipe for this one.  The prunes and red wine were an amazing combination with the rich goose meat, so I used that part of the recipe to create this one.

The pressure cooker wasn’t nearly as scary as I thought it would be.  I didn’t fill it up too high, made sure the steam was escaping and didn’t let the pressure get too high and we got this amazing goose dish!  The thighs and legs were completely tender, as was the breast.  Mission accomplished!!!  So, if you are faced with game meat, I would seriously consider a pressure cooker to make game meat tender and amazing!  This recipe was incredibly easy to execute!

As a disclaimer, please follow your own pressure cooker instructions to ensure the safe cooking of this dish.

Goose in Red Wine and Prunes
Prep Time: 25 minutes
Cook Time: 75 minutes

¼ cup duck or goose fat, or vegetable oil or clarified butter
1 onion, medium dice
1 cup of diced celery
3 carrots, peeled and roughly chopped
1 teaspoon salt
1 teaspoon pepper
1 teaspoon dried thyme
8-10 prunes, sliced in half
1 cup full bodied red wine
1 cup water or chicken broth
1 Wild Goose (5-6 pounds), skinned and quartered (2 breasts, 2 leg quarters)

Heat duck fat in pressure cooker over medium heat. Add onion, celery and carrots and cook until the onion is translucent. Add salt, pepper, thyme and prunes. Sauté for a minute. Add wine and chicken broth. Simmer for about 5 minutes, stirring occasionally. In a pressure cooker, the alcohol does not boil off. Obviously, we need to do that before beginning to pressure cook the goose. Add the goose parts, legs first, breasts on top. Add the lid of the pressure cooker and, following your pressure cooker’s instructions, bring the pressure cooker to high pressure for 60 minutes. For my cooker, I need to lower the temperature to medium low to maintain a safe pressure level after the ideal pressure level is reached. At the end of the 60 minutes, remove from the heat and allow pressure cooker to cool until the lid can be safely removed.

Wild Goose

Hunted by my husband, butchered and skinned by me. Very primal.

Wild Goose

Buffalo Hot Wings

Mild and Hot Wings, ready for dipping!

Mild and Hot Wings, ready for dipping!

I am not a fan of spicy foods.   I especially loathe the race to ever spicier foods.  Whole shows dedicated to making people eat foods that will likely lead to those foods making a return appearance later in the show, well, seem stupid.

Food is to be enjoyed.  Not designed to tear a hole in your stomach.

Which brings me to hot wings.  Buffalo hot wings.  Simple.   The origin story involves spare, cheap parts being repurposed for a quick meal.    Fast forward a few decades and now these cheap parts, the chicken wings, are actually quite a bit more expensive than the chicken thighs!!  Given the meat to bone ratio, the price for wings is rather ridiculous.  However, the idea of buffalo thighs is just an anathema.  Sacrilege!  So, I shall pay the outrageous price as an homage to tradition.  Granted, it’s a rather recent tradition, but tradition nonetheless.

Most hot sauces have lots of vinegar to punctuate the sensation of eating a hot food.  So, I figured why not use the same enhancement on my wings?  There are rumors a certain chicken fast food restaurant marinates their chicken in a pickle brine.  As luck would have it, I actually had some.  We love Clausen’s Dill Pickles.  They are crisp, not too tart, with the perfect level of dill.  After we recently finished a large, warehouse sized container of said pickles, I had a ton of pickle brine sitting around.  Since the price was right, and I wanted to try this technique, this brine served as my marinade.

The result?  Tender wings with a really complex flavor profile.  They didn’t taste like pickles, which was no small concern, but you could tell the influence of the brine was there.   My husband’s smoking hot wings were made more intense and my milder wings were really great without being crazy hot.

I would totally make this again.  It’s easy.  Cheaper than take out wings, and definitely better!

Buffalo Hot Wings, half really, really spicy, half “normal” spicy.
Serves: A Crowd
Prep Time: 2-3 hours (marinating)
Cook Time: 25-30 minutes

Wing Base

2 1/2 – 3 pounds chicken wings
Brine from 80 ounce package of Clausen’s Pickles

Add chicken wings to a closable plastic freezer bag. Pour brine into freezer bag, careful not to overfill. Close bag and marinate in refrigerator for 2-3 hours.

Preheat Oven to 370 degrees Fahrenheit

Super Hot Wings Sauce
4 Tablespoons melted bacon drippings, lard, or vegetable oil
2 Tablespoons cayenne
2 teaspoons granulated garlic
2 teaspoons salt

Combine well melted or liquid fat and spices, divide into two portions, three quarters and one quarter (reserved). In a small bowl, place three quarters of the liquid and half of the chicken wings. Toss wings with sauce. Alternatively, you could brush the sauce directly on the wings. Place a grate on a half sheet pan to elevate the wings. Place wings on grate.

Regular Hot Wings Sauce
1/3rd cup melted Ghee or clarified butter or vegetable oil
1/3rd cup favorite Hot Sauce

Combine well melted butter or ghee and hot sauce, divide into two portions, three quarters and one quarter (reserved). In a small bowl, place three quarters of the liquid and half of the chicken wings. Toss wings with sauce. Alternatively, you could brush the sauce directly on the wings individually.  Place wings on grate, next to spicy wings.

Bake wings for 25-30 minutes until completely cooked through, turning once during the cook time. At the end of the cooking, lightly brush the remaining sauce on the wings.

Serve with blue cheese dressing and any other accompaniments.

Buffalo Hot Wings

Had to see if they would all fit, which they did! Note the pickle brine pieces.

Buffalo Hot Wings

Buffalo Hot Wings

So spicy!!

Recipe Redo: Whole Foods Challenge

Whole Foods Greek Chicken ChallengeMy mom and I have “disagreements” over my shopping at Whole Foods.  She thinks it’s a rip off and the food is overpriced.  I’ve heard the snarky “Whole Paycheck” used as well.   Can Whole Foods be expensive?  You betcha.  If you compare grass fed ground beef made from cows that were raised on a pasture and never saw a feedlot at $8.99 a pound to the stuff in a big box store for $1.99 a pound that may or may not be butchered by illegal workers or comprised of the meat from 100 different cows from “North America”, it may seem expensive.  But you are also comparing a BMW with a Ford Escort.

So, I “re-did” my Greek Chicken and saved my receipts to see what it would cost.   First, some ground rules as to what this “costs”.  I don’t track the cost of spices (unless they are odd and can’t be used elsewhere), fats (butter, olive oil, etc.), onions or garlic.  These items, hopefully, are pantry staples and hard to parse out how much 1/2 tsp would “cost”, so to speak.

I got the leg quarters for $1.49 a pound, for a total of $5.02.  These are “level 2” chicken quarters, which means the chickens they are from aren’t crated or caged (except for transport), no antibiotics or animal byproduct feed, and an “enriched” environment that encourages pecking, perching, etc.  Additionally, the chickens need to have no more than an 8 hour journey to slaughter.

My $5.02 bought a lot of chicken quarters.  There’s no way we can eat this much, so there will be lunch left over at this price.   I used two cans of organic, diced tomatoes at $1.49 each.    Instead of cauliflower, I used lentils.  Well, I had lentils and didn’t remember to pick up the cauliflower.  My bad.   Organic green lentils run about $2.49/pound. I used a cup, which is about 1/2 of the pound (it’s a little less, so I’m over estimating), so $1.20.

Total “ridiculous” Whole Foods cost:  $7.22 and I have two plates leftover for lunch!  Now, for those tsk tsking me for calling my tomato the veg on the dish and not having something green.  I could have gotten a bag of organic broccoli for about $3.00, bringing my total to $10.22.   But I wasn’t feeling the “green” foods on this particular day.  Plus, the lentils were green, that counts, right?  And lentils are a “superfood”.   Fine, next time I’ll add a more substantial veg than tomatoes.  🙂

Greek Chicken

Made this recipe again using Cauliflower as “rice” for a paleo meal.

If doing this with Cauliflower, as shown above, cost is $2.99/head.


Country Captain

Country Captain

As you know, I love a good food story.  Somehow it elevates the dish beyond a concoction of ingredients.   Country Captain is one of those dishes that you may be inclined to pass over in a cookbook.  It’s a fairly old recipe, but born during a time when the name of the dish wasn’t exactly descriptive.   What’s Country Captain?  It’s a chicken dish.  A really, really good chicken dish, adapted by British soldiers who had visited India and brought to the southern port of Savannah, Georgia in the 1700s.

When I first started perusing historical cookbooks, I was so startled to see curry listed as an ingredient in an American Cookbook, you know, way back then.  Truthfully, in my little area, there are precious few Indian restaurants.  If you want Indian food, you have to travel quite a bit to find it.  So, I didn’t really have curry in my house until a few years ago.  I may cook gumbo, eat sushi, have kids that eat escargot, and go to Indian restaurants for lunch, but use curry?  Not so much.   Country Captain was my attempt to introduce my kids to something with curry in it.  They liked Greek Chicken, so I was hopeful this will go as well.

I should mention, the rise of this dish has an amazing backstory.   (See the whole article here) There was a famous socialite in Columbus, Georgia by the name of Mary Bullard.  Mrs. Bullard, legend has it, wanted to serve her guest, President Franklin D. Roosevelt, a spicy southern meal.  After perusing many cookbooks, she came across Country Captain and with few alterations, served it to the President.  He promptly took her cook to the White House to become the head chef!  If that wasn’t enough, General George Patton, on his way to Fort Benning, begged Mrs. Bullard for her Country Captain.   Roosevelt and Patton are thought to have spread the word about  Country Captain and gave the dish great notoriety.  James Beard called Country Captain second only to Southern Fried Chicken as the most important inherited chicken dish our country has.  Frankly, had I not seen Country Captain in Mr. Beard’s cookbook, American Cookery,  I wouldn’t have known it existed.  He dedicated 3 recipes and 2 pages to it.

This is a sublime dish, combining chicken, tomatoes, curry, onions, peppers, currants and almonds.  If you have time for this dish, most of the cooking occurs in the oven, which for me suits my weeknight meal schedule.  While it’s in the oven, I can check homework, clean up, etc.

You’ll understand why Patton was desperate to get a hold of this dish before he departed for Europe. It’s truly, truly good. I didn’t change too much about the recipe, except updated the format and used cauliflower “rice” for real rice and used chicken thighs, skin on.  Otherwise this is Mary Bullard’s recipe she served to President Roosevelt and General Patton.  How cool is that?!?  As a bonus, it got two thumbs up from the kids!

Country Captain
Serves 6-8
Prep Time: 15 minutes
Cook Time: 75 minutes

1 cup oil, lard, or any other frying oil
6-8 chicken thighs
1 cup flour
1 teaspoon salt
1 teaspoon black pepper
2 onions, chopped fine
2 green peppers, chopped fine
1 small clove of garlic, minced
1 teaspoon of salt
1/2 teaspoon of white pepper
2 teaspoons of curry powder
1/2 teaspoon of thyme
1 28 ounce can of crushed tomatoes
1 15 ounce can of crushed tomatoes (or however you can get to about 40 ounces)
1/2 tablespoon of Chopped Parsley
3 tablespoons dried currants (or raisins)
1/4 pound blanched, roasted almonds
black pepper, to taste

Heat oven to 350 degrees.

Heat oil over medium high heat in a frying pan. (Going forward, I would use a dutch oven, that way there’s less mess to clean up. But staying true to the recipe, I used two pans.)

Pat chicken dry. Combine flour, salt and pepper. Coat chicken in flour mixture. Fry chicken in heated oil, in batches, until each side is golden brown. Remove chicken from pan and set aside and keep warm. According to Mrs. Bullard, keeping the chicken warm is the secret to the success of the dish!

Lower the cooking temperature to the oil to medium low.  While stirring constantly, add onions , green peppers and garlic and cook slowly until the onions are translucent. Add salt, white pepper and curry powder, and cook for 1-2 minutes. At this point, Mrs. Bullard advises to taste the mixture and adjust the seasonings to taste. (Personally, I’d wait for the addition of the rest of the ingredients). Add the tomatoes, parsley and thyme, stir to combine and bring to a slight simmer.

Place chicken into roaster (I used a dutch oven), cover with tomato mixture. If the tomato mixture doesn’t adequately cover the chicken, Mrs. Bullard suggests rinsing out the frying pan and adding it to the roaster. Place the lid on the roaster and place in a 350 degree oven for about 45 minutes.

Place chicken over rice or, as I did, cauliflower “rice”. Add currents to the sauce and pour over chicken. Garnish with almonds and additional parsley.  Serve with mango chutney, if desired.

OLYMPUS DIGITAL CAMERA

OLYMPUS DIGITAL CAMERA

OLYMPUS DIGITAL CAMERA

OLYMPUS DIGITAL CAMERA

OLYMPUS DIGITAL CAMERA

OLYMPUS DIGITAL CAMERA

//

Lemon Chicken

Rao's Lemon Chicken- Incredibly easy weeknight meal

I’m not much of a lemon fan in food.  In drinks, sure.  Food?  Eh.  Don’t like Lemon squares, bars or pies.  My desserts should be sweet, not tangy.  Don’t like citrus in my salads.  About the only place where it’s really ok is squirted on seafood or part of guacamole.   Maybe as a flavor enhancer, but certainly not a main flavor.

So, why do lemon chicken?  One of my favorite cookbooks is Rao’s Cookbook:  Over 100 Years of Italian Home Cooking.  The recipes are amazingly simple and very good.  If you have never heard of Rao’s, it’s a much sought after traditional Italian restaurant in New York City.  Reservations are very prized.   But, if you follow the cookbook, you can easily recreate the experience at home.  One of their signature dishes is lemon chicken.   I decided to be brave and try it.  I’ve tried their lasagna and marinara to much success.  I had really high hopes for this.

First, some background.  Broiling chicken is a bit of an art, but perfect for a quick weeknight dinner.  It’s like indoor grilling.  All of the heat is high and coming from a single point.  On the downside, broiling is sort of messy and can cause the fire alarm to go off, many, many times.  You also have to flip things over, to ensure meat reaches a safe temperature.  Easier said than done.  Also, the type of chicken you use is critical.  There are actually chickens labeled “broiler chickens” — you want those.  Roasting chickens are too big for this dish.  Additionally, you have to keep the oven door a bit ajar when broiling, or your oven will cycle off because “temperature” has been reached.

The next bit of difference is how you prepare your chicken.  If you get a whole one, you need to “spatchcock” it.  “Spatchcock” is a fancy way of saying you need to cut the vertebrae out and open the chicken up to allow it to cook evenly.  Flip the chicken over (breast side down), and cut down both sides of the spine and open the chicken up so that it lies flat. I can sense some of you backing away now. It’s not hard, honest. The chicken bones you have to cut through are soft and more cartilage than anything else. You can seriously use good scissors with great success. If you would like to see a very good illustration of the technique:

http://www.marthastewart.com/891288/how-spatchcock-chicken/@center/897845/chicken-recipes#210562

I couldn’t really find my poultry shears and sort of did it with a bread knife.    I’m not one to pass along bad technique, so I will spare you the hideous techniques I used to get my chicken to look like:

Spatchcock Chicken

Note the bread knife handle on the side.

Good times, no?  Anyway, the rest is rather humdrum.  Broil on one side, flip, broil on the other, quarter the chicken, cover with sauce and bake for another 3 minutes.  One the whole, very impressive meal for a weeknight!

As far as the history of this dish goes, I believe it must be a mid-20th century invention, as lemons weren’t really commercially grown in Florida too much before the 1950s.  I found no mention of Lemon Chicken (or it’s Italian version Pollo al limone) in any of the historical (late 19th century) cookbooks I usually peruse.  Additionally,  this particular version uses an obscene about of lemon juice, 2 cups.  I squeezed 6 of them, and it wasn’t a cup. Most of the classic recipes were very conservative with the high dollar items, so this seems like more of a dish that would evolve later in our food timeline.

As mentioned above, this recipe is inspired by Rao’s Lemon Chicken Recipe I made some changes, however, as I didn’t think the original recipe had enough, I don’t know, something. This version was a bit more flavorful, in my estimation.

Lemon Chicken
Serves 4
Prep Time: 15 minutes
Cook Time: 30-45

Ingredients

CHICKEN:
1 (4 pound) broiling chicken, or 2 smaller ones, spatchcocked
1/2 cup olive oil
1 teaspoon salt
1 teaspoon ground black pepper
1/2 teaspoon granulated garlic
1 large onion, large dice
4 cloves of garlic, smashed
3 sprigs of rosemary
1 lemon, sliced

LEMON SAUCE:
1 cup fresh lemon juice (about 8 lemons)
2 tablespoons of lemon zest
1 cup olive oil
1 tablespoon red wine vinegar
1 1/2 teaspoons minced garlic
1/2 teaspoon dried oregano
Salt and pepper, to taste
Directions

SAUCE:
Whisk together juice, zest, oil, vinegar, garlic, oregano, and salt and pepper. Cover and refrigerate until ready to use. Whisk or shake vigorously before using.

CHICKEN:

Preheat broiler at least 15 minutes prior to using.

Place chicken on a cutting board and combine the olive oil, salt, pepper and granulated garlic. Rub olive oil mixture all over the poultry. Place onions, garlic, rosemary and lemons on the bottom of a baking pan (I used a cast iron skillet) and place chicken on top.
Broil chicken, turning once, for about 30 minutes or until skin is golden-brown and juices run clear when bird is pierced with a fork. Remove chicken from broiler, leaving broiler on. Using a very sharp knife, cut chicken into it’s typical serving pieces (leg, thigh, wings, and breast portions). Place chicken on a baking sheet (that will fit in the broiler) with sides. Pour half of the lemon sauce over the chicken and toss to coat well. If necessary, do this in 2 batches. Return chicken to broiler and broil for 3 minutes. Turn each piece and broil for an additional minute. Remove from broiler and portion the chicken onto each of 6 warm serving plates. While chicken is baking, slightly warm the remaining lemon sauce. Pour an equal amount of sauce over each chicken piece and serve with lots of crusty bread to absorb the sauce.

OLYMPUS DIGITAL CAMERA

OLYMPUS DIGITAL CAMERA

OLYMPUS DIGITAL CAMERA

Chicken Cacciatore

Lovely Italian Chicken and Tomato Dish

I was watching a BBC Program called “Pedigree Dogs Exposed” the other day.  As the new owner of such a dog, I was really interested in the subject matter.  The general gist is that line breeding and breeding for looks over purpose has substantial downsides.   Namely, some dog breeds are grossly exaggerated from their origins and/or riddled with significant health problems.  This particular show by the BBC inspired Crufts to implement vet checks on all the breed winners.  If the winners couldn’t pass the vet checks, they were unable to compete in the finals.   Many dogs were eliminated from this prestigious show, causing quite a stir in the dog world.

How does this show relate to my food blog?  As I’m watching this show as they compare what dogs used to look like versus what they look like now (and it’s not a favorable comparison), I feel some food has become about the same way.   Overly complicated and fussy, and not necessarily better.

Take this recipe for Chicken alla Cacciatore from The Italian Cookbook by Maria Gentile (1919):

Chop one large onion and keep it for more than half an hour in cold water, then dry it and brown it aside. Cut up a chicken, sprinkle the pieces with flour, salt and pepper and saute in the fat which remains in the frying pan. When the chicken is brown add one pint fresh or canned tomatoes and half a dozen sweet green peppers and put back the onion.  When the gravy is thick enough add hot water to prevent the burning of the vegetables. Cover the pan tightly and simmer until the chicken is very tender. This is an excellent way to cook tough chickens. Fowls which have been boiled may be cooked in this way, but of course young and tender chickens will have the finer flavor.

Let’s compare this relatively easy recipe with one from the Food Network’s Tyler Florence:

Ingredients
6 red bell peppers
Extra-virgin olive oil
Sea salt and freshly ground black pepper
1 1/2 cups all-purpose flour
2 tablespoons garlic powder
1 tablespoon dried oregano
1 egg
2 cups milk
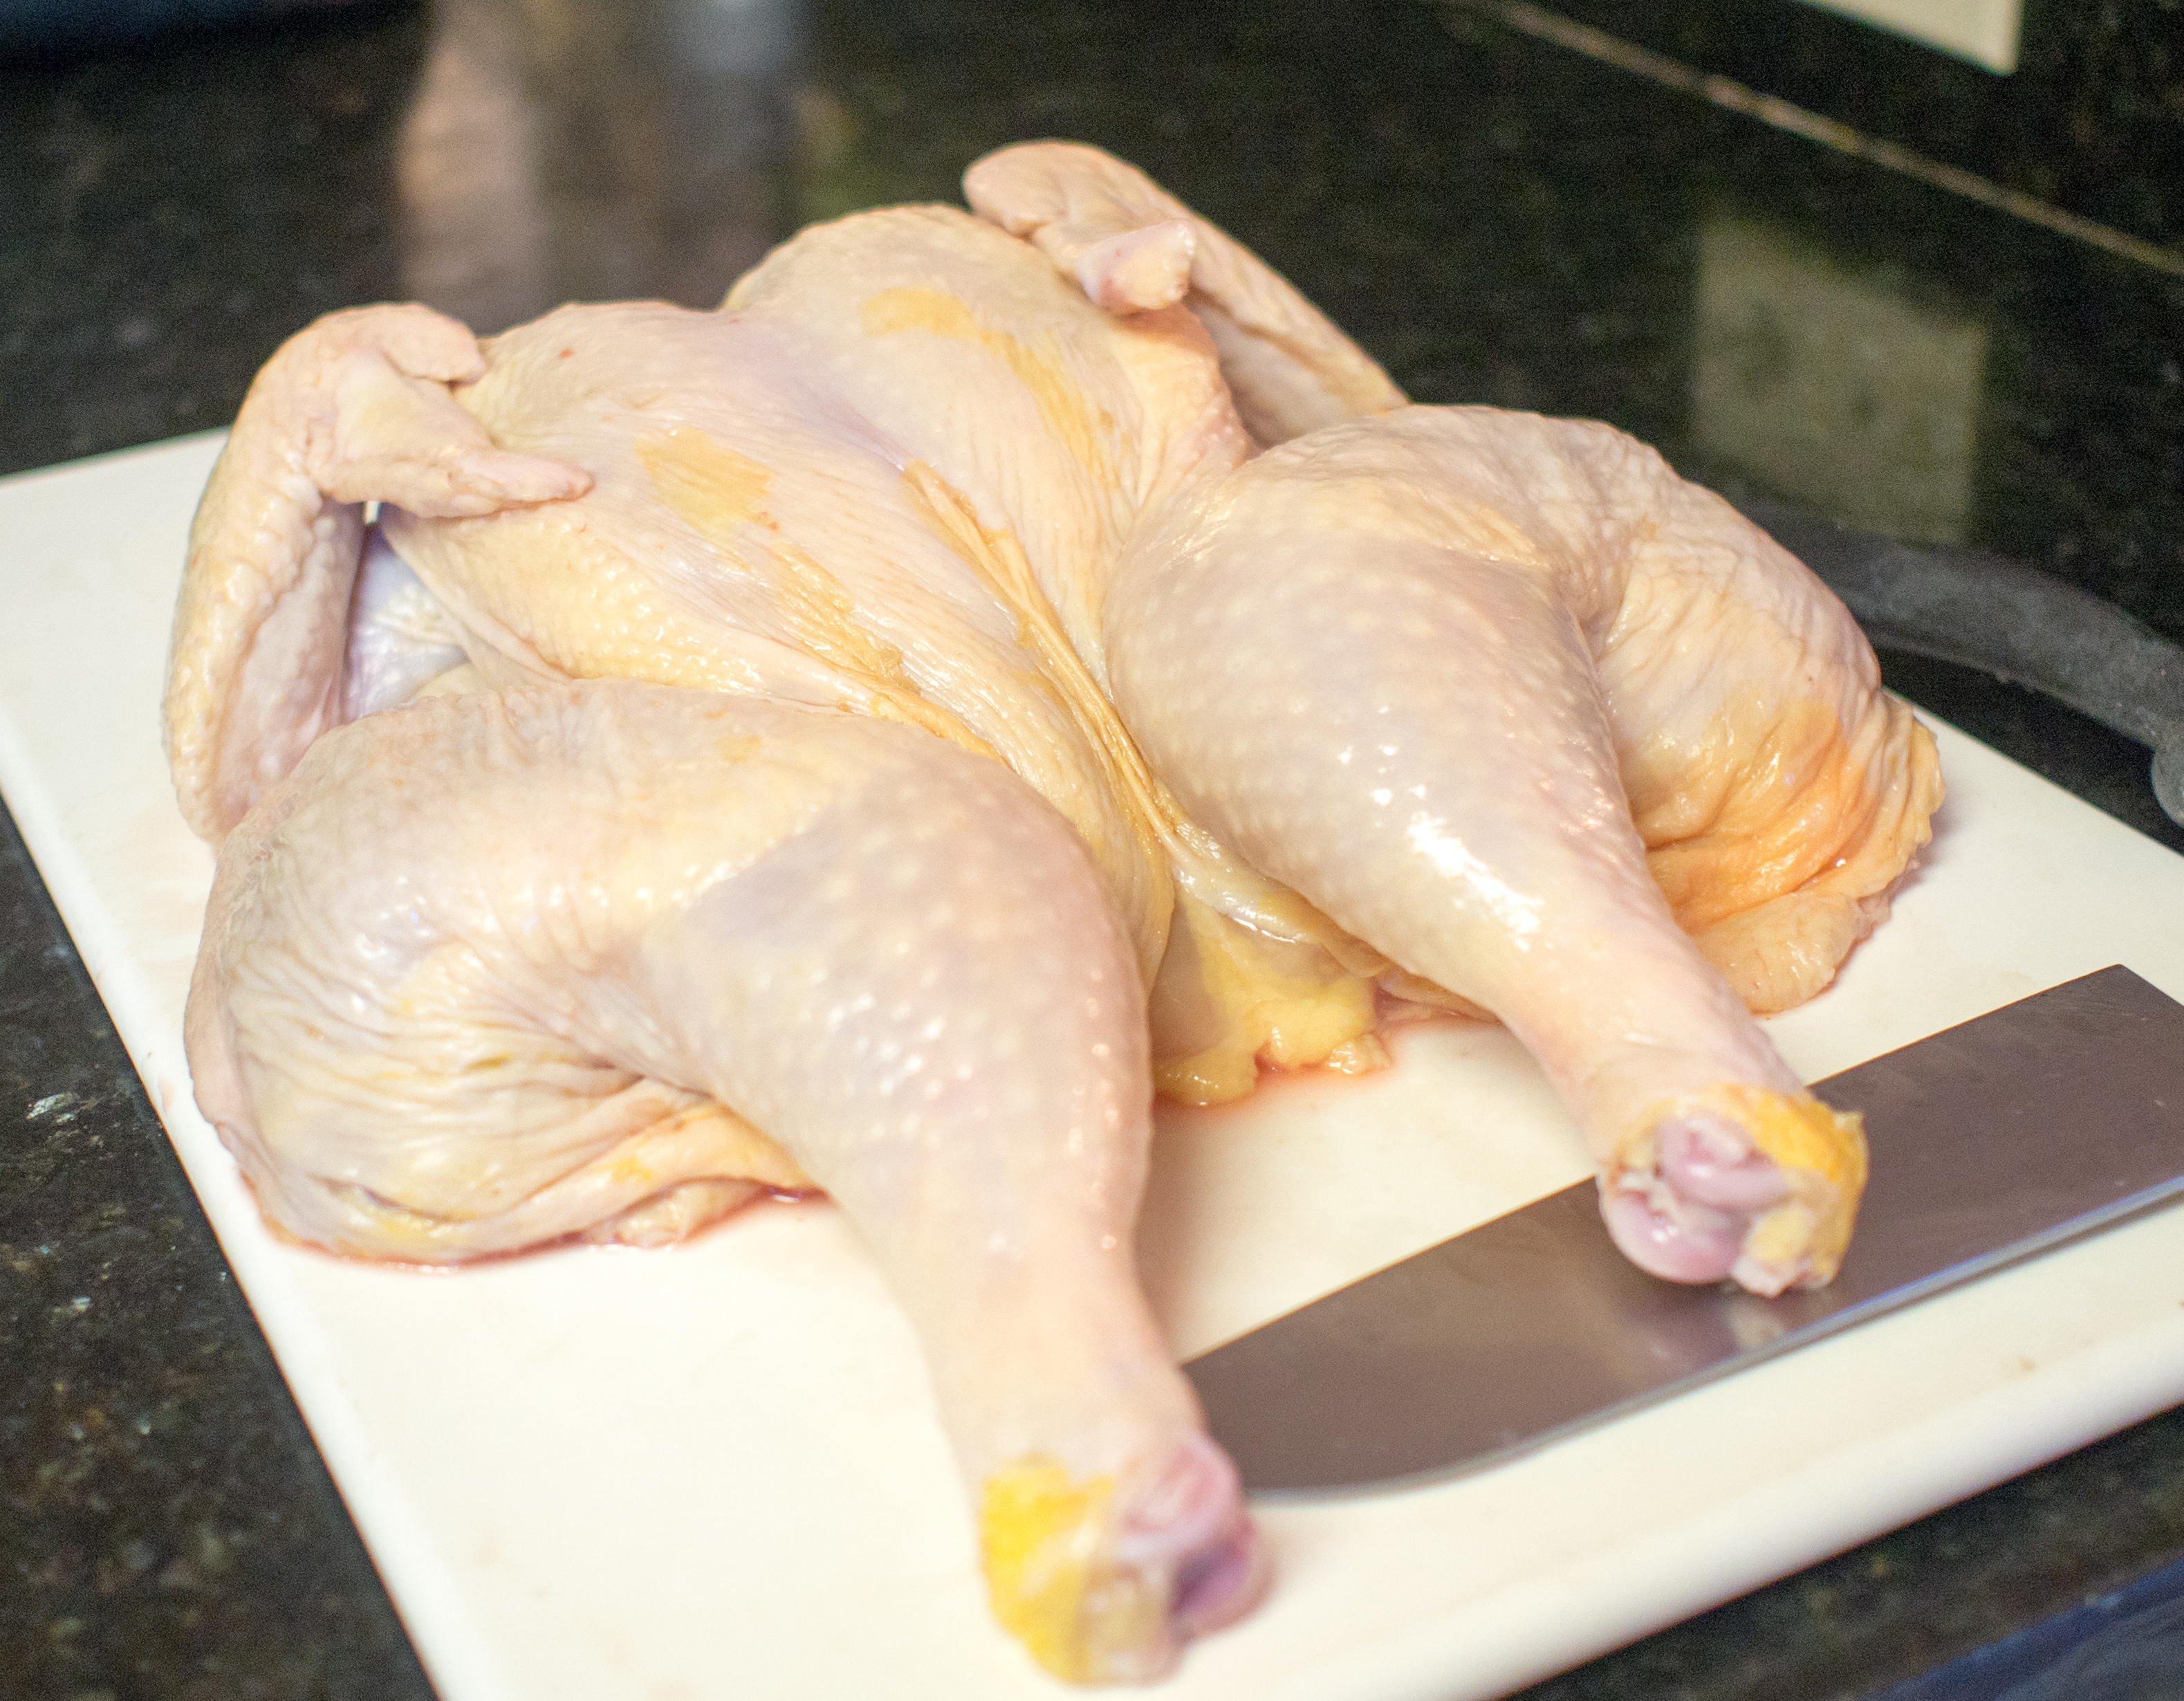
1 (3 1/2-pound) whole chicken, cut into 8 pieces
6 garlic cloves, halved lengthwise
1 onion, sliced thin
2 ripe tomatoes, coarsely chopped
1/2 lemon, sliced in paper-thin circles
3 anchovy fillets
1 tablespoon capers
1 teaspoon red pepper flakes
1/2 bunch fresh basil, hand-torn (1/4 bunch to flavor the base, 1/4 bunch to finish the dish)
1 cup dry white wine

Directions

Start by preparing the peppers because they will take the longest. Preheat the broiler. Pull out the cores of the red peppers; then halve them lengthwise and remove the ribs and seeds. Toss the peppers with a little olive oil, salt, and pepper. Place them on a cookie sheet, skin side up, and broil for 10 minutes, until really charred and blistered. Put the peppers into a bowl, cover with plastic wrap, and steam for about 10 minutes to loosen the skins. Peel the peppers and roughly chop into chunks; set aside.

Season the flour with the garlic powder, dried oregano, and a fair amount of salt and pepper. Whisk the egg and milk together in a shallow bowl. Dredge the chicken pieces in the flour and tap off the excess. Dip each piece in the egg wash to coat and then dredge with the flour again. Place a Dutch oven over medium heat and pour in about 1/4-inch of oil. Pan-fry the chicken in batches, skin side down, until crisp, about 8 minutes. Turn the chicken over and brown the other side about 10 minutes longer. Remove the chicken to a side plate, pour out the oil, and clean out the pot.

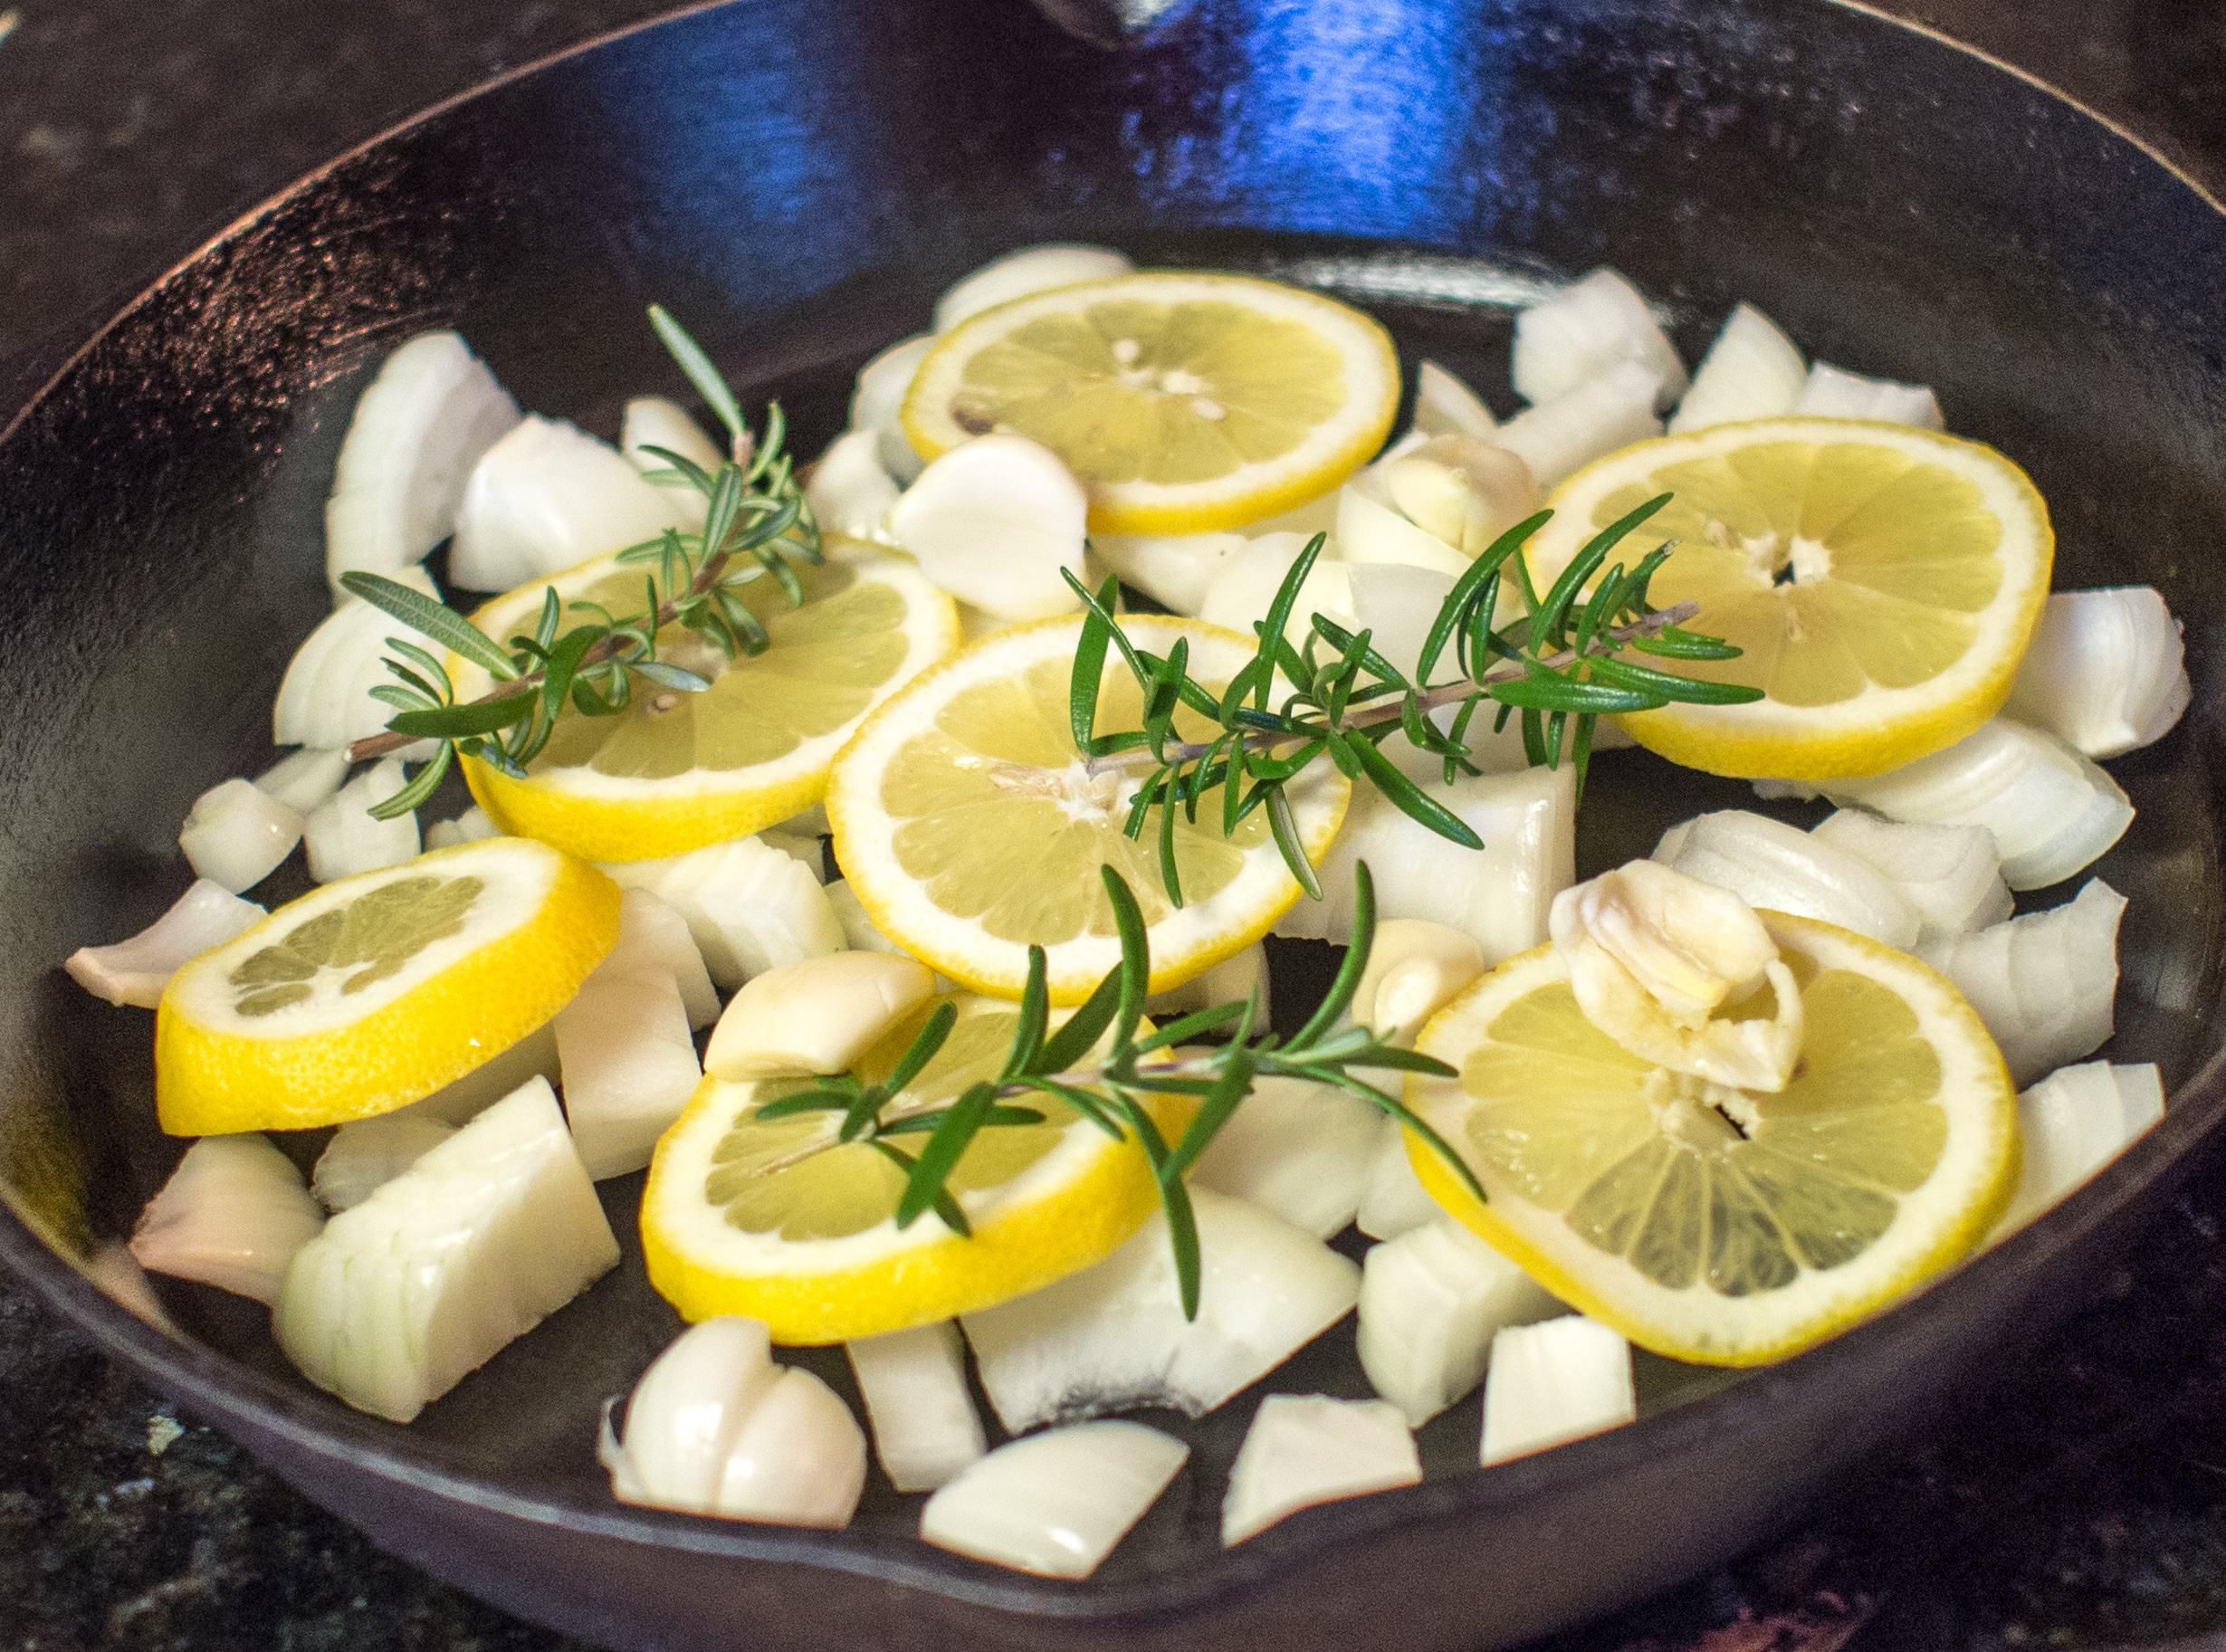
Put the pot back on the stove and coat with 1/4 cup of oil. Add the garlic, onion, tomatoes, lemon slices, anchovies, capers, red pepper flakes, half the roasted red peppers, and half the basil. Season with salt and pepper. This part of the recipe is going to be your base. What we are looking for is a fragrant vegetable pulp, so simmer for about 20 minutes, stirring often, until everything breaks down.

Add the remaining roasted peppers and the remaining basil. Tuck the chicken into the stewed peppers and pour in the wine. Turn the heat down to low, cover, and simmer for 20 minutes, until the chicken is cooked.

End.

Wow, right? In the summer, I would have no trouble coming up with the ingredients for Mrs. Gentile’s recipe. For Mr. Florence’s? Lemon, capers, white wine and anchovies aren’t something I keep around. Not only is the Florence recipe infinitely more complicated, but much more expensive. No wonder people don’t cook anymore. Honestly, you’d think you needed these things to make what was known as hunter’s chicken. You see hunters pulling out capers? Lemons? Doubtful.

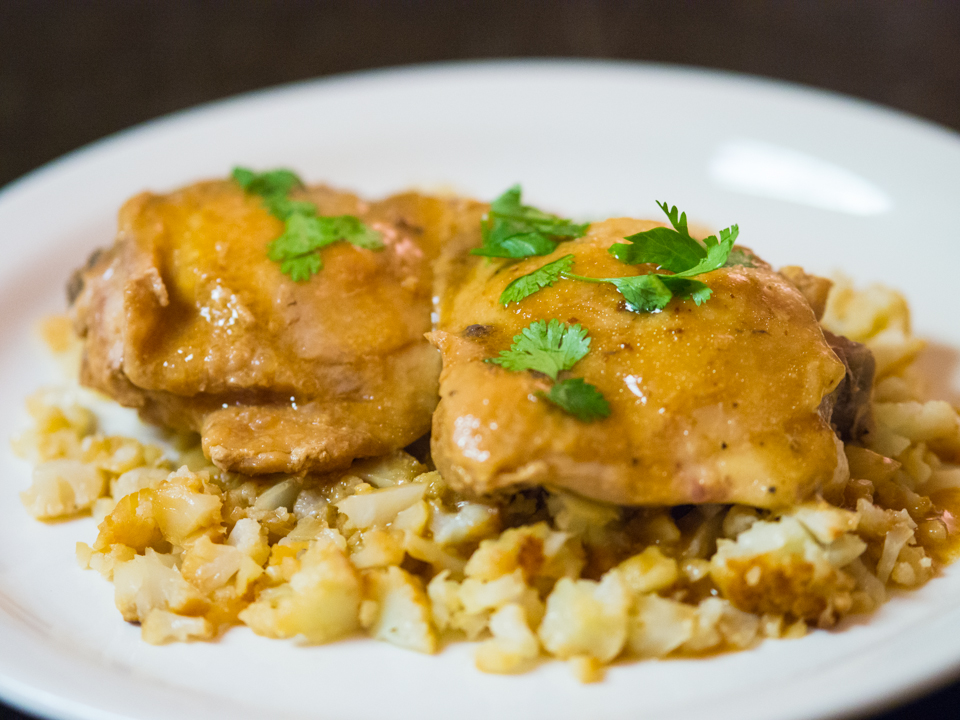
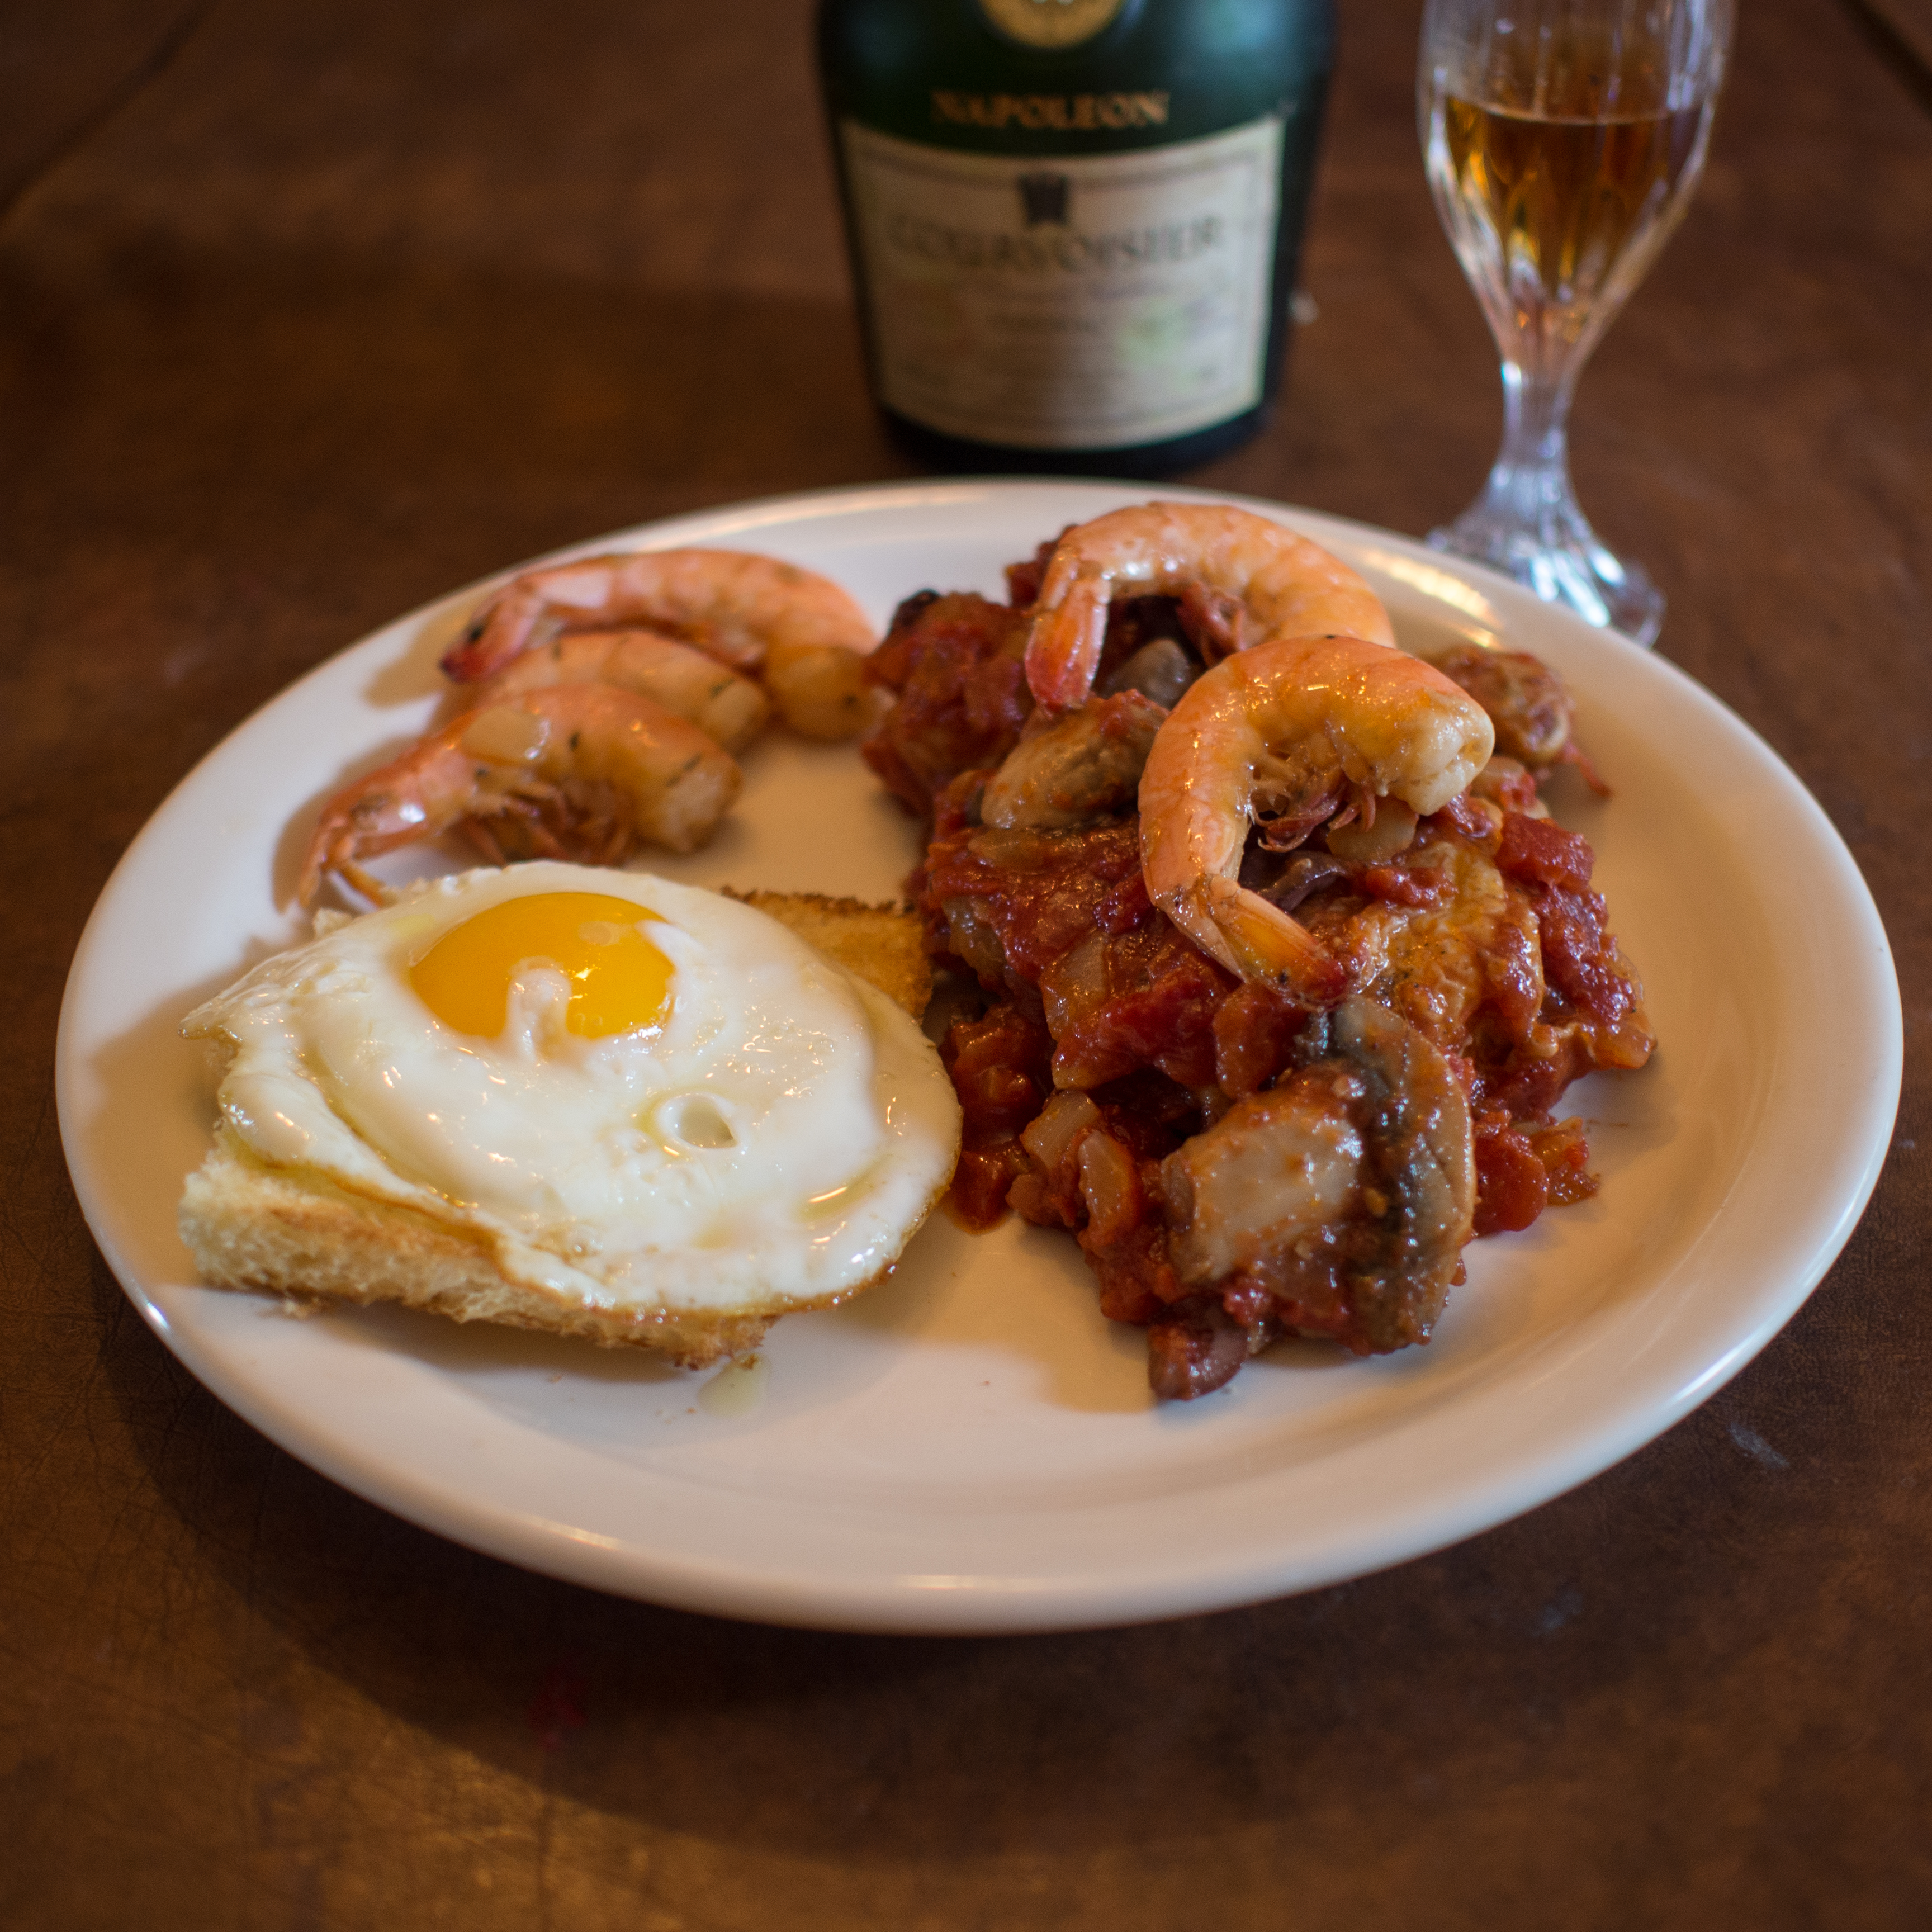
So, I modernized the format of the former recipe and it was really good and so easy to pull together.  It’s a one pot meal without a lot of mess. My husband adored it.    Summer’s bounty used to its greatest advantage.

Chicken Cacciatore
Serves 4-6
Prep Time: 20 minutes
Cook Time: 60-90 minutes

Oil (bacon drippings, lard, vegetable)
1 cup all purpose flour
1 teaspoon salt
1 teaspoon pepper
6 chicken thighs, patted dry (you can add more, I just couldn’t fit more in my pot)
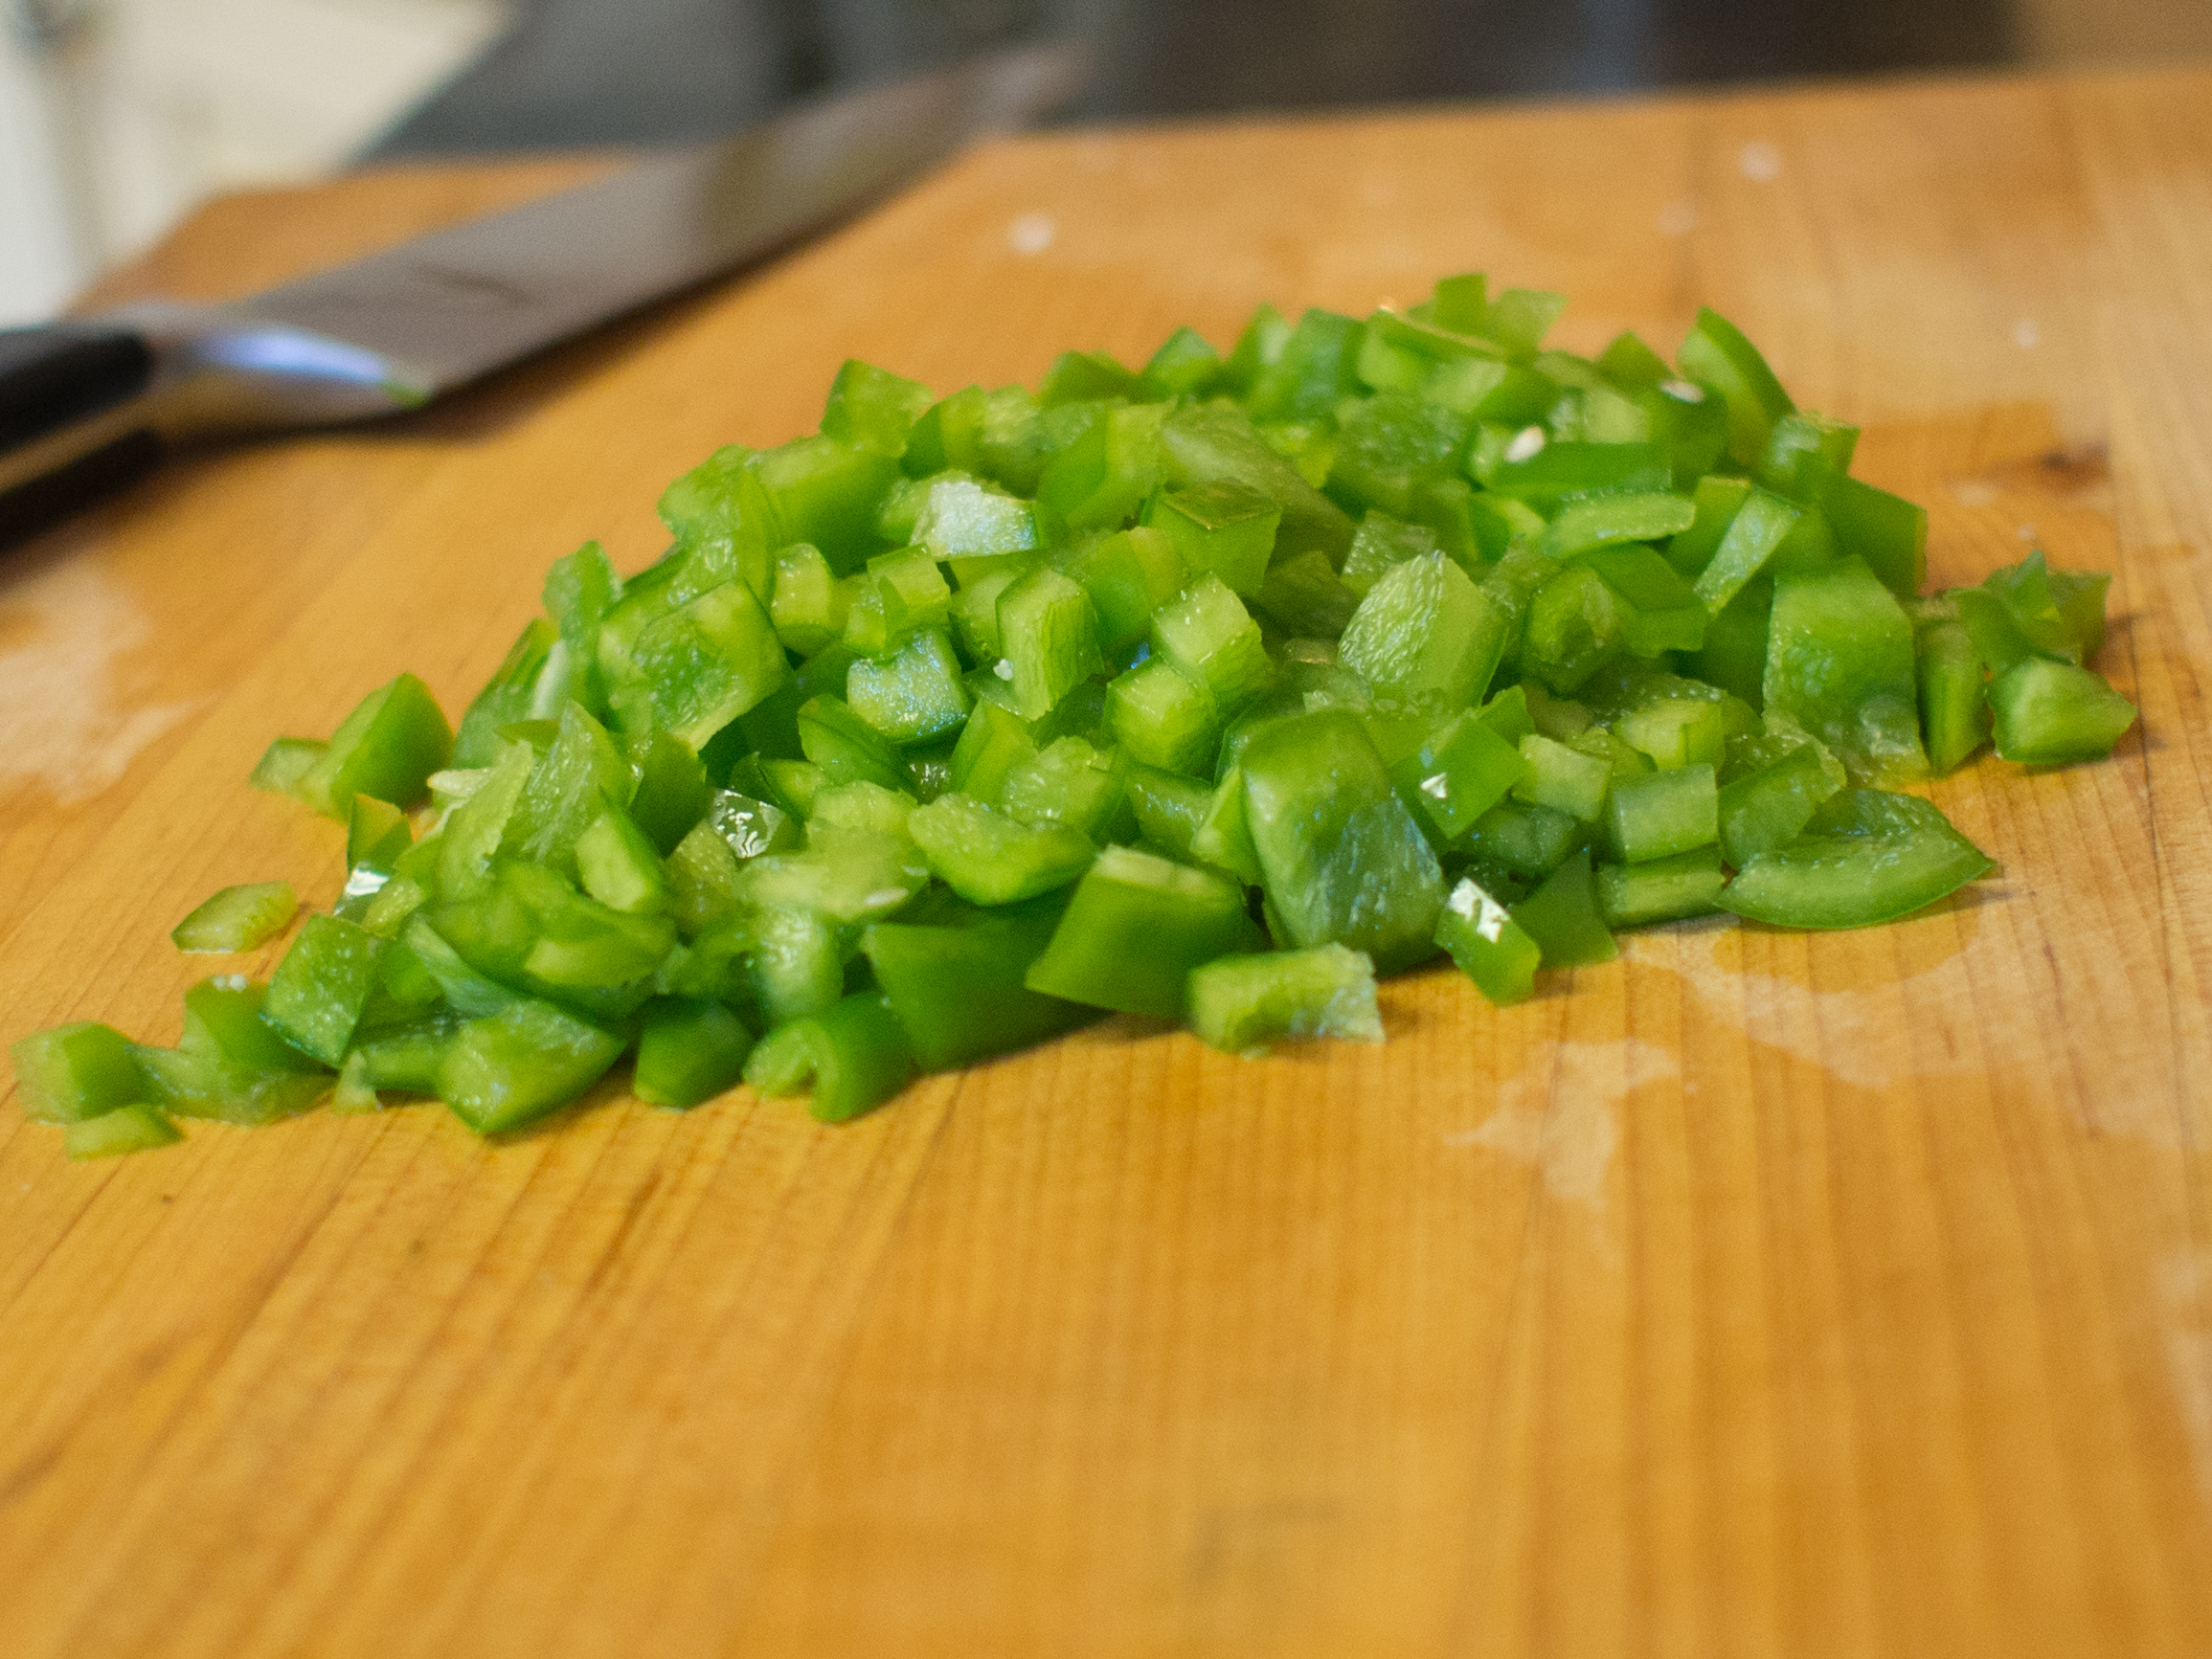
2 large green peppers, large dice
1 large onion, large dice
10 mushrooms, sliced (an 8 ounce container)
3 large cloves of garlic, minced
1 teaspoon dried oregano
1 bay leaf
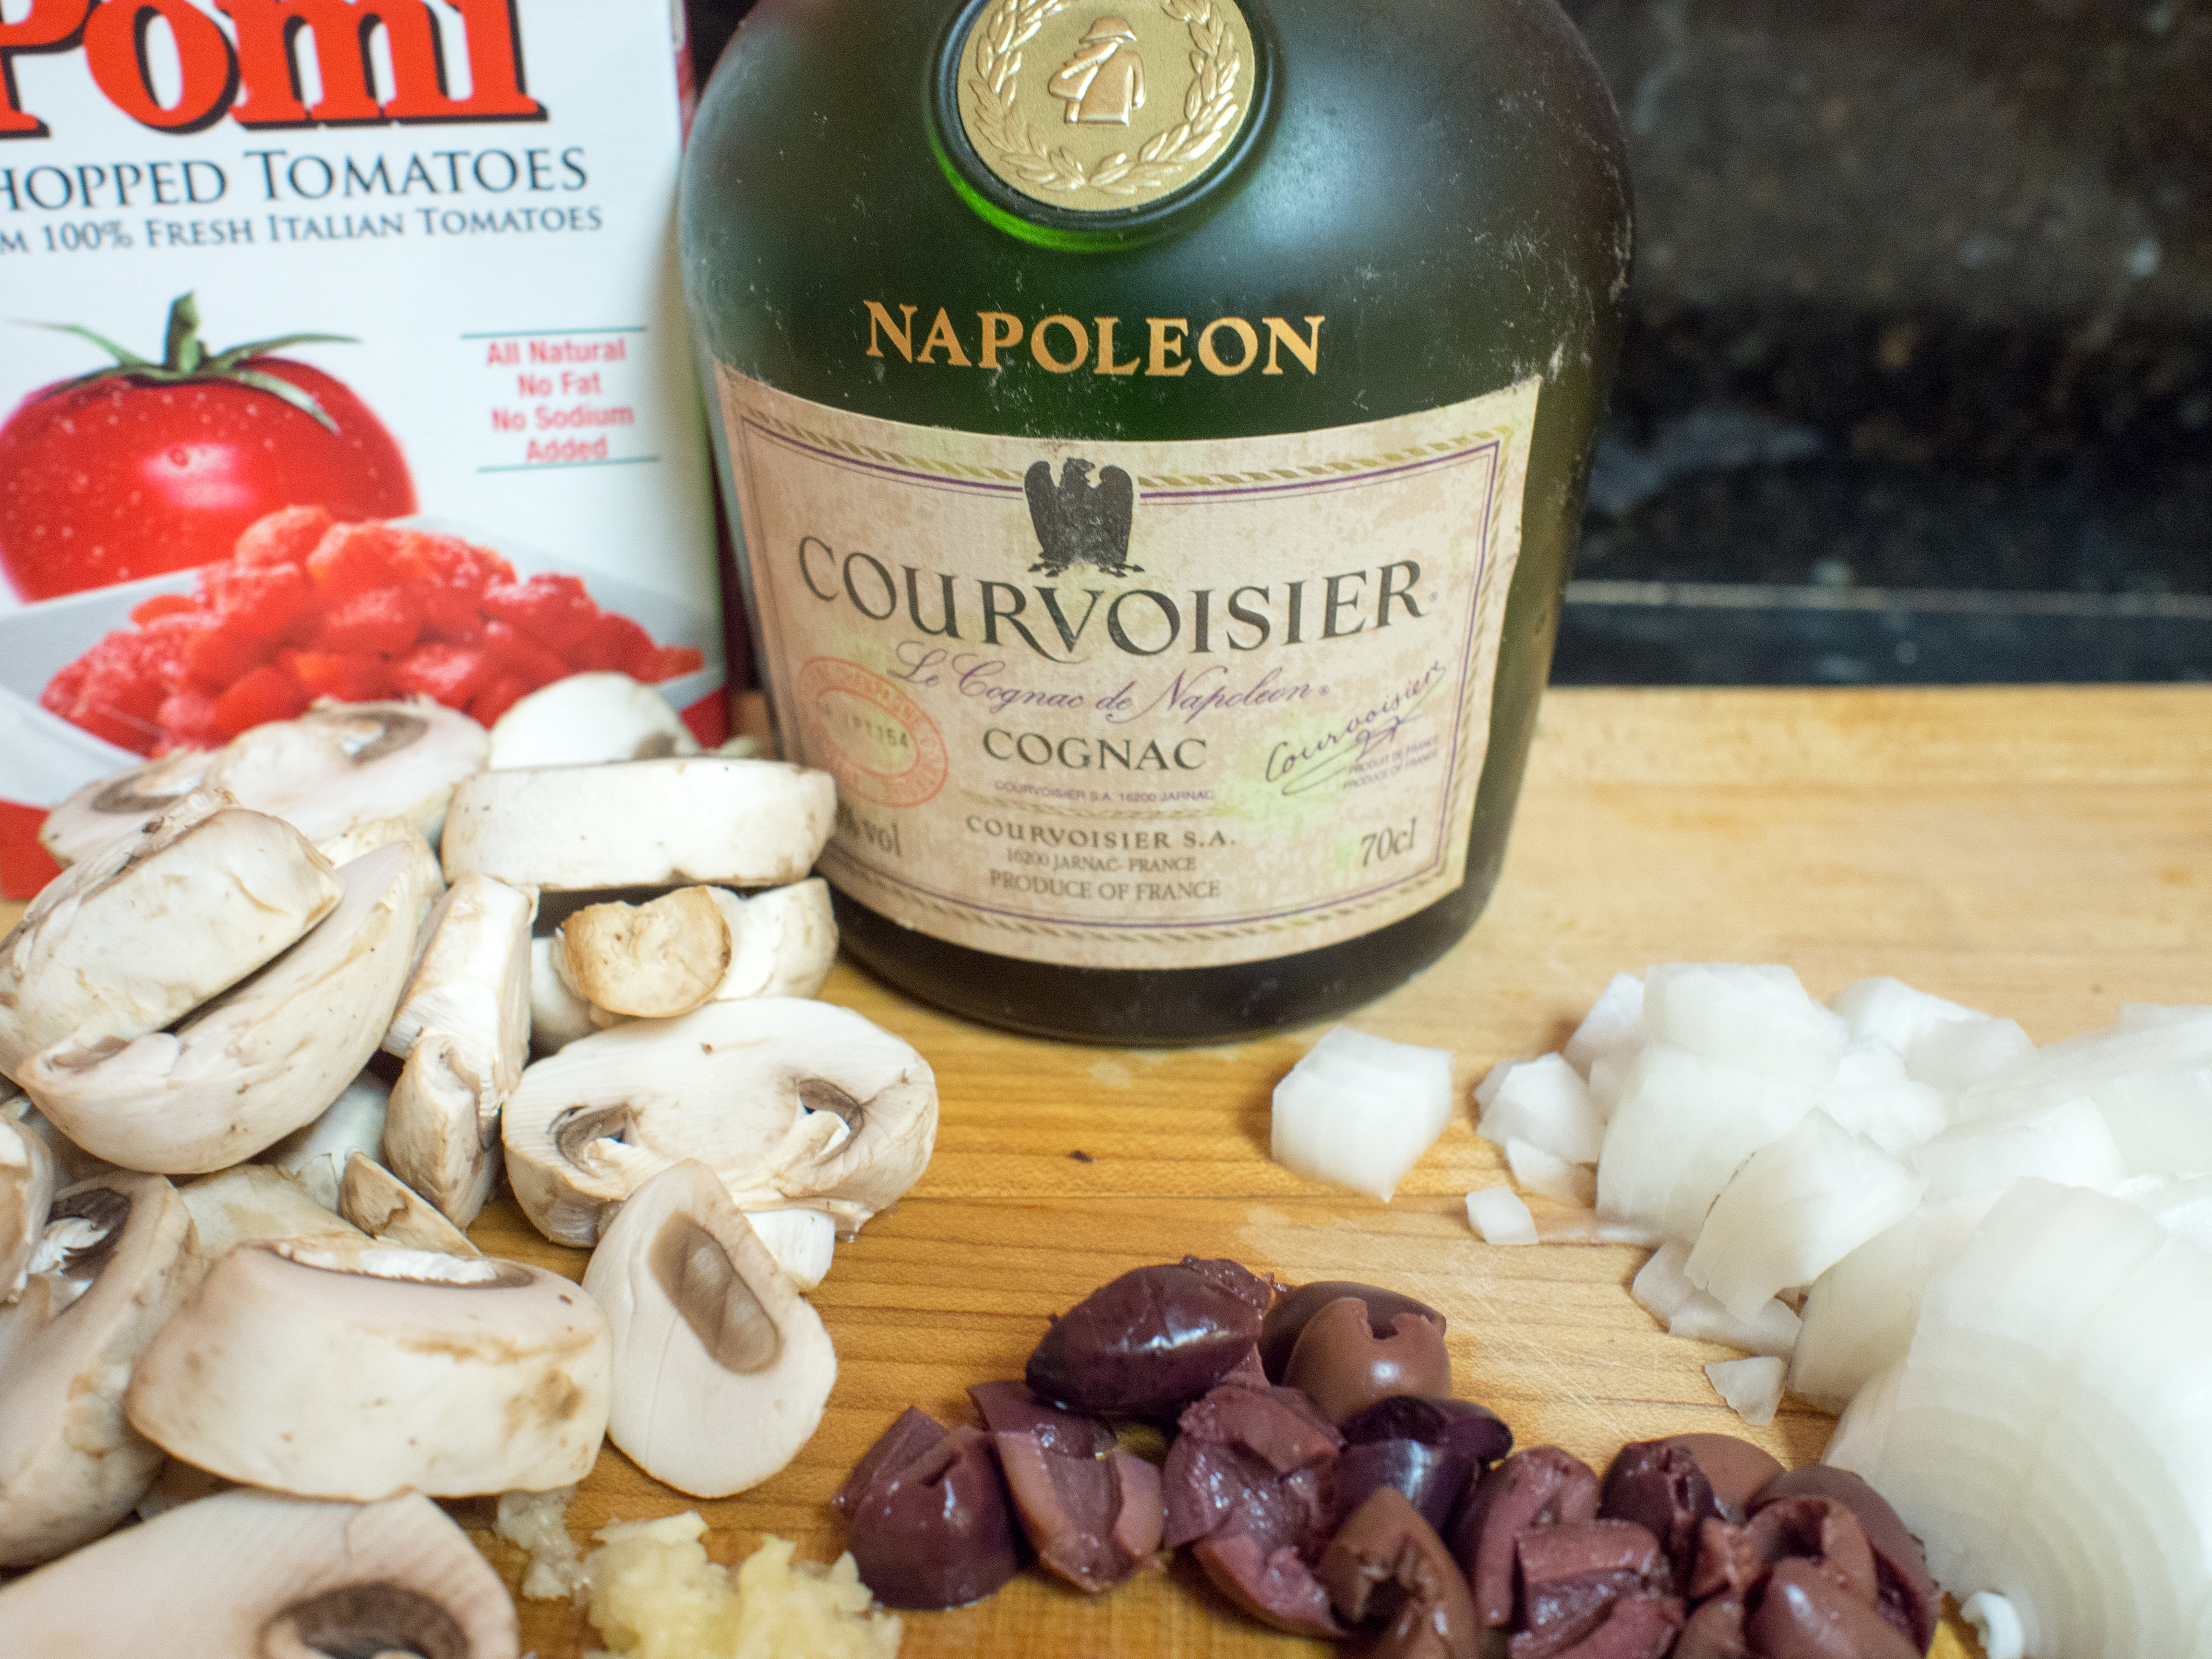
15 ounce can of diced tomatoes (may use fresh tomatoes as well, about 2 cups diced)
1/2 cup of water, white wine or chicken broth
1 teaspoon salt
1 teaspoon pepper

Preheat oven to 350 degrees Fahrenheit.

Heat oil over medium high heat in a dutch oven large enough to fit chicken comfortably. I used a 5 quart oval one.

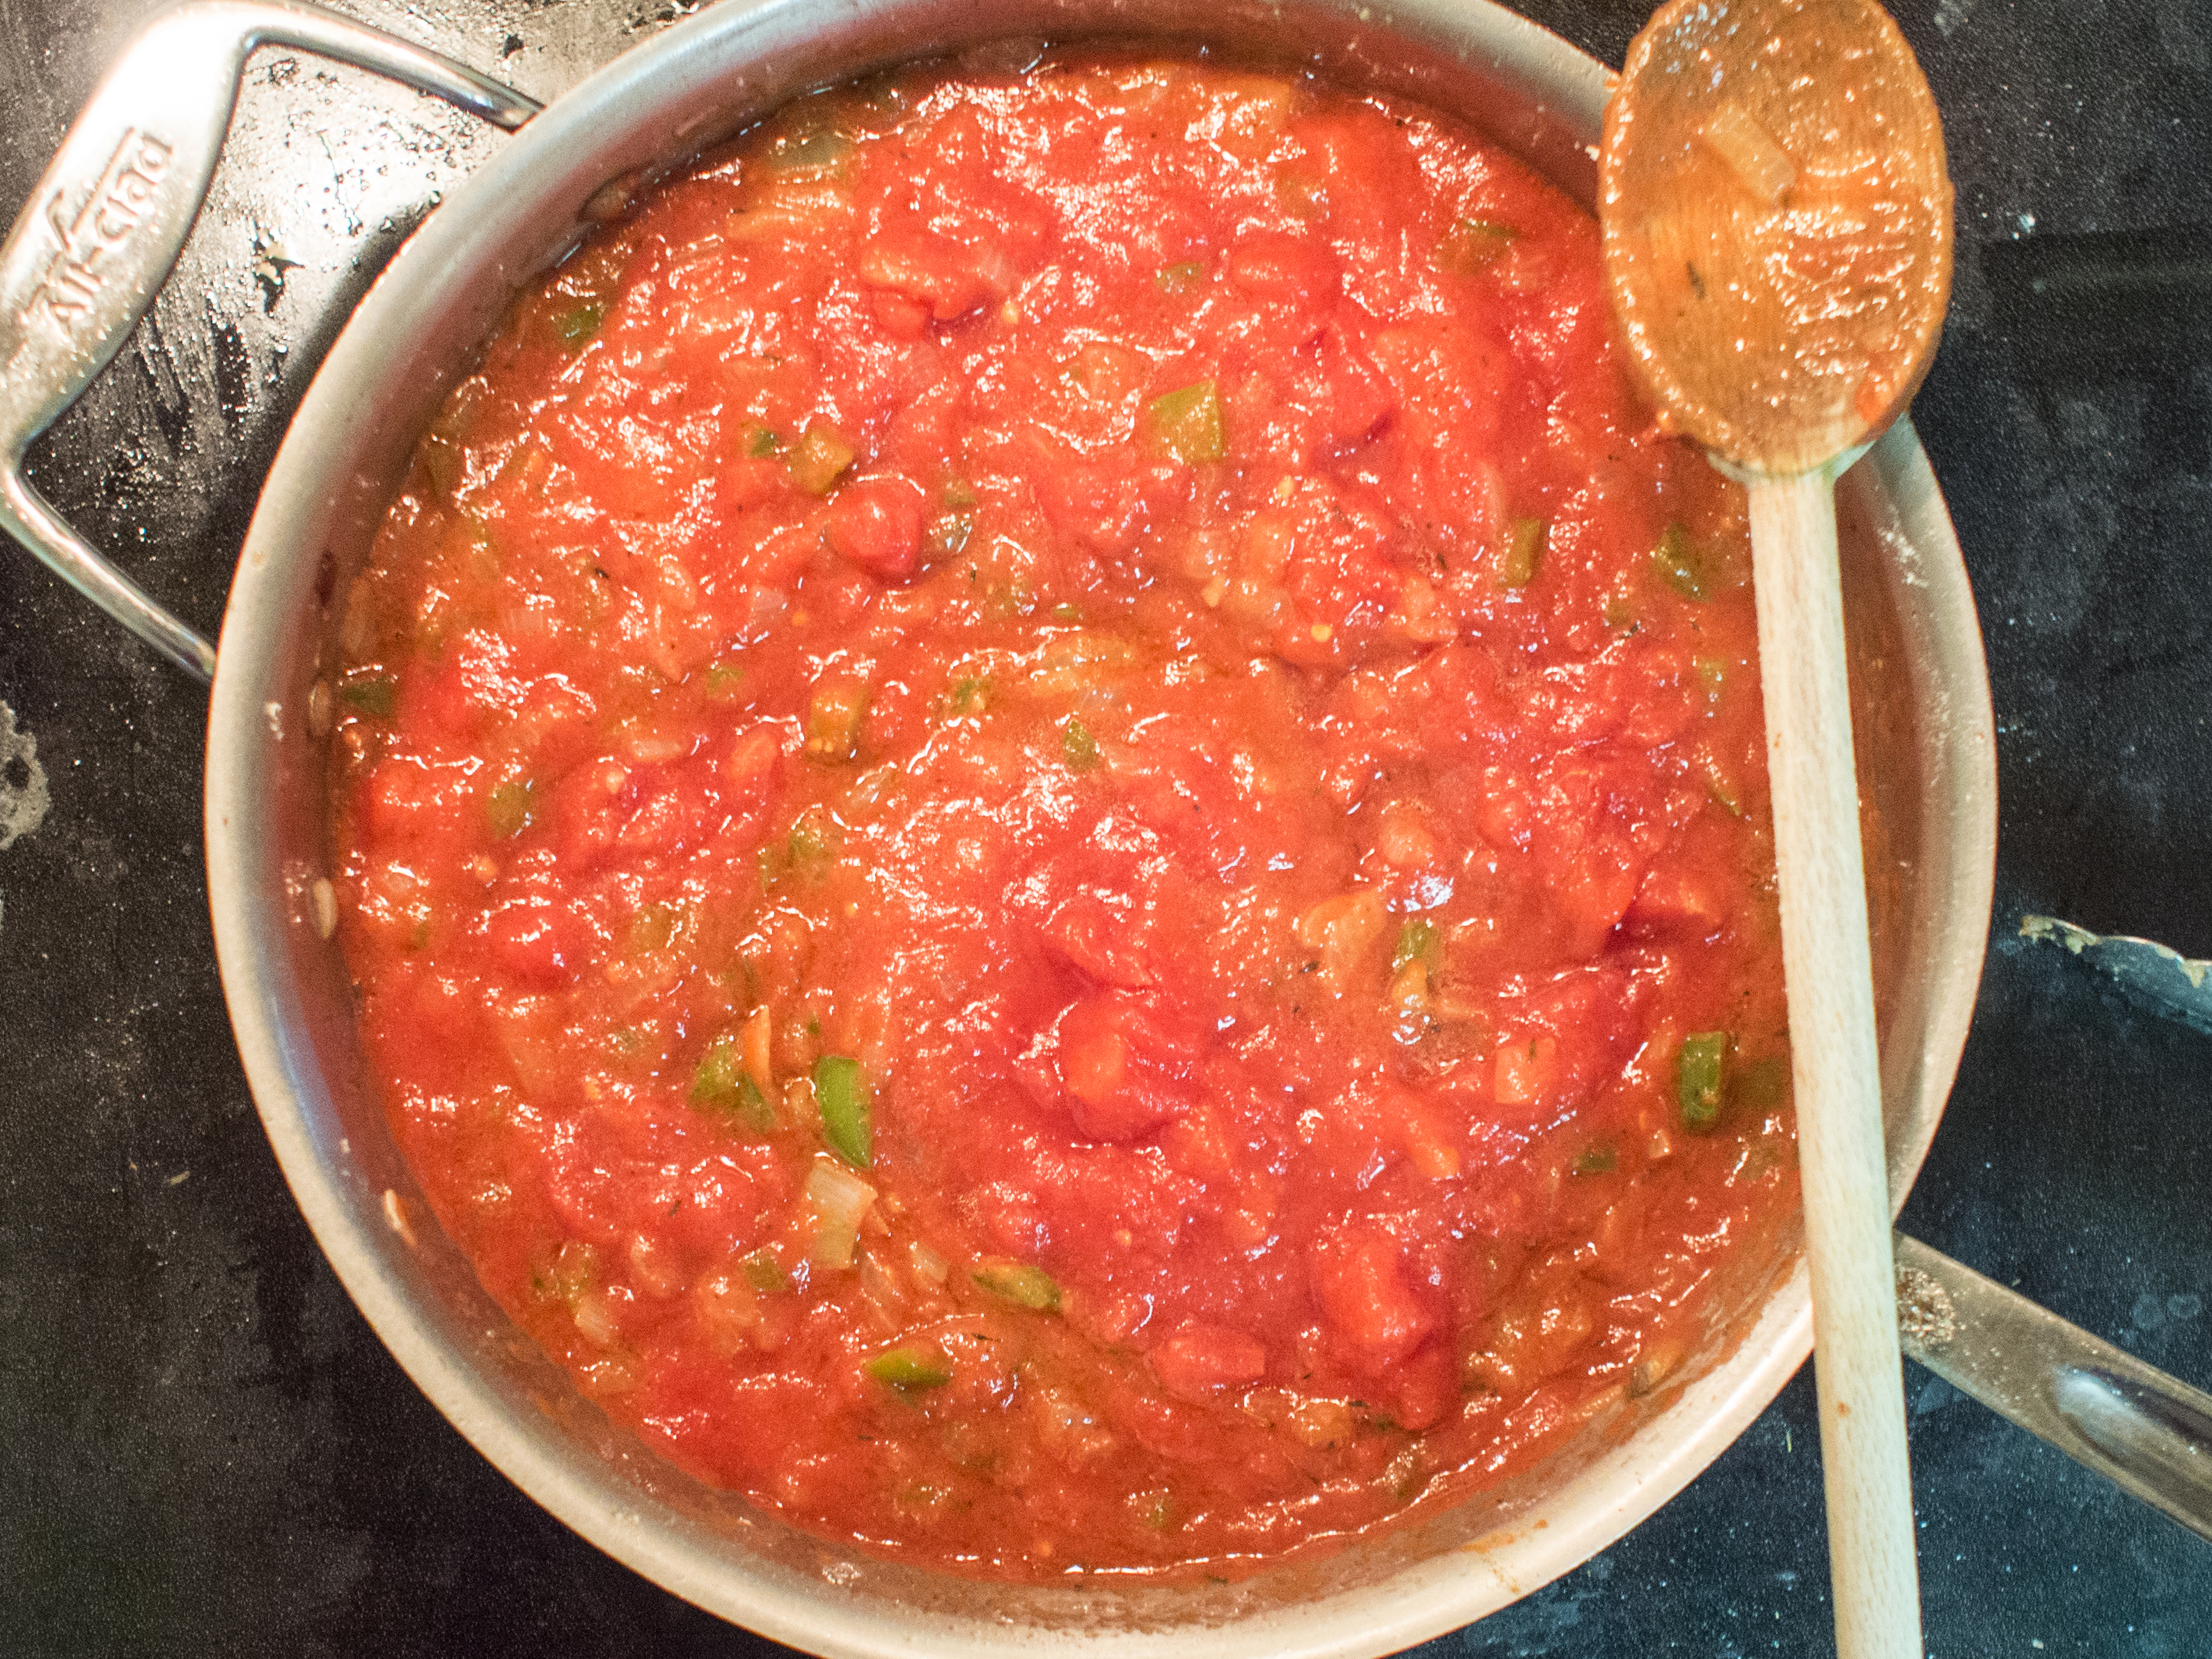
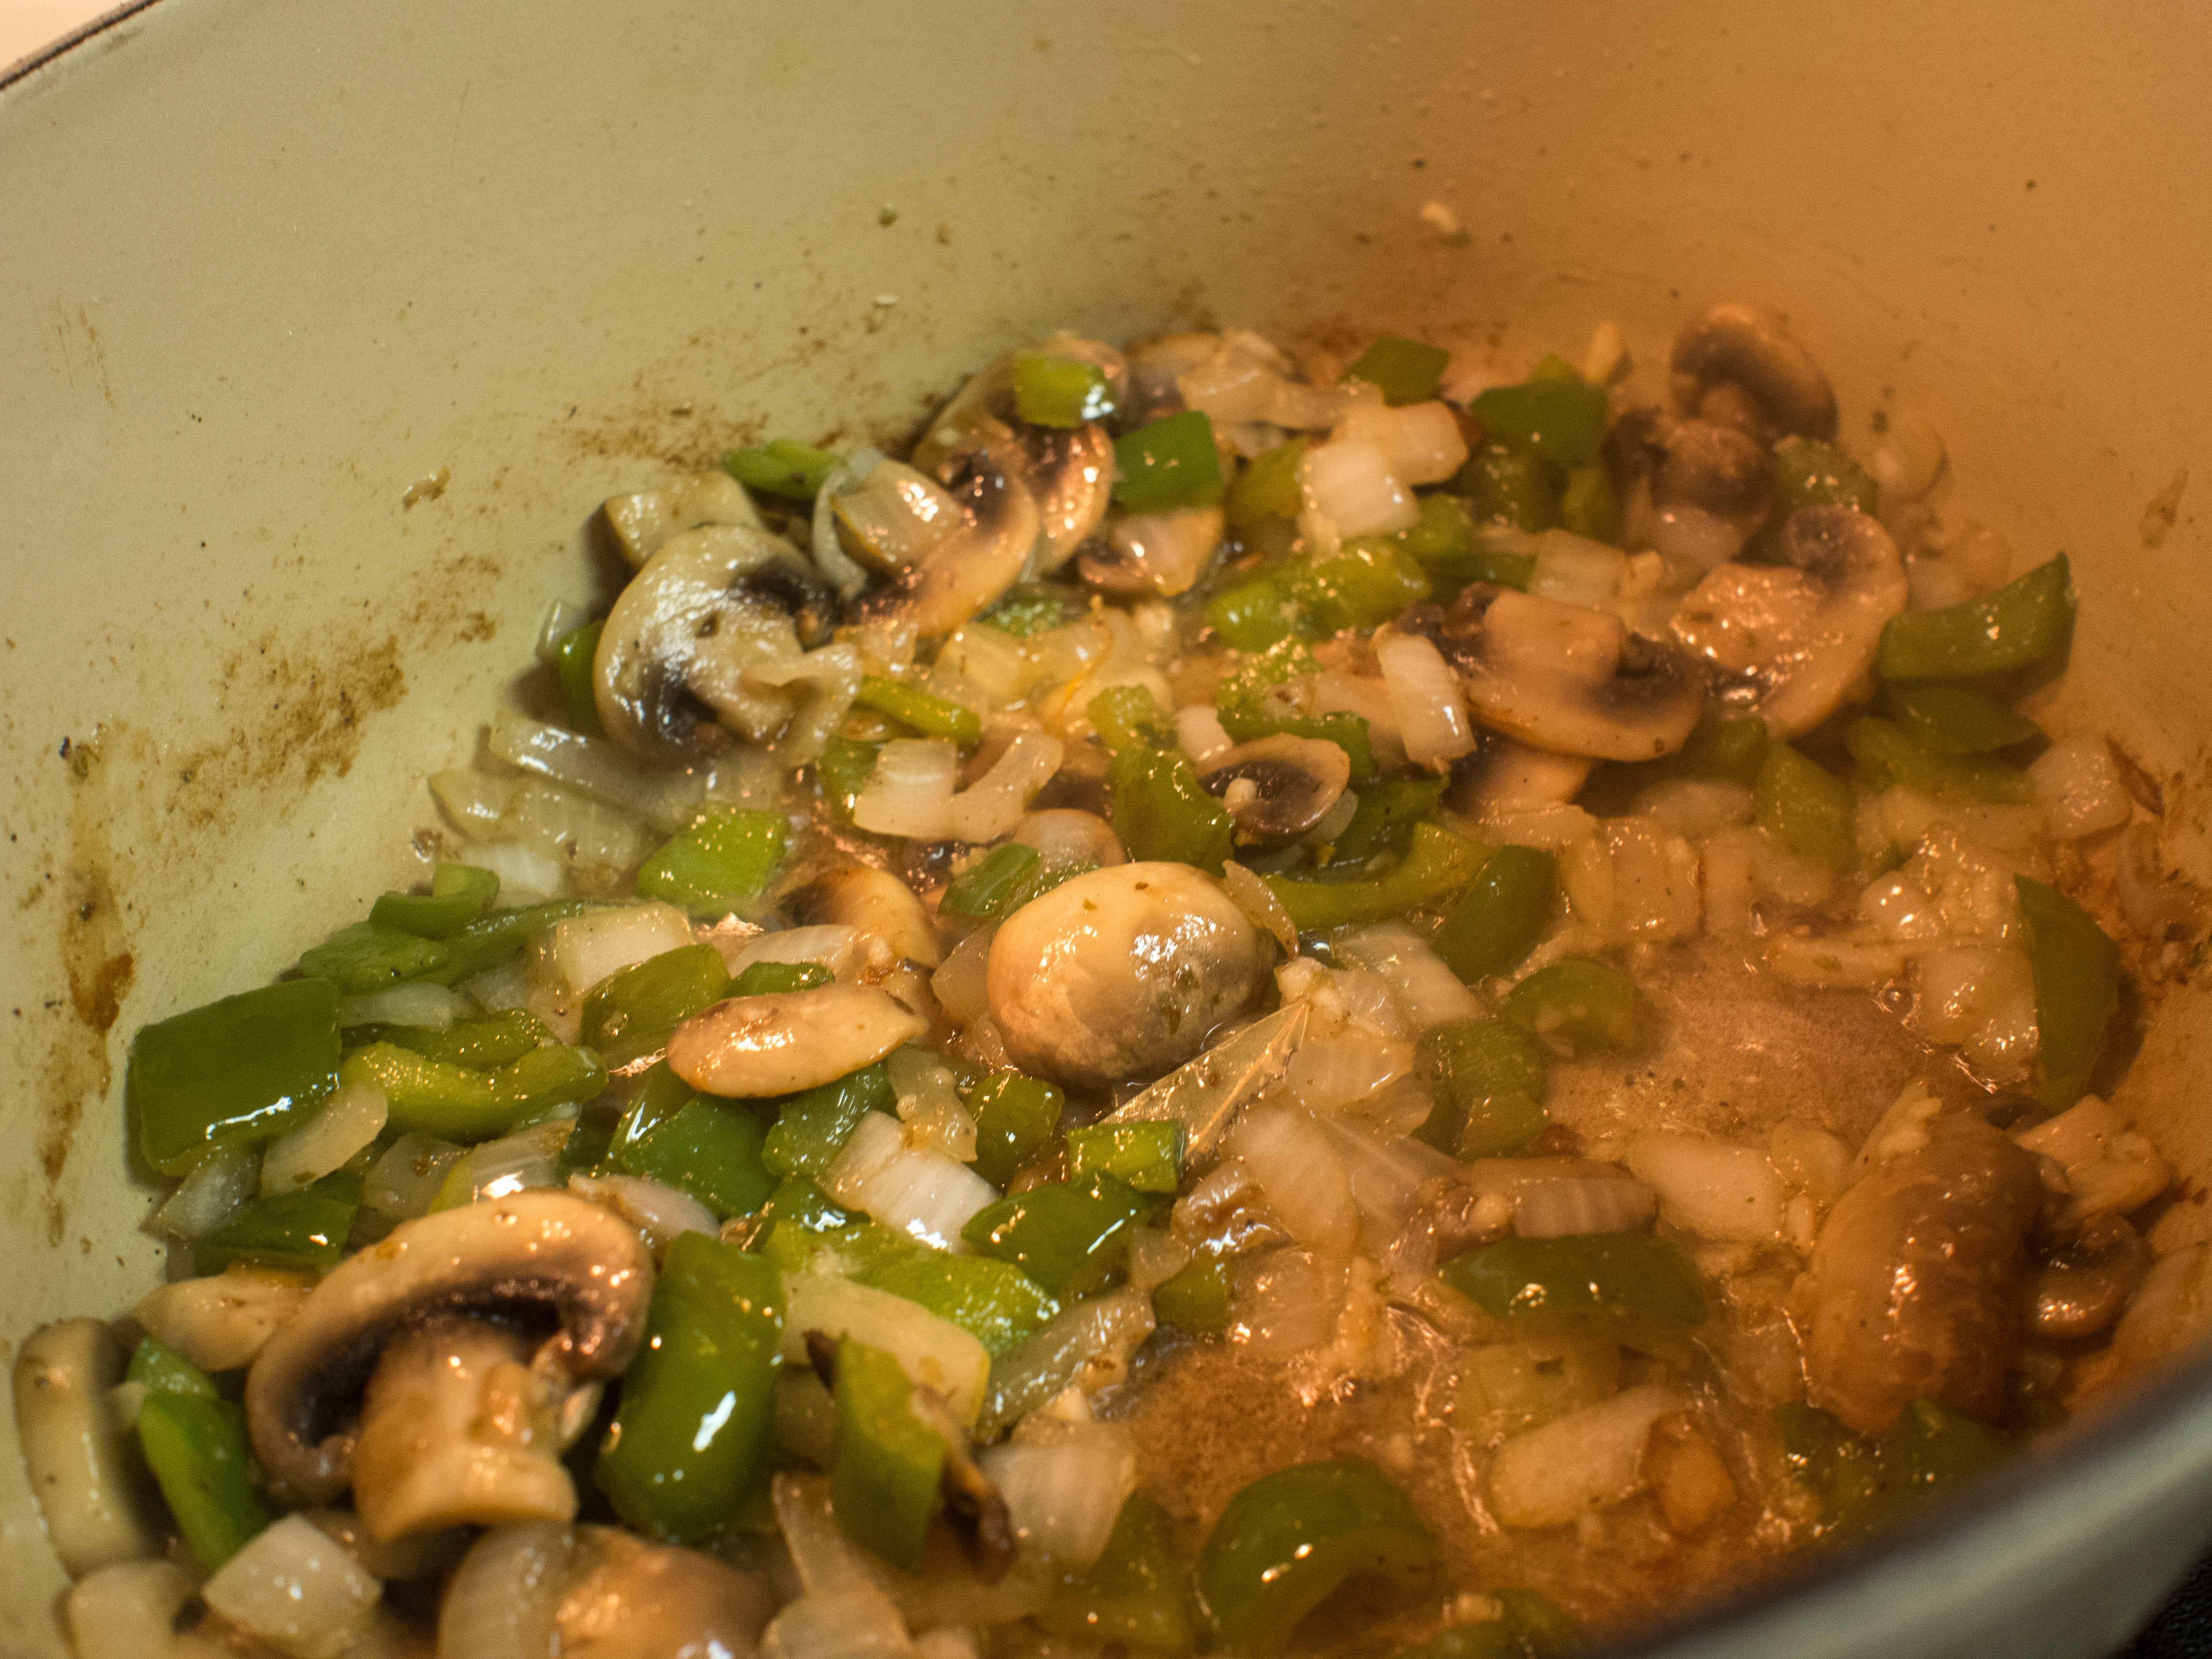
As the oil is heating, combine flour, salt and pepper in a large shallow bowl or plate. Dredge chicken thighs through the flour mixture. When the oil is ready (it will appear to be rippling), place the chicken skin side down in the dutch oven, careful not to crowd. You may need to cook the chicken in batches. Cook the chicken until each side is browned. Remove and set aside. Add peppers, onions and mushrooms to the pan and cook until soft. Turn the heat down to medium and add the garlic, oregano and bay leaf. Saute until fragrant, about 2 minutes. Add tomatoes and water and salt and pepper. Bring to a simmer. You may need to adjust the seasoning more at this point. Return the chicken to the pot, cover and continue cooking in the oven until the chicken is tender, about 45-60 minutes. You can’t really overcook the chicken too badly at this point.

OLYMPUS DIGITAL CAMERA

OLYMPUS DIGITAL CAMERA

OLYMPUS DIGITAL CAMERA

OLYMPUS DIGITAL CAMERA

Chicken Marengo

OLYMPUS DIGITAL CAMERA

Want to get your kids to eat something they wouldn’t normally eat? Have a cool backstory. Seriously. My kids were not really interested in eating this dish until I told the backstory, then they couldn’t get enough. So, what’s the back story?

We need to go back in time to the Napoleonic Wars. In 1800, First Consul Napoleon Bonaparte had just barely eeked out a victory over the Austrians at Marengo in Italy. This victory helped to solidify the new French government’s position in France after the Revolution. Legend has it, Napoleon asked his chef, Dinand, to make a meal to celebrate the victory. According to the lore, the Austrians had captured the food supplies of Napoleon’s army, so there was precious little in the way of food available to cook for such a meal. Not even butter!! Quelle horreur!! So, Dinand dispatch people into the Italian countryside to find something, anything, to put together a dinner for Napoleon. They came back with a chicken, olive oil, a few mushrooms, tomatoes, eggs and crawfish fished from a local river. Dinand added some bread rations, some staples he had handly (garlic, onions) and a bit of cognac from Napoleon’s flask, and voila! Chicken Marengo is born, June 14, 1800! Upon returning to Paris, legend has it Dinand attempted to “correct” the recipe by using white wine instead of cognac and omitting the crawfish. Napoleon sent it back instructing the Chef that the dish is to be made the original way. No deviation. Napoleon was very superstitious and considered this dish his victory dish.

Now, who wouldn’t want to eat, or at least try a dish with such a storied history?!? Eating the dish Napoleon ate? There are very few things in history you can recreate and have the same experience. What I love is that food is one of them. Some things might change a bit, like the breed of the chicken, but it’s still pretty close. You get a window into the times and how people (mainly the well to do) lived.

Chicken Marengo over the years has been “modernized”. One cookbook from the late 1800s called for making the dish with half a pound of truffles!! Well, that wasn’t happening on my blog budget. So, I tried to stick to the original. I actually had most of the ingredients, save the crawfish. I substituted shrimp. I added juniper berries (you can substitute a bay leaf) because I thought it might be a staple hanging around and it would work well with the tomatoes. And, while the dish looks completely wild, it actually kind of works. The chicken holds it own against the tomatoes and olives. The cognac gives the tomatoes and olives a subtle depth of flavor. White wine would bring a brighter flavor, but this is more round. Shrimp is pretty much always good, and the eggs on fried bread is just amazing. You can imagine this dish is a victory dish. Chicken Marengo is extravagant in every possible way.

I used chicken thighs and legs, not a whole chicken, because that’s what was on sale. But you could try cutting up a whole bird, just be aware of the cooking time differentials between the pieces.

Chicken Marengo
Serves 4-6
Prep time: 20 minutes
Cook time: 40 minutes

olive oil
4 chicken leg quarters, separated into thighs and legs
salt
pepper
3 tablespoons cognac (or enough to deglaze pan, plus a tablespoon)
1 onion, diced
5 cloves of garlic, minced
1/2 pound shrimp
8 ounces mushrooms, sliced
1/2 cup kalamata olives, rough chop
26 ounces crushed tomatoes (I used a box of tomatoes, you can use the large can too)
4 juniper berries (may substitute 1 bay leaf)
french bread, sliced
eggs

Cover bottom of a 3 quart of larger saute pan with olive oil. Slowly heat the oil over medium to medium high heat.

Generously salt and pepper the chicken pieces and place in the pan. Cook until chicken is cooked through, about 25 minutes. I used a thermometer to make sure the pieces were cooked to 165 degrees Fahrenheit. Remove chicken from pan and set aside. Deglaze pan with cognac. Add the onions and garlic. Cook until the onions are translucent. Add the shrimp and cook until pink and curled, about 7-10 minutes. Remove shrimp from pan, set aside. Add another tablespoon of cognac to neutralize the shrimp. Add the mushrooms and olives. Cook for a minute or so. Add the tomatoes, juniper berries and a bit more salt and pepper. Simmer. Briefly return chicken to pan to warm through

Meanwhile, cover the bottom of a small fry pan with olive oil and heat over medium high heat. Add the bread and “fry”. When golden on both sides, remove from the pan. Add more oil (or switch to a non-stick pan) and fry an egg for each person.

Assembly was alleged to be: chicken, covered with tomato sauce, topped with shrimp (crawfish). On the side, fried bread topped with a fried egg.

OLYMPUS DIGITAL CAMERA

OLYMPUS DIGITAL CAMERA

OLYMPUS DIGITAL CAMERA

OLYMPUS DIGITAL CAMERA