Monthly Archives: May 2013

Sour Cream Waffles, two ways

You may think I’ve only photographed the blueberry waffle, but no, the bottom waffle in the back is the Chocolate Chip one!

As followers of my blog may be aware I have a boy and a girl. The boy likes bold flavors. He makes hot sauce (like Tabasco) with his daddy. The girl eats in the “white” food group: potatoes, chicken, pancakes, waffles, apples, bananas, etc. with a few exceptions like salmon (because it’s pink!), hot dogs (ditto) and strawberries (almost pink!). However, my boy and girl have come to an impasse. The boy has tired of my chocolate chip waffles. He’d like a different flavor. The girl seeks no such change. There will never be anything wrong with chocolate chip waffles to her. Ever. She could have the same three meals forever: chocolate chip waffles (or doughnuts), hot dogs, and salmon. The girl never tires of the tried and true.

So, as I was looking through my fridge I noticed a container of sour cream I bought for a meal and forgot to put out. Oops. It’s about to expire,. I also have some blueberries that I bought as a snack for my son. Apparently, he found other things on which to snack. Imagine. Anyway, I asked him about blueberry waffles. He enthusiastically said yes and asked if I can add some lemon flavor to it, because he likes that combination. Ok….

At this point, the girl has stated that she will not eat blueberry pancakes. Of course she won’t. So, decide to divide the batter in half. Some for the blueberry and lemon waffles and some for the chocolate chip waffles. Oh the mess I will make!! The dishes I will do!

So, I need a waffle recipe to use up my sour cream. I don’t like wasting money on food I forgot I had! The White House Cookbook by Fannie Lemira Gillette (1887) and The Good Housekeeping Woman’s Home Cook Book by Isabel Gordon Curtis (1909) have recipes for “Cream Waffles” that use sour cream (but ironically, not cream). James Beard has a recipe in his American Cookery (1972) that is nearly the same of the aforementioned titles. I think sour cream may be have been different back then. I made the recipe and ended up with a really thick batter that wasn’t pouring anywhere, much less onto a waffle iron. So, I thinned out the batter with whole milk to make it pourable and problem solved. The waffles are really rich and very good. Even the blueberry lemon ones!! If you want to only make one type of waffle, just double the extra ingredients of the type of waffle you want to make (e.g. 2 cups of blueberries, 2 teaspoons lemon juice, and 2 tablespoons of flour).

Sour Cream Waffles, two ways

Base batter:

1 3/4 cups sifted all purpose flour (I used 1 cup all purpose and 3/4 cup white whole wheat)
1 teaspoon baking powder
1/2 teaspoon baking soda
1/2 teaspoon salt
3 tablespoons sugar
2 cups sour cream
3 eggs
6 tablespoons melted butter
1 teaspoon vanilla extract
1 1/2 cup whole milk

For 1/2 Blueberry and Lemon Waffles:
1 cup blueberries, rinsed
1 tablespoon flour
1 teaspoon lemon juice

For 1/2 Chocolate Chip Waffles
1 1/4 cups semisweet or bittersweet chocolate chips

Preheat waffle iron, grease iron when hot with spray oil.

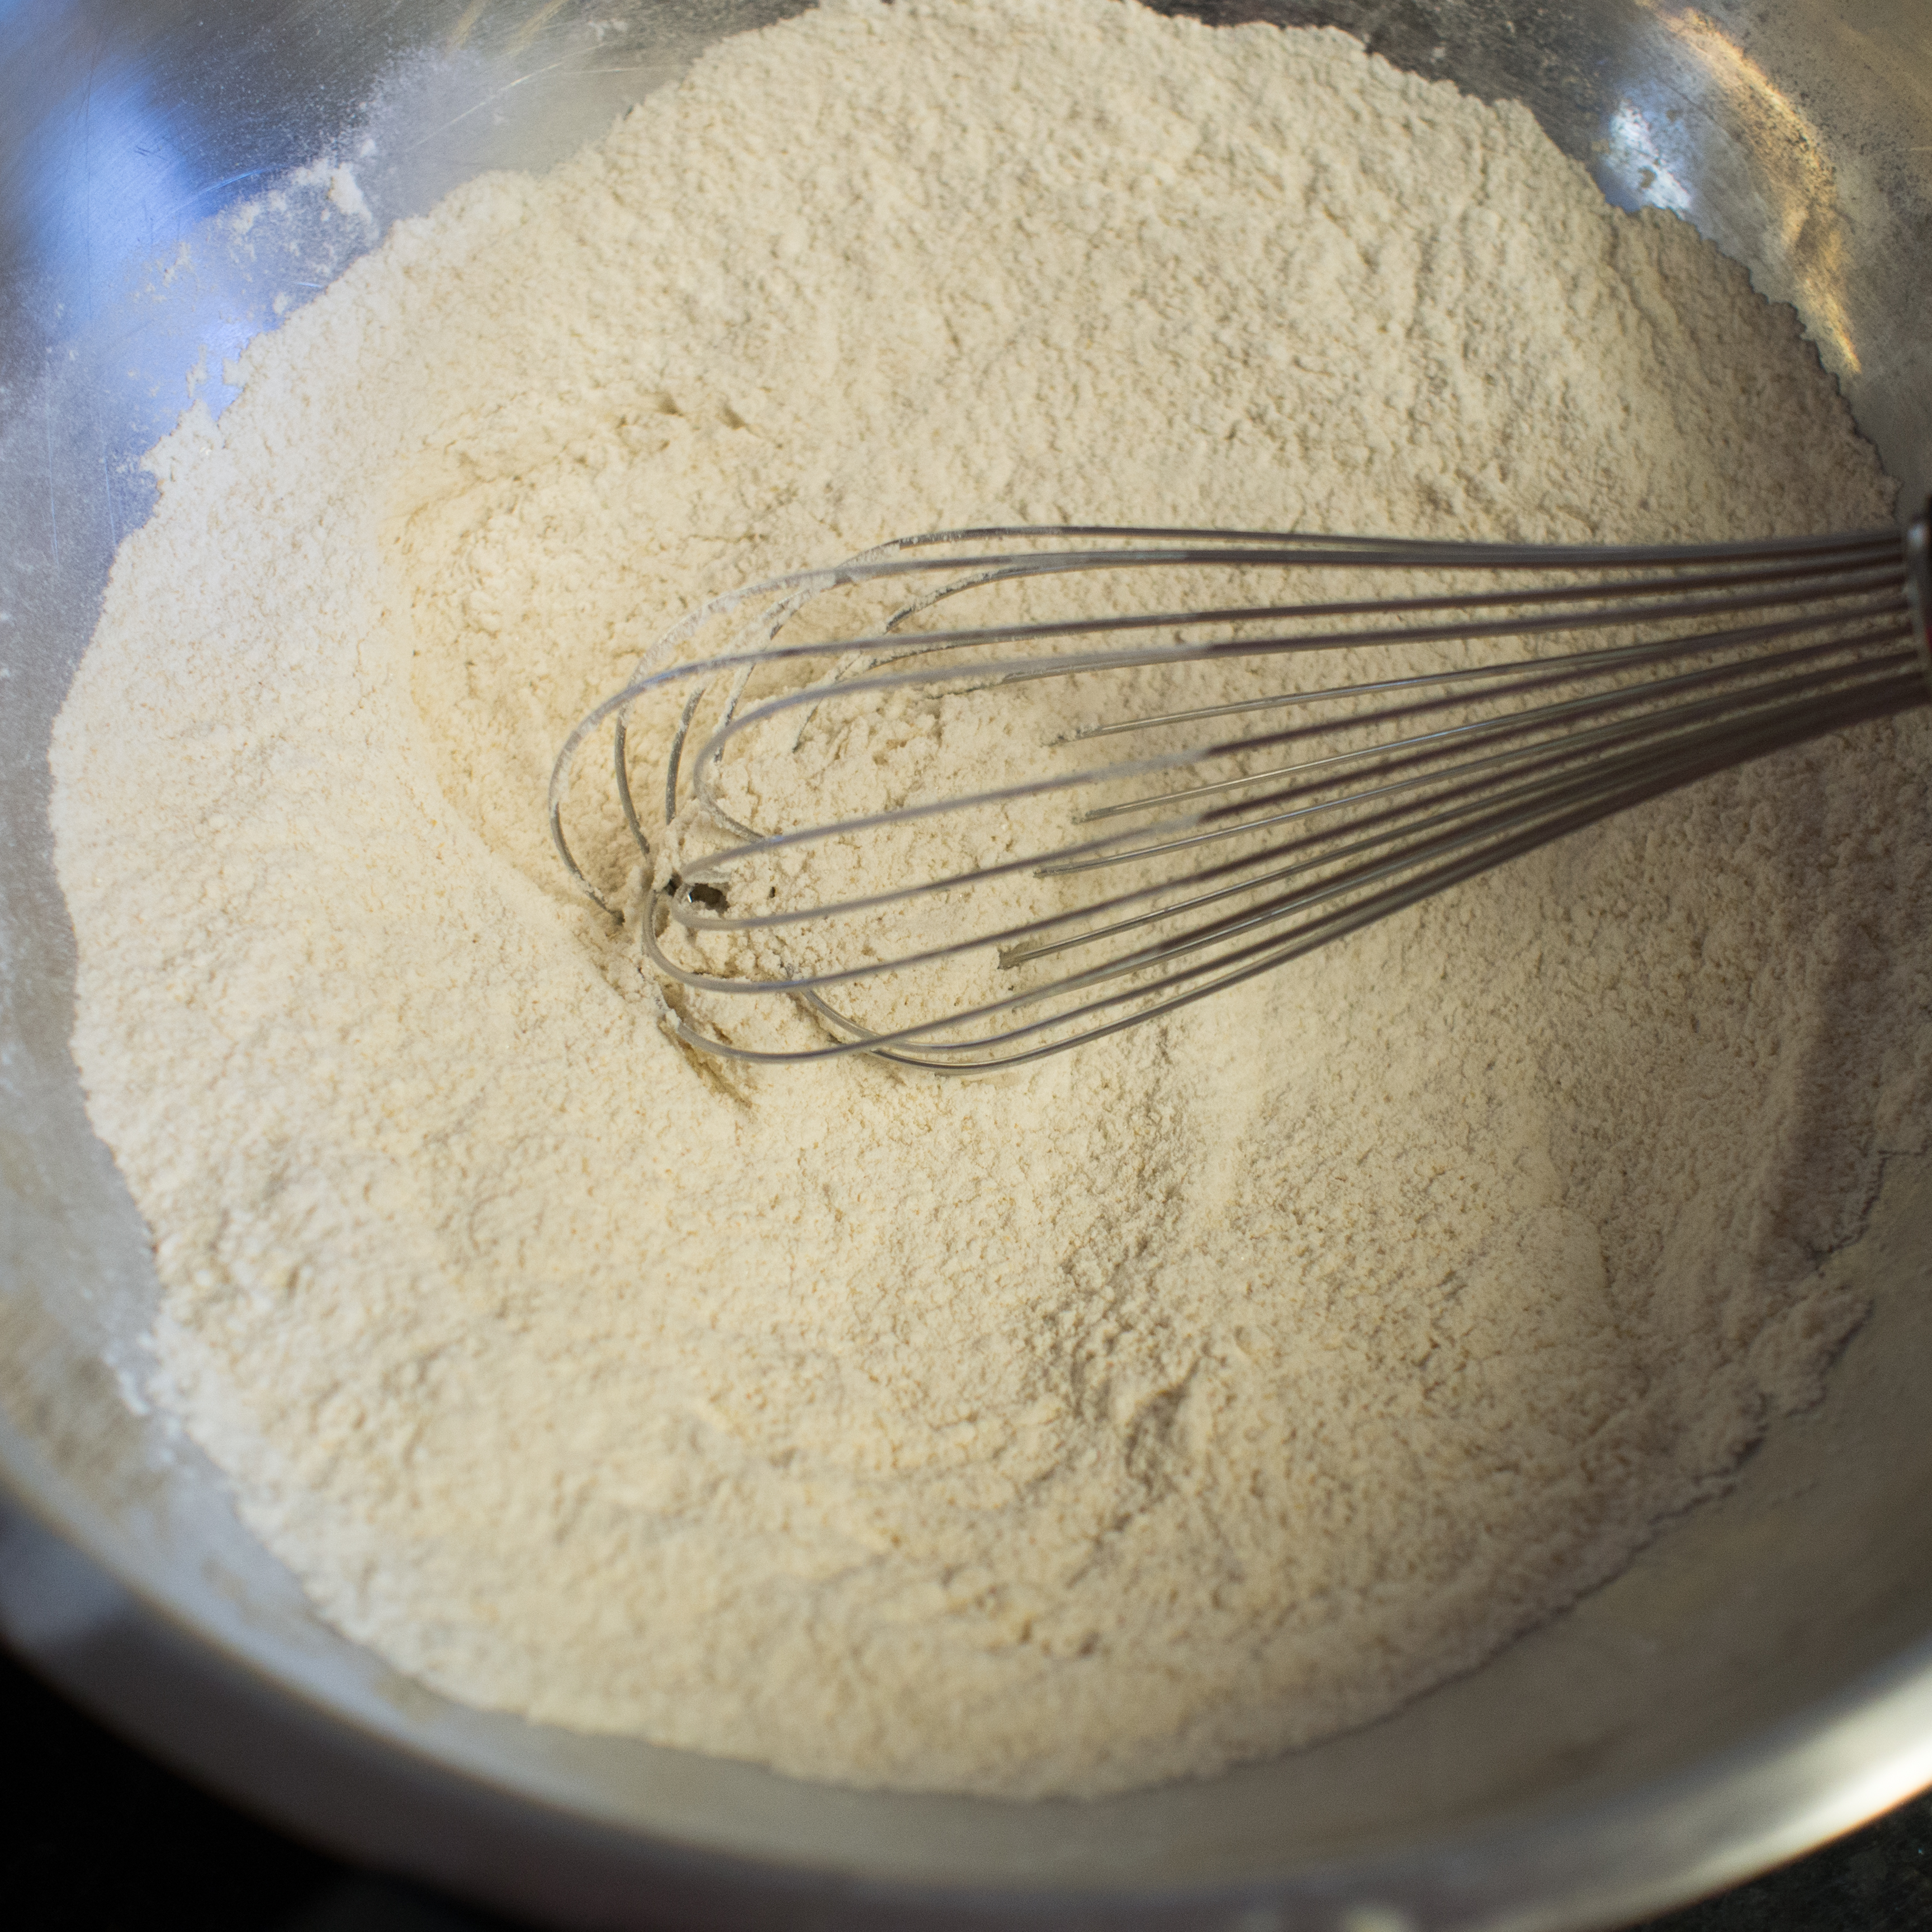
Combine the dry ingredients (flour, baking powder, baking soda, salt and sugar) in a large mixing bowl and whisk together until combined and aerated.

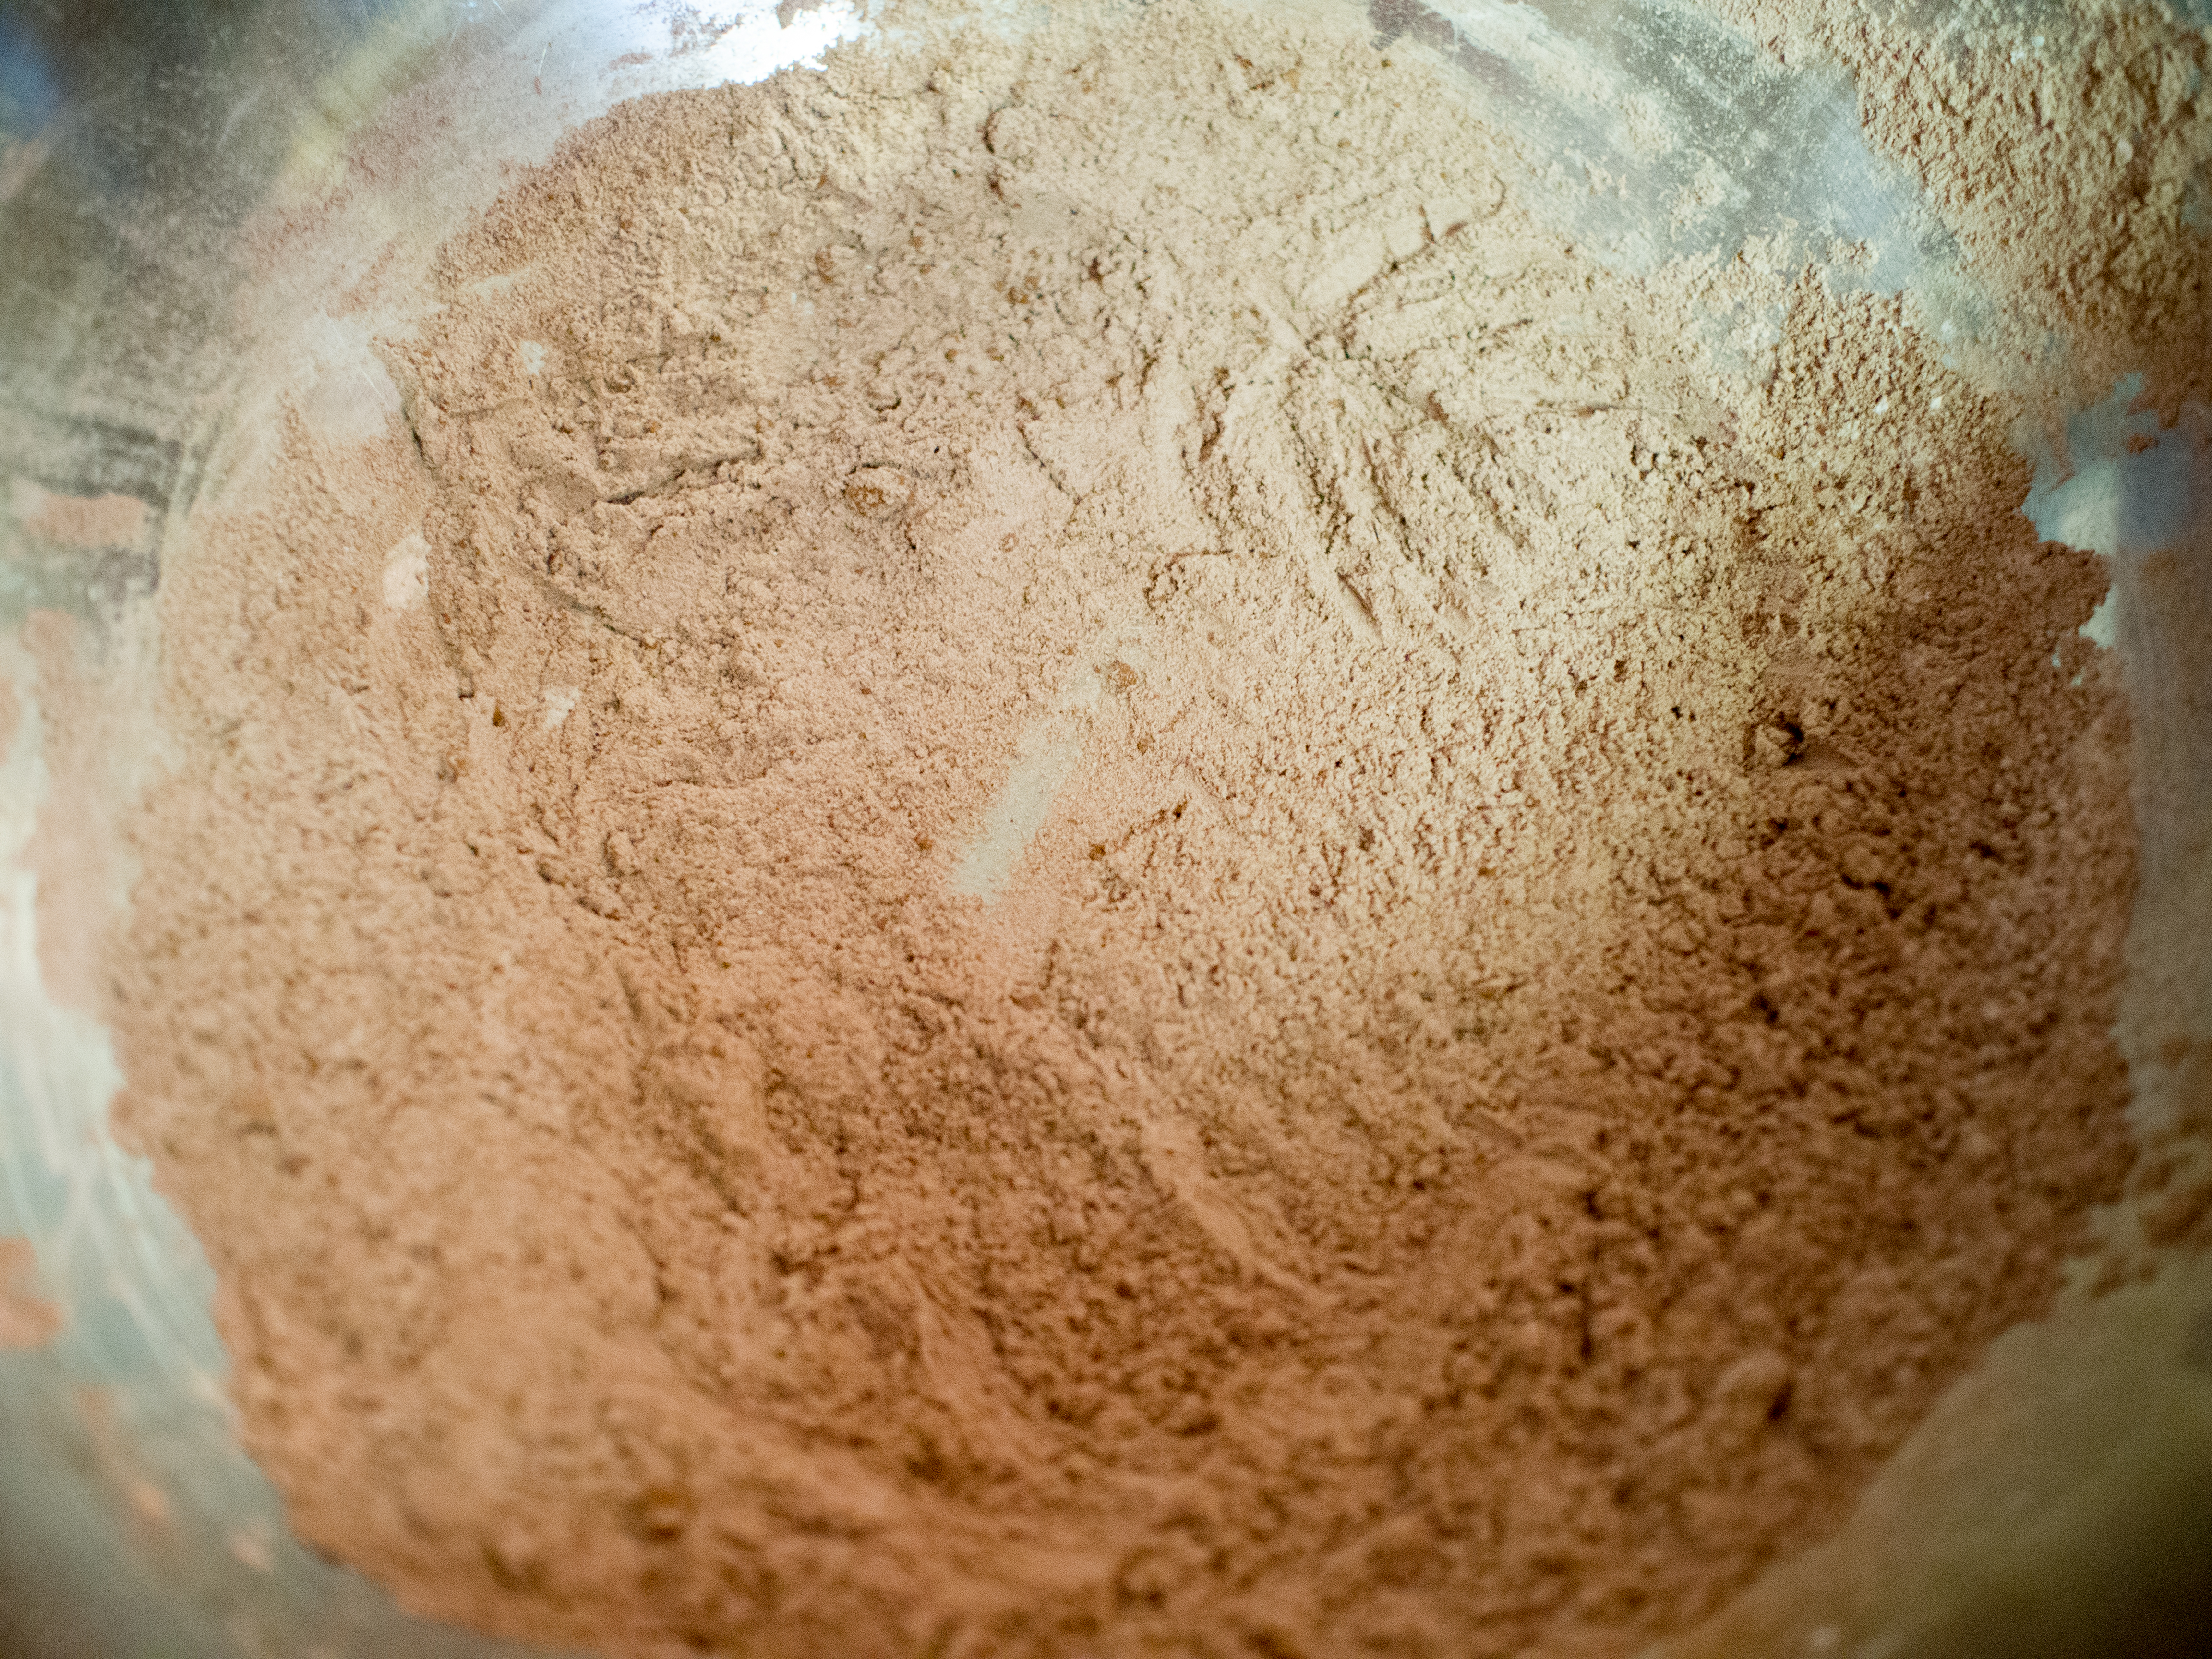
In a separate, smaller mixing bowl, whisk together the sour cream, eggs, butter, vanilla extract, and 1 cup of the milk.

Stir the wet ingredients into the dry ingredients. If the batter is too think, add the remaining milk in parts until the right consistency is achieved. Divide the batter in half and separate.

Blueberry and Lemon Waffles:

In a small bowl, combine the blueberries with the flour, coating the blueberries well. Gently fold the blueberries and the lemon juice into half of the batter and cook according to your waffle iron’s instructions.

Chocolate Chip Waffles:

Stir the chocolate chips into the remaining 1/2 of the batter and cook according to your waffle iron’s instructions.

OLYMPUS DIGITAL CAMERA

OLYMPUS DIGITAL CAMERA

OLYMPUS DIGITAL CAMERA

OLYMPUS DIGITAL CAMERA

Frosting

OLYMPUS DIGITAL CAMERA

I am one of those people who could seriously leave the cake on a plate and just eat the frosting.  Love it.  Vanilla, chocolate, cream cheese or caramel, it is all good.  Of late, however, I notice this annoying trend of wrapping everything in fondant so that it looks smooth and perfect.  Frosting is not supposed to be perfect looking.   It’s supposed to look like something you want to dig your finger through.  Who isn’t jealous of the baby at his or her first birthday party completely engulfed in a buttercream glaze of frosting and cake bits?

Frosting, in all of its fluffy goodness, is a rather new “invention”. Most beginning cake toppings were thin affairs made with a combination of sugar and egg whites. An example of this type of recipe can be found in The New England Economical Housekeeper (1845):

Beat the whites of an egg to an entire froth, and to each egg an 5 teaspoonfuls loaf sugar, gradually; beat a great while. Put it on when your cake is hot or cold, as is most convenient. A little lemon juice squeezed into the eggs and sugar, improves it. Spread it on with a knife, and smooth it over with a soft brush, like a shaving brush.

Another early variation of frosting was the boiled frosting. Fannie Farmer’s recipe in her The 1896 Boston Cooking-School Cook Book is as follows:

Boiled frosting

1 cup sugar
1/2 cup water
Whites 2 eggs
1 teaspoon vanilla or 1/2 tablespoon lemon juice

Put sugar and water in saucepan, and site to prevent sugar from adhering to saucepan; heat gradually to boiling point, and boil without stirring until syrup will thread when dropped from tip of spoon or tines of silver fork. Pour syrup gradually on beaten white of egg, beating mixture constantly, and continue beating until right consistency to spread; then add flavoring and pour over cake, spreading evenly with back of spoon. Crease as soon as firm. If not beaten long enough, frosting will run; if beaten too long, it will not be smooth. Frosting beaten too long may be improved by adding a few drops of lemon juice or boiling water. This frosting is soft inside, and has a glossy surface.

Well, in today’s world, the first one would appear to kill you with Salmonella or any other bacterial plague bought about and worsened by factory farming.  The second one sounds kinda hard. Thread, soft ball, hard ball stages of melting and boiled sugar require more judgment than I care to employ for a cake frosting. The success of my kid’s birthday party can’t hinge on whether I boiled the sugar past the soft ball stage and into the hard ball stage. That’s too much pressure!!!

As a kid, frosting in a can was always a big hit. But, looking back, the ingredients look a touch sad:

Duncan Hines Creamy Homestyle Classic Chocolate Frosting (http://www.duncanhines.com/products/frostings/creamy-home-style-classic-chocolate-frosting)

Sugar, Water, Vegetable Oil Shortening (Partially Hydrogenated Soybean and Cottonseed Oils, Mono- and Diglycerides, Polysorbate 60), Cocoa Powder Processed with Alkali, Corn Syrup. Contains 2% Or Less Of: Corn Starch, Salt, Invert Sugar, Natural and Artificial Flavors, Carmelized Sugar (Sugar, Water), Caramel Color, Acetic Acid, Preservatives (Potassium Sorbate), Sodium Acid Pyrophosphate, Citric Acid, Sodium Citrate.

The other frosting trend when I was small was to use  the Wilton Buttercream Icing Recipe (frosting and icing are terms that are used rather interchangeably). You could decorate with it more easily, I suppose.  Wilton also helped to user icing flower decorations to the masses.  Rose covered cakes became all the rage.   The Wilton recipe combines confectioner’s sugar, butter, vegetable shortening, vanilla extract and a touch of milk. The mouthfeel is what you would expect when one eats vegetable shortening. Sort of waxy and thick. Whenever you see cakes in the bakery with “buttercream” listed as the frosting and they are decorated with blindingly white icing, remember what butter looks like and just know it might have some butter in there, but will likely have shortening as well. I am generally anti-shortening because of the severe manufacturing process that turns a soybean and a cottonseed into a solid mass of fat-like substance. And the taste. Ick.

Do you want a good looking frosting or a good tasting frosting? That’s the question. Sure, you can have a marble smooth covering on your cake that will look fantastic in pictures, but the taste? Eh. How much taste can you get out of sugar, glucose, vegetable shortening, gelatin, water and extract?  I’ll say it:   fondant isn’t good. It’s gummy and rather artificial tasting, as most fondants are manufactured and stored in plastic tubs indefinitely.  You can also have a beautiful white frosting, but you’ll get stuck with something made from shortening.

Or, you can go retro and have a frosting made with real butter.  It won’t be blinding white and you can’t make flowers out of it.  But, it will taste amazing.  Like, you are hoping some makes it on the cake amazing.  And frankly, it doesn’t really look “bad”.  And, you can make it chocolate or vanilla flavored!!

OLYMPUS DIGITAL CAMERA

My inspiration from this recipe came from an episode of Good Eats and a book named The Cake Mix Doctor.  I have every great cake book.  Ruth Levy Beranbaum’s The Cake Bible?  Check.  Maida Heatter’s Book of Great Desserts and Cakes.  Check and Check.  Still, every cake I made was lacking.  Then I saw Alton Brown recommend a box cake mix.  Really?!?  According to him, you can’t beat the chemistry in a box for great cake.  With that logic, I found myself face to face with The Cake Mix Doctor book by Anne Byrn at a local bookseller and decided to try it for my son’s birthday.  He wanted a cake that “bled”.  So, I made the Red Velvet Cake.  First of all, it was so easy because it was a mix.  Second, he LOVED it.  Now, usually when people go to a kid’s birthday party, I never see the adults take a piece of cake.   I do the calculation myself and decide it’s not worth the calorie bomb to eat a piece of supermarket “buttercream” frosted cake and politely decline.  The kids love anything “cake”, and that’s what is important.  I don’t need it.

At my son’s party, not a single piece of cake remained.  It was gone.  The adults ate it.  No leftovers!!  The secret? Probably not the “doctored” German Chocolate Cake mix with sour cream and red food dye (although that was good), but the rich cream cheese frosting.  AMAZING.  Anne Byrn recommends homemade frosting for her doctored cake mixes, and includes several in her book.  She is right.  No one thought I used a mix, and the frosting was great,  but I have to doctor hers up a bit.  Hers are overly sweet for me.  My experiments are your gain.  Also, making your own cake will cost a fraction of a bakery cake, and be just as good.

Chocolate Cream Cheese Frosting
Frosts a 2 layer 9 inch round cake
Total Time: 10-15 minutes

2 8 ounce packages cream cheese, softened
2 sticks (16 tablespoons) butter, softened
1/2 cup unsweetened cocoa powder, sifted
1 teaspoon vanilla extract
4 cups confectioner’s sugar, sifted

Cream together the cream cheese and butter in a large mixing bowl until well combined. Turn off the mixer. Add the cocoa powder, vanilla extract and confectioner’s sugar. Mix on low speed until the sugar and cocoa are mostly incorporated (this avoids the explosion of powdered ingredients). Increase to medium speed and beat the frosting until it is fluffy.

Done.

I know, not hard, right? Not scary, no fear of failing. Just awesome, spoon lickin’ frosting. If you don’t want chocolate, omit the cocoa powder and cut the sugar to 3 1/2 cups and it’s an awesome white frosting.

OLYMPUS DIGITAL CAMERA

OLYMPUS DIGITAL CAMERA

OLYMPUS DIGITAL CAMERA

Broccoli Au Gratin

OLYMPUS DIGITAL CAMERA

When I started this blog, I had no idea there was food that was nearly impossible to photograph looking good. Coq au vin, Creamed Spinach and Ropa Vieja quickly taught me this lesson. The photos aren’t great. They don’t make it on Foodgawker or Tastespotting. They just aren’t pretty. They are fantastic to eat. Amazing, really. But, comparing a picture of Ropa Vieja and, say, a beautiful chocolate chip cookie, I can tell you which one will look better.

I’ve read where other bloggers have promised not to make food that is hard to photograph. I have no such rules. My goal is good food that is easily made. The photos will try to capture my enthusiasm for the subject. I’m no photographer. If you’ve seen my photos at all, you’ve seen that. The best I can say is that I try. Really, really hard.

Broccoli Au Gratin. Broccoli baked in a creamy sauce with cheese. Admit it, it’s not going to look good. It will taste great, however.

My husband and I went on an awesome date night and chose to patronize a famous steakhouse restaurant. We had the creamed spinach and the broccoli au gratin for sides with our steak.   Why Broccoli Au Gratin?  Well, really, is there a bad “au gratin”? Something cooked in a creamy sauce topped with a cheese topping? Very few things wouldn’t improve under such conditions!!

So, I wanted to try to make the dish when I got home because it was really good!  Plus, we eat broccoli three to four times a week. Steamed, with some butter, salt and pepper. Three.  Times.  A.  Week.  This would certainly shake that routine up!!

Au Gratin is a French term that translates into the words “to scrape or grate”, likely a reference to the cheese or bread use as a topping for the dish. I believe the New Orleans chefs like Emeril have elevated these creamy dishes with the addition of heat. Cream and cayenne are just made for each other. The heaviness seems to abate a touch when you add unexpected flavors.

This dish is derived in part from Emeril Lagasse’s Broccoli and Cauliflower Au Gratin’s Recipe ( http://www.foodnetwork.com/recipes/emeril-lagasse/broccoli-and-cauliflower-au-gratin-recipe/index.html)

Broccoli Au Gratin
Serves 6-8
Prep Time: 20 minutes
Total Time: 50-60 minutes

1 cup water
2 16 ounce bags of broccoli florets
1 stick (8 tablespoons) of unsalted butter
1/2 cup flour
1 teaspoon paprika
1 teaspoon ground mustard
1/4 teaspoon white pepper
1/4 teaspoon ground cayenne pepper
2 teaspoons salt (may need more based on tasting and preference)
4 cups of whole milk (may need more, depending on thickness of sauce)
8 ounces grated cheddar cheese (or a cheddar cheese/monterey jack mixture), divided

Preheat oven to 375 degrees Fahrenheit.

Boil water in medium sauce pan. Add broccoli. Cook until just thawed. You may need to stir several times.  Remove from heat, drain well and set aside. Place in a baking dish (at least 3 quarts).

In a medium sauce pan over medium heat, melt the butter. Add flour to the melted butter and whisk until the raw flour taste is cooked out, about 4 minutes.  The mixture will be a blonde roux. Do not let the mixture brown or the creamy mixture will be the “wrong” color. Whisk in paprika, mustard, peppers and salt. Add milk and stir with a wooden spoon. As the mixture heats and the flour and butter mixture is incorporated with the milk, the milk will thicken. The mixture should be fairly thick, but not too tight. You should be able to stir it.  If the mixture is just too thick, slowly add milk, stir and heat for a bit and repeat that until you get the mixture to the right consistency. Add three quarters of the cheese and stir until melted.

Poor the milk mixture over the broccoli and fold the cream sauce into the broccoli so that the mixture is completely incorporated throughout the baking dish. Top with the remaining cheese, adding more if necessary. Bake until the top is browned and the sides bubble, about 30 minutes.  Let sit for about 15 minutes before serving.
OLYMPUS DIGITAL CAMERA


Blonde Roux

OLYMPUS DIGITAL CAMERA

Thick, but not too thick….

OLYMPUS DIGITAL CAMERA

OLYMPUS DIGITAL CAMERA

Italian Sausage “Parmesan”

Italian Sausage Stuffed Pepper

I am constantly on a quest to fulfill my husband desire for low nutrient density carby foods.  Baked Ziti, sandwiches of every kind, Chinese Food with rice, etc.  So, I asked him what food he missed most of all.  His answer:  Italian Sausage Parm.

What now?

I’m from Maryland, not exactly know as a bastion of Italian cooking. However, I’ve heard of eggplant parmesan, chicken parmesan, and even veal parmesan. I also lived in New Orleans, which has a pretty extensive repertoire of putting fried things on sandwiches. I’ve eaten virtually every kind of po’ boy known to man. But this request stumped me. I really didn’t want to think of Italian sausage breaded and fried, slathered with cheese on a big Italian sub roll, so I didn’t ask. I just tried to think of something, well anything, that would be healthier, but still give him a sense of what he was missing.

So, I needed a vehicle. I vehicle to replace the bread. It’s a tad early for summer squash and the poblano peppers at the store looked a little small. An eggplant boat seemed wrong. But, the green peppers were enormous. So, by default, the dish would be a form of stuffed pepper!!

With the pepper part of the dish covered, I wanted to add sautéed mushrooms and onions, tomato sauce, melted cheese and Italian sausage. Combined, they should give a pretty good approximation of the Italian Sausage parm sandwich. And, to quote the hubs, it was.

I don’t really think of this as a “recipe”. You don’t like onions? Don’t add them. Want to make your own marinara or tomato sauce? Go ahead. Want spicy sausage vs. mild. Fine by me. Pretty much cook your “stuffing”, hollow out the pepper, stuff it and top with cheese. Whether that qualifies as a “recipe”, I’m sort of torn.

Italian Sausage “Parm”
Serves 5-6
Prep time: 20-25 minutes
Cooking time: 45-60 minutes

5-6 Large Green Bell Peppers
1/2 cup olive oil, divided
1 medium onion, sliced
4 ounces of mushrooms, sliced
1 teaspoon salt
1/2 teaspoon pepper
1 1/2 pounds Italian Sausage
1/2 of a 25 ounce jar (approximately) of tomato sauce
2 cups of shredded mozzarella cheese (or Italian Shred mix)

Preheat oven to 350 degrees Fahrenheit.

Cut the tops off of the green peppers, and remove the seed core and any soft white parts. Place in an oven safe baking dish and set aside.

In a pan suitable for sautéing onions and mushrooms, heat 1/4 cup of the oil over medium heat. Once heated, add the onions, mushrooms and salt and pepper. Cook until the onions and mushrooms are very soft, about 10-15 minutes. Stirring occasionally. You may need to turn the heat down, as you do not want the onions to “brown” excessively.

In a separate pan, heat the remaining 1/4 cup of olive oil over medium heat. Slice the Italian sausage into rounds about an inch thick. Place into pan and sauté until cooked through, about 15 minutes.

Layer the ingredients into the bell pepper as follows: onion and mushroom mixture, few tablespoons of tomato sauce, sausage rounds, and tomato sauce again. Top the pepper with cheese.

Place the stuffed peppers into the oven and bake until the peppers are soft about 45-60 minutes.

OLYMPUS DIGITAL CAMERA

OLYMPUS DIGITAL CAMERA

OLYMPUS DIGITAL CAMERA

OLYMPUS DIGITAL CAMERA

OLYMPUS DIGITAL CAMERA

OLYMPUS DIGITAL CAMERA

Brownie Joys

OLYMPUS DIGITAL CAMERA

I am going to give you two versions of the same recipe. One is super easy, but comes partially from a box. One is still easy and gluten free. Completely up to you as to which version you choose. Both are spectacular and impressive. I favor the non-gluten free one slightly, but my kids and husband like them both equally.

A few years ago, I started trying out for the Pillsbury Bake-Off, but to be honest, my heart wasn’t in it. How could I encourage people to use their heavily processed, suspect-ingredient products? So, I quit. But the one recipe that I really liked from my efforts was a very simple, but impressive brownie dish.

My kids love coconut and my husband thinks he hates it. As he’s diabetic, this was a win-win for me. I taint my baked goods with coconut and he avoids them. No guilt about him “missing out” on things I make because frankly, he thought he didn’t like it.

So, I make my brownies. I make a brownie batter from a box of brownie mix that’s suitable for a 9 x 13 pan. I place half the batter in the bottom of an 8 x 8 pan. I then in a separate container mix together coconut, sweetened condensed milk, melted white chocolate and almond extract. I layer the coconut mixture on the bottom brownie layer and top with the remaining brownie mix. Done. When you cut it, the layers were completely intact and the dessert was really impressive.

He couldn’t resist and tried the brownie, despite the presence of the accursed coconut. Turns out, he likes coconut. Now, he’s ordering items like curry with coconut milk in it everywhere. Apparently, he doesn’t like the artificial coconut taste.

So, I haven’t made these brownies for a while. Last weekend, my neighbor Sherron made some great cookies for a photoshoot that she shared with me. She eats a gluten free diet. I don’t really get to give her that many baked items because of it. Gluten free is scary to me. Gluten is a really important chemical to baked goods and whenever I have something gluten free, it tastes “off”. So, I scoured the internet for brownie recipes that are gluten free and came across one by Martha Stewart using corn starch instead of flour. I’ve made a cornstarch cake before and it was passable, albeit not great. So, my hopes were low for this recipe. However, my low hopes were tempered by the really good reviews.

I call them brownie joys because they are very similar to my Joys recipe, but in Brownie Form.

If you want to make the easy, gluten version, make the brownies per the directions on the box, and follow the Coconut Layer instructions below.  Layer in an 8×8 pan and bake.  Done.  And trust me, people will think you are pure genius.

Adapted from Martha Stewart’s Gluten Free Brownies.

Brownie Joys

Brownie

6 tablespoons unsalted butter, cut into pieces, plus more for the pan
1/3 cup cornstartch (spooned and leveled)
1/4 cup unsweetened cocoa powder (I used Ghirardelli’s)
1/2 teaspoon fine salt
12 ounces bittersweet chocolate chips (60% cocoa)
3/4 cup of sugar
1 teaspoon pure vanilla extract
2 large eggs, lightly beaten
1 cup chopped nuts (optional)

Coconut Layer
1 cup unsweetened coconut flakes
1/2 can (7 ounces) sweetened condensed milk
1/2 cup white chocolate, melted
1/8 teaspoon almond extract (optional)

Preheat oven to 350 degrees Fahrenheit.

Butter an 8×8 square baking pan and line with parchment paper so that there is some overhang on the pan. The purpose of this is to allow for easy removal of the brownies after cooling.

Whisk together cornstarch, cocoa and salt. Set aside.

In a large, microwave safe bowl, add the chocolate chips and butter and melt over low heat, checking and stirring frequently until thoroughly combined. The mixture will look like lush, glossy, thick chocolate. Try not to eat. Stir in sugar and vanilla. The chocolate will look gritty and rather unappealing at this stage. Add the eggs and stir until combined.

Add the chocolate mixture to the cornstarch mixture and stir vigorously until you notice the mixture coming together and pulling away from the bowl. I noticed this within about a minute. Add nuts and stir.

Coconut Layer

In a small mixing bowl, combine the milk, the coconut, the white chocolate and the almond extract and stir.

Brownie Assembly

Divide the brownie mix in half. Add half the brownie mixture to the brownie pan, top with the coconut layer, then finish the remaining brownie mixture.

Place pan in the oven and cook for about 35 minutes. The clean toothpick test will work on the brown parts, not the coconut parts.  This brownie needs to cool all the way.  It’s also best to sit over night.  Don’t get me wrong, it will taste great out of the oven, but without gluten it can be a little greasy without enough time to rest.  For a perfect fudgy brownie that is exactly like it’s gluten counterpart, wait a day.

Dry ingredients whisked together

Seriously, don’t you just want to eat that?

Crazy easy coconut mixture

First layer in the pan

Second layer in the pan

Third layer in the pan

Completely cooled and out of the pan

Fudgy with impressive layers!


OLYMPUS DIGITAL CAMERA

Cuban Black Beans and “Rice”

OLYMPUS DIGITAL CAMERA

The three things I miss the most on a low carb diet are bread, pasta and rice. And sugar. And ice cream. Ok, I miss a lot. But when serving the Ropa Vieja, I knew I had to come up with a “rice” like dish. Ropa Vieja with a side of asparagus just, well, sounded so unappealing. So, I researched “rice” dishes.

Cauliflower seems the go to vegetable for starch substitutes. And why not? It’s white, low glycemic, low carb and high fiber. It’s fairly neutral tasting, has some texture, and takes well to other flavors. But when I saw recipes with directions that began with “grate the cauliflower”, I’m out.

Just no.

I’ll grate nutmeg and that’s about it. I have better things to do with my time than to grate a head of cauliflower. But the interesting part to me was that these recipes steamed the bits of cauliflower. Why is that interesting? Well, there were lots of tips included in these recipes to dry the cauliflower bits out. So, the steaming made the vegetable to wet. Go figure.

So, I roasted it. Why? Because if moisture is a problem, that’s a problem oven heat can fix. Two, there’s something very appealing about the slightly charred, nutty, roasted taste of vegetables. Three. You stick it in the oven, jostle the pan a bit during the cooking time, and the veggies are cooked. Just chop finely and you have “rice”. I’m all about simple and easy cooking methods.

My daughter came home from school one day with a recipe for pinto beans. She copied it down from her workbook over the course of a few days to “sneak” it home because she thought it sounded good. How cute is that?!? I told her I was making this dish and she ran and brought me her purloined recipe. So, I used parts of that recipe to make the dish. She was so thrilled she actually ate it! As an extra bonus, I told my husband I was making a black bean and rice dish and asked if he would sample it. He grabbed the offered spoon, ate it and said it was great! I replied, “Really? You were tricked by the cauliflower?” His eyes flew open and he went to the dish and shrugged and said, “I guess so!”

Put this dish in the rotation!!

So, here you go. A lower carb version of Cuban Black Beans and Rice.

Cuban Black Beans and Rice
Serves 4-5

“Rice”
1 head of cauliflower
1/4 olive oil (or any neutral oil)
1 teaspoon salt
1 teaspoon of pepper

Black Beans

1/4 cup of olive oil
1 green pepper, diced
1/2 jalapeño pepper, minced
1 medium onion, small dice
2 cloves of garlic, minced
1 teaspoon cumin
1 teaspoon paprika
1 15 ounce can of black beans, drained and rinsed
1-2 tablespoons of olive oil (as needed)
Salt and Pepper

“Rice”

Preheat oven to 375 degrees Fahrenheit

Separate the florets from the stalk of the cauliflower. Place florets on a baking sheet and coat with oil, salt and pepper. Place sheet in oven. During roasting, flip florets occasionally to prevent over browning. Roast until florets are tender and slightly browned, about 20 minutes. Remove from oven, let cool slightly and when you can handle them, chop finely until the pieces are about the size of rice. Set aside.

Black beans

In a saute pan, heat the olive oil over medium heat. When heated, add the peppers and onion. When the onion is translucent, add the garlic. As the garlic softens, add the cumin and the paprika, stir well. Add the black beans and the “rice”. Mix thoroughly. Taste the mixture, if the mixture is too dry, add the olive oil until the texture is appropriate. Season with salt and pepper as needed.

OLYMPUS DIGITAL CAMERA

OLYMPUS DIGITAL CAMERA

OLYMPUS DIGITAL CAMERA

OLYMPUS DIGITAL CAMERA

OLYMPUS DIGITAL CAMERA

OLYMPUS DIGITAL CAMERA

DIY- Coleslaw

OLYMPUS DIGITAL CAMERA

Coleslaw, as we know it in all of its creamy goodness is a mid 18th century invention, as this is when mayonnaise was invented.  Fannie Farmer recommends coleslaw in her cookbook Food and Cookery for the Sick and Convalescent (1904).  The recipe was simple:  select a heavy cabbage, remove the tough outer leaves, quarter the cabbage, slice thinly, soak in cold water, drain, dry and mix with cream salad dressing.  James Beard devotes nearly 4 whole pages to various coleslaw recipes in his American Cookery.  Now?  Coleslaw is relegated to a plastic container on a shelf surrounded by other picnic salads.  So, so sad.

What barbecue feast would be complete without this accompaniment? It’s simultaneously cool, crunchy, creamy, sweet and sour. It hits all the high notes of summer outdoor eating fare. Most people just pick up a tub from the deli or supermarket. But why? Why?!?!

Walk away from the deli counter. Go over to the vegetable section of the store. I believe it’s called the “produce” section. I have always wondered why. Anyway, grab a nice looking head of cabbage. Splurge on a carrot or two. Want more crunch? Add celery. Want more color? Add red cabbage (I didn’t in the recipe below, but you totally could). You are now three ingredients away from coleslaw and you likely have the other three ingredients at home: Italian Dressing, mayonnaise, and sugar. Slice the cabbage and celery, peel the carrots and mix. Done. Coleslaw.

It’s that easy. And, I firmly believe what you make will taste better and be cheaper per pound than what you would buy at the deli counter! Again, it’s completely customizable. Want onion? Add it. Want less mayo more vinegar? Add more dressing, less mayo. Like less dressing? Cut it down. Coleslaw, your way!!! No more buyer’s remorse on coleslaw. And the veggies will be crisp!! Not limp and, well, awful.

Coleslaw
Serves 4-6 people

1 head of cabbage
2 carrots, peeled into ribbons or strands
2 stalks of celery, sliced thin (optional)
1/2 cup of your favorite mayonnaise
1/4 cup of your favorite Italian dressing
1-2 tablespoons sugar (to taste)
Cracked pepper (optional)

Remove the tough outer leaves of the cabbage.  Quarter and slice thin.  If you would like really crisp cabbage, place in cold water and soak for 30 minutes or until crisp.

Put the cabbage, carrots and celery in a large bowl. In a separate bowl, combine the mayonnaise and Italian dressing. Add one tablespoon of the sugar to the mayonnaise mix. Taste and adjust the ratio of mayonnaise to dressing as needed. Add the remaining sugar if needed. Pour the mayonnaise mixture into the cabbage mixture and combine. Add pepper, if desired. Refrigerate until needed. Take care not to refrigerate too long, as the cabbage will go limp.

One caveat, if you decide to use purple cabbage, mixing ahead will lead to a purple colored dressing. Leave it out of the mix until closer to serving time.

OLYMPUS DIGITAL CAMERA

Ropa Vieja

OLYMPUS DIGITAL CAMERA

Perfect stringy texture!

I may have mentioned in a previous post that my husband and I purchase beef by the cow. Actually, 1/2 a cow. This is the only possible way we could afford grass fed, pastured beef. It’s a lot of money up front, but it lasts a year and gives us fantastic beef from a great farmer. Per pound, it’s cheaper than the factory farm stuff. The downside? Lots and lots of roasts. Part of the reason I started this blog was to go out into the world and try to find new and exciting things to cook, especially with the roasts. I may have also mentioned that my kids cry when I say we are having pot roast. Yeah, fun. Good times.

So, one day we were exploring the local restaurant scene and came across a restaurant called Sin Frontieras. On the menu was a dish called “Ropa Vieja”. My high school Spanish kicked in and I said “old clothes”? What kind of dish is named “old clothes”? Turns out it’s a Cuban version of pot roast. It’s called “old clothes” because the cooking process makes the meat look like stringy cloth rags, or old clothes. Regardless of the name, the dish is superb. This dish would be PERFECT to recreate at home. I need something other than a regular “yankee” pot roast recipe and my wine and onion braised roast. And, as a bonus, I can repurpose the leftovers and call them something like fajitas the next night!

In the interest of authenticity, I should note that I did not use flank steak or brisket. I don’t really have a surplus of those. But I do have a crazy amount of chuck and arm roasts. So, I used 2 of my chuck roasts, about 4 pounds. I am a working mom.  I get home around the time most people are starting dinner.   I am slightly behind because I have to get the kiddos started with homework and such.  So, dinner management drives my life.  I promise my recipes to be ones that a real life working mom (me) uses. Tonight I made Ropa Vieja because my mom asked me over at the last minute for dinner. While she’s cooking dinner tonight, I am cooking also. I’ll just have it tomorrow and use the leftovers (even my family can’t put away 4 pounds of pot roast) some other time in the week. I’ll also cook something like this in the background (since it just sits in the oven) one night when I make a grilled meal or skillet meal. Then, I put it in the fridge and just warm it up the following day. Given the long cooking time, it’s not really practical to cook on a weeknight and expect to eat before 7:30. Start to finish, this is probably a 3 hour meal. I know people will put this in a slow cooker. I have done that with similar dishes. I am just not wild about the slow cooker. Things just taste better to me in the dutch oven.

As an aside, I would like to rant about some of the few cooking shows left on the Food Network on the Cooking Channel. There are more than a few shows that give the illusion of helping working moms cook. One claims to make meals in a half an hour. Those meals can be crazy expensive with one off ingredients you’ll never use again. I saw one that was Thai inspired beef noodles that included flank steak, curry paste, fish sauce, shallots and shiitake mushrooms. Does the meal sound lovely? Yes, it does. But, by the time I bought all the ingredients, I could have gone out to a restaurant. There’s another show that claims you can make things almost homemade by incorporating pre-made ingredients in the recipe. When the host suggested that I buy pre-cut onions, I was out. Really? You can’t cut your own onions? And again, pre-cut onions are expensive.

On the other end of the spectrum are the money saving shows that essentially pad out their menus with rice, pasta or bread. These are items I try to avoid because of their high calorie and carb contents and little to no nutritional value. Also, I found the valuations absurd. There was one episode of a show that claims to make all meals for $10 that called for skirt steak, baking potatoes AND kale. A pound of skirt steak runs me $8.99 minimum. To buy everything in the episode is well over $10 in my area. Lastly, there is actually a show that advises you to cook your entire week’s meals in one day. In other words, use one of the two days a week (if you are lucky) you have completely with your family to cook meals for the rest of the week. Oh, I’d love to go to the movies or for a hike with you, son, but I need to cook tonight’s meal and next week’s. Seriously? Does anyone do it? I would run out of pans and refrigerator space before I finished the week!

The family review of this recipe was overwhelmingly positive.  My son said I was allowed to make this dish whenever I wanted. It was “awesome”. So, I have found one pot roast recipe he likes! Eureka!!

Ropa Vieja

Serves 6-8

1/4 cup of lard, vegetable oil, bacon drippings, etc.
4 lb Chuck Roast, brisket or flank steak
Salt
Pepper
1 medium onion, halved, sliced
1 medium bell pepper, cut into rough strips
2 stalks of celery, sliced
1 jalapeño, small dice
3 cloves of garlic, minced
1 bay leaf
1/2 tablespoon ground cumin
1 tablespoon paprika
1 cup olives, stuffed with pimentos, sliced
2 cups of beef broth (may use water)
14.5 ounce can of diced tomatoes

Preheat oven to 350 degrees.

Heat oil in a dutch oven (I used a 5 quart). Salt and pepper the beef and brown on each side. Remove and set aside.

In the dutch oven, place the onion and peppers and sauté for about 2-3 minutes. Add the garlic, bay leaf, cumin and paprika. Cook until fragrant, about a minute. Add the olives, sauté for another minute. Deglaze with the beef broth and scrap the brown bits off the bottom of the pan. Add the tomatoes. Bring to a simmer. Return the beef and any accumulated juices to the dutch oven. The liquid should come up the sides of the beef without completely covering it. If your liquid is short, add more broth or water.

Place the lid on the dutch oven and place the pot in the preheated oven. Bake for 2 hours or until the meat pulls apart, resembling “old clothes”.

OLYMPUS DIGITAL CAMERA  

OLYMPUS DIGITAL CAMERA  

OLYMPUS DIGITAL CAMERA  

OLYMPUS DIGITAL CAMERA  

OLYMPUS DIGITAL CAMERA  

OLYMPUS DIGITAL CAMERA  

OLYMPUS DIGITAL CAMERA

BBQ Sauce

OLYMPUS DIGITAL CAMERA

Can you have a good barbecue with barbecue sauce from a jar? I suppose. Will you pay an arm and leg for it? Yes.

I am cheap. I prefer the more positive terms like “frugal” or “fiscally conservative” when it comes to food. If I can make it myself with better ingredients, for less money, I totally will. You think you are getting organic, high fructose corn syrup free sauces made with the finest ingredients? Probably not. And if you are, you are certainly paying for it. You can make this sauce in no time with ingredients you likely have on hand. Seriously.

What is barbecue sauce? Depends on the type you like. Generally barbecue sauces fall into two categories. I like tomato based “Kansas City” style sauce. I realize being from a mid-Atlantic state, I should be partial to South Carolina’s mustard based sauce, but I’m just not. I like the thick mahogany tomato based sauces. These sauces are not complicated. At all. Barbecue sauce is….ready? Ketchup (I don’t accept Catsup as an option, sorry Catsup crowd). Molasses. Vinegar. Mustard. Brown Sugar. Spices. Done. You think you can put these items in a pan and simmer for a bit? Then you can make your own barbecue sauce! The exact amount you need. No more half used bottles of sauce clogging up valuable real estate in your fridge, waiting to be tossed because you forgot how old they are. No more running to the store because that is the one ingredient you forgot. You will be set free from the tyranny of bottled barbecue sauce!! The best is you can customize it. Want it blazing hot? Add hot sauce or more cayenne. Want it sweeter? Add more brown sugar and leave out the cayenne. You can make the sauce exactly the way you want it! The following is a template of very basic and balanced sauce. Feel free to experiment!

Barbecue Sauce

1 cup (dry measure) ketchup
1 tablespoon molasses
1 tablespoon brown sugar
1 tablespoon apple cider vinegar (or white vinegar)
1/2 tablespoon mustard (I used French’s, whatever kind is handy)
2 tablespoons chili powder
1 teaspoon ground cumin
1/2 teaspoon ground black pepper
1/2 teaspoon salt
1/2 teaspoon crushed oregano
1/2 teaspoon granulated garlic (or powder)
1/2 teaspoon onion powder
1/4 teaspoon cayenne pepper

Combine all the ingredients in a small saucepan. Bring to a simmer and simmer until the flavors combine, about 5-10 minutes. Remove from heat and apply to your favorite barbecue item.

OLYMPUS DIGITAL CAMERA

Goofy Toast

OLYMPUS DIGITAL CAMERA

I can’t believe I am writing this post, but kids are insistent.   “You have to do a post on this!” They cried.  Now, when I made the Chocolate Chip Cookies Noir, they forbid me from putting the recipe on the blog.  They didn’t want the “secret” recipe to get out.   But for this, they thought everyone should share in the fun.  I’m having trouble because I’m not sure this is “blog worthy”, but I’ll give it a go.

Let me start by saying the reason I made this dish is that I announced we were having pork loin for dinner. You may have heard the crying and whining where you are. Let’s just say pork loin doesn’t pique the kids’ fancy. Any chance they can get, they’ll try to make a play for “breakfast for dinner”. If they sense any weakness in the resolve of the person making dinner, the begging will commence. Seriously, it is their favorite meal. You may notice a lot of breakfast dishes on this blog. We mostly have them for dinner. Tonight is no exception. Since Daddy was away, they made a play for Goofy Toast. The idea of pork loin wasn’t too hot with mom either, so they won that round.

The history of Goofy Toast begins at Disney World. We have taken many a vacation to Disney World.  Back during the depths of the  Depression Recession, Disney was deeply discounted.  So discounted, we could afford to stay at the Polynesian Resort.  Man, does that spoil you.  We went one year and got 30% off the hotel, free food AND a $250 Visa Gift Card.  Now, you may get 30% off the hotel rate, but that’s about it.  The exact same vacation is nearly twice as much money as it was 3-4 years ago.  I guess the economy has recovered? Luckily, we have pictures to relive the experience.  Anyway, at one of the many breakfasts we ate at the Polynesian during our stay was something called “Goofy Toast”.  The kids loved the name and ordered it.  In the old days we would have called it “Eggs in a Nest” or something like that.  Now, Goofy Toast.  I’m sure that’s trademarked or something.

My kids fawned all over this dish.  I looked at it and it appeared to be grilled bread with an egg in the middle.  No big.   I was perplexed as my children were not big egg eaters.  Nor were they particularly fond of toast, unless it was slathered with peanut butter and dotted with chocolate chips.  But the Goofy Toast had cast its spell.  Moving the egg from the side of the plate to the middle of the toast transformed both moderately despised food items into an edible creation. I guess those Disney people really know their target audience.

So, when we got home I asked if they wanted Goofy Toast.  I got the eye roll.  No, really, I can make it, I replied.   So, I made it and they were amazed that I could recapture the magic of the Goofy Toast.   Truly amazed.  Like I had turned lead into gold amazed. Ok…..

So, if you would like to try something ever so slightly different for breakfast, here you go.  Apparently, this is crazy kid friendly!  I will say, it is an elegant presentation of what is otherwise humdrum eggs and toast.  So, there is that.

Goofy Toast (aka Eggs in a Nest)
makes 1

butter
slice of bread
egg
salt and pepper

Melt butter in a nonstick pan over medium heat.

While the butter is melting, cut a hole in the middle of the bread.

Place bread in pan.

Crack egg into the hole in the bread. Season with salt and pepper. Dot bread with butter. When egg has set on the bottom (2-3 minutes), carefully turn over in pan. Cook until desired doneness.

Seriously, that’s it. As a variation, my daughter only likes scrambled eggs, so I scramble the egg before putting it into the opening in the bread.

OLYMPUS DIGITAL CAMERA

OLYMPUS DIGITAL CAMERA

OLYMPUS DIGITAL CAMERA

OLYMPUS DIGITAL CAMERA