Category Archives: Breakfast/Brunch

Quiche

Mushroom Gruyere Quiche

I am an unabashed fan of cooking. There’s something so satisfying about providing a great dish to someone. Hosting two great friends was the inspiration for this dish. I needed something easy, but impressive. I also didn’t want to be cooking or cleaning while they were watching! I wanted to be enjoying their company! The perfect dish is quiche. I made the crust (using only 1 tablespoon of sugar) and sauteed the vegetables in the filling the day before. I also adapted the crust recipe by using all butter due to dietary restrictions of my guests. The only thing I had to do on brunch day was whisk the eggs, milk, cheese and vegetables together and bake!

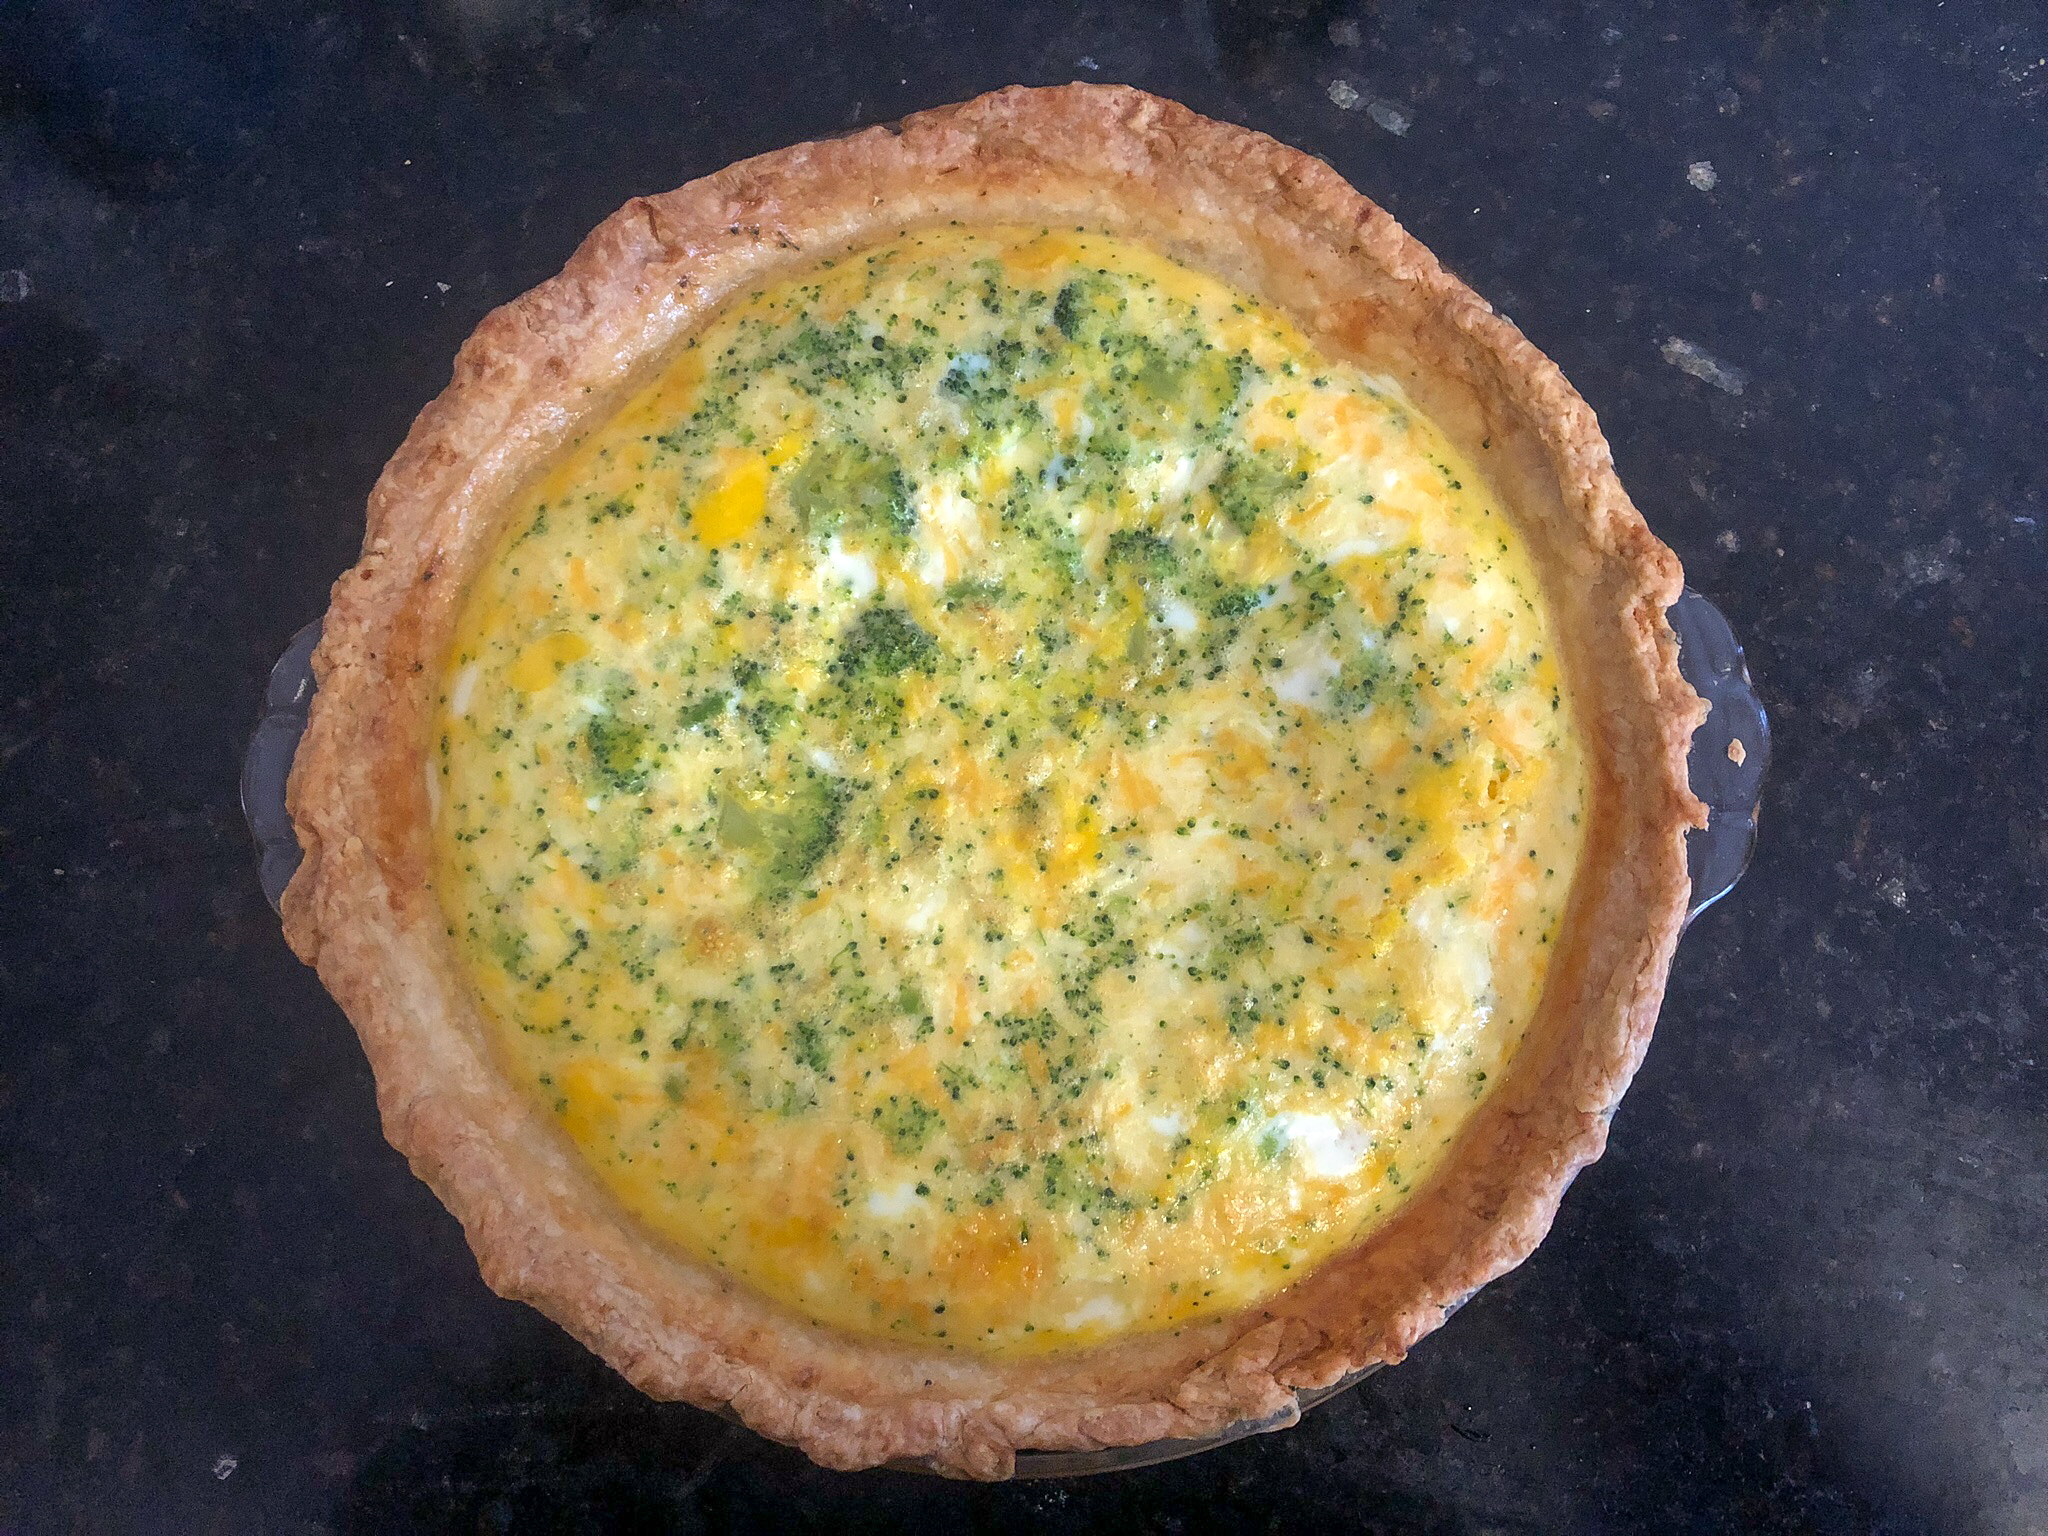
With quiche you use pretty much anything you have leftover and the end result will be amazing. Partial bag of frozen broccoli? Great. Leftover shredded cheese from taco night? Throw it in! Quiche transforms leftovers into a sublime brunch dish.

Broccoli Cheese Quiche

The basic recipe consists of 6 eggs, a cup of whole milk and salt and pepper to taste. Add a cup of anything you like along with cheese and you are set! For the mushroom quiche, I sauteed 6 ounces of mushrooms along with 2 medium shallots. Added a cup of grated gruyere (or fontina would be good) and a teaspoon of thyme. For the broccoli cheese quiche, I added a cup of frozen broccoli that had been microwaved for 30 seconds and patted dry and a cup of shredded Mexican blend cheese. It’s really that easy. Bake at 350 degrees until the center isn’t wobbly- about 45 minutes.


Base Quiche Recipe

  • Servings: 4-6
  • Difficulty: easy
  • Print

An easy, inexpensive and impressive brunch dish.

Ingredients

  • 1 basic pie crust (made with 1 tablespoon of sugar instead of 3), blind baked with pie weights for 10 minutes at 400 degrees Fahrenheit, and 10 minutes at 375 with the crust edge covered. Or store bought
  • 6 eggs, slightly beaten
  • 1 cup of whole milk. Or any combination of heavy cream, half and half or whole milk adding up to a cup.
  • salt and pepper to taste

For Mushroom Quiche:

  • 2 tablespoons butter
  • 6 ounces of mushrooms, sliced
  • 2 medium shallots, finely chopped
  • 1 teaspoon dried thyme
  • 1 cup of grated gruyere or fontina cheese

Directions

  1. Preheat oven to 350 degrees Fahrenheit.
  2. Melt butter in a medium saute pan.
  3. Saute mushrooms and shallots until the mushrooms are brown and the shallots are soft. Add the dried thyme and saute until fragrant.
  4. In a large bowl, add the eggs, milk, cheese, mushroom mixture and salt and pepper. Stir until well combined.
  5. Place the prepared pie crust on a sheet pan.
  6. Pour the egg mixture into the prepared pie crust, protect the edge of the crust and place pie in the preheated oven. Cook until the center of the quiche is no longer wobbly and cooked through, about 45 minutes.

http://dawnoffood.com

Cajun Breakfast Souffle

I needed something to bring to a breakfast meeting for a group of, I guess you could say, community organizers. It’s a group of awesome women who meet to throw my community’s big 4th of July celebration. As a food blogger, I feel a certain bit of pressure to bring something great. Not just good, but amazing. Most people aren’t low carb, so I choose to splurge at these events. Hunting for something to bring, I came across something called a “breakfast casserole”. Essentially it was bread, eggs, cheese and ham. Eh. Just didn’t speak to me. But it got me thinking. How could I put a Cajun spin on it? I love all things Cajun. So, I began by subbing out the bread for cornbread, the ham for blazing hot andouille sausage, added onion, green pepper and garlic and BAM! Cajun Breakfast Souffle.

This dish is easy, and can be made ahead and assembled the next morning. It’s pretty great reheated, too. It travels well. This is the perfect “bring to brunch” dish. I cannot emphasize the ease of this dish. The only hard part is deciding whether you are making the cornbread or not. I opted to make the cornbread from a boxed mix, but you could easily buy cornbread and make it work in this recipe. I know that boxed mixes aren’t fantastic (in my defense, there were all natural ingredients), but I can’t get my cornbread recipes to work. I’m cornbread challenged.

Cajun Breakfast Souffle
Serves about 6-8

Butter for greasing a pan
4 cups loosely packed cornbread, cut into 1 inch (or so) cubes (add jalapenos for extra spice!!)
2-3 tablespoons olive oil
1 medium onion, small dice
1 green pepper, small dice
1/2 pound of andouille sausage, medium dice
1 teaspoon garlic, minced
1/2 teaspoon salt
1/4 teaspoon cayenne pepper (optional)
1/4 teaspoon black pepper
6 eggs
1 1/2 cup whole milk
1 cup shredded cheese (I used Cheddar/Monterey Jack)

Preheat oven to 350 Degrees Fahrenheit.

Grease a 2-2 1/2 quart baking dish. Place cornbread into dish and set aside.

In a skillet, heat olive oil over medium heat. Add onion, pepper and andouille and cook until the onion is translucent and the green peppers are soft. Stir occasionally. Add the garlic, salt and peppers. Incorporate the spices. Set aside to slightly cool.

In a small mixing bowl, combine the eggs and the milk. Add the cheese and stir until incorporated.

Spread the pepper and sausage mixture over the cornbread. Evenly pour the milk mixture over the whole concoction.

Bake, uncovered, for about an hour, or until the edges are bubbling and the top begins to just brown. If you are unsure about whether the souffle is done, push a knife into the center of the dish. If it comes out clean, your dish should be finished.

Make ahead notes: You can make the cornbread ahead of time (or cut it into squares ahead of time), as well as the pepper mixture. Store the cornbread in an airtight container and place the pepper mixture in the refrigerator over night until you are ready to make the dish. You can also let the egg mixture “soak into” the cornbread for an hour or so before baking.

http://dawnoffood.com

http://dawnoffood.com

Sour Cream Pancakes

http://dawnoffood.com


I have a love hate relationship with breakfast.  All of the best “breakfast” food is chock full of carbs.  As someone who shouldn’t be indulging in carbs, this presents a lot of problems. Breakfast is where one can shamefully eat something that’s a dessert and call it a “meal”. You can’t get away with waffles, pancakes, or French toast at lunch.  But breakfast?  No problem.   Bacon and fatty sausage are paired with such indulgences and it’s perfectly acceptable.  What other meal can pull this off?  Not one.  You have a side of bacon at dinner, you better be eating “breakfast for dinner”.   Breakfast is such an anomaly.  Eggs and sausage is one person’s low carb breakfast and another person’s health nightmare.   On the flip side, one person’s oatmeal is a heart healthy breakfast for some people,  but a low carb eater’s horror show.

In other meals, you just don’t get so much controversy.  The other meals have a sense of balance.  You could be low carb and low calorie/fat with a salad.  Or grilled fish or chicken.  There is more overlap and options for all types of eaters.

My kids LOVE breakfast.  Doughnuts, waffles, pancakes, french toast, regular toast and muffins are all begged for in large quantities.  From a practical standpoint, I love waffles and muffins.  They keep well, make lots in a short amount of time, and can be reheated easily for breakfast during the week.  Add a breakfast meat cooked the night before and reheated and morning breakfasts are a breeze.  But, the kids grow tired of repetition and insist on pancakes.  I am just not a fan.  The first batch comes out meh and it takes FOREVER to cook them.  Until, of course, the pan becomes too hot, then the pancakes burn.  Saving them for another day?  Unless you are going to cut squares of parchment out and place them between each pancake, better not freeze or refrigerate them.  They meld into a large mass never to be separated again.  My waffles have never betrayed me in such an unforgivable manner.  Ditto my muffins.

But, the heart wants what it wants.  Plus, I had sour cream to spare.  And maybe one of my kids was boycotting waffles and guilt wouldn’t let me send her to school with nothing in her stomach.  So, I when I came across a really old recipe for sour cream pancakes (1850s!), I caved. As an aside, I love when people write about how they “thought” to add sour cream to anything and call it new or improved. Um, people have been cooking for a really, really long time. Unless this is some kind of crazy pancake foam or sous vide, it’s not new.

In The Great Western Cookbook by Angelina Maria Collins, written for Western Housewifes, Mrs. Collins details her very own pancake recipe in one titled:  Mrs. Collins’ Batter Cakes.   I was particularly interested in this recipe as it would make use of my left over sour cream.  I made tacos, and you just don’t need that much sour cream for tacos.  I ALWAYS have leftover sour cream.

The recipe is fairly modern, as Mrs. Collins used several interesting techniques, for the time, to make very light pancakes. First, she separated the eggs,  and whipped the whites “until frothy”.  Aerated egg whites, if the bubbles are left intact through careful folding into the pancake batter, will create a very airy confection. She also employed some chemical assistance.  In the days before baking powder or soda, there was, for a brief time, “saleratus”.  Instead of sodium bicarbonate (modern baking soda), saleratus was usually potassium bicarbonate.   Using a bicarbonate with sour cream, which is acidic, and heat would also create air bubbles, also helping to lighten the pancake. Nowadays, people largely rely on baking powder or soda alone to lighten the pancakes.

The recipe also included all the usual suspects in such a concoction:  flour, eggs, and milk:

Take four eggs, beat them separately, and to the yolks add of pint of rich milk, beat in enough flour to make it into a thick batter.  Put in a tea-cupful of sour cream, a tea-spoonful of saleratus; add this to the batter, mix in lightly the white of the eggs, beaten to a froth, and bake on a hot griddle like buckwheat cakes.

I’ve updated it slightly to include a bit of salt and vanilla and changed some of the ratios because, well, “enough flour” just isn’t a really good descriptor for a blog recipe, is it?

Sour Cream Pancakes
Makes about 16

2 cups all-purpose flour
2 tablespoons sugar
2 teaspoons baking soda
1 teaspoon salt
1 cup sour cream
1 cup whole milk
2 large eggs, separated
4 tablespoons unsalted butter, melted and cooled, plus additional for cooking pancakes
1 teaspoon vanilla
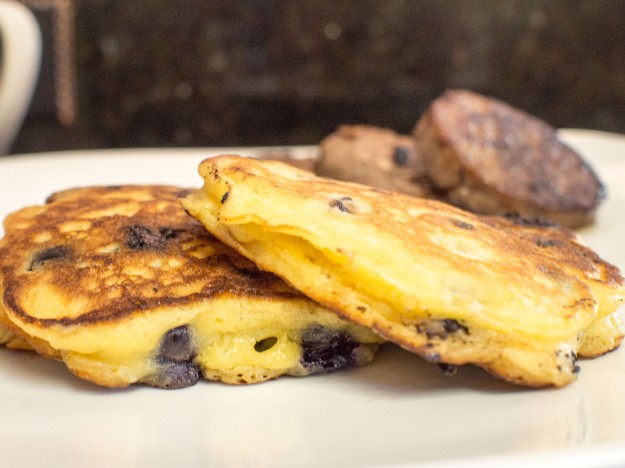
1 cup blueberries (optional), dusted with 1 tablespoon flour

In a medium mixing bowl, sift together the flour, sugar, baking soda and salt. Set aside.

In a small mixing bowl, combine the sour cream, whole milk, egg yolks, melted butter and vanilla. In a separate bowl, Whip the egg yolks until soft peaks form.

Add the sour cream mixture to the flour mixture and just combine (batter will be lumpy and that’s ok). Gently fold in the egg whites. If desired, fold in the blueberries.

In large non-stick pan, or flat griddle, melt enough butter over medium heat to coat the pan. I like to use clarified butter or ghee for this step, but butter works well. You may need to add more as you work through the batches. It just has to be watched because it has a tendency to burn. When the griddle is evenly heated, add about a 1/4th a cup of batter to the griddle. When the top of the pancake is dotted with bubbles and the bottom is brown, flip over and cook for another minute or so. Remove from the griddle and serve. Alternatively, put the oven on low (170-200 degrees Fahrenheit), and keep the pancakes in the oven until needed.

 

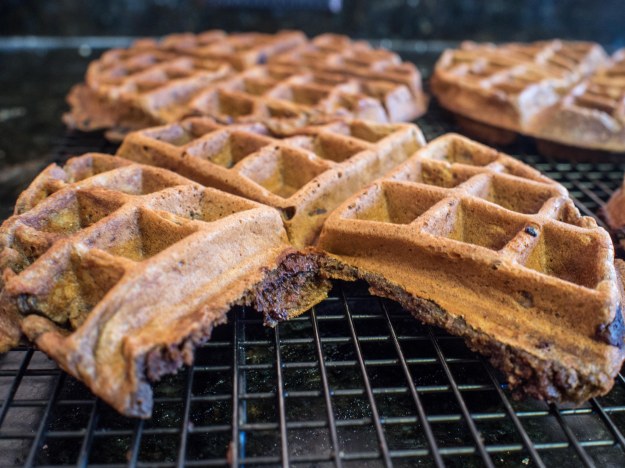
Chocolate Chocolate Chip Waffles

http://dawnoffood.com


I’m on quite a tear.  Chocolate everywhere.  I am supposed to be eating healthier.  The whole point of this blog was to eat simply.  Here I am pimping out muffins, fancy waffles and shortbread.

On the other hand, as I have reviewed my blog progress over the course of the last year my biggest view-getting posts were:  Pizza Fondue, Waffles, and Maryland Fried Chicken.   My readers want what they want!  Also, these items are so much easier to photograph well.

I have tried Chocolate Chocolate Chip Waffle recipes and all promised that they weren’t “too sweet”.  Indeed, they weren’t.  They were terrible.  Like when you sneak a bit of unsweetened chocolate for the first time.  Ick.  Chocolate needs sugar.  It just does.  Also, it’s breakfast.  People eat doughnuts, French toast, pancakes, crepes, muffins, pastries and all sorts of sweet things for breakfast.  It won’t kill people to put a touch of sugar in chocolate waffles.  Plus, Chocolate is virtually a health food anymore.

I borrowed parts of this recipe from epicurious.com.  I altered it quite a bit to add more sugar and swap out the olive oil for butter. Olive oil in waffles? Just no.

Chocolate Chocolate Chip Waffles

2 cups all-purpose flour
½ cup unsweetened cocoa
powder
¼ cup (packed) brown sugar
1/4 cup sugar
2 teaspoons baking powder
1 teaspoon baking soda
1/2  teaspoon salt
3 large eggs
2 cups buttermilk (or 2 cups milk with 1 tablespoon vinegar)
6 tablespoons butter, melted and cooled
1 teaspoon vanilla extract
6 oz. bittersweet chocolate chips
Nonstick vegetable oil spray

Preheat waffle iron.

Whisk together the flour, cocoa, sugar, baking powder, baking soda and salt.

Combine eggs, buttermilk, and vanilla.

Combine the dry ingredients with the wet ingredients until just combined. Stir in the chocolate chips.

Spray the waffle iron with the oil spray and cook the waffles according to your iron’s instructions.

http://dawnoffood.com

http://dawnoffood.com

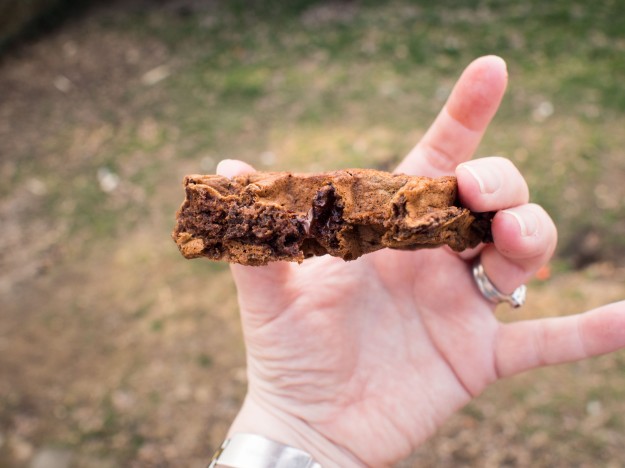
Chocolate Chocolate Chip Muffins

http://dawnoffood.com

My kids were getting tired of waffles for breakfast on school mornings.  Really, really tired.  But they are so easy.  You make them on the weekend, freeze them, pop them in the toaster and serve with “breakfast meats” you reheated because the hubs made them the night before and BAM! breakfast complete.  A seriously 5 star breakfast complete, if I do say so myself.  But, repetition has a price.  Boredom.

So, I tried pancakes.  They were fine, but didn’t store particularly well.  Couldn’t really separate them as nicely as the waffles.  The kids then came to a bit of an impasse.  They could agree on nothing, until I came across a recipe for Chocolate Chocolate Chunk Muffins. Well, what’s not to like?  To quote Cosby, it has wheat, eggs and milk!  Must be good for you! The recipe was originally from Dorie Greenspan’s Baking from My Home to Yours. She is one of my favorite cookbook authors.  I found it on the Brown Eyed Baker’s blog.  I made a very few changes because Dorie Greenspan’s command of baking is just extraordinary.  Just reading the ingredients was a joy because you could see how they all fit together and their purpose.

I have one little change.  For whatever reason, buttermilk recipes are never quite right for me.  The batter is always too dry.  When I substitute milk and vinegar, it seems to work quite well.  I’ve tried all brands of buttermilk and find that I have to add more liquid.  Plus, buttermilk comes in quarts and I always need 1 1/4 cups or something like that.  What do you do with the rest?  Make the recipe again?  Milk is just more versatile and I don’t throw it away like I do buttermilk.

Ok, I lied. I have two changes. I’m not breaking up some fancy, expensive chocolate for this recipe. Bittersweet chocolate chips are just fine!

Also, and I’ve mentioned this before, I scoff at melting chocolate over the double boiler.  ESPECIALLY when I’m melting it with butter.  Put a dishwasher and microwave safe plate in the microwave and nuke for a few minutes on low power.  Done.  Stir, use mixture, and place in dishwasher.  No messy cleanup of several bowls and pans.

Chocolate Chocolate Chip Muffins
Makes 12
Prep Time: 15 minutes
Cook Time: 15-20 minutes

6 tablespoons unsalted butter
4 ounces bittersweet chocolate chips (divided)
2 cups all purpose flour
2/3 cups sugar
1/3 cup unsweetened cocoa powder, sifted
1 tablespoon baking powder
1/2 teaspoon baking soda
1/2 teaspoon salt
1 1/4 cups whole milk
1 tablespoon vinegar
1 large egg
1 teaspoon pure vanilla extract

Preheat oven to 375 degrees Fahrenheit. Line muffin pan with liners. Set aside.

Place 2 ounces of the chocolate and all of the butter in a microwave safe bowl. Over low power (50% or less), microwave the chocolate and butter in small increments until just melted. For my microwave, I started with 60 seconds on 50% power. Stirred the items, then another 30 seconds on 50% power and the mixture was melted. Stir between each increment, as chips can retain their shape not appear “melted”. Set aside. Or, feel free to use the double boiler method.

Whisk flour, sugar, cocoa, baking powder, baking soda and salt together in a large mixing bowl. In a large liquid measuring cup, combine milk and vinegar. Let sit for 5 minutes. Stir. Add egg and vanilla extract.

Pour the melted chocolate mixture and the buttermilk mixtured into the flour mixture. Gently stir together until just blended. I found the mixture to have a mousse-like quality, much more so than a batter quality. Add the remaining chocolate and stir gently. Divide equally among the muffin cups. Bake for 15-20 minutes until a tester inserted into the center of the muffin comes out clean. Remove from oven and cool in a baking rack for at least 5 minutes.


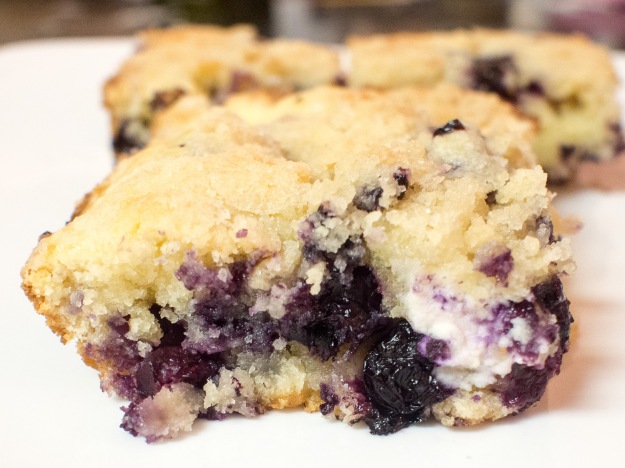
Blueberry Cream Cheese Coffee Cake

Blueberry Cream Cheese Coffee Cake

I’m on a roll with recipes that aren’t really good for you. I had blueberries and cream cheese that needed to be used and thought: what can I do with these items? Around the same time, my son asked for a hiatus from waffles for breakfast. So, despite having the brownies, I figured I would venture into coffee cake land. I love coffee cake, it’s an acceptable cake to eat for breakfast! What made this cake appealing was really the fantastic chunks of cream cheese dotted throughout. The cream cheese adds a sweetness and texture that is so unique and incredibly good to contrast with the tart blueberries.

As always, this recipe is very easy and straightforward. No surprises. I saw this recipe on tasteofhome.com and thought I would give it a go. I added lemon zest and lemon juice for a bit of a bright pop.

My son loved this recipe and my husband said it was amazing! So overall, this was a really big hit.

Blueberry Cream Cheese Coffee Cake
Prep Time: 10 minutes
Cook Time: about 40 minutes

1/4 cup butter, softened
2/3 cup sugar
1 egg
1 teaspoon lemon zest
½ tablespoon lemon juice
1 cup plus 2 tablespoons all-purpose flour, divided
1/2 teaspoon baking powder
1/4 teaspoon salt
1/2 cup milk
1 cup fresh or frozen blueberries
1 package (3 ounces) cream cheese, cubed

TOPPING:
2 tablespoons all-purpose flour
2 tablespoons sugar
1 tablespoon cold butter

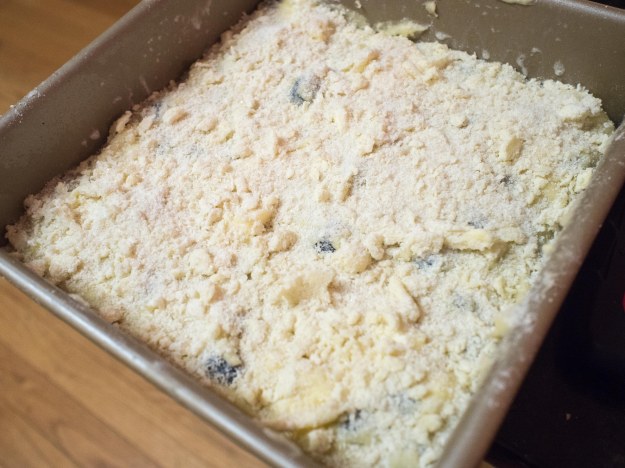
Preheat Oven to 375 degrees Fahrenheit. Grease an 8 inch square baking dish.

For batter, in a large bowl, cream butter and sugar until light and
fluffy. Beat in egg, lemon zest and lemon juice. Combine 1 cup flour, baking powder and salt;
gradually add to creamed mixture alternately with milk.

Toss blueberries with remaining 2 tablespoons of flour. Stir blueberries and cream
cheese into creamed mixture (batter will be thick). Transfer to the greased dish.

For topping, in a small bowl, combine flour and sugar. Cut in butter
until crumbly. Sprinkle over batter.

Bake at 375° for 40-45 minutes or until a toothpick inserted near the center comes out clean. Cool on a wire rack.

Blueberry Cream Cheese Coffee Cake

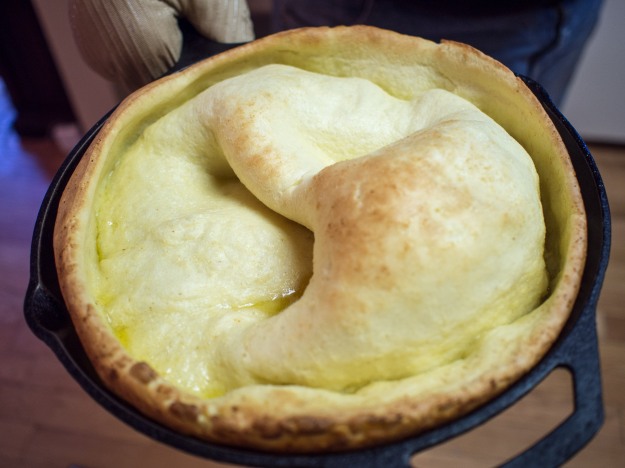
Dutch Baby

Dutch Baby

I first saw this dish made on Alton Brown’s show Good Eats and I thought it was pretty cool.    It’s not really a good entertaining dish in that it doesn’t serve a bunch of people and for breakfast, and it’s pretty labor intensive.  However, if you are serving a smallish group or a family, this is a pretty impressive dish.

This dish resembles a few others.  When eating this dish, you get hints of the influence of German Pancakes and Yorkshire Pudding.  Crispy in parts, soft and soufflé-y otherwise.   On the whole, a fantastic addition to your breakfast regime, if you are eating carbs/gluten/other stuff that is likely not good for you.

As for the history of the Dutch Baby, the recipe supposedly has its origins in Manca’s Cafe in Seattle.   A recipe for the Dutch Baby from Manca’s ran in Sunset Magazine in 1971, making it a popular dish.  There are LOADS of recipes now for this dish.  I stick to a fairly classic version that uses a cast iron skillet.  In order for this recipe to work, you have to preheat the pan, not just the oven.  Also, as you’d like to remove the Dutch Baby from the pan when finished, you want to employ pans or methods that aren’t prone to sticking.    I like cast iron for this task for a variety of reasons.  It’s naturally non-stick if seasoned correctly.  But most importantly, I don’t trust coated non-stick pans in high heat environments.  I won’t say I never use non-stick pans, but I especially don’t use them with heat over medium.  With cast iron, no worries.  And, while I could use my stainless steel and lots of oil, I really don’t want to take a chance.  It’s not like you get any redos on this recipe.  It’s pretty much a one shot deal.  It’s an easy one shot deal, however.

My recipe was inspired in part by a recipe I found on Food Network.

Dutch Baby
Serves 6
Prep Time: 5 minutes
Cook Time: 20-25 minutes

3 tablespoons clarified butter
3 eggs
3/4 cup all-purpose flour
3/4 cup milk, warm (heat 20 to 30 seconds in the microwave)
1 tablespoon sugar,
2 teaspoons vanilla extract
Pinch salt

Confectioner’s Sugar for topping

Preheat oven to 400 degrees Fahrenheit.

Place clarified butter in a cast iron skillet (about 9-10 inches) and place skillet into the oven.  You may ask if you can substitute butter.  I’m leery of butter for this recipe, as this cast iron skillet will get hot (see the 400 degrees above) and you’ll really not be watching the butter melt as you are making the batter.  Clarified butter is the safer choice.  You could easily end up with burned butter here.  Any other high heat tolerant fat would be fine here as well.

Place remaining ingredients in a mixer and mix at medium speed until well combined.  Remove skillet from the oven (with an oven mitt!!!) and swirl butter completely around the pan (again, with oven mitt!!).  If the butter is excessive, whisk surplus into batter.  Pour batter into pan and bake until golden brown and puffy, about 20-25 minutes.  Serve sprinkled with confectioner’s (powdered) sugar.

Love my Kitchen Aid mixer!!

Right out of the oven.  CAUTION HOT!!!

Right out of the oven. CAUTION HOT!!!

Smørrebrød- Shrimp

smørrebrød shrimpI have more than a few close friends that don’t eat chicken, beef, pork, etc.  They confine their meat sources to seafood, for health and ethical reasons.   On the other hand, husband is an unabashed carnivore.   So, this blog won’t veer too far from animal meat sources.  However, every once in a while, I will come across an awesome sounding recipe and make a seafood dish as tribute to my wonderful seafood eating friends.  When research items for my smørrebrød post, I came across this pretty amazing version of the Danish open faced sandwich and couldn’t resist giving it a go.

If you are looking for an easy appetizer, or luncheon dish, this is it.  It’s pretty much just assembly.  No real work of any consequence, yet you end up with a very high impact dish.  This is a fairly minimal, clean dish and the flavors work very well together.  While the look is amazing, the taste is not overly complicated.  Some of my taste testers preferred a pinch of salt added to the sandwich, so you may want to consider that as a finishing touch.

This recipe is inspired by a recipe I found on Epicurious.

Shrimp Smørrebrød
Makes 8 Sandwiches

1/4 cup chilled heavy cream
1/4 cup sour cream
2 tablespoons drained bottled horseradish
1/2 stick (1/4 cup) unsalted butter, softened
8 slices rye bread
2 firm-ripe California avocados
1 tablespoon fresh lemon juice
8 leaves Boston lettuce, rinsed and dried
1 pound large-jumbo shrimp (16), steamed, peeled, chilled and deveined
Cut Chives
1 1/2 tablespoons drained bottled capers

In a mixing bowl, whip heavy cream to soft peaks. Add sour cream and horseradish and whip until stiff. Set aside.

Cut the crust off of the rye bread and make uniform squares or rectangles. Generously butter bread. Set aside on serving plate.

Peel and slice avocados, place in a bowl and toss with lemon juice until thoroughly covered. Set aside.

Place a lettuce leaf on each piece of buttered bread. Layer avocado, shrimp, cream, chives and capers on each sandwich. Serve.

Biscuits and Sausage Gravy

Biscuits and Sausage Gravy, a traditional American breakfast dish

My first brush with a variation of biscuits and sausage gravy was something kindly called sh$t on a shingle, or creamed chipped beef on toast.   I couldn’t understand how anyone had a disparaging word to say about this wonderful dish.  It was amazing!  Creamy gravy, salty beef and crunchy toast.  Keep your breakfast pancakes, this was awesome!

Then, I had biscuits and sausage gravy.   Combine a white gravy with my favorite breakfast meat and you have me at “gravy”.    Let’s be clear, there’s not a single redeeming value about this dish.  Sure, you could try to say you are getting “calcium” from the milk in the gravy.  I use that justification for ice cream and milkshakes.  However, let’s be real, this is a fairly empty calorie carbohydrate extravaganza.   It’s up there with a doughnut for breakfast.  Maybe a bagel with cream cheese.  You get the drift.  Not health food.

Biscuits and gravy have a storied history in America.  The morning meal was terribly important, but, the meal needed to be economical.  A meal that used flour, milk and scant meat was very well received. It kept people full for a day of hard labor in the field. It may have also been a small sign of rebellion, as it was entirely different from anything the British ate for breakfast. I picked recipes from the 1896 Boston Cooking-School Cook Book by Fannie Farmer.  They mirrored other recipes and had exact measurements.  The instructions were sometimes lacking and the ingredients weren’t necessarily listed in the order they were used.  However, I love seeing the differences in preparation.  Now, when you make pie crust or biscuits, you are admonished to keep everything cold, or the biscuits won’t be flaky.  Mrs. Farmer makes no such admonishment.  It just wasn’t an option during her time.  Mrs. Farmer was more concerned about the  oven being “hot”.   If the biscuits were baked “too slow”, Mrs. Farmer warned that “the gas will escape before it has done its work”.

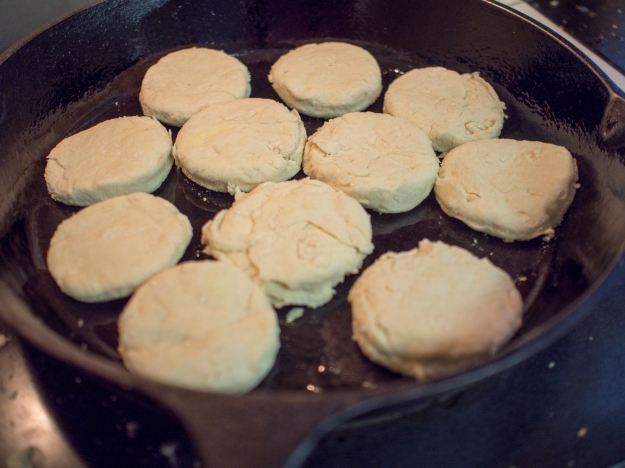
She has 3 versions of baking powder biscuits in her cookbook:  Baking Powder Biscuit I, Baking Powder Biscuit II and “Emergency Biscuit”.    I chose to work off of Biscuit I, as I didn’t have an emergency that a biscuit would solve.  It also used lard and butter, versus just butter, which was good enough for me.  I like the combination of the two fats, as they each add something different to the biscuit. Butter adds a flakiness as it melts and lard adds tenderness. I also interpreted a “hot oven” to be 425 degrees Fahrenheit.   I can’t really say that I was impressed by the biscuits.  They were very serviceable.  They had a great crunch on the outside and were tender inside.  However, they didn’t rise really high.  Maybe that’s a modern convention.  Maybe the oven needed to be hotter.  Maybe, as an American, I’m used to biscuits that are just too big.  I don’t know. They tasted wonderful, they just lacked in presentation.  So, be warned.  I passed it off as “how they ate back then”.  No one cared and there wasn’t a drop left. They were very good, just a little plain.

The sausage gravy is a different story.  Why does it have to be soooo drab?  Fat, flour, milk, salt, pepper and bits of sausage. So bland, albeit delicious.  But, what if it could be better?  So, I decided to break the mold.  I used onion.  I know, gasp.  I then added cognac.  That’s a pearl clutching ingredient there.  Look, this recipe can be fancied up.  The cognac adds a warm layer of flavor that compliments the sausage perfectly.  Your kitchen will smell amazing.  I am using a small amount to deglaze the pan, nothing too boozy.  You are free to leave these out for a more “pure” experience.

Biscuits and Sausage Gravy
Inspired by Baking Powder Biscuits I and White Sauce I from Fannie Farmer’s 1896 Boston Cooking-School Cook Book
Serves 6
Prep and Cook Time: 30-40 minutes

Biscuits
2 cups all purpose flour
4 teaspoons baking powder
1 teaspoon salt
1 tablespoon lard (or vegetable shortening)
2 tablespoons butter, divided
3/4 cup milk

Sausage Gravy
1 pound ground breakfast sausage
1 small onion, finely diced
1 tablespoon cognac
2 tablespoons flour
1 cup milk
1/4 teaspoon salt
1/4 teaspoon black pepper

For the biscuits:

Preheat oven to 425 degrees Fahrenheit.

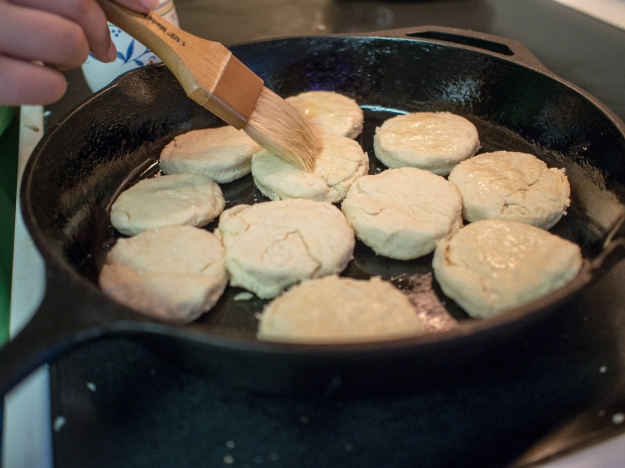
Mix dry ingredients together and sift twice. Work 1 tablespoon of butter and the lard into flour mixture with tips of fingers; add milk gradually while mixing with a knife. The amount of liquid needed to bring the dough together may vary depending on the flour. Place dough on a floured surface, pat and roll lightly to one-half inch thickness. Cut dough with biscuit cutter. Place biscuits on buttered pan, and melt the remaining butter and brush on the tops of the biscuits. For a crunchy surface use a cast iron pan. Bake for 10-14 minutes.

For the sausage gravy:

Over medium heat, brown the sausage and cook until thoroughly done. Remove sausage from pan. Sauté the onions in the sausage drippings until translucent. Add butter if more fat is needed. Deglaze pan with cognac. Add flour to the pan and cook until the raw flour taste is gone, about 1-2 minutes. Do not let the flour brown. Whisk in the milk and bring the mixture to a slow bubble. If the mixture becomes too thick, add more milk. Season with salt and pepper and return sausage to the pan. Serve over biscuits. Traditionally, this dish is served with scrambled eggs.

OLYMPUS DIGITAL CAMERA

OLYMPUS DIGITAL CAMERA

OLYMPUS DIGITAL CAMERA

OLYMPUS DIGITAL CAMERA

OLYMPUS DIGITAL CAMERA

OLYMPUS DIGITAL CAMERA

Muffins

OLYMPUS DIGITAL CAMERA

When my kids were in daycare, for Mother’s Day there would be “muffins for mom” and for Father’s Day there would be “Doughnuts for Dad”.  I was so jealous of “Dad”.  The moms would get these large, dense, tasteless, mass produced muffins that sat in packaging for weeks.  Dads would get doughnuts fresh from a local shop. So not the same!

The only muffins I really remember growing up were blueberry.  I guess there were other flavors, but I don’t recall having them.  Muffins had their heyday in the 1990s.  There was an entire Seinfeld episode dedicated to the best part of the muffin:  the top.  Thanks to that episode, you can buy a muffin top pan.  Who would possibly want those terrible muffin stumps?  The tops were clearly the best part!!  I love Seinfeld.

Muffin flavors exploded, and there was a bit of a muffin craze.  No different than the cupcake phase now.   Can that be over now?  No one looks good eating a cupcake.  It’s messy, you get frosting everywhere, and those little things are expensive!  I’m really not a big fan. But, I digress.

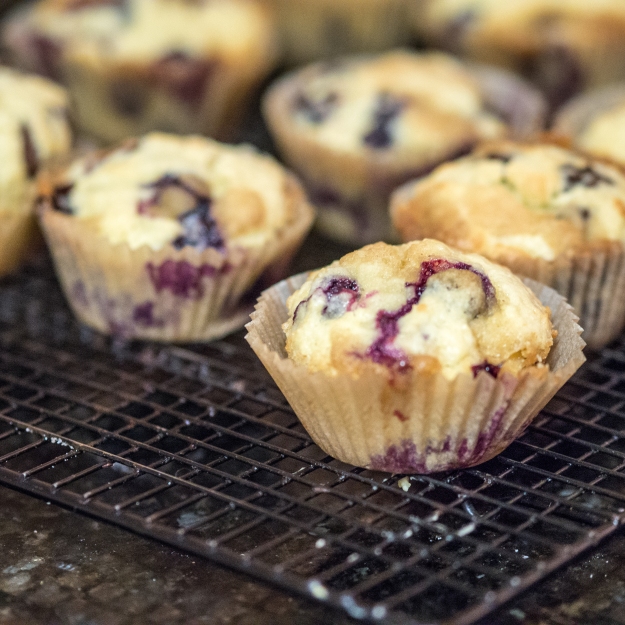
As everyone has a muffin tin, there should be no “special equipment” required to execute this recipe.  Most people now probably make cupcakes out of their “muffin pans”, but I like the old standby of blueberry muffins.  Simple, elegant, and well, it’s got to be good for you, there’s blueberries in it!

This recipe is allegedly based on a Martha Stewart Recipe.   The blueberry recipe currently listed on her webpage is loaded with comments asking where the old blueberry recipe went. One of the commenters kindly put the more popular “old” recipe up.  I used that one as a base for the following recipe.  If the recipe was so good that people were willing to print it and save it, then comment on Martha’s site about it on another recipe’s webpage, it was good enough for me!  A purloined recipe!  Quite the scandal!

As you can guess, it’s made two ways.  One for the boy and one for the girl.   She wouldn’t touch blueberries for anything.

Muffins, two ways

2 cups of all purpose flour
1 1/2 teaspoon baking powder
1/2 teaspoon salt
1 stick unsalted butter, room temperature
1 cup sugar
2 eggs
2 teaspoons vanilla extract
1/2 cup whole milk

Blueberry Version (double if you aren’t making chocolate chip muffins)
1 cup of blueberries
1 teaspoon lemon zest
1 tablespoon lemon juice

Chocolate Chip Version (double if you aren’t making blueberry muffins)
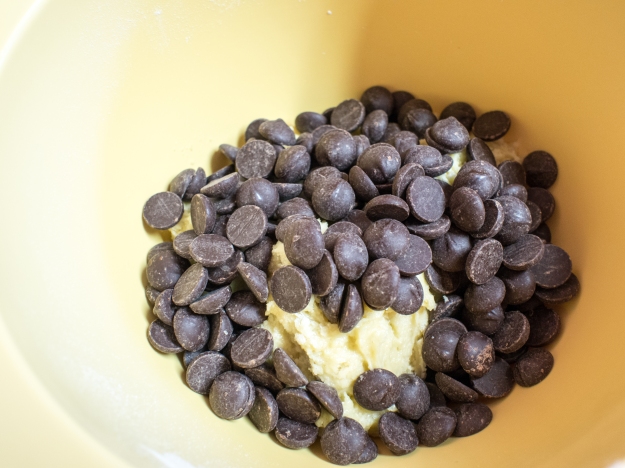
1 cup bittersweet chocolate chips

Topping
1/2 cup sugar
1/4 teaspoon nutmeg

Preheat oven to 375 Degrees Fahrenheit. Line a muffin tin with baking cups or liners.

Whisk together the flour, baking powder and salt in a small mixing bowl. Set aside.

Cream together the butter and the sugar in a large mixing bowl, until fluffy. About 3 minutes. Add eggs, one at a time until combined. Add vanilla and milk until combined.

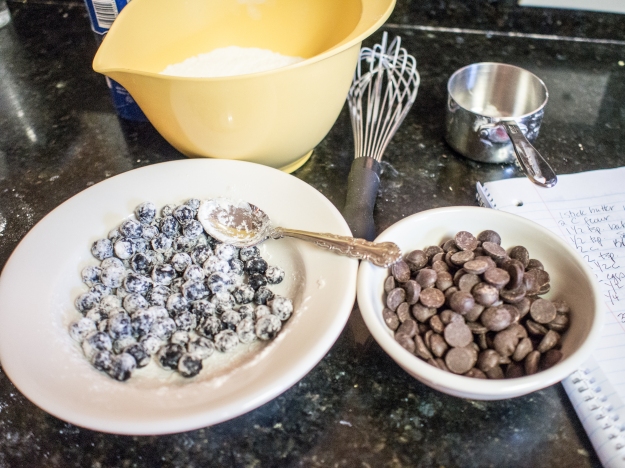
Take 1 teaspoon of the flour mixture and use to coat the blueberries.

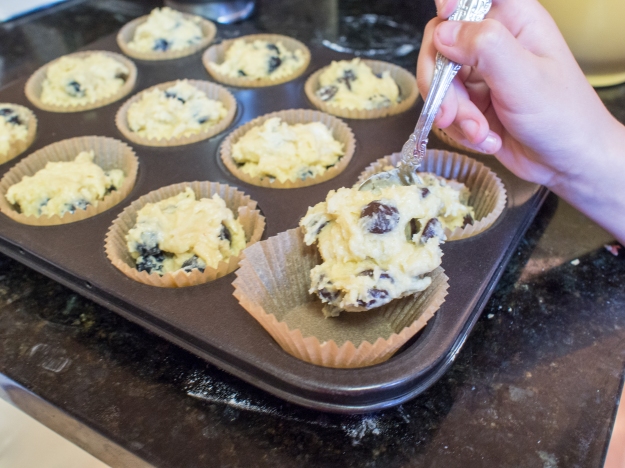
Using a wooden spoon, slowly stir the remaining flour mixture into the wet ingredients. Divide the batter in two. Add the lemon zest, lemon juice and blueberries to one part of the batter and the chocolate chips to the other part.

Add the batter to the muffin tin. Mix together the sugar and nutmeg and sprinkle on top of each muffin. If you have too much batter for 12 muffins, bake a second batch. I got 14 muffins out of mine.

Bake until the tops of the muffins start to brown and a toothpick comes out clean.

OLYMPUS DIGITAL CAMERA

OLYMPUS DIGITAL CAMERA

OLYMPUS DIGITAL CAMERA OLYMPUS DIGITAL CAMERA OLYMPUS DIGITAL CAMERA OLYMPUS DIGITAL CAMERA OLYMPUS DIGITAL CAMERA