Getting ready for the Barbecue Competition

OLYMPUS DIGITAL CAMERA

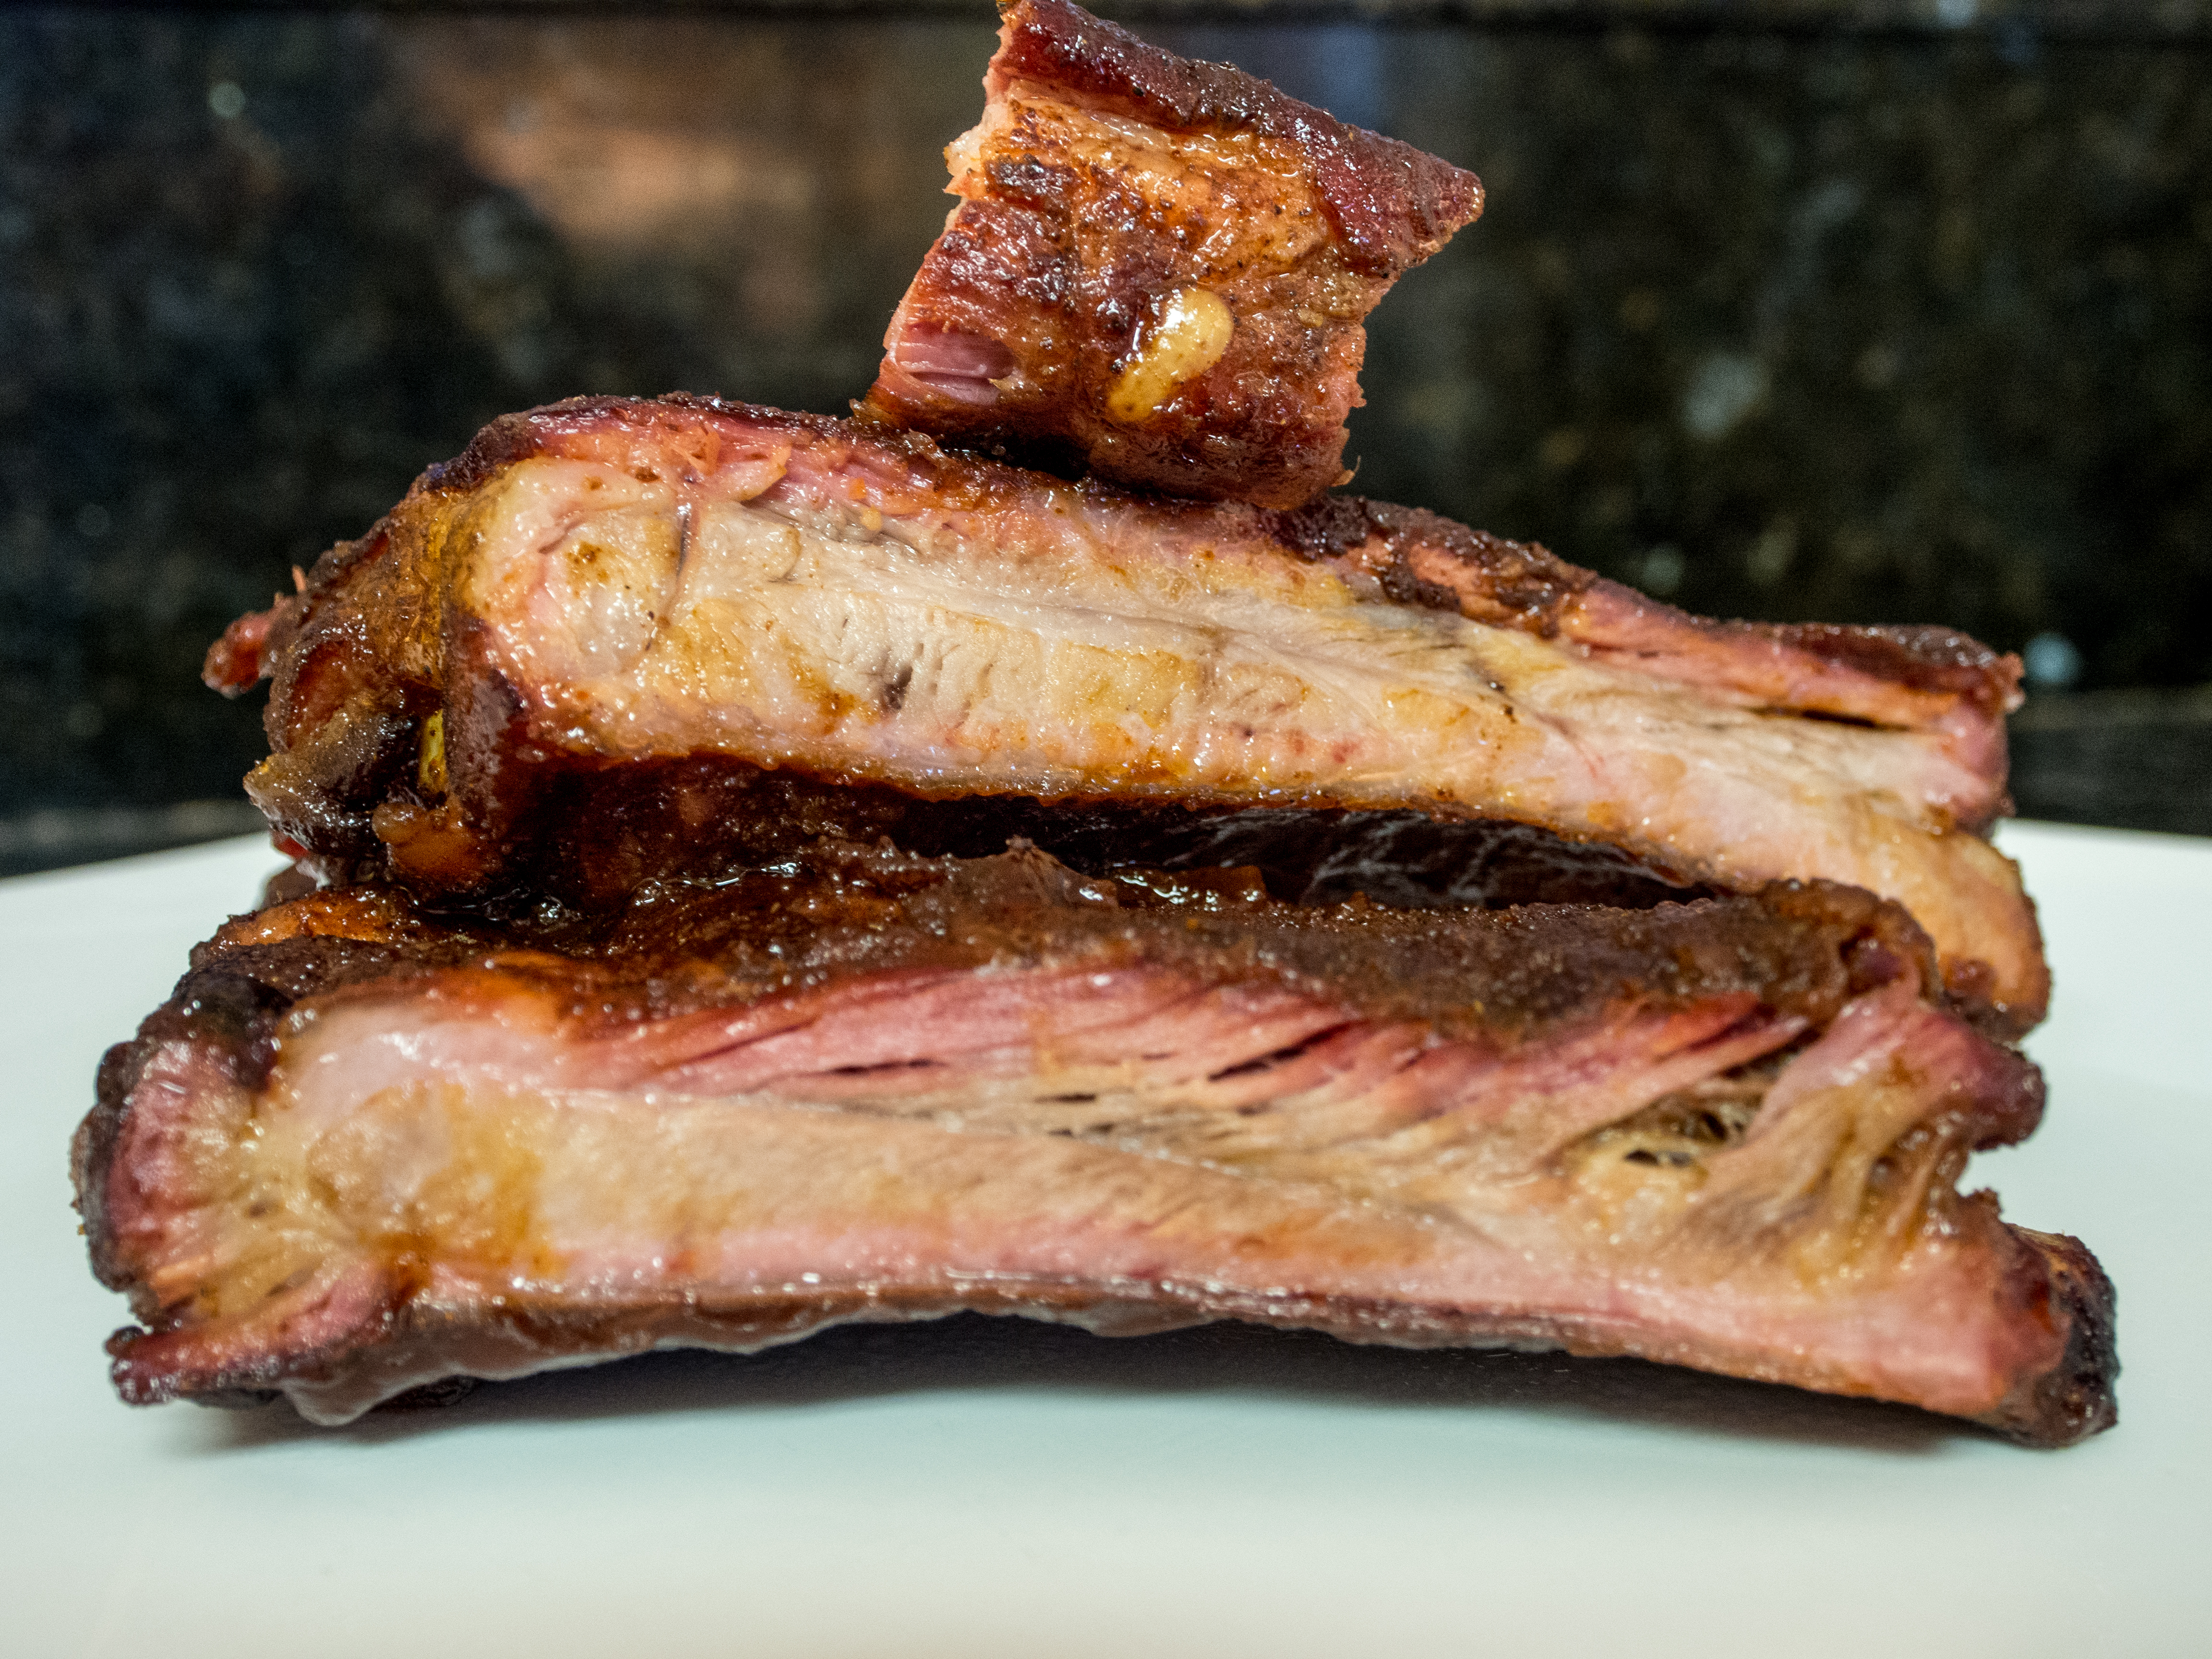
See my beautiful smoke ring!

Barbecue. Few things smell sweeter in the summer than fruity wood chips slowing giving up their flavor in plumes of smoke over low heat. The act of slow smoking renders rather unappealing and tough cuts of meat into tender, smokey nirvana. For those who have had ribs at a chain restaurant where you don’t smell smoke when you walk up to it, realize you have been cheated.

I bought my husband his first smoker as a birthday present one year. A Weber Smokey Mountain smoker, or “bullet”. This is a vertical water type smoker. Very budget friendly (compared to the thousands people can spend on other rigs), as well as beginner friendly. The concept is simple: heat on the bottom, water in the middle as a shield, meat on the top. Smoke from the heat rises to the top to flavor the meat and the meat is slow cooked over low temperatures (225-300 degrees fahrenheit depending on the meat) for a long time.

We smoked briskets, chicken, ribs, pork shoulder or Boston Butt. After our first homemade smoked ribs, we swore we would never eat barbecue out again. Tender with an authentic smoke flavor. You could actually see a smoke ring! The ribs weren’t drowning in sauce or desert dry.  The brisket wasn’t rubbery and, well, dry.  And the chicken wasn’t, you guessed it, dry.  Everything was just amazing.

There’s no one recipe for barbecue. There are no lists of ingredients that make or break a rub or sauce. It’s about the cooking process and letting the meat shine. These are really tough pieces of meat. They are from the hardest working areas of their respective animals. If you can conquer brisket and make it tender and moist, you can cook anything!

Some things I can pass along: if you are making ribs, take off the silverskin. It’s the tough membrane on the underside of the ribs. There are books that say that the low and slow cooking method will “dissolve” the membrane. You can try that approach, but if you’ve ever had ribs that are tough to pull off the bone, chances are the silver skin was left intact.

Watch your temperature.  Just because it’s been sitting beautifully at 250 for 4 hours, doesn’t mean it will stay there.  If you run out of water in a vertical water smoker, your temperature can skyrocket without warning.   You don’t have to stare at it for hours, and you can buy fancy equipment that will email you when there’s a deviation.  I just prefer to keep a watchful eye on it.

Make your own rub and sauce. It’s fun. For Kansas City style sauce, it’s just ketchup (mostly), molasses (or brown sugar), mustard, vinegar, chili powder, cayenne (if you like heat), salt and pepper. Like more cumin flavor? Add it. Like it spicer? Change it. Smokier? Add smoked paprika. Really fun and if you mess up, add more ketchup. That almost always fixes anything. Plus, you won’t have MSG or high fructose corn syrup in your sauce, unless you want them there, of course.

If you ruin your meat, there’s no amount of sauce or rub that will make up for it.  Fortunately, it’s fairly difficult to completely mess it up.

We are doing our first competition in August, so we are practicing. Our neighbors are getting lots of barbecue and will be getting more. We have to practice Boston Butt, ribs, brisket and chicken.

OLYMPUS DIGITAL CAMERA

Yesterday was ribs and chicken. I’m partial to the chicken. Smoked chicken is really good and something very different than the usual baked/roasted/braised chicken I usually do. I do like ribs as well, but everyone has a favorite of something, right?

OLYMPUS DIGITAL CAMERA

So, if you want to join the really slow food movement, invest in a smoker. We’ve had a ton of fun with it and the neighbors definitely know when you are cooking!!  I’ll update everyone as we get closer to the competition!!

Tacos

OLYMPUS DIGITAL CAMERA

The humble taco.  A big staple in my house growing up in the 70s and 80s.  Ortega’s “dinner in a box”.  Add some cheese and meat and dinner was served on crisp and crunchy shells.  As a kid, taco night was the equivalent of going out to eat.   It was fun to assemble your own food and you were eating something exotic, something Mexican.

Like many portable sandwich type items, tacos are thought to be invented by poor workers. In this case, silver miners in Mexico.  Excerpted from Smithsonian.com:

Jeffrey M. Pilcher, professor of history at the University of Minnesota, has traveled around the world eating tacos.   According to Dr. Pilcher, the origins of the taco are really unknown, but he thinks that it dates from the 18th century and the silver mines in Mexico, because in those mines the word “taco” referred to the little charges they would use to excavate the ore. These were pieces of paper that they would wrap around gunpowder and insert into the holes they carved in the rock face. For instance, a chicken taquito with a good hot sauce is really a lot like a stick of dynamite. The first references [to the taco] in any sort of archive or dictionary come from the end of the 19th century. And one of the first types of tacos described is called tacos de minero—miner’s tacos. So the taco is not necessarily this age-old cultural expression; it’s not a food that goes back to time immemorial.  Read more: http://www.smithsonianmag.com/arts-culture/Where-Did-the-Taco-Come-From.html#ixzz2QfSTk512 

It wasn’t long before Glenn Bell co-opted the taco and franchised it all over the United States.  The key to the success of the taco franchise concept lay in the shell.  Soft corn tortillas aren’t good for the long haul.  They are very time sensitive.  This works against the general franchise principles of longevity and shelf life.  But when you fry the shell, the shelf life is extended.  Thus, the taco with the crunchy u-shaped shell is born.  Lasts longer, tastes better.  As an aside, I haven’t eaten at Taco Bell in a very long time.  I like beef to be “beef” and not 88% beef.  However, I must say the dorito flavored taco shells are inspired.  I loved doritos as a kid.  While they are verboten now, it sounds awesome!

Back to taco night!  My kids love taco night, just as much as I did.  My picky daughter can make her taco with meat, taco shell and cheese.  My son can load his up with all the fixings.  My husband and I can keep low carb with a taco salad.

So, I wanted to have a simple dinner and picked up a packet of taco seasoning.  Ortega, my childhood favorite (from http://www.ortega.com/products/products_detail.php?id=13126):

Ingredients
Yellow Corn Flour, Salt, Maltodextrin, Paprika, Spices, Modified Corn Starch, Sugar, Garlic Powder, Citric Acid, Autolyzed Yeast Extract, Natural Flavor, Caramel Color (sulfites).

I know what corn flour, salt, paprika, sugar, and garlic powder (isn’t that a spice?) are.  If you can write “spices”, can’t you say what they are?  Autolyzed yeast extract has MSG in it.  Otherwise, I’m at a loss.  For taco seasoning, shouldn’t seasonings be, I don’t know, greater than 4th on the list of ingredients?

Let’s try Old El Paso, another classic standby:

Maltodextrin, Salt, Pepper(s) Chili, Onion(s) Powder, Spice(s), Monosodium Glutamate, Corn Starch Modified, Corn Flour Yellow, Soybean(s) Oil With BHT Partially Hydrogenated To Protect Flavor, Silicon Dioxide Added To Prevent Caking, Flavor(s) Natural

Well, at least a spice was in the third position.

For the organics, Simply Organic (http://www.simplyorganic.com/products.php?cn=Southwest+Taco&ct=sosouth):

Organic Chili Pepper, Organic Maltodextrin, Organic Paprika, Sea Salt, Organic Garlic, Organic Onion, Organic Potato Starch, Organic Coriander, Organic Cumin, Silicon Dioxide, Citric Acid, Organic Cayenne.

The spice has moved up to number one, but maltodextrin (a sweetener), is a tad high for me, and it’s $1.50 for a little over 1 ounce.    Ugh.

So, I made my own “taco” seasoning.  I hesitated to write this entry because I don’t use corn starch as a thickener.  I use tomato sauce, or tomato paste and water in a pinch.   Whenever I have people over, they remark how really good the taco meat is and I don’t tell them my “secret” ingredient.    The meat doesn’t particularly taste “tomato-y”.  It honestly, just tastes like taco meat.

As with any recipe, feel free to adjust the seasonings to your particular taste.  Try the meat when it’s done and adjust as necessary.  Spices are fickle.  My 12 month old club size container of cayenne may not be as spicy as your fresh from Penzey’s bag of cayenne.  For such a spice heavy dish, all things are relative. Also, and I hate to get political, but I use organic corn shells. Genetically modified (GMO) corn scares me. It doesn’t die when you spray round up on it. GMO corn has caused a blight of round up resistant weeds and an increase in the amount of chemicals sprayed on the corn crops. Organic corn is supposed to be GMO free. The reality is with cross pollination, one can never be sure, but it’s better than definitely GMO.

Also, I used the following fixings, so I don’t really have a recipe for “sides” for this dish. I would love to say that I made the salsa and the guac, but my local Whole Foods did. It’s a weeknight and I work. I spent my time making the seasoned meat!!

OLYMPUS DIGITAL CAMERA

Taco Meat

olive oil
2 pounds ground beef (turkey or chicken are ok too)
2 1/2 tablespoons of a mild red pepper powder (Ancho, Paprika, etc.)
1 tablespoon ground cumin
1 teaspoon garlic powder
1 teaspoon onion powder
1 teaspoon dried oregano (crushed)
1/4 teaspoon smoked paprika (optional)
8 ounces tomato sauce
Salt and Pepper to taste

In a saute pan (I used a 3 quart), heat olive oil over medium heat. Add ground beef and brown. Drain the beef, if there is a lot of liquid. To the browned beef, add each of the spices and heat until fragrant. Add the tomato sauce and stir well. Taste, adjust seasonings as necessary.

You can either place the meat in an oven warmed taco shell (see package directions):

OLYMPUS DIGITAL CAMERA

Or on a bed of leafy greens:

OLYMPUS DIGITAL CAMERA

Creamed Spinach

Just writing the title made me shudder.  Gloppy creamed spinach, who wants that?  Well, to quote Alton Brown, it’s Good Eats.  Really.  If you make it yourself.  If you buy it out of a can or the freezer section, well, I can’t guarantee it so much.

Anytime I saw creamed spinach as a child, I refused to try it.  It sat on my plate all gloppy and greenish.  Hardly the stuff a kid wants to eat.  If I was made to eat it, it was just slime.   Now, I liked regular cooked spinach.  To this day love it.  Just the creamed part seemed to be the problem.  Then, my husband took me on a date to Morton’s.  He ordered creamed spinach as a side dish.   I tried it and it was divine.  Not gloppy or slimy.  But rather thick with a creamy, yet substantial mouthfeel.    I make this stuff at home and my 10 year old LOVES it.  Tells me he could “seriously eat this every day”.  My daughter, not so much.   This is a staple on our Christmas Eve dinner menu when the theme is “Steakhouse”.

I could tell you to buy pounds of fresh spinach and wilt it.  But I won’t.  That’s crazy.  Frozen chopped spinach is made for this recipe.  Buy an organic version if you are unhappy with the little retro frozen bricks in your grocery basket.

Creamed Spinach

2 10 ounce packages frozen, chopped spinach
water

4 tablespoons of butter
2 tablespoons of finely chopped onion
2 teaspoons minced garlic
2 tablespoons flour
1 cup of heavy cream
1/4 teaspoon nutmeg
Salt and Pepper to taste

Put enough water to cover the bottom of a 4 quart sauce pan, place spinach in the pan and cover. Over medium heat, thaw the spinach. Once there are no frozen parts left to the spinach (the spinach will be hot in parts, so be careful), drain well. I use the pan lid to drain most of the water and then a bunch of paper towels to soak up the rest. Honestly, cleaning bits of spinach out of my strainer is just a no. Not gonna happen again. Strain if you want, but I warned you. Set aside.

In a second sauce pan, melt the butter. Sauté the onion, then the garlic. Once the onion and garlic are softened, add the flour. You want a nice, blonde roux. Sauté flour until the flour taste is gone. Don’t let the flour brown. Once the flour is sufficiently done, add the cream slowly. As the cream and flour meet over the heat, the mixture will thicken. Add the cream until you have a consistency that is slightly thicker than how you want the creamed spinach. You may need slightly more than 1 cup of cream to achieve this consistency. Let simmer for a minute or so and then add to the drained spinach. Stir until well incorporated. Add nutmeg and salt and pepper.

For big dinners, I make this a day ahead, keep in the fridge, reheat when needed. It’s actually better with a little wait time.

OLYMPUS DIGITAL CAMERA

Butter, onions and garlic sautéing. The smell is amazing!

OLYMPUS DIGITAL CAMERA

Creamed spinach with roasted chicken.

Salmon, two ways

My daughter loves salmon.  She’s 7.  Won’t really eat much else.  Chicken?  No thanks.  Steak?  Nope.  Pork?  Why bother asking.    She would have salmon 7 days a week for dinner.  She eats lunch and breakfast, but dinner food is just not her thing.  Unless it’s a baked potato, she’s crazy about those.  But I digress.

Not only does she love salmon, she’s extremely discerning.  “Is this farmed or wild?  I think it is farmed.  It doesn’t taste like the King Salmon I really like.”  This is an actual sentence from a recent dinner conversation.  And no, it wasn’t wild.  It was Atlantic farmed salmon because the King Salmon was $24.99 a pound and looked icky.  That’s the technical term, of course.

We cannot fool this girl at all.  She can spot Coho or Sockeye if we try to lie and say it’s King Salmon.  She loves King Salmon and wants only that.  When she gets a job and can shell that kind of money out, she can get it.  For now, it’s whatever is cheaper with Wild being preferred.

On the other end of my dinner table are my husband and 10 year old son.  My husband hates fish.  Mainly because he has texture issues.  He can’t handle rare beef and I think the texture of the fish is too much.  He’s good if it is overcooked to the point of dry though, which is not to anyone else’s liking, of course. My son really doesn’t like salmon.  He’s more of a white fish kid.   Loves monkfish, tilapia, hake, and cod.  We all also like swordfish, but because of mercury concerns don’t really count that anymore.

So, how to bridge the two?  Salmon is a really health fish.  It’s very versatile.   My daughter isn’t about versatile.  She loves it prepared  one way.  The way Julia Child taught me, which is as close to “plain” as it comes.  Kind of poached.  And that’s it.  So I had to find a way to make the fish appealing to her and to my boys.    The only compromise I could think of was adding a sauce to the salmon.   And Salmon two ways was born.  Now, there are no hard and fast measuring rules here.  Use what you have.  Really. I served this with roasted asparagus. Super quick weeknight meal!

Salmon, two ways

1 large onion, rough chop
1-2 carrots, rough sticks
2 celery stalks, rough chop
2 lbs of salmon
2 tablespoons olive oil
Salt and pepper to taste
Water

Ginger Soy Sauce

1/2 cup of soy sauce (I use gluten free Tamari)
1/4 cup maple syrup
1 teaspoon chopped fresh ginger (1/2 tsp ginger powder)
1 tablespoon finely chopped onion (snag a bit from the recipe above)
1 teaspoon minced garlic

Preheat oven to 350 degrees Fahrenheit.

Place onion, carrots and celery on a baking sheet. Place salmon on top of vegetables. Cover lightly with oil and salt and pepper.

Fill baking pan with enough water to cover the bottom of the pan.  You want enough water to survive a 20 minute ride through a 350 degree oven.

Poach until just cooked though, about 20-25 minutes.

About 10 minutes before the salmon is finished cooking, prepare the Ginger Soy Sauce by combining all the ingredients, whisk together and simmer until the Salmon is done. Stir occasionally. Top salmon with the sauce for those that want it, leave the salmon plain for those that don’t!

OLYMPUS DIGITAL CAMERA

OLYMPUS DIGITAL CAMERA

Ready for the oven!

OLYMPUS DIGITAL CAMERA

OLYMPUS DIGITAL CAMERA

OLYMPUS DIGITAL CAMERA

40 Cloves of Garlic Chicken

OLYMPUS DIGITAL CAMERAOne of the main reasons I started this blog was to add some creativity to my cooking.  Day after day making and eating the same stuff was becoming tedious.  Old cookbooks give me great inspiration.   They don’t have 100s of ingredients using various and sundry appliances that I don’t have (or frankly, want).   If you google this recipe, you will see what modern chefs have done to it.   Some have made it ridiculously hard with lots of steps and expensive ingredients.  Frankly, it’s a travesty.  If you are tired of plain old chicken, give this recipe a try.  It’s easy, crazy good, and fairly cheap eats. If you are lucky and can eat carbs, this dish is made to have the cooked garlic smashed across some wonderful, crusty French bread. The bread can also be used to soak up the amazing sauce created by this dish.  If you are no carbing it, the smashed garlic is still wonderful to combine with the chicken.

Serve with a salad or steamed veggie and dinner is complete.

I’ve made this recipe to fit a 5 quart dutch oven.  The recipe is very scalable for other sizes. It’s adapted from James Beard’s 40 Cloves of Garlic Chicken recipe.
40 Cloves of Garlic Chicken

3 stalks of celery, rough chop
1 large onion, medium dice
1 tablespoon dried tarragon
7 chicken thighs (could be 6 or eight, whatever fits)
1/4 cup dry vermouth
1/2 cup olive oil
Salt and Pepper
40 cloves of garlic, unpeeled (or however many you have)

Preheat oven to 350 degrees Fahrenheit.

Place celery, onion, tarragon in the dutch oven. Top with the chicken thighs. Pour vermouth over thighs, then pour the oil. Season thighs to taste.

Tuck unwrapped garlic into every nook and cranny.

Cover the dutch oven and bake until the chicken is done, about 60 minutes.

OLYMPUS DIGITAL CAMERA

OLYMPUS DIGITAL CAMERA

Blueberry Sour Cream Quick Bread

OLYMPUS DIGITAL CAMERA

I’m not a big bread person, but I had such a good time with the #twelveloaves challenge last month, I decided to do it again.   This month, the theme is berries.  Generally speaking, I don’t like cooked berries.  They tend to be mushy and cloying.  I love berries in their raw, full, ripeness.   The one exception, however, is blueberries.  Blueberries raw are tart and lack the mouth feel of a good strawberry.  But cooked, they are a beautiful purple explosion in the middle of what is usually a pale yellow confection.

Blueberry muffins are seriously my favorite muffins.   I  know, how retro, not cool like scones, I suppose.  Can I rant? Muffins have become these gargantuan bakery items with every single imaginable flavor foisted upon it.  Remember when chocolate chip muffins were a big deal?  Now, it’s double chocolate chip muffins with cayenne or sea salt caramel or some such awful twist.  I saw a maple bacon muffin.  Seems a little “try hard”.  Meanwhile, what makes a good bakery product seems to get lost in the quest for unique flavor.  Sure, the muffins are huge, but they are likely a dry mess with an overly big top that comes easily apart from the bottom. Not hardly worth the $2 they are charging for them.  Rant over.

Quick breads are so called because they don’t use yeast, thus no need to wait for a “rise”.  Using yeast as a leavening agent was slow and not always consistent.  As chemistry was applied to cooking, someone thought to combine baking soda with an acid like lemon juice, buttermilk, or vinegar and a little heat to give “rise” to cakes and breads.  Thusly creating rise with no yeast.   The “rise” of the quick breads starts around the mid 18th century.  Without this step forward, brownies, cakes, and some cookies would really not be made.  As time progressed, chemists worked to create a powder that combined the base and the acid, but that didn’t react until instigated by the presence of a liquid.  Baking powder (baking soda and a powdered acid like cream of tartar) in its various brand incarnations  (Rumford,  Calumet, Clabber Girl, etc.) was born.  If you have ever wondered why recipes have both baking powder and baking soda, you’ll probably see elsewhere in the recipe an acid.  If so,  the recipe is adjusting the baking powder downward because baking soda alone will react with the acid.  No need to make the dish unpleasantly bitter with acid in both the baking powder and the acidic ingredient.

Could I translate the parts that I love from my muffin recipes into quick bread?  Plus, I have some sour cream in my fridge that I need to get rid of before it expires, could I include that?

I could.  And I did.

I love the combination of blueberry and citrus.  Round out the flavors with bourbon vanilla and this is my ideal flavor profile for blueberry muffins.

Blueberry Sour Cream Quick Bread

2 cups and 1 teaspoon All Purpose Flour, used separately
1 tablespoon baking powder
1/2 teaspoon salt
2 1/2 tablespoons butter
1 cup sugar
1 large egg
1 cup sour cream
1/2 cup milk
1 tablespoon honey
1 teaspoon bourbon vanilla extract
1 teaspoon orange zest
1 teaspoon lemon zest
1 cup blueberries

Streusel topping
1/4 cup brown sugar
2 tablespoons of flour
2 tablespoons of butter

Grease a 9×5 loaf pan and set aside
Preheat oven to 375

Combine the flour, baking powder and salt in a mixing bowl, whisk or mix briefly to aerate. Add the butter and sugar and beat until the butter is in small pieces.

In a separate mixing bowl, combine the egg, sour cream, milk, honey, vanilla and zests. Mix until well combined. Pour the liquid mixture into the dry mixture. Mix the dry and wet mixtures until they are just combined.  This will look really dry.

In a small bowl, combine the remaining 1 teaspoon of flour and blueberries. Toss blueberries until well coated.

Gently fold the blueberries into the batter. Pour the batter into the loaf pan. Combine all the ingredients for the streusel topping and place on top of mixture.

Bake at 375 for about 60 minutes. Check at intervals after 45 minutes to avoid overcooking.

OLYMPUS DIGITAL CAMERA

Really dry looking batter!

OLYMPUS DIGITAL CAMERA

OLYMPUS DIGITAL CAMERA

OLYMPUS DIGITAL CAMERA

Dusting the berries with flour keeps them all from sinking to the bottom.

Waffles!

OLYMPUS DIGITAL CAMERA

Waffles are a really, really old food.  So old, that there is reference to them in Chaucer’s The Canterbury Tales the 14th Century!   Puritans, fleeing English persecution, stayed for a bit in Belgium and brought the waffle to colonies.    Thomas Jefferson, according to legend, brought a waffle maker from France and threw lavish waffle parties.    Who doesn’t love a good waffle?

I really, really love waffles. When I was a kid (and there were only 3 channels on the tv), all we had were pancakes. Waffles were restaurant type food. Fancy stuff, not something mom would just make for breakfast. Even though pancakes are made with essentially the same batter, the batter was transformed into something special on the waffle iron. Crunchy, yet tender. Somehow always sweeter.

In 2009, Kellogg’s put out a press release saying it would have to ration its Eggo Waffles due to a flooded plant in Atlanta and issues with a bakery in Tennessee.  This shortage was a really big deal at the time.   There were panicked consumers stocking up just like when Hostess recently shuttered it factories. I should confess,  I have a hard time understanding why one would pay for a frozen waffle.  They don’t taste particularly good and are insanely expensive, given the ingredients (ingredients listed are for Eggo’s Homestyle Waffles):

Enriched flour (wheat flour, niacin, reduced iron, vitamin B1 [thiamin mononitrate], vitamin B2 [riboflavin], folic acid), water, vegetable oil (soybean, palm, and/or canola oil), eggs, leavening (baking soda, sodium aluminum phosphate, monocalcium phosphate), contains 2% or less of sugar, salt, whey, soy lecithin, yellow 5, yellow 6.

Vitamins and Minerals:  Calcium carbonate, vitamin A palmitate, reduced iron, niacinamide, vitamin B12, vitamin B6 (pyridoxine hydrochloride), vitamin B1 (thiamin hydrochloride), vitamin B2 (riboflavin).

I think the normal price is about $2.50 per 10 ounce package.  The organic brand (Van’s) is $3.50 per 8 ounce package.  The ingredients aren’t really much different:

Water, Organic Whole Wheat Flour, Organic Unbleached Wheat Flour, Organic Soybean Oil, Organic Oat Fiber, Organic Cane Sugar, Baking Powder (Baking Soda, Sodium Acid Pyrophosphate, Monocalcium Phosphate), Organic Cornstarch, Organic Malt Extract, Sea Salt, Organic Soy Lecithin, Organic Guar Gum, Organic Caramel Color.

I’m not sure how I acquired my first waffle iron.  I just remember buying a box of frozen waffles and thinking how EXPENSIVE they were.  And I had to buy 2 boxes for just the weekdays.  I decided to buy a waffle iron and try it out.  It was so easy!  My kids pretty much eat waffles every day for breakfast. I make them on the weekend, freeze them, and toast them all week.  It’s really not that hard and makes my mornings SO easy.  I make eggs or reheat sausage made the night before and toast the waffle.  Viola!  Breakfast. Of course, my kids now think pancakes are a special treat!  The ingredients I use are organic or pastured and I don’t need guar gum and colors to make them look good.  And, the fat in the recipe is butter versus soybean/vegetable oil.  Needless to say, they are a lot cheaper!

Waffles require a gentle touch.  The key is bubble maintenance.   A good waffle recipe has two methods to infuse bubbles into the batter.  One is through chemistry.  The combination of an acid and a base (usually baking powder, which is activated by liquid).  The other is through the whipping of the egg whites.  I will confess that I have skipped the egg white whipping portion of the recipe and just tossed the eggs in there and really, saw no appreciable difference.  I’m serving a 7 and a 10 year old.  Not Gordon Ramsey.   So, when you get to that part of the recipe, understand that you can take a short cut.  Also, I have substituted Whole White Wheat flour from King Arthur Flour for the All Purpose Flour and no one seemed to notice.

Chocolate Chip Waffles

1 3/4 cups of all purpose flour
2 teaspoons baking powder
1/2 teaspoon salt
2 tablespoons sugar
3 eggs, separated
1 3/4 cups of milk
6 tablespoons of butter, melted and cooled
2 teaspoons vanilla extract
1 1/4 cups chocolate chips (I use 60% cacao)

Preheat waffle iron.

In a large bowl, combine flour, baking powder, salt and sugar. Whisk until aerated and well combined. In a separate bowl, whisk together milk, butter and vanilla. Slowly add the wet mixture to the flour mixture and stir just until the flour mixture is moistened.

In a mixing bowl, beat egg whites until they hold firm peaks.

Fold the egg whites into the now moistened flour mixture until just combined.  Gently fold in the chocolate chips.

Spray the waffle iron with a spray oil (I use coconut) and then follow your waffle iron’s instructions.  I freeze the leftovers in a freezer bag and enjoy the rest of the week.

OLYMPUS DIGITAL CAMERA

OLYMPUS DIGITAL CAMERA

Joys

The Peter Paul Company introduced the Mounds bar in 1920, and its “sister” candy Almond Joy in 1946. Mounds is a really old, but beloved, candy bar, a coconut confection enrobed in dark chocolate. The Peter Paul company changed hands a variety of times and is now owned by the Hershey Company. My kids adore these candy bars, although they love the Mounds more. They aren’t wild about the almond.

One day I reviewed the ingredients for the Mounds (source: Hershey’s website: http://www.thehersheycompany.com/brands/mounds-bars/bar.aspx):

CORN SYRUP; SEMI-SWEET CHOCOLATE (CHOCOLATE; SUGAR; COCOA; MILK FAT; COCOA BUTTER; SOY LECITHIN; PGPR, EMULSIFIER) ; COCONUT; SUGAR; SALT; NATURAL & ARTIFICIAL FLAVOR; HYDROLYZED MILK PROTEIN; SODIUM METABISULFITE, TO MAINTAIN FRESHNESS; SULFUR DIOXIDE, TO MAINTAIN FRESHNESS; CARAMEL COLOR; MILK

Um, wow.

So, I looked around the internet to see if there is a more simple recipe.  Joy the Baker had a great one (http://joythebaker.com/2010/10/homemade-almond-joy/) that I was able to adapt.  My kids loved making the Almond Joys, but didn’t want the almonds.  In fact, one burst into tears about the addition of almonds.  She wanted to know if we could just make Joys.  I tried to tell her that the candy without almonds is called “Mounds”, but that “sounded gross”.  So, we call them Joys.  Almond Joys without the Almonds.

Joys
7 ounces sweetened condensed milk
1 cup powdered sugar
1 tablespoon pure vanilla extract
pinch of salt
2 1/2 cups unsweetened flaked coconut
about 20 ounces (a bag and a half) of good quality bittersweet (60% Cocoa) chocolate chips

OLYMPUS DIGITAL CAMERA

Combine milk, sugar, vanilla extract and salt in a medium bowl.

OLYMPUS DIGITAL CAMERA

Add the coconut.  At this point, the mixture is the sticky mess you see above.  Cover with plastic wrap and place in the freezer for about 30 minutes.  The freezer firms the mixture up a bit and makes is easier to work with.

Line a baking sheet with parchment paper.  Remove the mixture from the freezer and with clean hands, shape coconut mixture into tight logs or “mounds”.   They need to be rather hearty, as we are going to be dipping them in chocolate.  If the mixture becomes too soft during the log making, stick it back in the freezer.  Place the logs onto the lined baking sheet.

OLYMPUS DIGITAL CAMERA

Place the baking sheet in the fridge.

Now, I could tell you to whip out your double boiler and gently stir the chocolate until melted.  I could.  But that’s not how I do it.  I stick the chocolate in a microwave safe bowl and over low power, and nuke it until  just melted.  You have to actually stir the chocolate to check the level of melt (this is the best way I know to describe it.  Seriously, you can look at the bowl and all the chips look fine and then stir it and the chips are all melted), because chocolate chips will hold their shape even if completely melted through.  Once your chips are melted, allow the chocolate to cool slightly.  Remove your baking sheet from the fridge.  Place a log on a fork and coat with the chocolate using a spoon and return the covered log to the baking sheet.  Repeat until all logs are covered.

Return baking sheet to the fridge until the “Joys” firmed up and the chocolate is solid.    I store mine in the fridge.  The kids love them, to quote “these are awesome”!

OLYMPUS DIGITAL CAMERA

My Shepherd’s Pie Disaster

OLYMPUS DIGITAL CAMERA

Friends, family (Hi Mom!), I could have posted a wonderful recipe for Shepherd’s Pie with great pictures.  But, it would be lies.  LIES!  This Shepherd’s Pie was a disaster.  Actually, it wasn’t.  It wasn’t a disaster until I added Guinness Beer.  But, let me start from the beginning.

I love Shepherd’s Pie.  The first one I had was at a little restaurant called Galway Bay in Annapolis.  Long before carbs were evil, a dish consisting of ground meat and veggies in gravy covered with mashed potatoes was just awesome.  I could say it was better than pot pie because I wasn’t eating pastry.  Ha!

One of the first recipes my husband and I made together was Cajun Shepherd’s Pie by Paul Prudhomme in his fantastic Louisiana Kitchen.  That recipe was really long and had a ton of ingredients and took us hours to make (not a good call when starting at 6 pm!), but it was fantastic.  I introduced my husband to cajun spicy, which is a wicked combination of white, black and cayenne peppers.  Chicken Big Mamou remains a dish to this day that will live in infamy as the one spicy dish that was just too much for him.    Don’t get me wrong, he ate it, but he did it for “macho” reasons, not because he liked it.  He was sweating bullets and beet red.   My mom made the Chicken Big Mamou and was quick to say, “but I cut the cayenne in half!”.

So, I have a long and fond relationship with Shepherd’s Pie.  Until now.  For St. Patrick’s Day my dear son asked me to make Shepherd’s Pie.  Sounds great!!  Very Irish dish.  I got ground lamb, carrots, onions, celery and potatoes.   And, a bit of Guinness.  Lots of recipes on the internet called for that as the liquid to form the gravy part of the pie.  That was my fatal mistake.

The recipe was progressing so nicely.  The pictures were lovely.  The gravy bubbled up and was the correct consistency.  Then I tried it.  At first is was really good, then it hit you like a bad odor.  What was that awful taste?  I tried again, no surprise, it was still there.  Took it to my husband and before he could get the whole sentence out he sputtered, “honey this is gr…oh God, what’s wrong with it?”.  Exactly.  The Guinness.

So, I could have pretended all was well, changed the recipe from Guinness to “stock” or “water” and gone my merry way.  But no.  If Julia Child can drop a chicken on TV, rinse it off and keep going, so can I.  And that’s what I did.  I rinsed everything off.  Made a new roux, used beef stock and kept going.  Keep Calm and Carry On.  Stiff upper lip and all.  I will even include the pictures.  Fun!  Lesson learned.  Keep Guinness Beer away from the Shepherd’s Pie.
Shepherd’s Pie

3 lbs yellow or gold potatoes, peeled, diced and covered with water.
2 tablespoons cooking fat (lard, bacon drippings, canola oil, etc.)
2 lbs ground lamb
1 medium onion, diced
4 medium carrots, diced
2 stalks of celery, sliced thin
1/2 teaspoon thyme (dried)
1 teaspoon rosemary (dried)
2 1/2 Tablespoons of flour
2 cups beef stock (or water)
1/2 cup grated Irish Cheddar Cheese
3 Tablespoons butter
1 cup milk (as needed to get mashed potatoes to desired consistency)


Preheat oven to 350 Degrees Fahrenheit.

Bring potatoes to a boil and boil until fork tender.

While the potatoes are boiling, heat fat (I use lard) over medium high heat in sauté pan.  Sauté lamb until mostly done.

OLYMPUS DIGITAL CAMERA

Remove from pan and sauté onions, carrots and celery.

OLYMPUS DIGITAL CAMERA

Irish flag!!

OLYMPUS DIGITAL CAMERA

Return lamb to pan, add spices.  Saute until flour is browned and lost its raw flavor.  Add stock slowly.  Stir between additions.  Add enough stock to bring the mixture to the thickness desired.

OLYMPUS DIGITAL CAMERA

Lovely. Tasted awful. The offending ingredient looks on in rapt joy at the destruction wrought.

At this point, your Shepherd’s Pie will be lovely.  Mine needed to be rinsed off and started again.  You do not need to do this step!!  I promised a picture, so here it is.  Rinsed off Shepherd’s Pie :

OLYMPUS DIGITAL CAMERA

Place your wonderful meat and veggies sauce in a suitable oven dish.  Remove potatoes, add butter and cheese and mash potatoes.  Add milk until you get the desired consistency.  Place on top of meat mixture.

OLYMPUS DIGITAL CAMERA

OLYMPUS DIGITAL CAMERA

In the end, it was awesome, despite the hiccup!

Place dish in oven and heat through, about 20-30 minutes.  If you want the potatoes browned on top, add additional butter to the top of the dish before baking.

“Spaghetti” with Tomato Sauce and Italian Sausage

OLYMPUS DIGITAL CAMERA


My husband loves pasta.  As you may recall, he’s also diabetic, so he can’t really have it.  So, one day while prepping squash for a dish, I realized that if you keep using the peeler on the squash, it kind of looks like pasta ribbons.  So, I tried it.  I used my peeler on the flesh of the squash and made very pretty ribbons.  I stopped when I reached the seeds of the squash.  I sautéed the  ribbons in butter and a bit of olive oil with salt.  I then used them like pasta with tomato sauce and Italian sausage.

While they don’t taste like pasta, as squash is a bit sweeter, the look and mouth feel was very similar to a wide pasta like pappardelle.  And, as a bonus, the kids got to eat a vegetable!

Tomato sauce has been around since the importation of the tomato to the “old world” in the 1500s.  While at first considered poisonous due to its relation to the nightshade family, eventually the tomato was widely adopted with the Italians leading the way.  My sauce recipe is really simple, please use your favorite sauce, if you have one:  sauté in olive oil 1 medium onion (small dice).  When onion is translucent, add 3 cloves of minced garlic.  Add 1 teaspoon of dried oregano and 1 teaspoon of dried basil and 1 bay leaf.   Sauté until fragrant.  Add 1 33 ounce can of crushed tomatoes and simmer for 30 minutes.   Salt and pepper to taste.  If the sauce is too thin, add a tablespoon of tomato paste and stir.  If it is still too thin, repeat.  For the Italian sausage, I sauté in heated olive oil until almost done and throw into the sauce to finish.

OLYMPUS DIGITAL CAMERA