Author Archives: dawn of food

Unknown's avatar

About dawn of food

Wife and mother who loves to uncover old recipes that fit into our modern world.

Cauliflower Mashed Potatoes

Cauliflower Mashed Potatoes

Being a fairly low carb person, there are certain foods I desperately miss.   Would I love a plate of French Fries?  Yup.  Pizza?  You bet.  Stuffing?  Yes, a million times.  Crackers with my cheese?  Of course!  Bun with my hamburger?  Oy.

Mashed Potatoes?  Not really.  I’m not a potato fan, unless they are completely fried crisp. Then, ok!  I’m mostly in it for the crispy outside shell.  Steak fries?  Pass.  My husband, on the other hand is part Irish and LOVES potatoes.  He’s having to get extremely serious about being low carb because his lack of seriousness has had some health consequences.  So, he reluctantly joins the low carb bandwagon.

I had heard about fake mashed potatoes.  But honestly, the thought of cauliflower really didn’t appeal to me.  Sure, it’s beautiful when raw.  That’s about where my affinity ends.  I’ve used it as a rice substitute, but it’s pretty swamped with strong flavors and more there for filler.  In this recipe, cauliflower is the star.  The. Star.

I tried a ton of recipes and some lacked the heft or texture of mashed potatoes.  Some were just runny.  Others worked better, but really didn’t take advantage of the blank canvas.  I tried to up the flavor here and add really good texture as well.

Cauliflower is wet.  Very, very wet.  And in this recipe we steam it, adding more water to the process.  So, without something more, you’ll have a very thin mixture with just pureed cauliflower.  I used a combination of cream cheese and butter to really give the dish more substance.  I also could have roasted garlic and added it to the puree, but I liked the convenience of granulated garlic.  It added flavor without any additional moisture.

This recipe comes extremely close to garlic mashed potatoes.  My kids ate it up until I told them it wasn’t mashed potatoes, then it became a pariah on the plate.  But really, it stands on its own as a great dish.  No need to fool anyone, just say it’s pureed cauliflower.  Unless they are minors.  Then it’s mashed potatoes.  As an extra bonus, it’s mashed potatoes that are quicker and easier to make then real mashed potatoes!

Your mileage my vary on this dish.  I used 1 really large head of cauliflower.

Cauliflower Mashed Potatoes
Serves 4-6, as a side dish
Prep Time: 5 minutes
Cook Time: 20 minutes

1 large head of cauliflower, heavy stalks removed, cut into florets
3 tablespoons of cream cheese, divided
3 tablespoons of butter, divided (I used European Style, which has more fat content)
3/4 teaspoon granulated garlic, divided
Salt and Pepper

Steam cauliflower until soft. I used a steamer insert and placed it over boiling water and it took about 13 minutes.

Place one third of the cauliflower into a food processor (if yours can take more, great, mine couldn’t). Add 1 tablespoon cream cheese, 1 tablespoon butter, and 1/4 teaspoon granulated garlic to the food processor. Puree until the consistency desired and there are no remaining chunks of cauliflower. Place in a serving bowl and cover. Repeat process until the cauliflower is all pureed. Salt and Pepper to taste and serve.

Cauliflower Mashed Potatoes Cauliflower Mashed Potatoes Cauliflower Mashed Potatoes

Buffalo Hot Wings

Mild and Hot Wings, ready for dipping!

Mild and Hot Wings, ready for dipping!

I am not a fan of spicy foods.   I especially loathe the race to ever spicier foods.  Whole shows dedicated to making people eat foods that will likely lead to those foods making a return appearance later in the show, well, seem stupid.

Food is to be enjoyed.  Not designed to tear a hole in your stomach.

Which brings me to hot wings.  Buffalo hot wings.  Simple.   The origin story involves spare, cheap parts being repurposed for a quick meal.    Fast forward a few decades and now these cheap parts, the chicken wings, are actually quite a bit more expensive than the chicken thighs!!  Given the meat to bone ratio, the price for wings is rather ridiculous.  However, the idea of buffalo thighs is just an anathema.  Sacrilege!  So, I shall pay the outrageous price as an homage to tradition.  Granted, it’s a rather recent tradition, but tradition nonetheless.

Most hot sauces have lots of vinegar to punctuate the sensation of eating a hot food.  So, I figured why not use the same enhancement on my wings?  There are rumors a certain chicken fast food restaurant marinates their chicken in a pickle brine.  As luck would have it, I actually had some.  We love Clausen’s Dill Pickles.  They are crisp, not too tart, with the perfect level of dill.  After we recently finished a large, warehouse sized container of said pickles, I had a ton of pickle brine sitting around.  Since the price was right, and I wanted to try this technique, this brine served as my marinade.

The result?  Tender wings with a really complex flavor profile.  They didn’t taste like pickles, which was no small concern, but you could tell the influence of the brine was there.   My husband’s smoking hot wings were made more intense and my milder wings were really great without being crazy hot.

I would totally make this again.  It’s easy.  Cheaper than take out wings, and definitely better!

Buffalo Hot Wings, half really, really spicy, half “normal” spicy.
Serves: A Crowd
Prep Time: 2-3 hours (marinating)
Cook Time: 25-30 minutes

Wing Base

2 1/2 – 3 pounds chicken wings
Brine from 80 ounce package of Clausen’s Pickles

Add chicken wings to a closable plastic freezer bag. Pour brine into freezer bag, careful not to overfill. Close bag and marinate in refrigerator for 2-3 hours.

Preheat Oven to 370 degrees Fahrenheit

Super Hot Wings Sauce
4 Tablespoons melted bacon drippings, lard, or vegetable oil
2 Tablespoons cayenne
2 teaspoons granulated garlic
2 teaspoons salt

Combine well melted or liquid fat and spices, divide into two portions, three quarters and one quarter (reserved). In a small bowl, place three quarters of the liquid and half of the chicken wings. Toss wings with sauce. Alternatively, you could brush the sauce directly on the wings. Place a grate on a half sheet pan to elevate the wings. Place wings on grate.

Regular Hot Wings Sauce
1/3rd cup melted Ghee or clarified butter or vegetable oil
1/3rd cup favorite Hot Sauce

Combine well melted butter or ghee and hot sauce, divide into two portions, three quarters and one quarter (reserved). In a small bowl, place three quarters of the liquid and half of the chicken wings. Toss wings with sauce. Alternatively, you could brush the sauce directly on the wings individually.  Place wings on grate, next to spicy wings.

Bake wings for 25-30 minutes until completely cooked through, turning once during the cook time. At the end of the cooking, lightly brush the remaining sauce on the wings.

Serve with blue cheese dressing and any other accompaniments.

Buffalo Hot Wings

Had to see if they would all fit, which they did! Note the pickle brine pieces.

Buffalo Hot Wings

Buffalo Hot Wings

So spicy!!

Lobster Newburg

Lobster NewburgWe have a small football pool in our house.  We pick for winners only.  The winner of the weekly pool gets to pick either a special dinner or a special dessert.  My kids, being rather awesome.  They “saved” their wins and pooled them so they got a special dinner and dessert on the same night.

Now, my kids don’t eat the same, at all.  I never thought in a million years they would agree on anything dinner-wise.  So, imagine my surprise when they did.  Want to guess what they picked?  Lobster.  Yup.  One’s never had it, but wanted to try it.  The other one has had it once.

Lobster.

At the same time, I haven’t really done a historical recipe for a while.   So, the first one that came to mind was Lobster Newburg (or Newberg).  What’s not to love?  Lobster, cream, sherry, some kind of wonderful bread.  Sheer Nirvana.  I could eat a sherry cream sauce everyday.  Love it.

But, the kids didn’t want a “recipe”, they wanted plain lobster with butter.   So, two of the lobsters were steamed “plain” and two were turned into Newburg.  For dessert, they requested a banana split.  Odd pairing, but given it’s ease to make, I’ll take it!!

Lobster Newburg has a fascinating story, depending on which one you believe, if any of them.  The dish originated in the late 1800s in America, believe it or not!   All renditions of the origin story are tied to Delmonico’s, a very famous restaurant in New York City at the time.  One version has a French chef departing Delmonico’s to open an inn in Pennsylvania.  He wanted to serve very continental cuisine and came up with Lobster Newberg to serve at the Hotel Fauchere in Millford, Pennsylvania.

The traditional story is a bit more colorful.  Ben Wenburg was an avid traveler, successful businessman, and reliably regular customer at Delmonico’s.  To boot, he was a favorite diner of Delmonico’s owner, Charles Delmonico.  One version has Ben swooping in and, with great showmanship,  making his new favorite dish over a chafing dish in the middle of the dining room and serving it to Delmonico.  Delmonico loved the dish and added it to the menu, naming it Lobster Wenburg.  Delmonico and Wenburg subsequently had a falling out and the item was removed from the menu.  However, as it’s delicious, there was a great cry to bring it back.  So, the Delmonico transposed the W and the N and renaming Lobster “Newburg”.  Other versions have the Delmonico naming the dish in honor of Wenburg, and Wenburg politely declining to have his name on the menu.  Wenburg then suggests the N and W swap to disguise his name.

No matter what the story, the dish was an amazing success.  When you see how simple this is, you will be amazed. It is an awesome romantic dinner. You know, when the kids are eating their steamed lobsters next to you and everything.  Ah, romance.

Lobster Newburg
Serves 2-3

1 sheet of Puff Pastry, divided
1 1/2 cups heavy cream
3 egg yolks, beaten well
3 Cups Cooked Lobster Meat*
1 tablespoon butter
1 tablespoon sherry

Preheat oven to 400 degrees Fahrenheit. Place pastry on a baking sheet lined with parchment paper or a silicone baking sheet. Bake for 15-20 minutes until the pastry has risen and is golden.

While the pastry is cooking, turn your attention to the sauce. Ok, you may want to use a double boiler if you are skittish about heating a high fat milk product, but if you promise to use a heavy bottomed pan and cook the cream over medium low heat, you may be fine. I was. I hate using a double boiler, too many pans!  Slowly heat the cream in a larger sauce pan, stirring frequently, but don’t let it boil. When it is moderately hot (like hot chocolate hot), temper the egg yolks (add a tiny bit of the hot cream to the yolks incrementally until the yolks are rather warm), and add the yolks back to the cream. Return the pan to the heat and allow to simmer gently, again with frequent stirring. Add the lobster to the pan and continue to cook until the lobster is warmed through, about 5 minutes. Add the butter and sherry and stir until the butter is melted, about 1 minute. Serve over puff pastry (can also use rice or toast made from great French bread).

Wasn’t that easy?

*You can have your market steam your lobster. You can boil the lobster yourself in a deep kettle of boiling water for 5 minutes for the first pound, and 3 minutes for each additional pound until the lobsters are done. You can steam the lobsters until they are a bright red. However you cook your lobsters, you just need to shell them afterwards. As a Marylander and a voracious crab eater, picking lobsters is a walk in the park compared to crabs. This step should not be a deterrent!!

Dead Lobster Walking So Red!! Puff Pastry

Pulled Pork and Carnitas- Slow Cooker

Slow Cooker Pulled Pork

My husband and I work. We have two kids that like to do stuff. Our weeknight schedules are crazy and I have to tape (how old am I that I still use the word “tape”!!)  DVR The Daily Show and The Colbert Report because the thought of being awake at 11 o’clock is beyond hysterical.  I’m laughing right now, just imagining trying to stay up that late.  I really belong in the central time zone.  If it wasn’t for my DVR, I would not see any shows with a 10 o’clock start time.

More importantly, getting dinner on the table before 7 pm is a herculean effort.  Between arguing about doing homework, arguing about correcting homework, and actually making the meal, the night flies by really fast!  So, any shortcut I can find is greatly appreciated.

I was in a large warehouse store the other day picking up my month supply of paper towels and toilet paper and decided to pick up a Boston Butt, also known as pork shoulder.  At $1.69 a pound, it’s a hard bargain to pass up.  I realize that it’s not pastured or otherwise “green”, but as we eat that way most of the time, once in a while being cheap isn’t awful.  Being a warehouse club, I ended up with 14 pounds of the stuff.  No mean feat to cook this hunk of pork.

Now, I’m pretty reluctant to pull out my slow cooker due to less than optimal results and the fact that my daughter hates anything “saucy”.   I find pot roasts and chicken either turn out “dry” or mushy.   Let’s face it, once you remove “sauce” as an option for a dish made in a slow cooker, you pretty much remove the slow cooker as an option.  Except for this recipe.  You can really cook this pork rather plain in the slow cooker, and the pork stands up pretty well to a long cook time.  I put half the package (about 7 pounds) in the slow cooker.  The first night, we had “pulled pork”- my husband asked that I put the quotation marks, as the pork was not smoked.  Then two nights later, I repurposed the leftovers into carnitas.   Cook one piece of meat in the slow cooker, get two awesome meals on the table before 7 pm!!

I pulled no punches with the meat.  I made it pretty much as you would any piece of pork that you would put in the smoker.   I start with a light glaze of mustard and then heavily season with traditional barbecue spices, but I did add some spices that had been smoked- like smoked paprika.  I would normally leave that out of any seasoning mix to go on the smoker.  Here, to give it a more smokey feel, the meat needs, well, smoke.

For my second night, I placed all the meat on a cookie sheet and baked it in a fairly hot oven to make the meat a little more dry and the end bits a touch crispy.   In a few minutes, I had the perfect pork carnitas meat and I served the carnitas with the traditional toppings.  I can’t stress how easy this made dinner time for the week, especially in a week when my husband was working late most nights!

Slow Cooker Pulled Pork

5-7 Pound Boston Butt or Pork Shoulder Roast
1/4 cup yellow mustard (enough to cover meat)
2 tablespoons chili powder
2 tablespoons dry mustard (love Coleman’s)
1 teaspoon cayenne pepper (more if you like it spicy!)
2 tablespoons coarsely ground black pepper
1 tablespoon ground white pepper
2 tablespoons onion powder
2 tablespoons granulated garlic
2 tablespoons kosher salt
1/2 teaspoon smoked paprika
1 onion, roughly chopped
1/4 cup water

Cover the Boston Butt with a thin layer of yellow mustard. In a small bowl, combine all the spices and rub over the pork. Add the onion and the water to the slow cooker. Add the pork. Cover and cook on low for about 8 hours.

Remove pork from slow cooker and pull apart with a couple of forks. Serve with Cole Slaw and barbecue sauce.  Seriously easy stuff!

Pork Carnitas

Pork Carnitas

Left over pulled pork
1/4 cup olive oil
Onions, cut into strips
Green peppers, cut into strips
Round tortillas, slightly warmed
Avocado, chopped
Salsa
Queso Fresca

Preheat oven to 375 degrees Fahrenheit.

Heat oil over medium heat in a sauté pan.

While the oil is heating, spread pork in an even layer over a cookie sheet. Place in oven and cook until less moist with some crispy bits, about 15-20 minutes.

Sauté onions and peppers until slightly caramelized, about 20 minutes.

Serve with your favorite toppings.

Slow Cooker Pulled Pork and Carnitas

My best Jackson Pollock inspired work!

Slow Cooker Pulled Pork

Slow Cooker Pulled Pork

When I came home, the house smelled amazing!

Slow Cooker Pulled Pork

So moist and ready to be pulled!!

Slightly dried and ready to go!

Slightly dried and ready to go!

Beef Shanks

Beef Shanks "osso bucco"

Have you ever walked by something in the store and just thought to yourself:  gotta cook that!!  It happened to me the other day.  Beef shanks.  Just look at them:

Beef Shanks

I couldn’t walk by these babies.  Awesome, meaty, lots of marrow.  If you eat meat, what’s not to love?    I looked at similar veal shanks and comparing $16.99 a pound for veal and $5.99 a pound for beef, well, that’s a no brainer.  Beef it was.  So, it’s not really Osso Buco, but it’s not far off.

My first time having osso buco was at Chiapparelli’s in Little Italy in Baltimore.  My sister had just graduated college and my parents took her out to celebrate.   Chiapparelli’s is a very old world Italian restaurant.  Dark and cozy and dripping with Italian charm. It was an amazing meal from beginning to end, but the osso buco was unforgettable.  When I began to learn how to cook, this was among my wish list items I wanted to learn how to make.

I wanted to be gluten free and lower carb, so I omitted the flour step.  Look, meat browns without flour.  I think this is kind of an antiquated step that everyone does just because it’s always been done.  So, I just salt and peppered these babies and browned them in my dutch oven.  No change difference in flavor.

See, they can brown without flour!

See, they can brown without flour!

 I know, somehow this little bit of flour is supposed to thicken the sauce.  I never find that to be the case.  I always have to add thickener or reduce forever anyway. Frankly, I don’t care if my sauce is thin or thick, I just care how it tastes.  And with this dish, the meat is so moist and tender, the sauce is really a bonus.  

Also, you may notice a distinct lack of gremolata that some recipes add.  First of all, I’m serving a 10 year old and an 8 year old.  I’m pushing it with beef shanks.  I’m not a fan of gremolata.   It’s not cheap, it adds a room temperature taste layer to a warm comforting dish that I just don’t see as necessary.  This dish is packed with flavor.

So, for a greatly reduced price, compared to the veal, I was able to make an amazing dinner that seems so fancy!  Yet, as you will see, so easy!

“Osso Buco” (or, Braised Beef Shanks)

Serves: 4 generously
Total Cook Time: 2 hours

1/4 cup olive oil
Salt and Pepper
4 beef shanks, about 3/4 lb-1 lb each
1 medium onion, medium dice
1 small carrot, medium dice
2 ribs of celery, medium dice
4 ounces mushrooms, sliced
1 tablespoon of tomato paste
1 teaspoon dried rosemary
1 teaspoon dried thyme
1 bay leaf
1 cup red wine (I used a zinfandel)
3 cups chicken stock or water
1 can cannellini beans

Preheat oven to 350 degrees Fahrenheit.

In a dutch oven, heat the olive oil over medium high heat. Liberally salt and pepper the shanks. Brown in batches in the dutch oven, about 3 minutes a side. Remove and set aside.

Turn the heat to medium. Add the onions, carrots, celery and mushrooms. Sweat the vegetables until wilted, stirring the bottom of the pan to loosen any brown bits. Add the tomato paste and rosemary, thyme, and bay leaf to the vegetables. Cook until fragrant, about 2 minutes. Add the red wine, cook and stir for about 2 minutes. Add the chicken stock. Bring to a boil. Cover and bake for 1 1/2 hours. If you are using enamel cast iron, the lid should be heavy and tight enough to maintain moisture throughout cooking. If not, you may need to check the dish occasionally to make sure you have adequate liquid. 20 minutes before the end of the cook time, add the beans and stir to make sure they are submerged. Check salt and pepper levels prior to serving and adjust as needed.

Recipe Redo: Whole Foods Challenge

Whole Foods Greek Chicken ChallengeMy mom and I have “disagreements” over my shopping at Whole Foods.  She thinks it’s a rip off and the food is overpriced.  I’ve heard the snarky “Whole Paycheck” used as well.   Can Whole Foods be expensive?  You betcha.  If you compare grass fed ground beef made from cows that were raised on a pasture and never saw a feedlot at $8.99 a pound to the stuff in a big box store for $1.99 a pound that may or may not be butchered by illegal workers or comprised of the meat from 100 different cows from “North America”, it may seem expensive.  But you are also comparing a BMW with a Ford Escort.

So, I “re-did” my Greek Chicken and saved my receipts to see what it would cost.   First, some ground rules as to what this “costs”.  I don’t track the cost of spices (unless they are odd and can’t be used elsewhere), fats (butter, olive oil, etc.), onions or garlic.  These items, hopefully, are pantry staples and hard to parse out how much 1/2 tsp would “cost”, so to speak.

I got the leg quarters for $1.49 a pound, for a total of $5.02.  These are “level 2” chicken quarters, which means the chickens they are from aren’t crated or caged (except for transport), no antibiotics or animal byproduct feed, and an “enriched” environment that encourages pecking, perching, etc.  Additionally, the chickens need to have no more than an 8 hour journey to slaughter.

My $5.02 bought a lot of chicken quarters.  There’s no way we can eat this much, so there will be lunch left over at this price.   I used two cans of organic, diced tomatoes at $1.49 each.    Instead of cauliflower, I used lentils.  Well, I had lentils and didn’t remember to pick up the cauliflower.  My bad.   Organic green lentils run about $2.49/pound. I used a cup, which is about 1/2 of the pound (it’s a little less, so I’m over estimating), so $1.20.

Total “ridiculous” Whole Foods cost:  $7.22 and I have two plates leftover for lunch!  Now, for those tsk tsking me for calling my tomato the veg on the dish and not having something green.  I could have gotten a bag of organic broccoli for about $3.00, bringing my total to $10.22.   But I wasn’t feeling the “green” foods on this particular day.  Plus, the lentils were green, that counts, right?  And lentils are a “superfood”.   Fine, next time I’ll add a more substantial veg than tomatoes.  🙂

Greek Chicken

Made this recipe again using Cauliflower as “rice” for a paleo meal.

If doing this with Cauliflower, as shown above, cost is $2.99/head.


Pulled Pork

Smoker Chimney

Of all of the meats involved in barbecue, pulled pork is by far my favorite.   When done right, it’s moist, tender and sweet.   When done wrong, it’s dry and stringy. On the plus side, it’s pretty hard to do wrong.  Unless you are some large, BBQ chain restaurants.  I don’t know how, but some of them manage to turn this perfect meat into a mass of dry strings with sauce.

My husband was practicing his pulled pork when he indulged me in my blogging venture.  He’s a very patient hand model, so I want to profusely thank him for his participation in my blog this week.

The meat involved in pulled pork is a pork shoulder roast, or “Boston Butt”.  Now, you could skip the smoking, place the butt (hee hee) in a crock pot with a bit of water and a chopped onion, slow cook on low for 8 hours and presto, tender pulled pork.  Drain and add a smoky barbecue sauce and it’s pretty awesome.   Is it the same?  No.  But, it’s pretty darn good for doing pretty much nothing more than dumping a few ingredients in a container and flipping a switch.

But, smoking the Boston Butt brings the pork to a whole different level.  First, there’s the injection, piercing flavors deep within the meat.  Then there’s the lovely rub and smoke infusing the meat with even more flavor.  Top it with barbecue sauce and you have pork nirvana.  Truly, the pork is just so amazing.

You can make an ugly drum smoker (google that!) or use a weber bullet (we have both) for an affordable smoker.  They are an endless source of entertainment and amazing food for us.  Top with an amazing Barbecue Sauce and serve with Cole Slaw.

Pulled Pork

1/2 Boston Butt, trimmed

Pork Butt Rub
1 cup light brown sugar (packed)
2 tablespoons chili powder
2 tablespoons dry mustard (love Coleman’s)
2 teaspoons cayenne pepper (more if you like it spicy!)
2 tablespoons coarsely ground black pepper
1 tablespoon ground white pepper
2 tablespoons onion powder
2 tablespoons granulated garlic
2 tablespoons kosher salt

Pork Injection
1 quart apple juice
1/2 pint distilled white vinegar
3 cups sugar
1/2 cup table salt (not iodized)

Directions for the rub: Thoroughly combine all the ingredients in a large bowl. Set aside.

Directions for the pork injection: In a 4 quart saucepan, combine the juice and the vinegar over medium heat. Once the juice is warm, add the sugar and the salt and stir constantly. Without bringing the juice to a boil, stir until the salt and sugar are dissolved. Remove from heat and cool.

Bring the smoker to 275 degrees. How you smoke the meat depends on your smoker, so I won’t give you directions as each one is slightly different. While the smoker is heating, thoroughly inject the butt with the injection. Massage the rub into the meat, wrap in plastic wrap and return to the refrigerator until the smoker is at temperature. Smoke the meat until a nice bark is formed, the meat is thoroughly cooked, and tender enough to be pulled, about 6-8 hours. Longer, if you prefer to cook at a lower temperature.

Pork Butt Trimming

Trimmed Pork Butt

Pork Butt Injections

Pork Butt with Rub

Pork Butt on Smoker

Smoked Pork Butt

Not burnt, just bark!!

Pulled Pork Plate

Smørrebrød- Shrimp

smørrebrød shrimpI have more than a few close friends that don’t eat chicken, beef, pork, etc.  They confine their meat sources to seafood, for health and ethical reasons.   On the other hand, husband is an unabashed carnivore.   So, this blog won’t veer too far from animal meat sources.  However, every once in a while, I will come across an awesome sounding recipe and make a seafood dish as tribute to my wonderful seafood eating friends.  When research items for my smørrebrød post, I came across this pretty amazing version of the Danish open faced sandwich and couldn’t resist giving it a go.

If you are looking for an easy appetizer, or luncheon dish, this is it.  It’s pretty much just assembly.  No real work of any consequence, yet you end up with a very high impact dish.  This is a fairly minimal, clean dish and the flavors work very well together.  While the look is amazing, the taste is not overly complicated.  Some of my taste testers preferred a pinch of salt added to the sandwich, so you may want to consider that as a finishing touch.

This recipe is inspired by a recipe I found on Epicurious.

Shrimp Smørrebrød
Makes 8 Sandwiches

1/4 cup chilled heavy cream
1/4 cup sour cream
2 tablespoons drained bottled horseradish
1/2 stick (1/4 cup) unsalted butter, softened
8 slices rye bread
2 firm-ripe California avocados
1 tablespoon fresh lemon juice
8 leaves Boston lettuce, rinsed and dried
1 pound large-jumbo shrimp (16), steamed, peeled, chilled and deveined
Cut Chives
1 1/2 tablespoons drained bottled capers

In a mixing bowl, whip heavy cream to soft peaks. Add sour cream and horseradish and whip until stiff. Set aside.

Cut the crust off of the rye bread and make uniform squares or rectangles. Generously butter bread. Set aside on serving plate.

Peel and slice avocados, place in a bowl and toss with lemon juice until thoroughly covered. Set aside.

Place a lettuce leaf on each piece of buttered bread. Layer avocado, shrimp, cream, chives and capers on each sandwich. Serve.

Pizza Fondue

Pizza Fondue

To celebrate the season opener of the National Football League (NFL), or American football season, I have decided to share one of my most favorite recipes from my childhood:  Pizza Fondue.

I’m from Maryland and we have two professional football teams:  the Washington Redskins and the Baltimore Ravens.  As they are in two different conferences, there’s no great rivalry.  You can root for both teams. They only play each other every four years.  Theoretically they could play each other in the Superbowl, but that’s extremely unlikely to happen.  Last season, the Redskins made it to the playoffs and the Ravens won the Superbowl.  Pretty awesome season.  Can’t wait to see what this season brings!

Come game day, my kid are excited because, while they don’t really care about the game, they are all about the game day snacks.  Crab Dip and Pizza Fondue are the most requested.

Back in the 1970s, fondues were all the rage.  Pizza Fondue is a kid friendly take on the trend. My mom made this fondue for me and I still remember it in all of its awesomeness.   It is really easy to make and a true crowd pleaser.  I never have “leftover” fondue.  You can’t ask for an easier recipe that is so popular with pretty much everyone!

Pizza Fondue
Serves: A Crowd
Prep Time: 5 minutes
Cook Time: 20 minutes

1 tablespoon olive oil
1 medium onion, small dice
1/2 pound ground beef or Italian Sausage (casings removed)
2 cloves of garlic, minced
1 1/2 teaspoons dried oregano
1 teaspoon salt
1/2 teaspoon pepper
2 containers of pizza sauce (about 28-30 ounces)
1 1/2 cups of shredded mozzarella cheese
1 1/2 cups shredded Monterey Jack or Cheddar Cheese

1 loaf of Italian Bread, cubed

Heat olive oil over in a 4 quart sauce pan over medium heat. Add onions and sauté until translucent, stirring frequently. Add meat to the pan and break into smaller pieces while cooking. Once the meat is almost done, add the garlic, oregano, salt and pepper. Once the meat is cooked through, reduce the heat to medium low, add the pizza sauce and stir well. Then add the cheeses and stir until all the cheese is completely melted.

Serve with cubed bread for dipping.

OLYMPUS DIGITAL CAMERA

OLYMPUS DIGITAL CAMERA

NORTH Festival-Danish Meatballs

NORTH Festival

Frikadeller Smørrebrød

Sponsored Post

I was talking to one of my co-workers the other day about how easy it is for kids to research things online. When I was a kid (GET OFF MY LAWN!! warning), there was no “internet”. If you were assigned a report on the American Revolution, you had to hope that someone didn’t get to the library and check out the one or two books on the American Revolution before you did, otherwise, your “source” information was gleaned from whatever was in the reference section. Need a magazine article? Welcome to the wonderful world of microfiche and scrolling through months of other articles to get to yours. Now? Google it. Who needs patience in the age of information? I can probably get a George Washington Hologram to tell me about the American Revolution now.

This is my first sponsored post. For my first such post, I am tasked with writing about the food from the great country of Denmark. Upon learning of my assignment three food items popped into my head: the danish, Danish butter cookies, and pickled herring. I was really hoping that my first impressions could be greatly expanded to other foodstuffs. Luckily, I was right.  Thanks to the internet, I was not only able to learn that the Danes have an app for their food (for real!), but I could get access to some really great, traditional recipes.  Recipes that I probably couldn’t have found in my local library all those years ago. Lucky me!

Danish food is experiencing a bit of a renaissance, as a Danish restaurant, Noma, holds the distinction of being the best restaurant in the world. Also, Aamanns-Copenhagen, a very Danish restaurant, has opened in New York City to great fanfare. I was completely smitten by Adam Aamann when, during an interview with honestcooking.com (http://honestcooking.com/adam-aamann-and-the-reinvention-of-danish-smorrebrod/), he hit on something that I find so deeply ironic about food nowadays:

[Aamann] laughs briefly at the word “modern”, an adjective loosely used by food writers to describe anything that stands out. “It’s quite funny”, he says. “Nowadays modern means making your food from scratch; you would think it would be the other way around”.

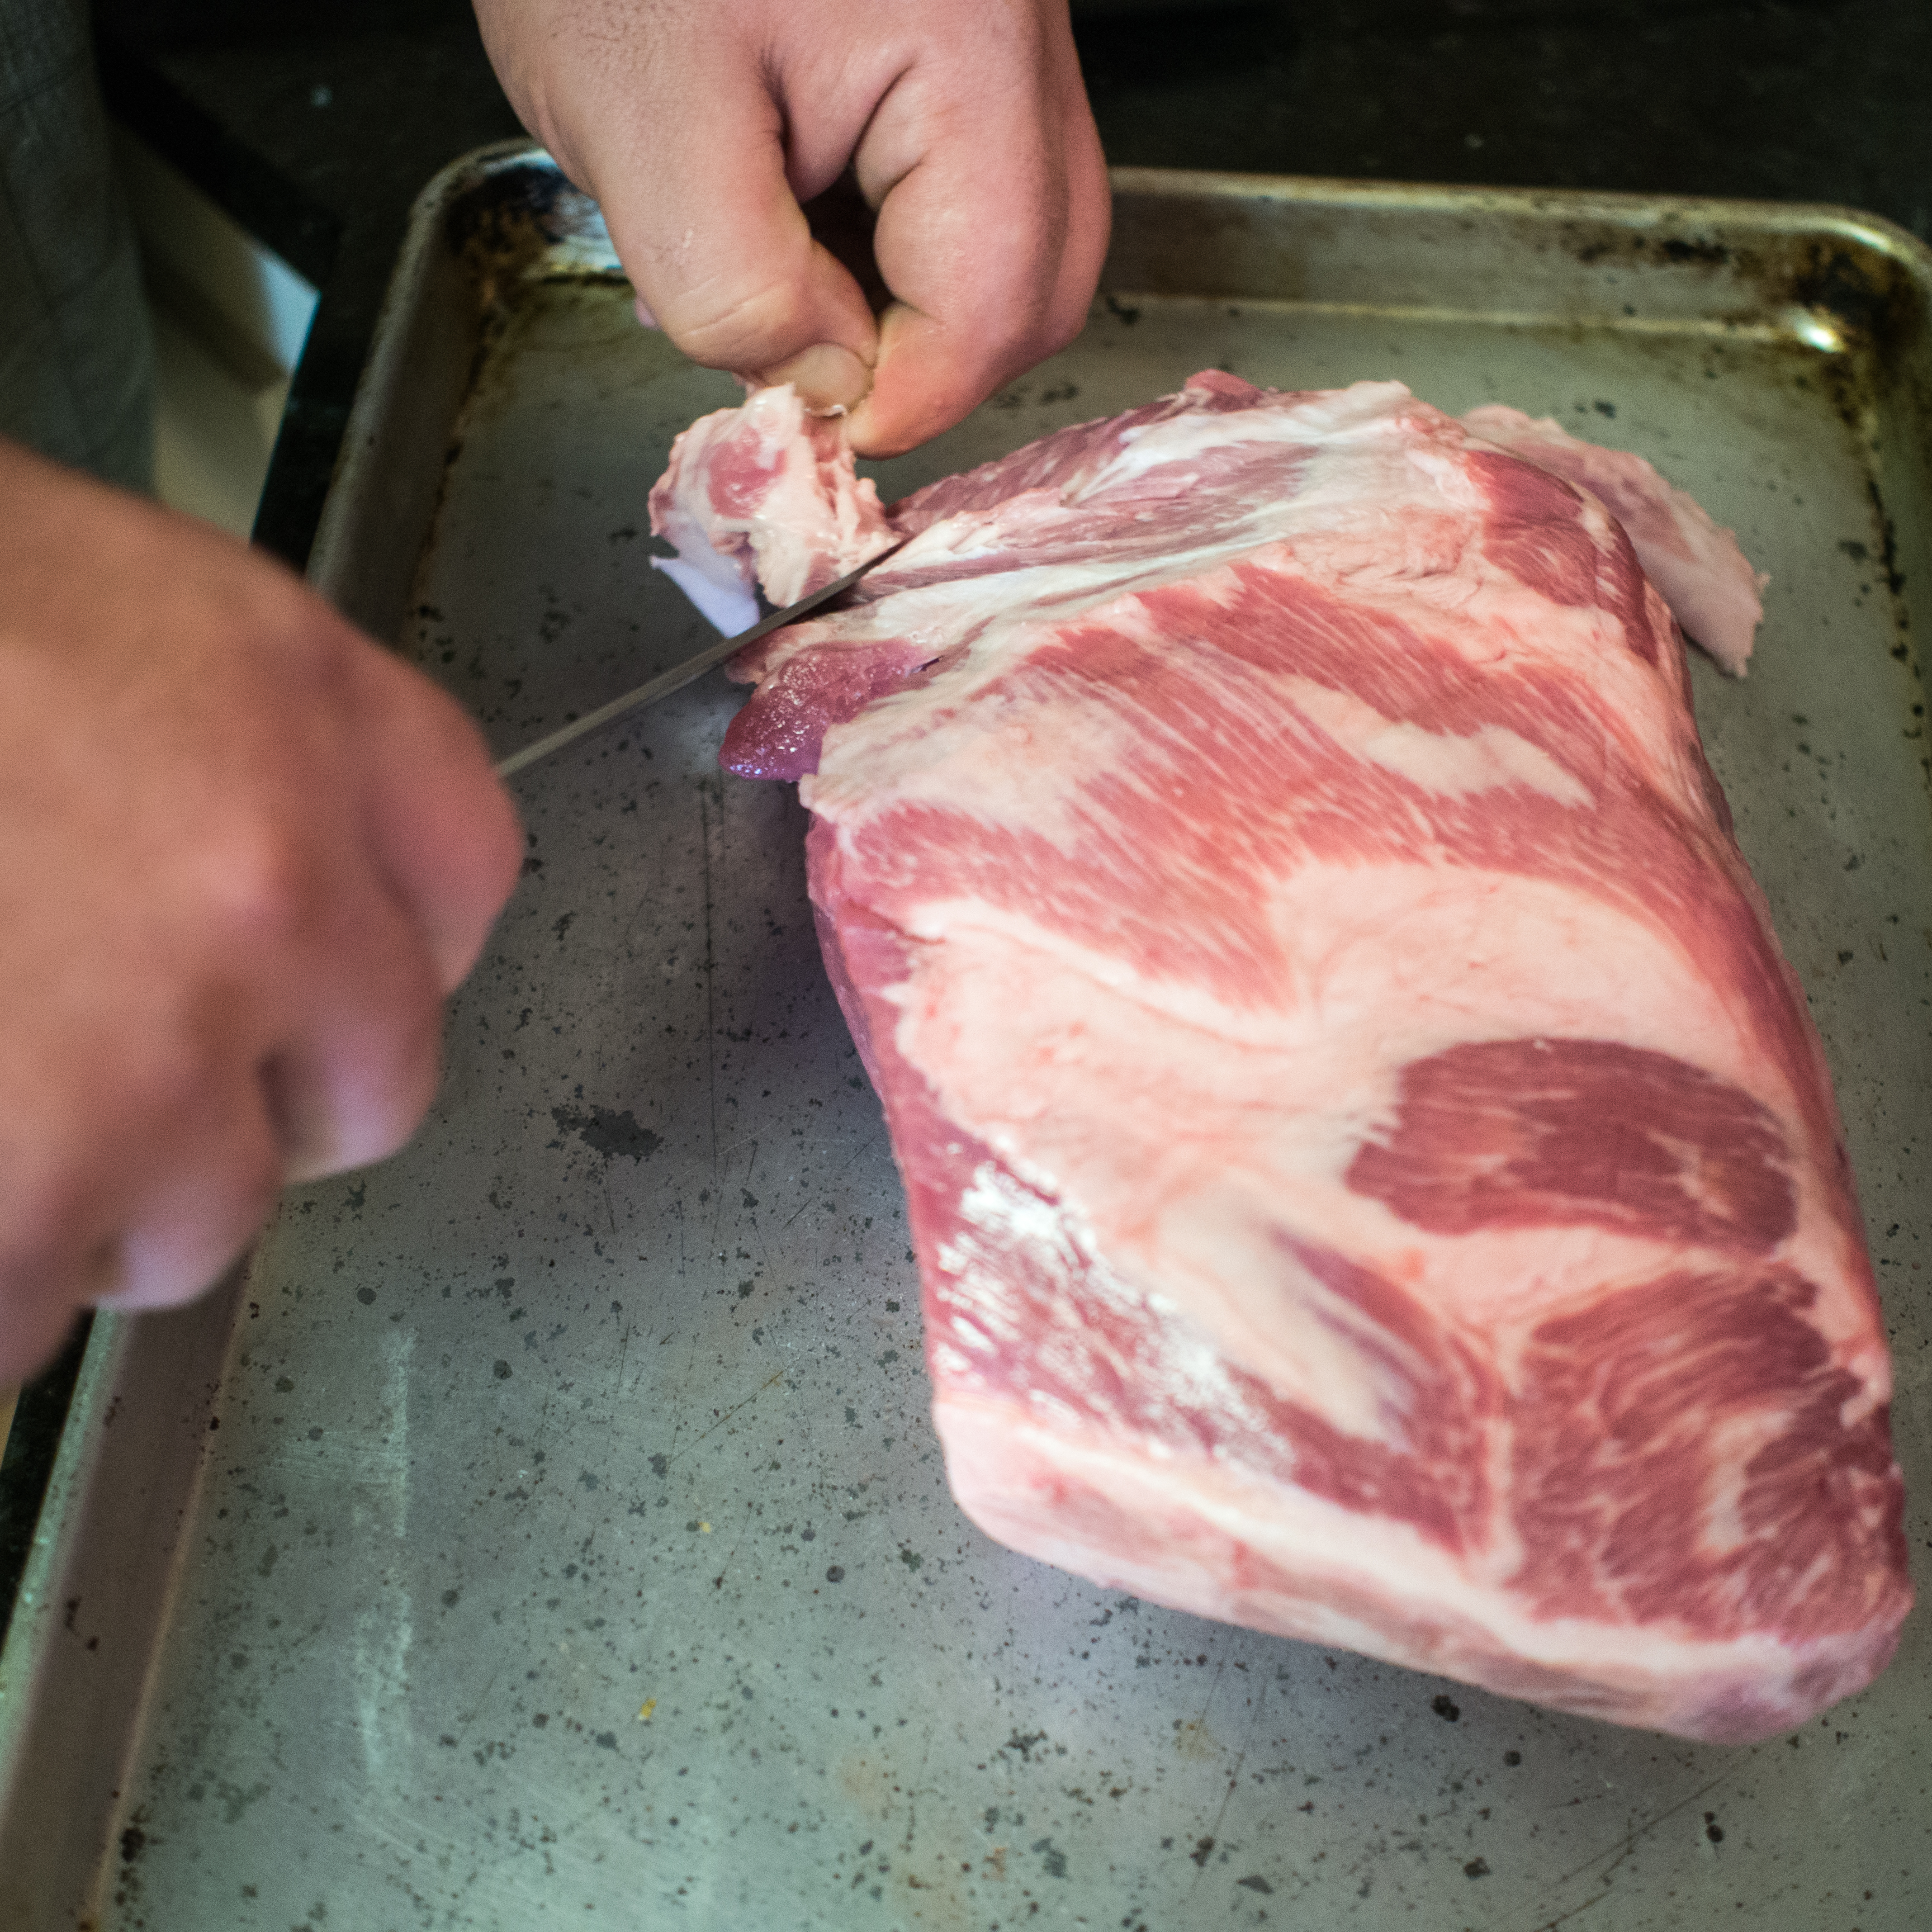
Yes, yes you would. Aamann resuscitated the Danish standby of smørrebrød.  Smørrebrød is an open faced sandwich that you eat with a knife and fork.  Traditionally, the base is a hearty Danish rye bread and the toppings vary from cured meats, pickled fish to leftover frikadeller, or Danish meatballs.  There’s no mayonnaise on the bread, just butter.  This was definitely going to be an adventure if I’m going to do the smørrebrød.  My kids have eaten traditional French breads like Challah and brioche, but rye would be a new experience.   I realized I had a really hard sell ahead because my daughter was heartbroken to learn that the dark brown rye wasn’t really chocolate flavored.

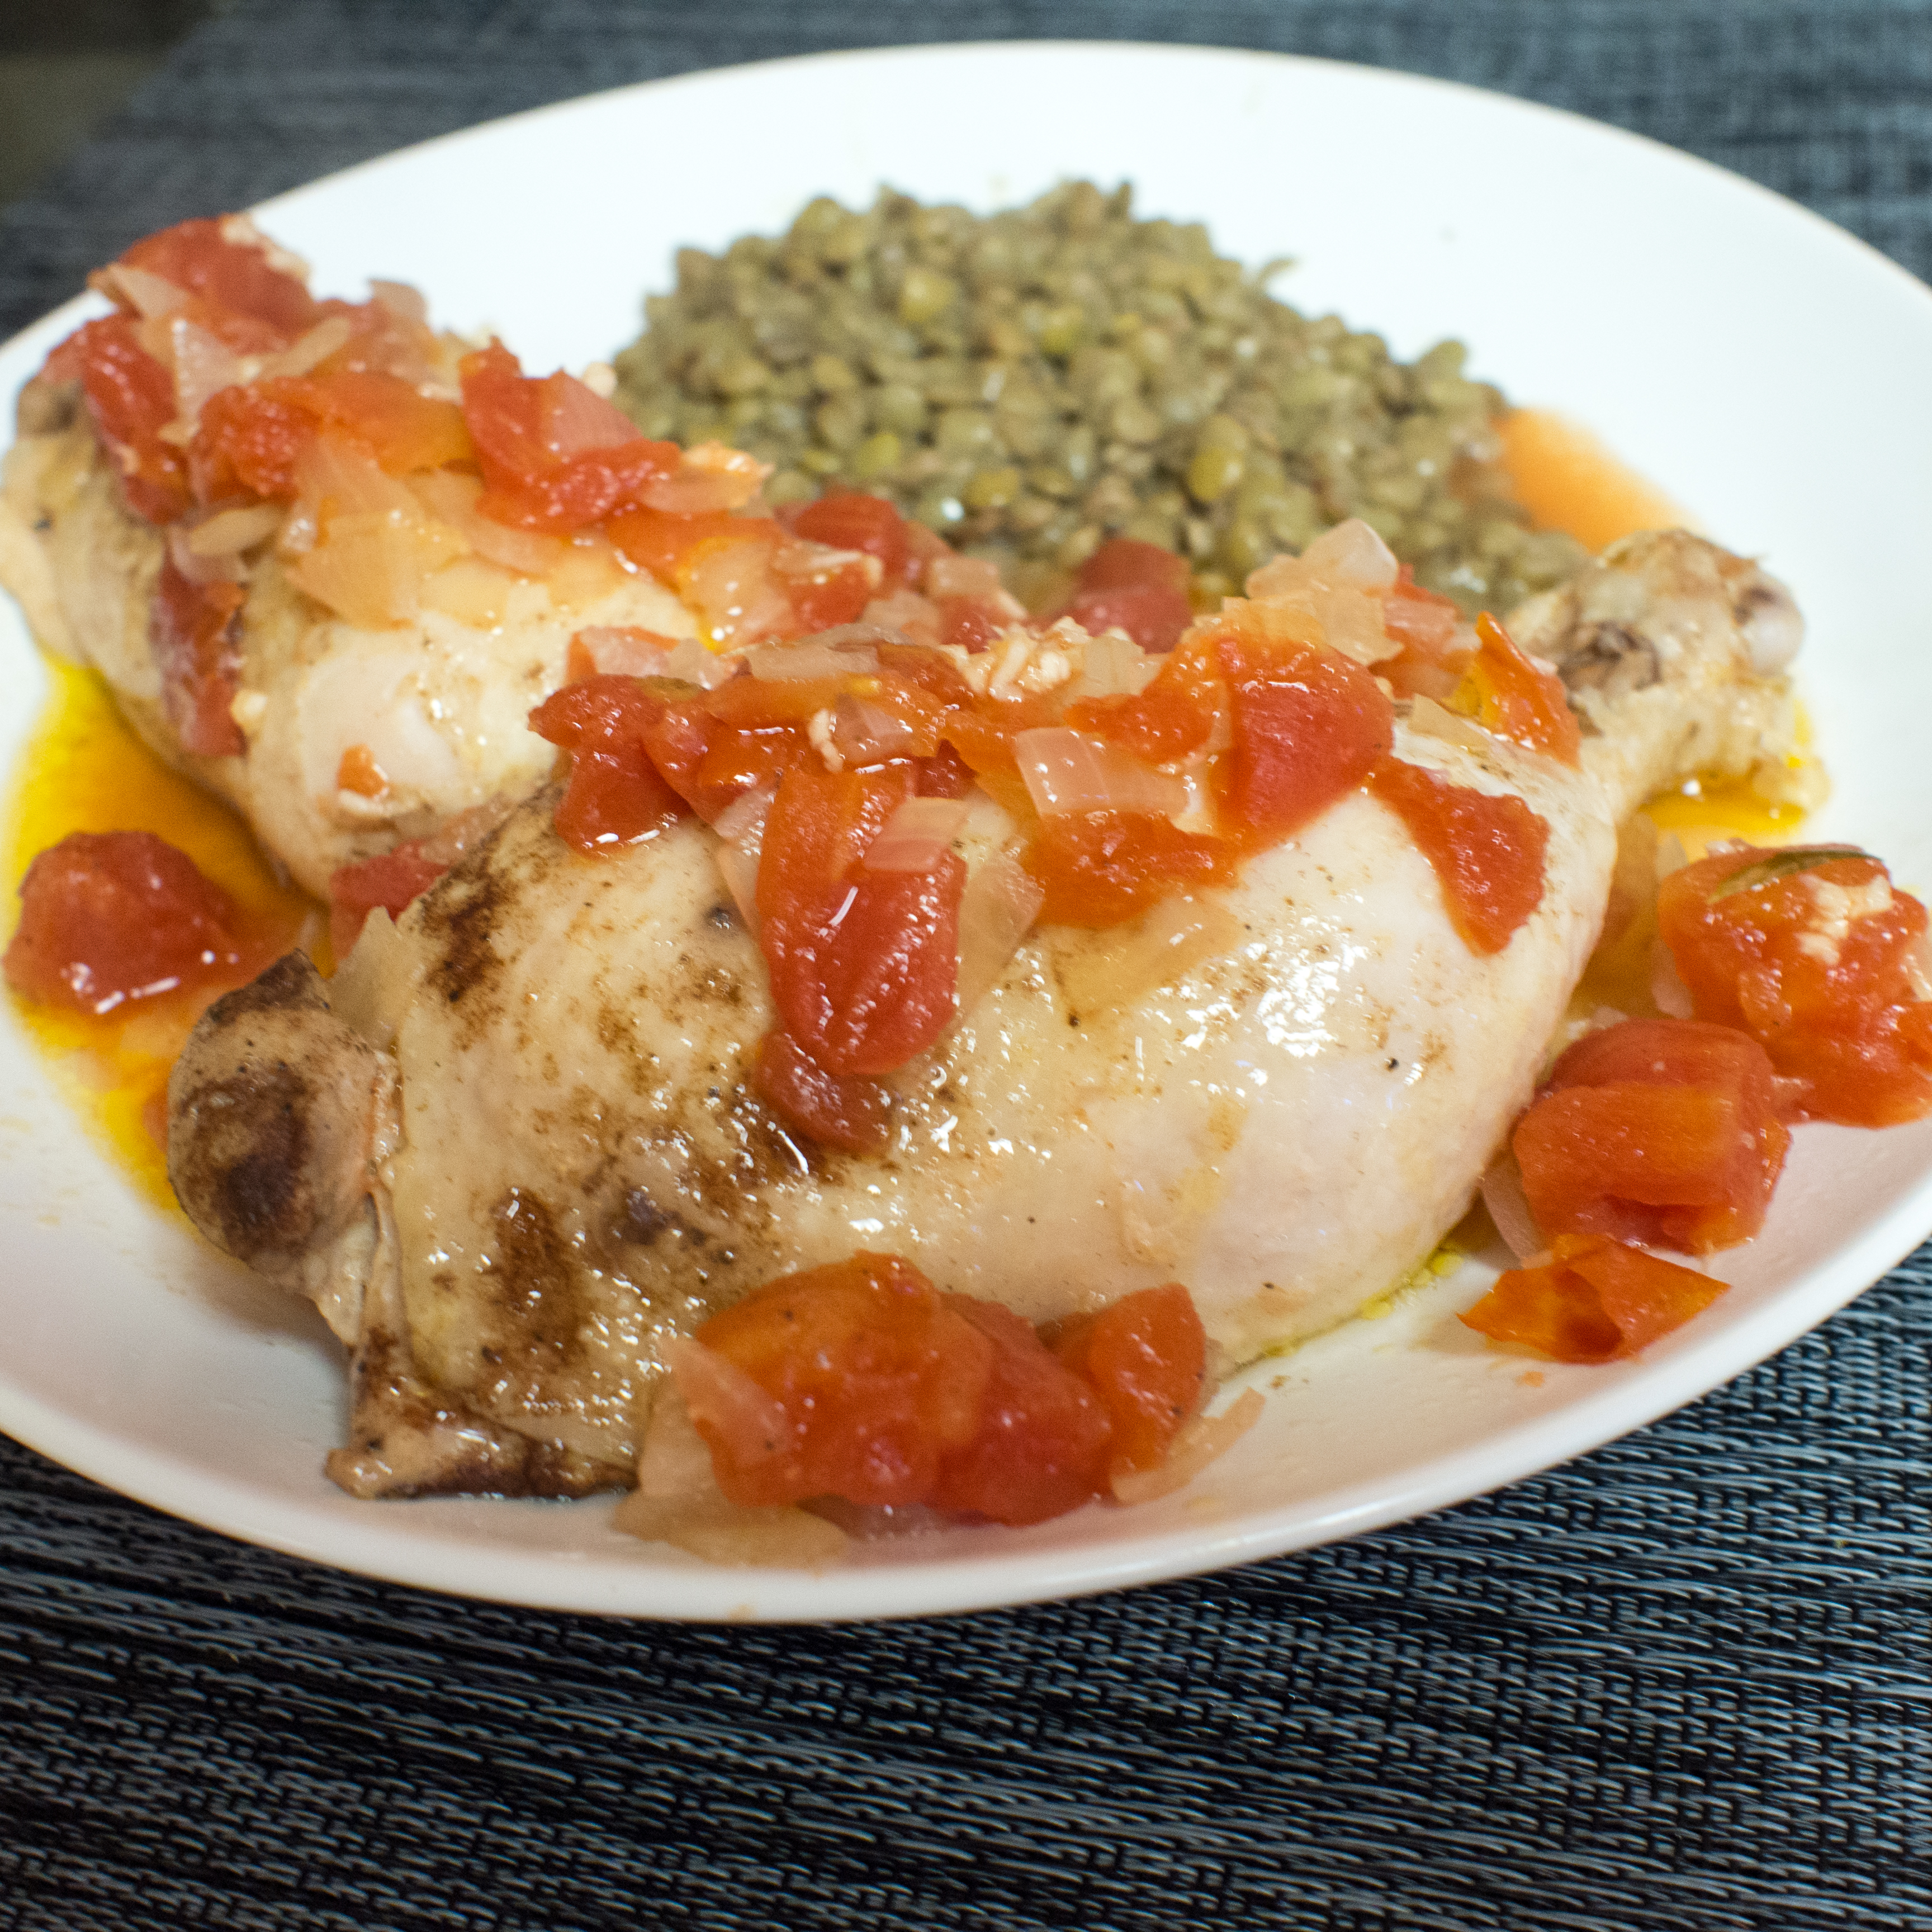
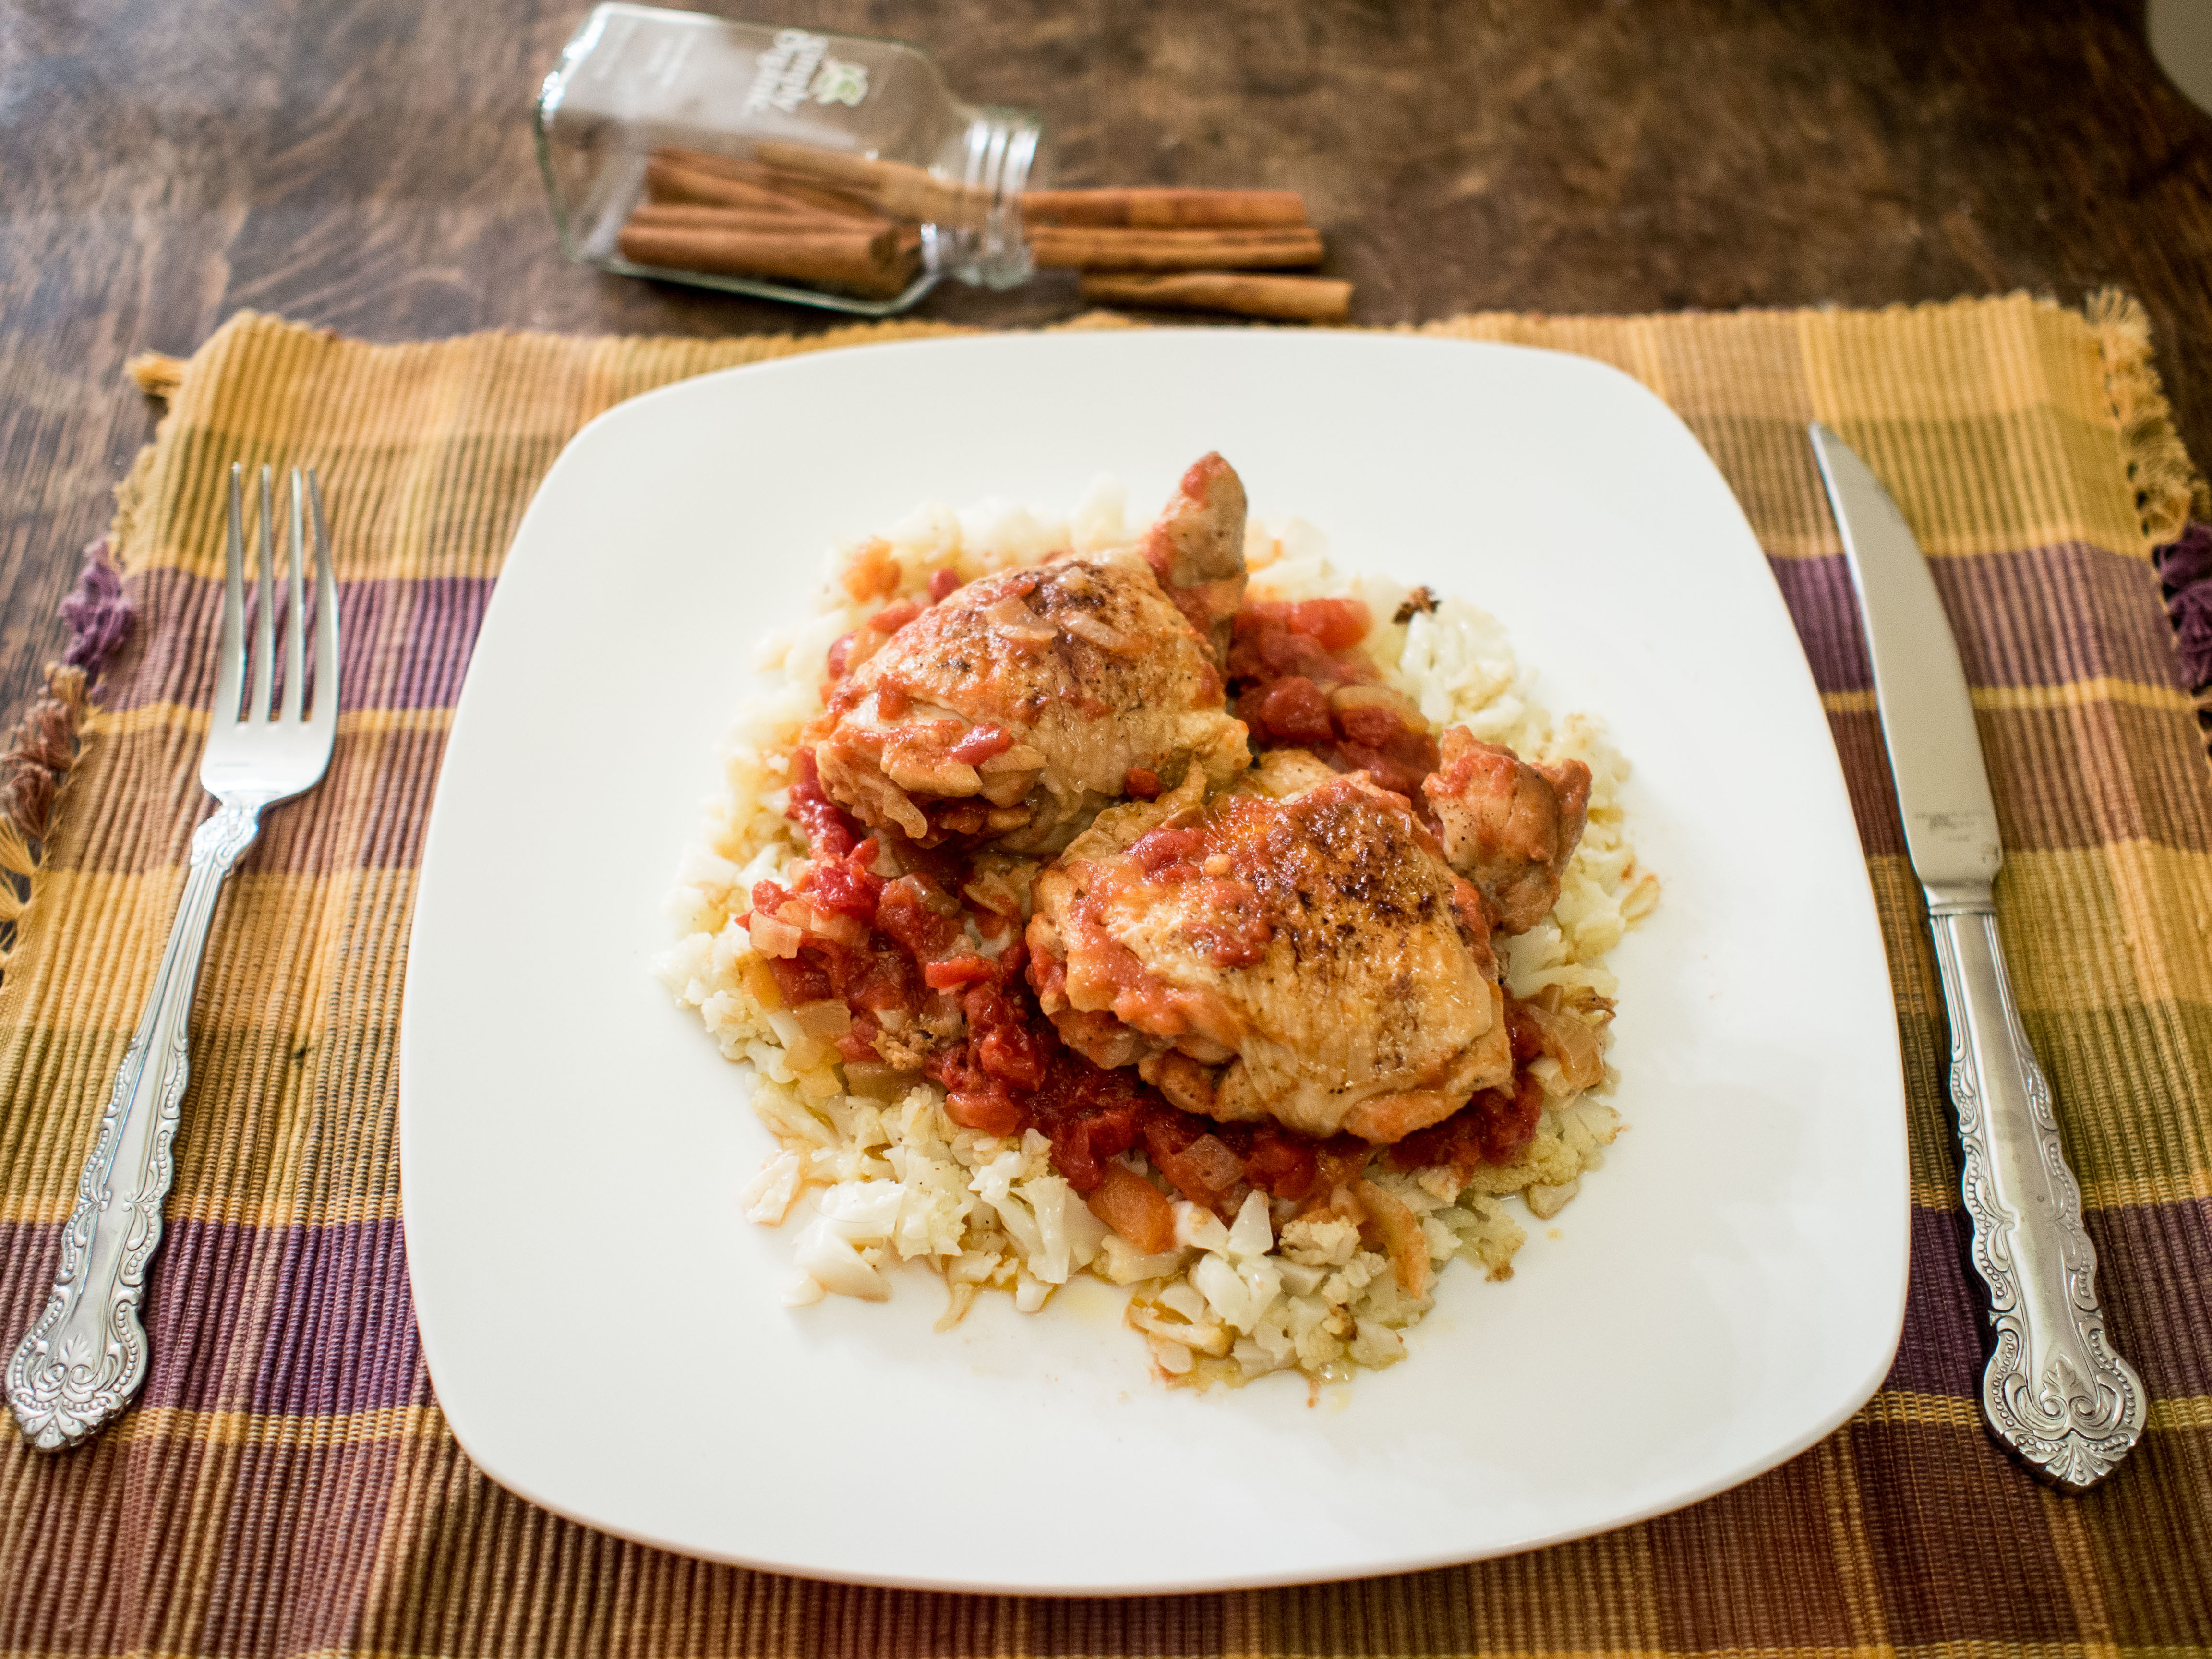
So, I figured the easiest path would be frikadeller, a Danish meatball.  More specifically, the national dish of Denmark.   My kids LOVE meatballs.  We could have traditional Danish frikadeller for dinner with red cabbage and then used the leftovers for a smørrebrød lunch.  I’d cover traditional and new!

The meatballs were light and extremely easy to make.  They were also very traditional.    My kids LOVED them.  The adults were sort of non-plussed.  They were fine meatballs, but nothing spectacularly different.  Honestly, it’s what I loved about them.  No odd flavors.  Unpretentious presentation and great texture.  Simple, honest, clean food.  Not overly fussy and very approachable.

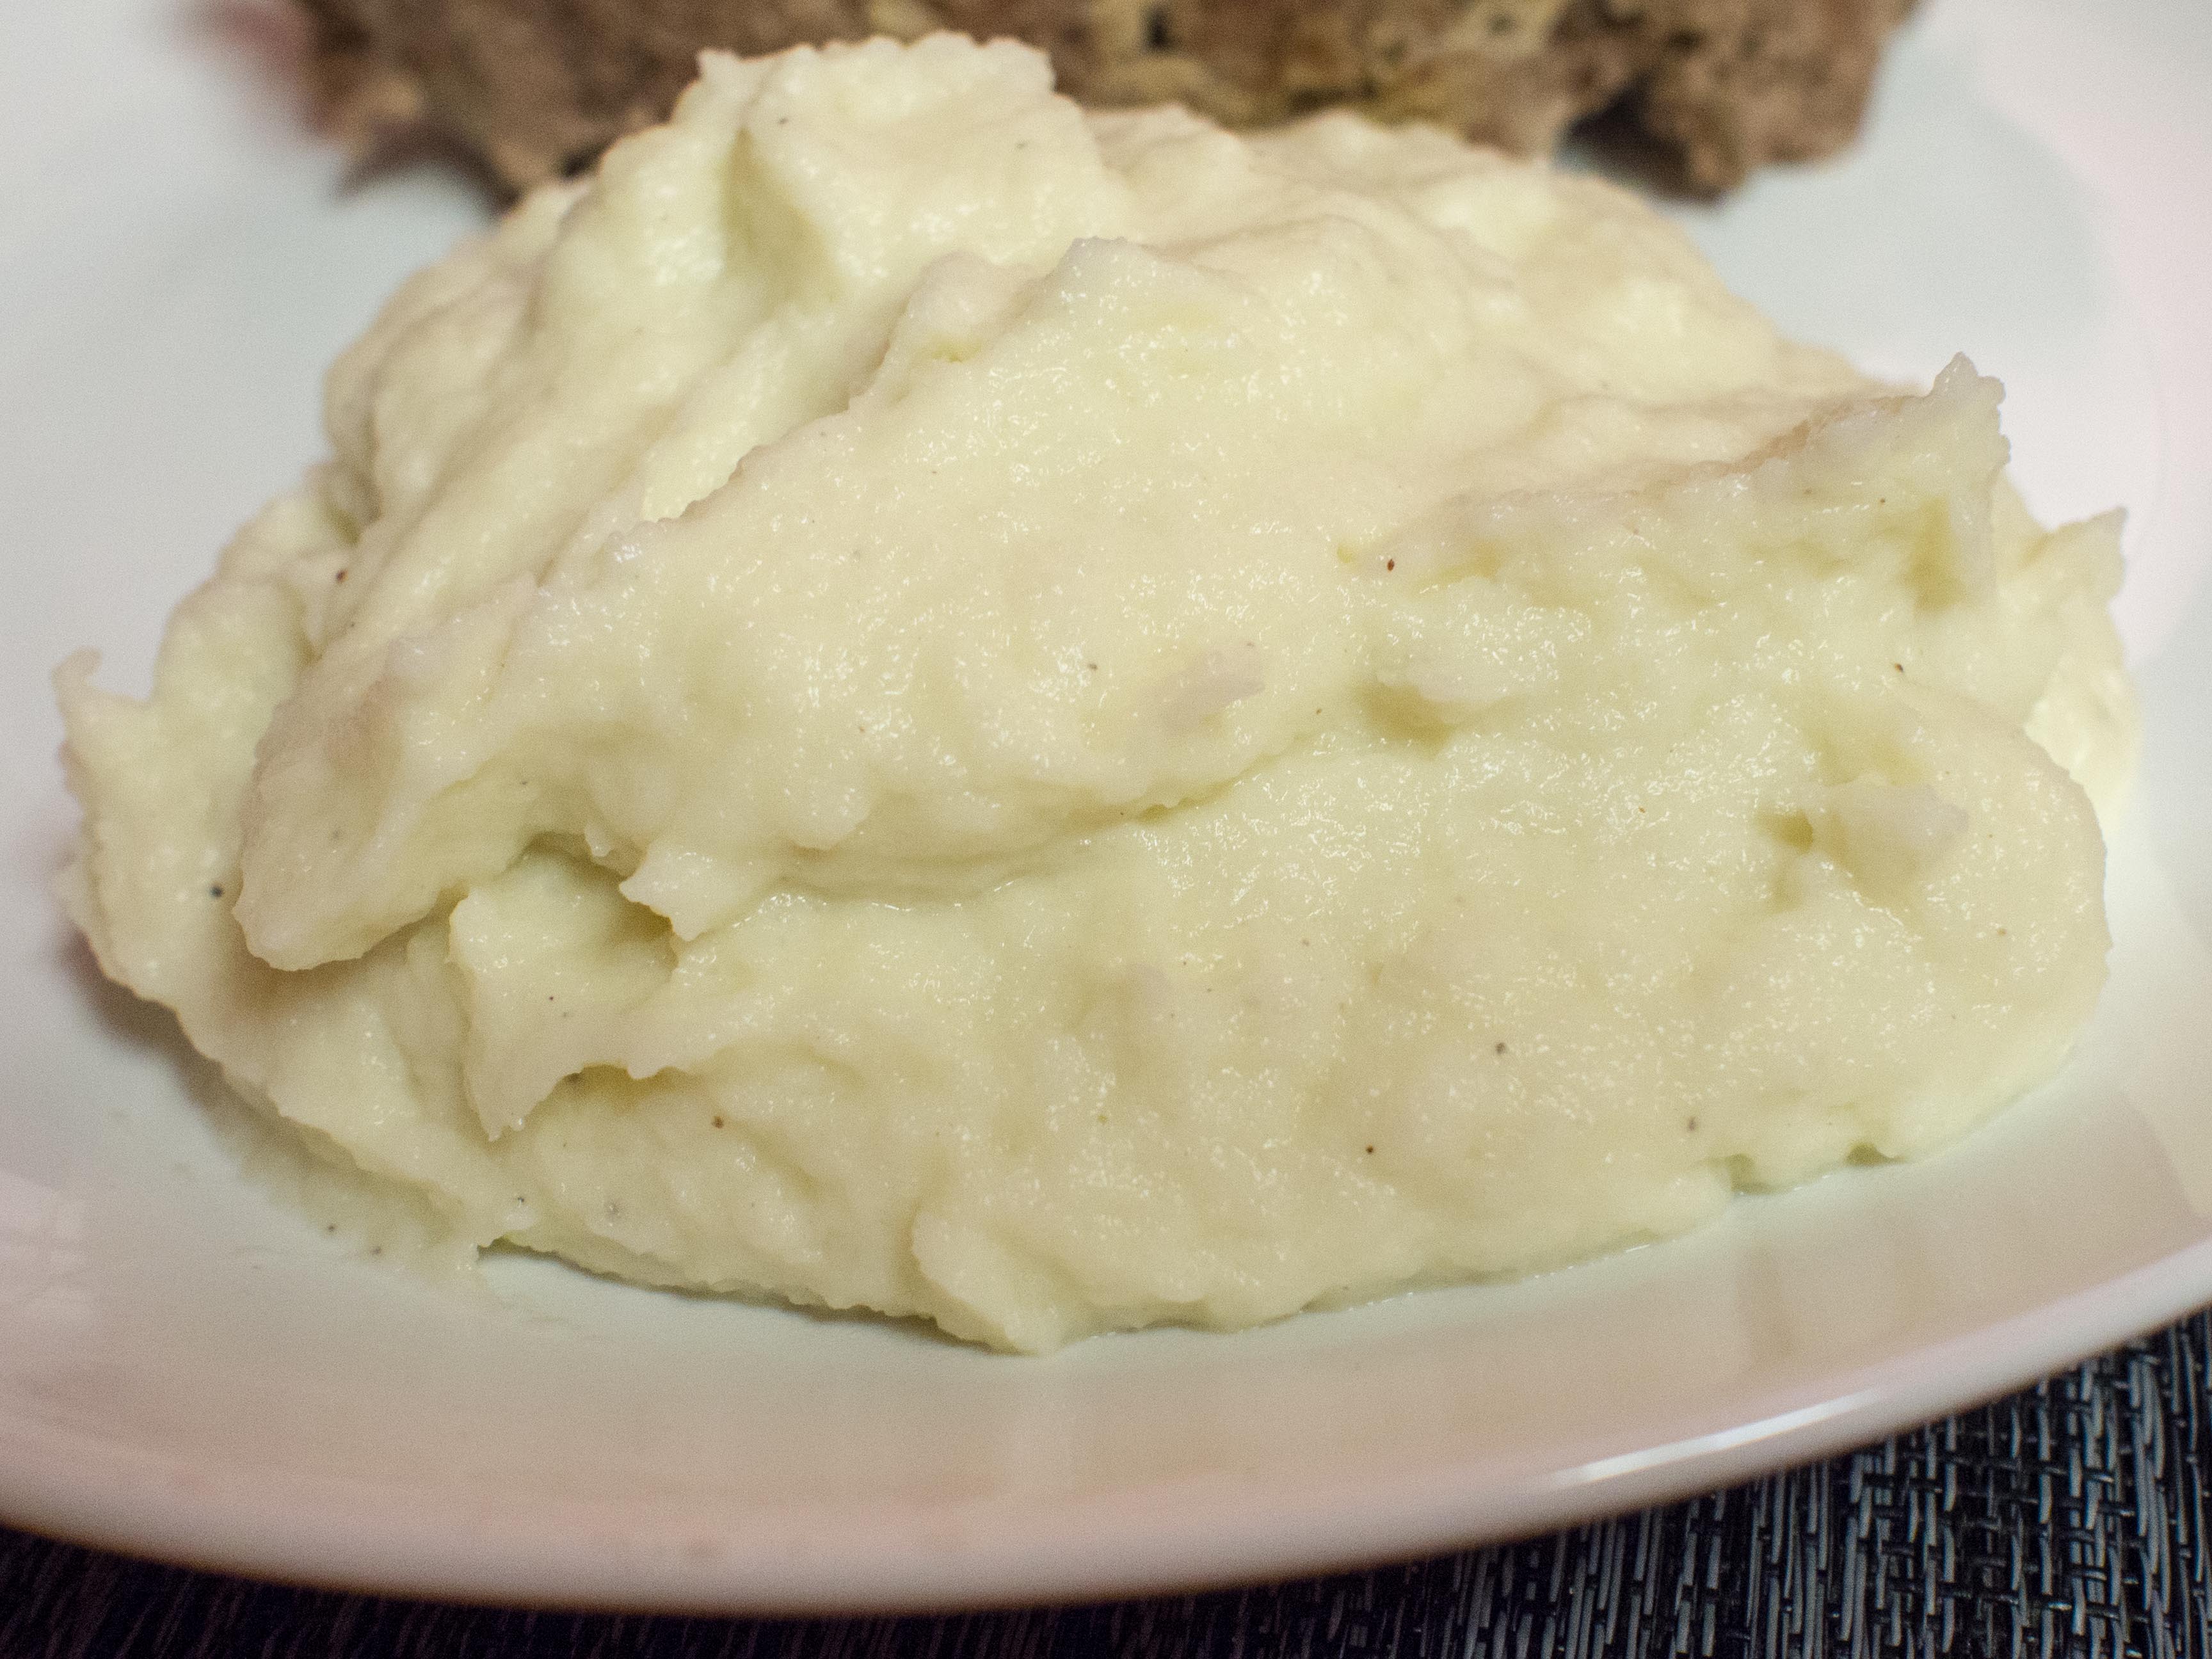
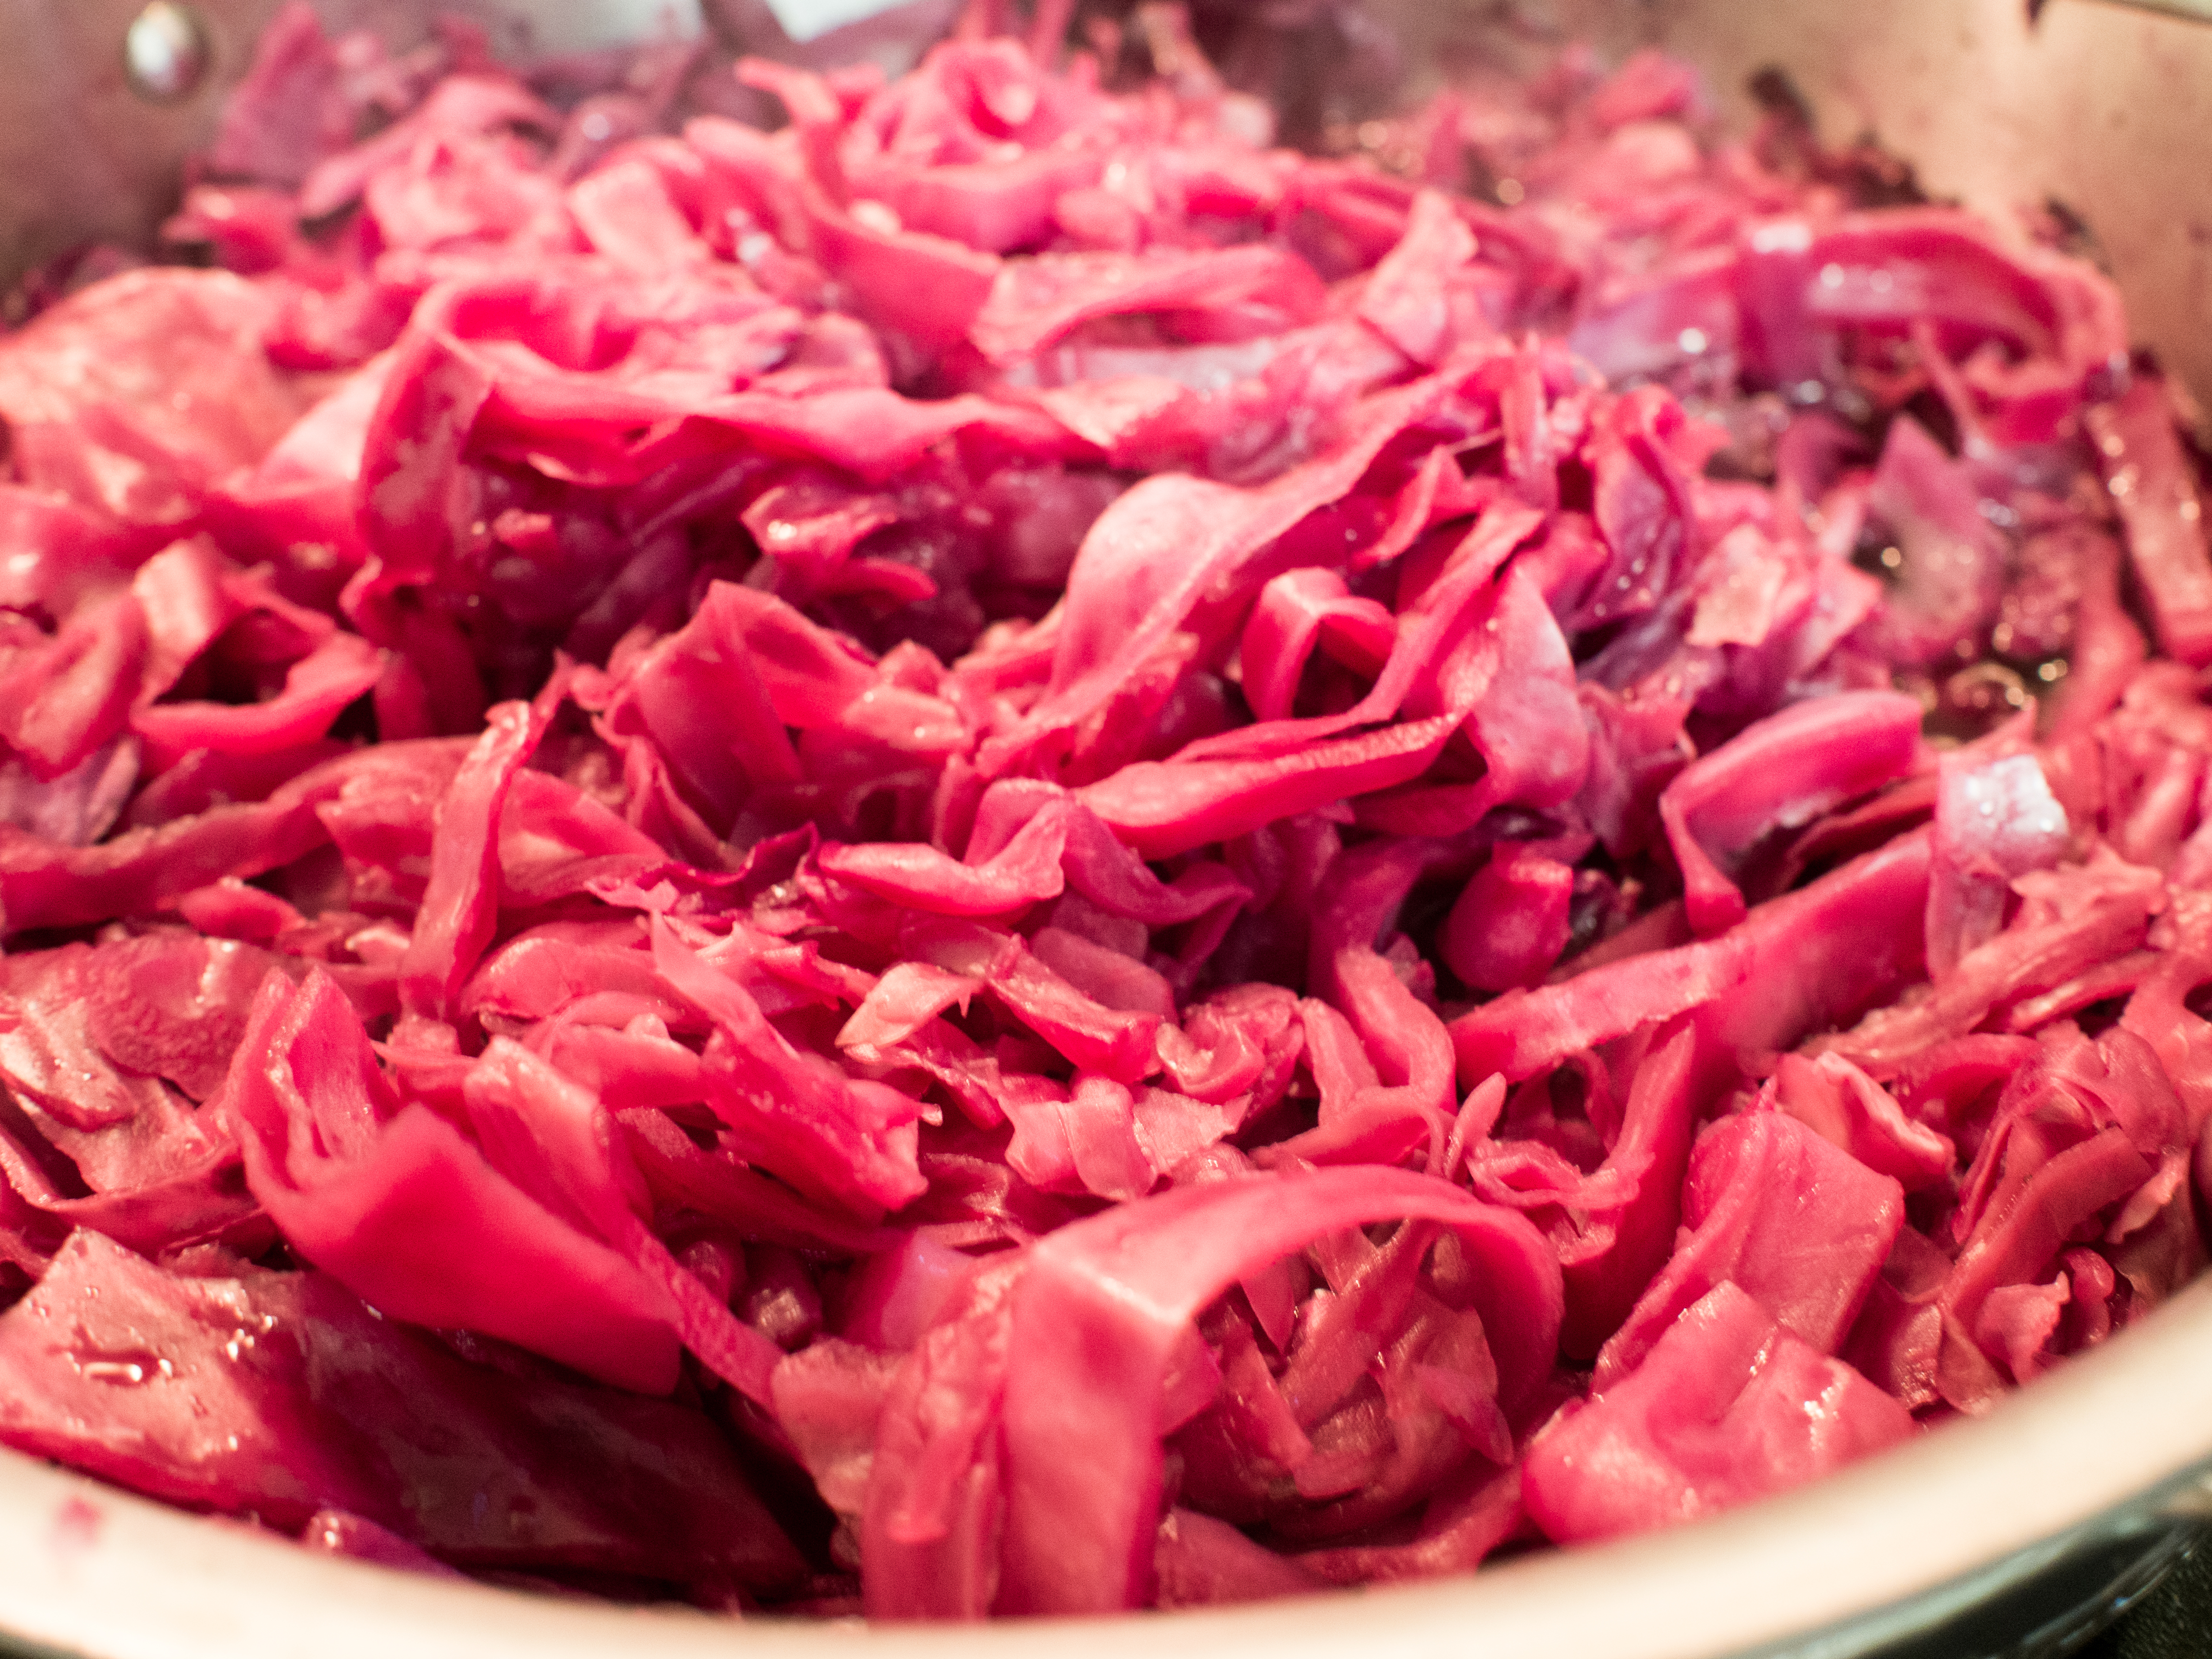
The red cabbage was so easy to make.  I LOVE the red cabbage sides when I go to German restaurants.  I had no idea they were so simple to make.  I am thrilled to learn how to make this dish, officially called rødkål.  It’s beautiful and remarkably good for the trace amount of effort required.  It’s also traditionally served at Christmas time and it’s so easy to see why.  The color is amazingly festive! This dish will be on my to do list for Christmas!

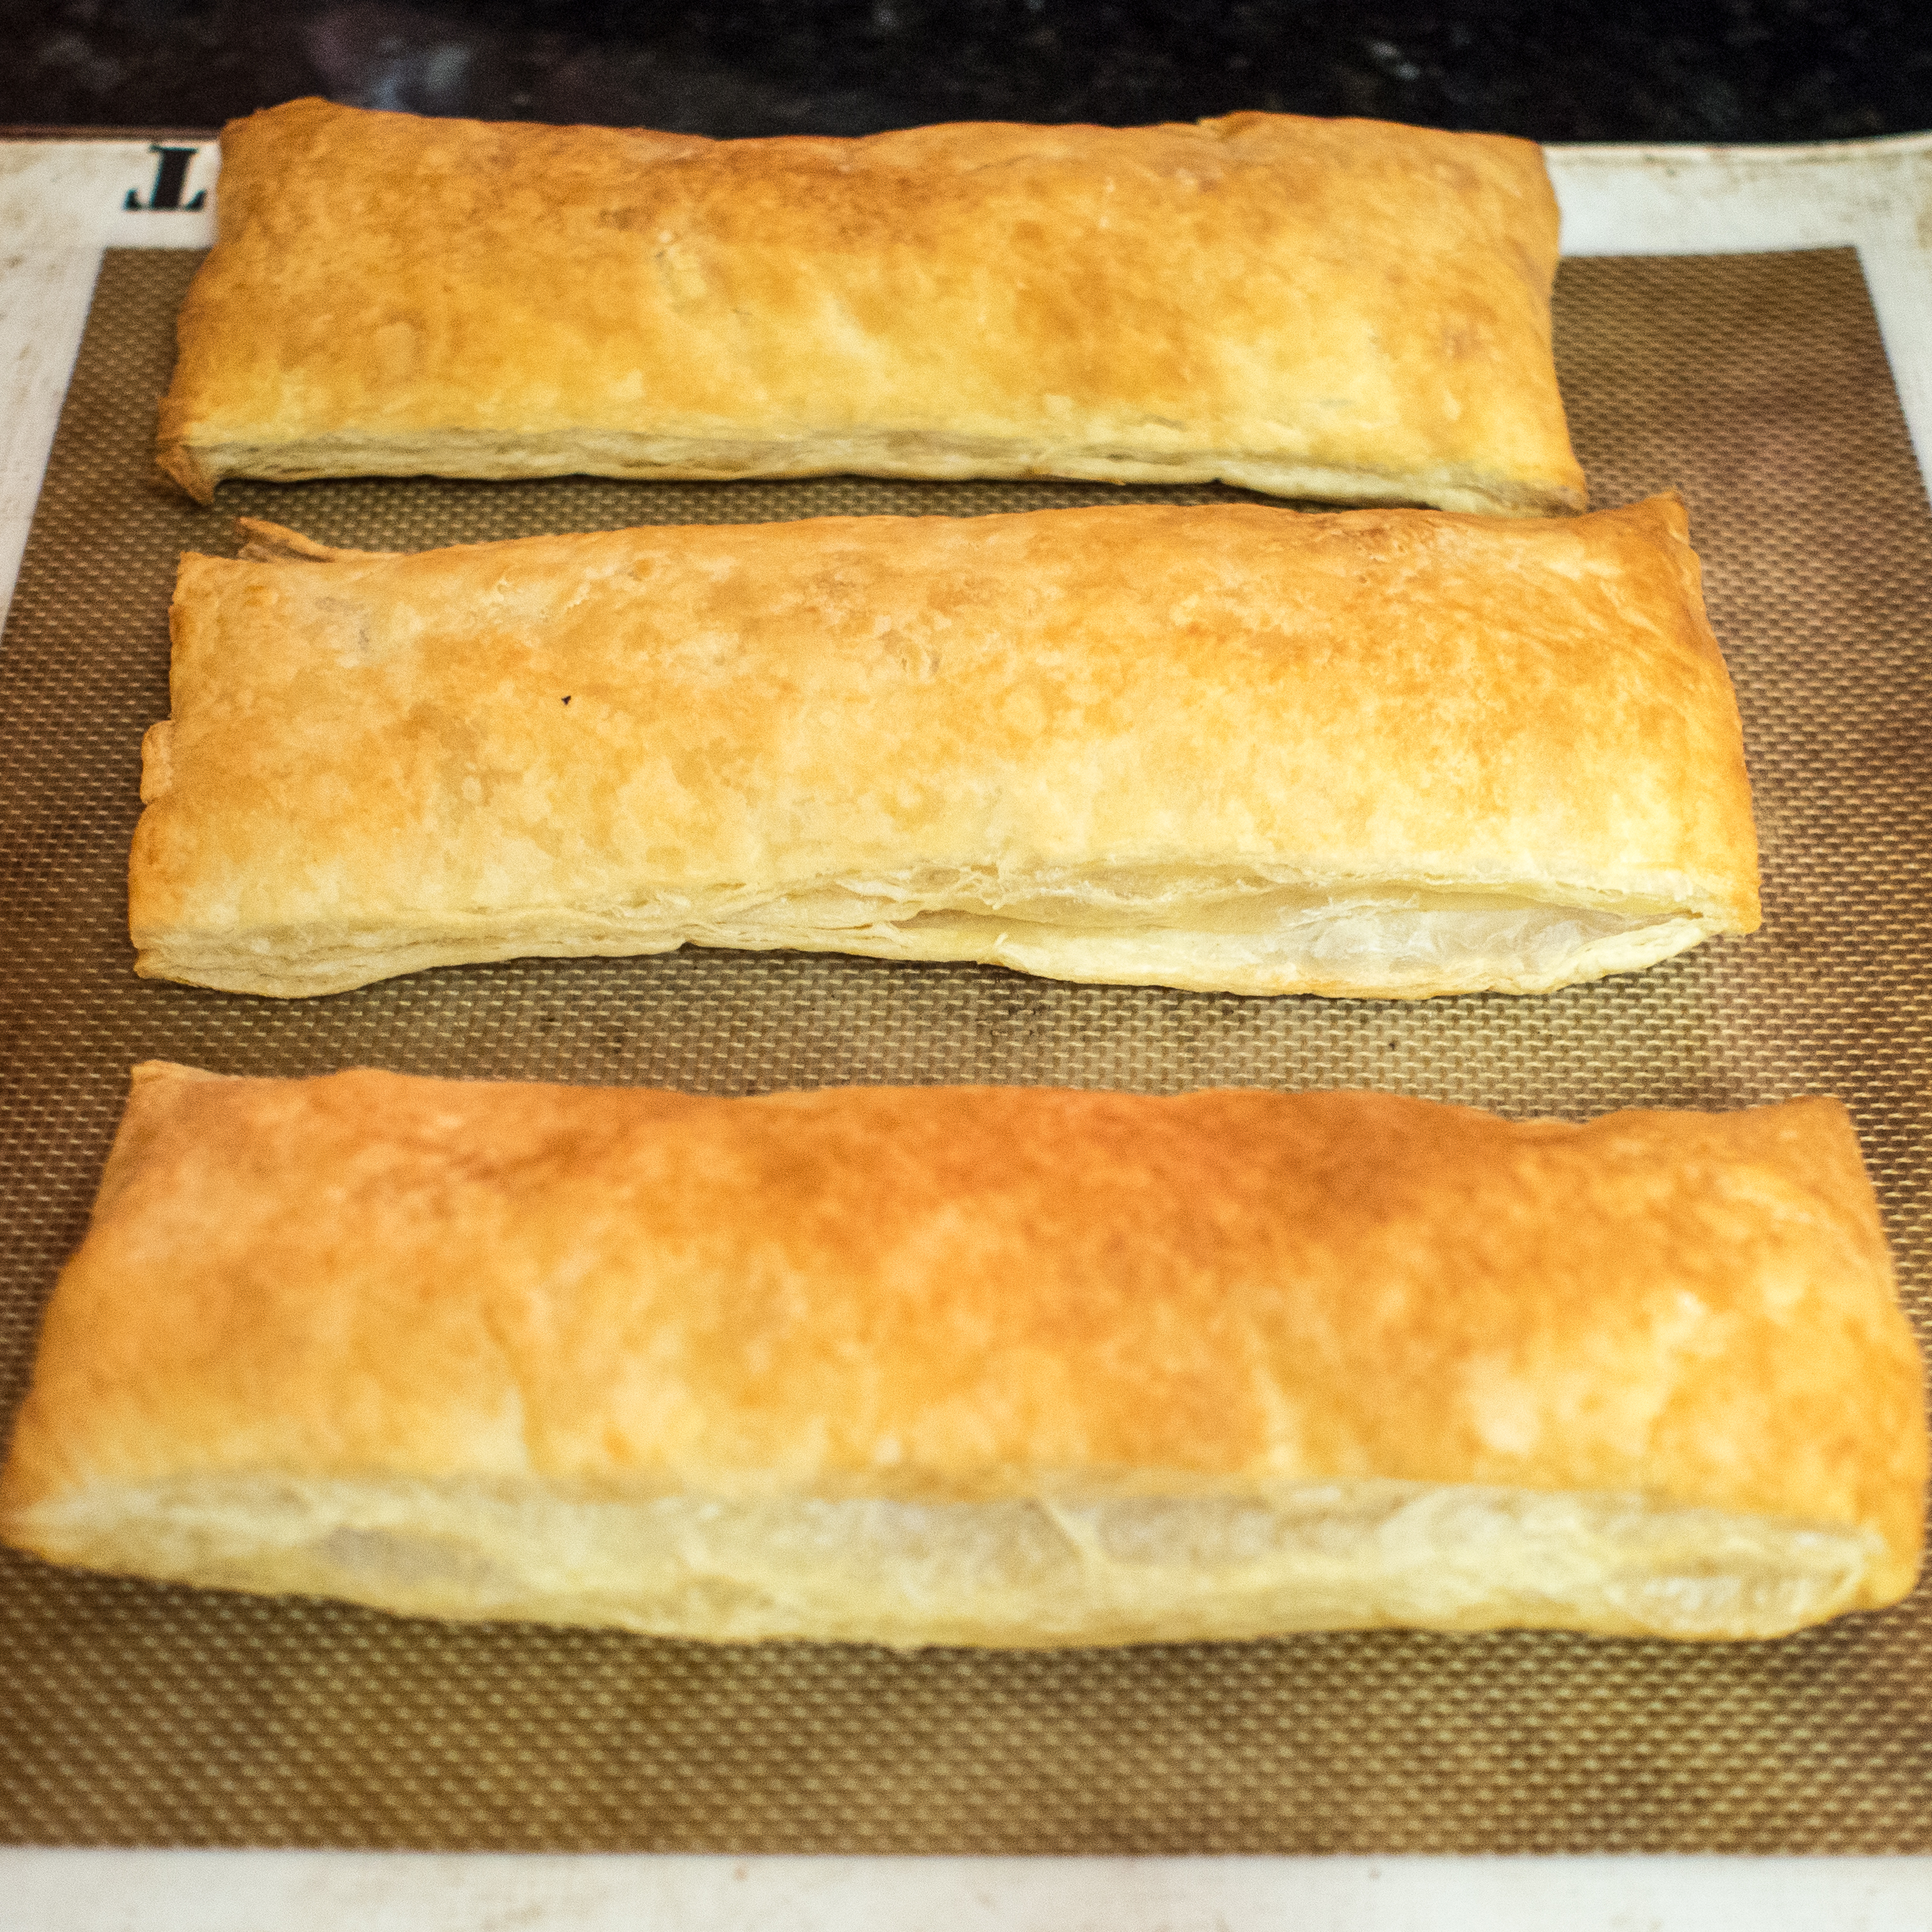
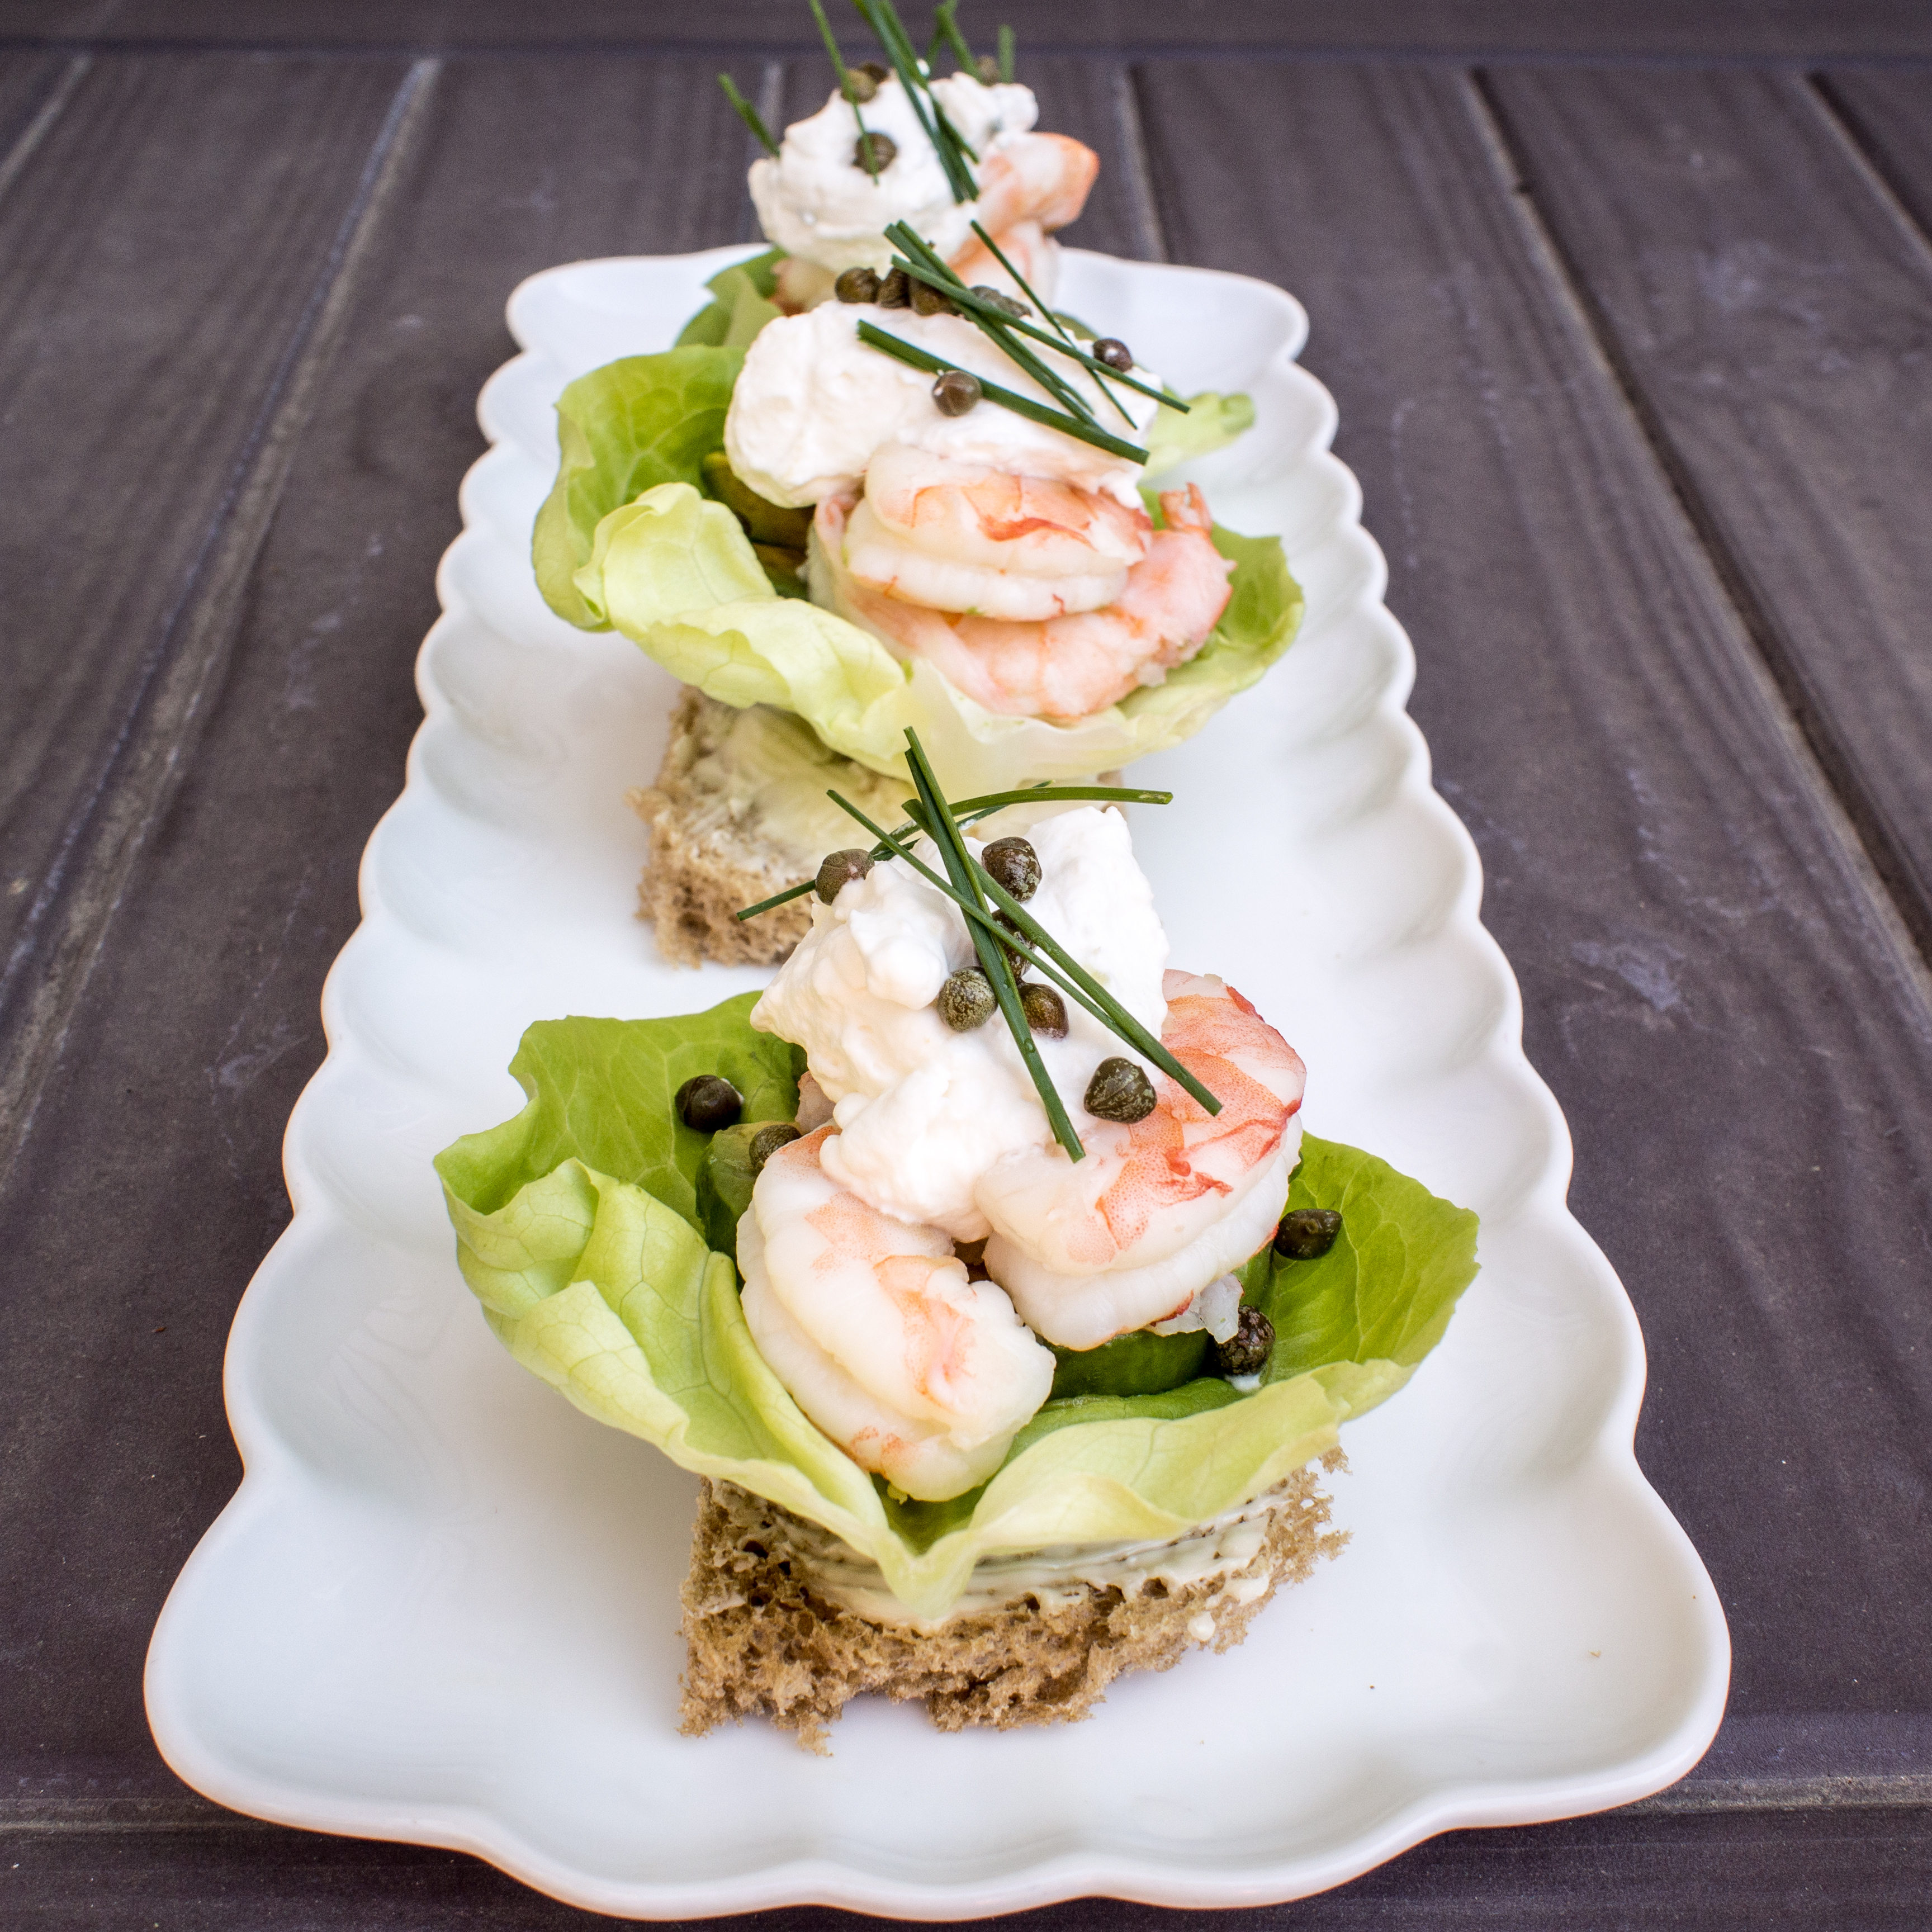
Repurposing the frikadeller into smørrebrød the next day was ridiculously easy, and yet really good.  Subbing the butter for the mayo made for a lighter, less gloppy lunch.  It was almost cleaner, if that makes sense.  And you can’t put an American amount of butter on the bread. You know, a bare scraping of butter.   No, you need to put a layer thick enough on there so that when you bite through it, you can see teeth marks.  My kind of butter layer!!  Add the leftover frikadeller, rødkål, and dill pickles, and you have some amazing smørrebrød.

Rødkål (Sweet and Sour Red Cabbage)
Recipe inspired by: Scandinavian Today Blogspot (http://scandinavtoday.blogspot.com/2013/01/how-to-make-danish-red-cabbage-rdkaal.html)
Prep Time: 5 minutes
Cook Time: 2 hours

1 head of red cabbage
1 cup apple cider vinegar
2 cups water
1 teaspoon salt
1/4 cup sugar
1/2 teaspoon pepper
1 tablespoon red currant jelly

Remove tough outer leaves and white core of the cabbage. Slice the remaining cabbage into thin strips.

In a preheated saute pan, place the cabbage, vinegar, water, salt, sugar and pepper over medium heat. Stir occasionally and cook until tender for about 2 hours. Before serving, stir in the red currant jelly.

Frikadeller (Danish Meatballs)
Recipe inspired by allrecipes.com (http://allrecipes.com/recipe/frikadeller-danish-meatballs/)
Serves: 6-8
Prep Time: 40 minutes (mostly chilling before cooking)
Cook Time: 30 minutes

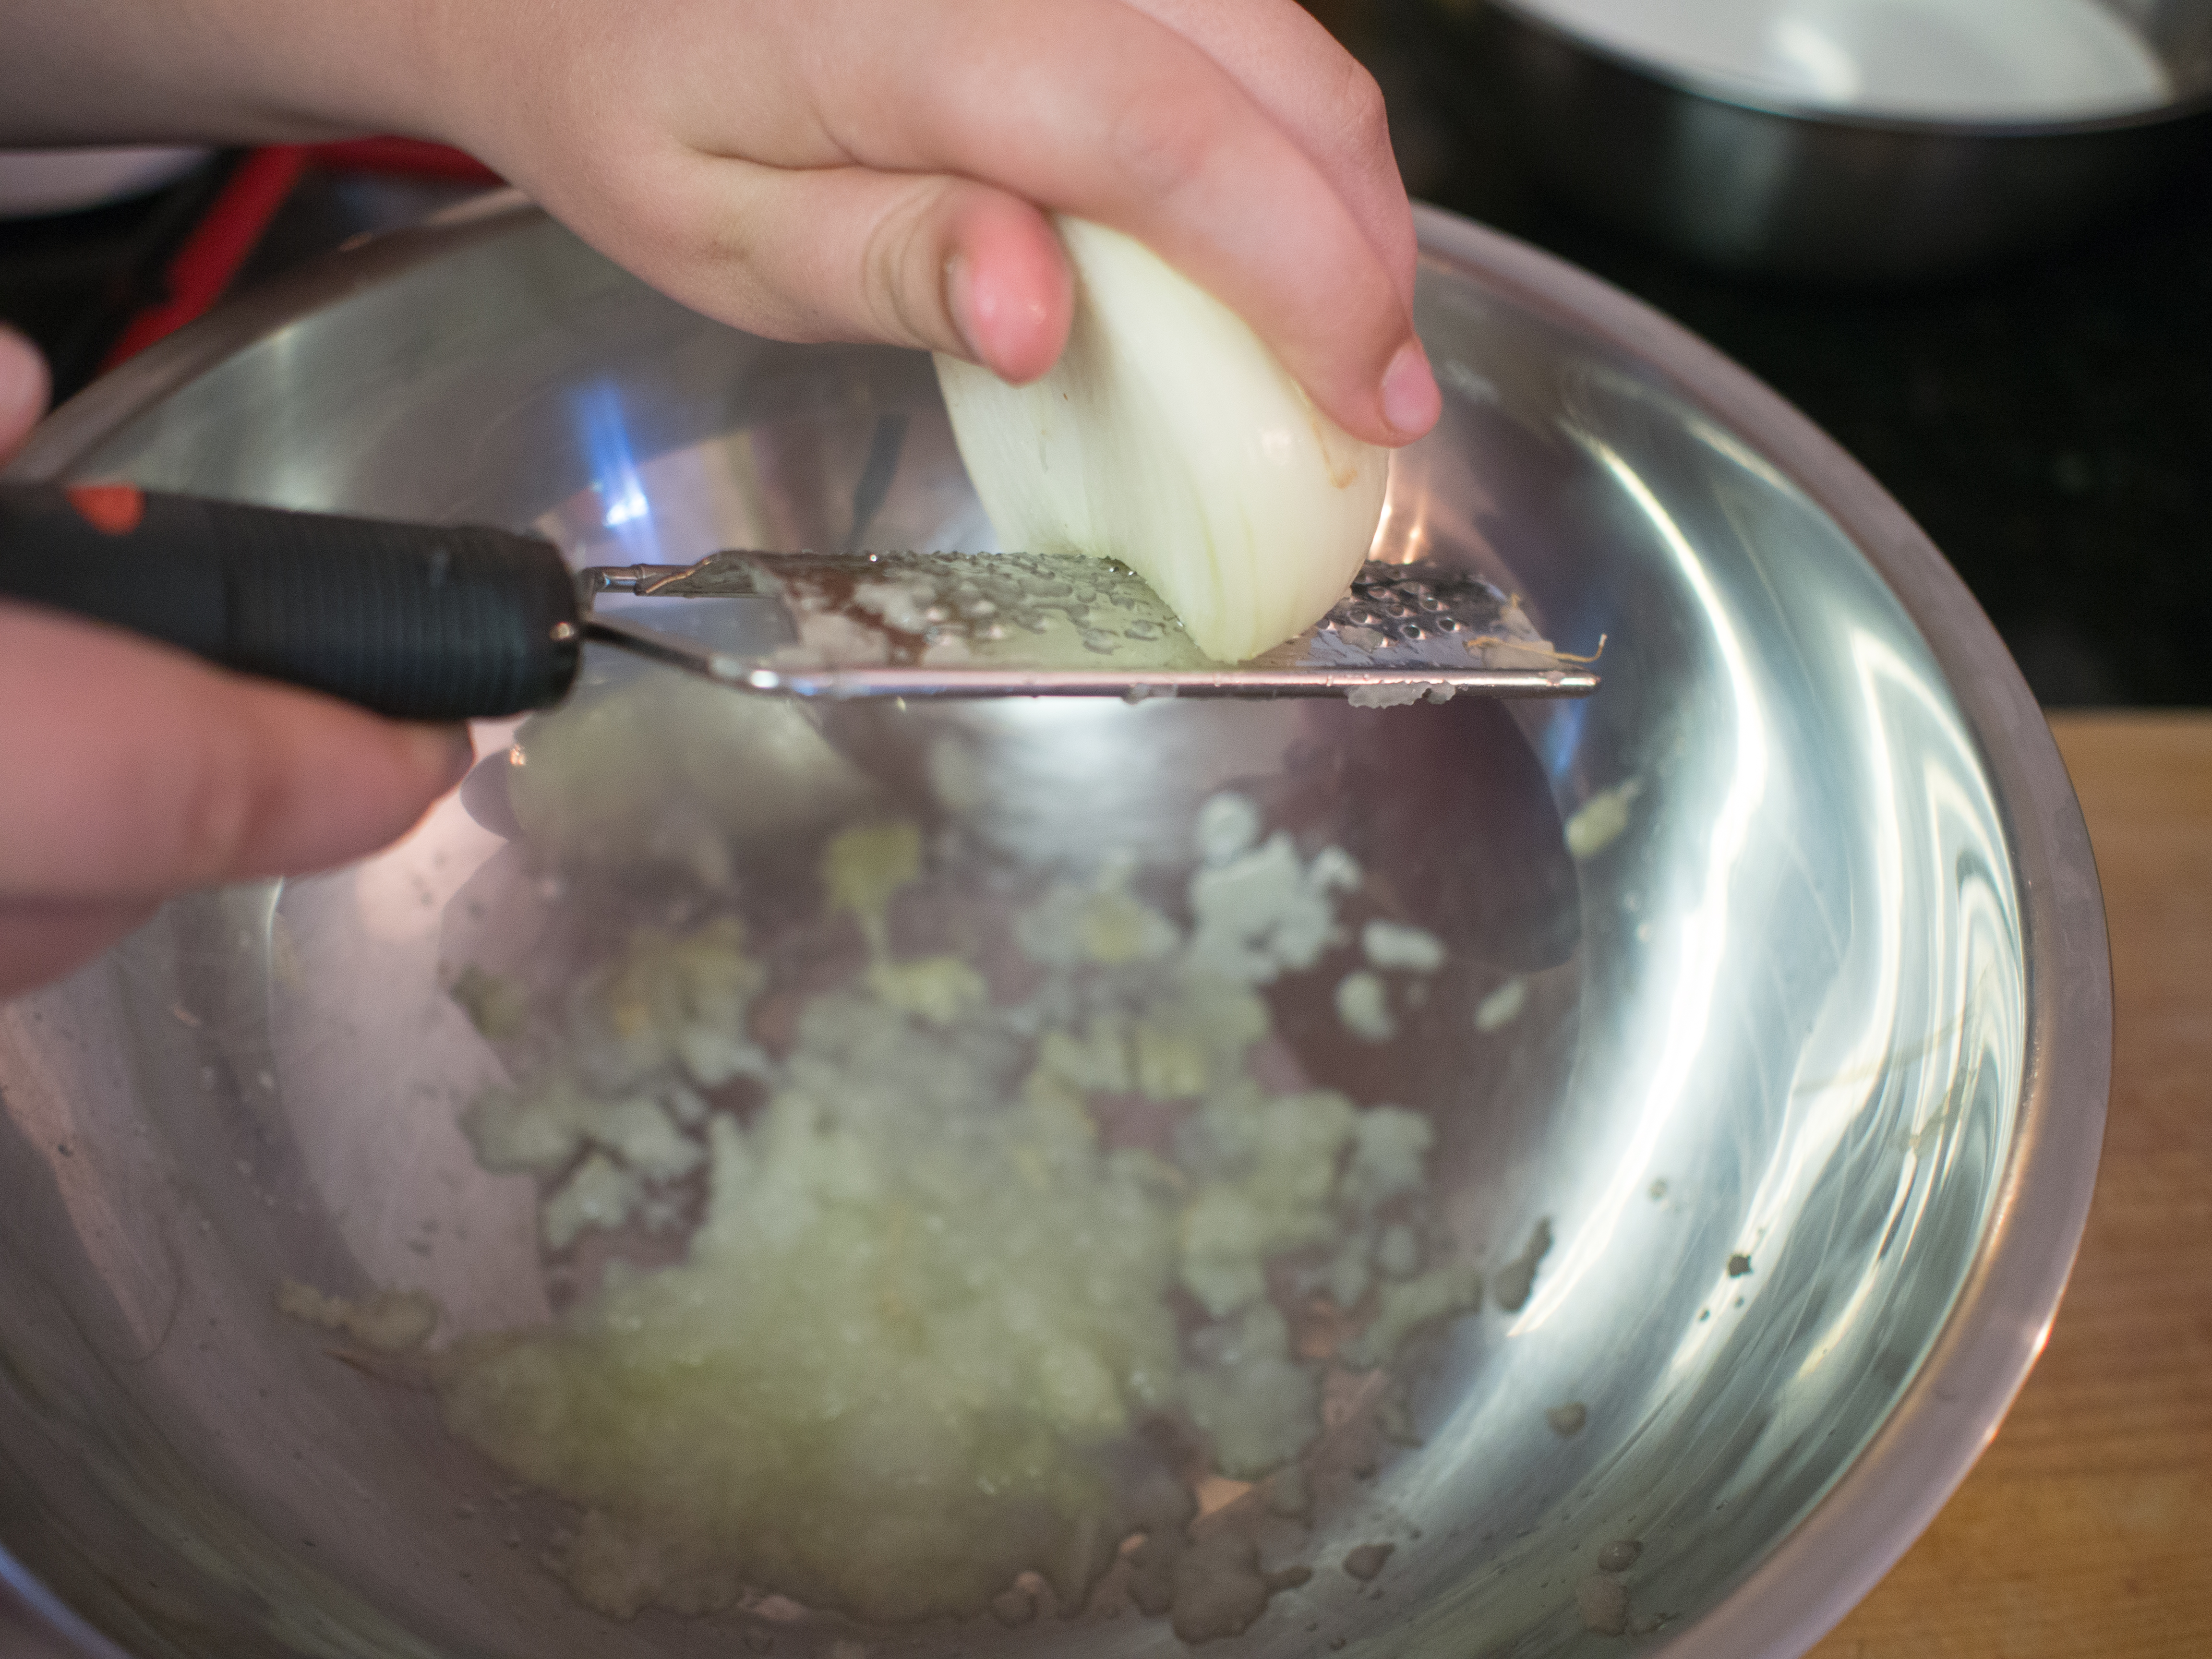
1 medium onion, grated
1 pound ground pork
1 pound ground veal
1/2 cup milk
2 eggs
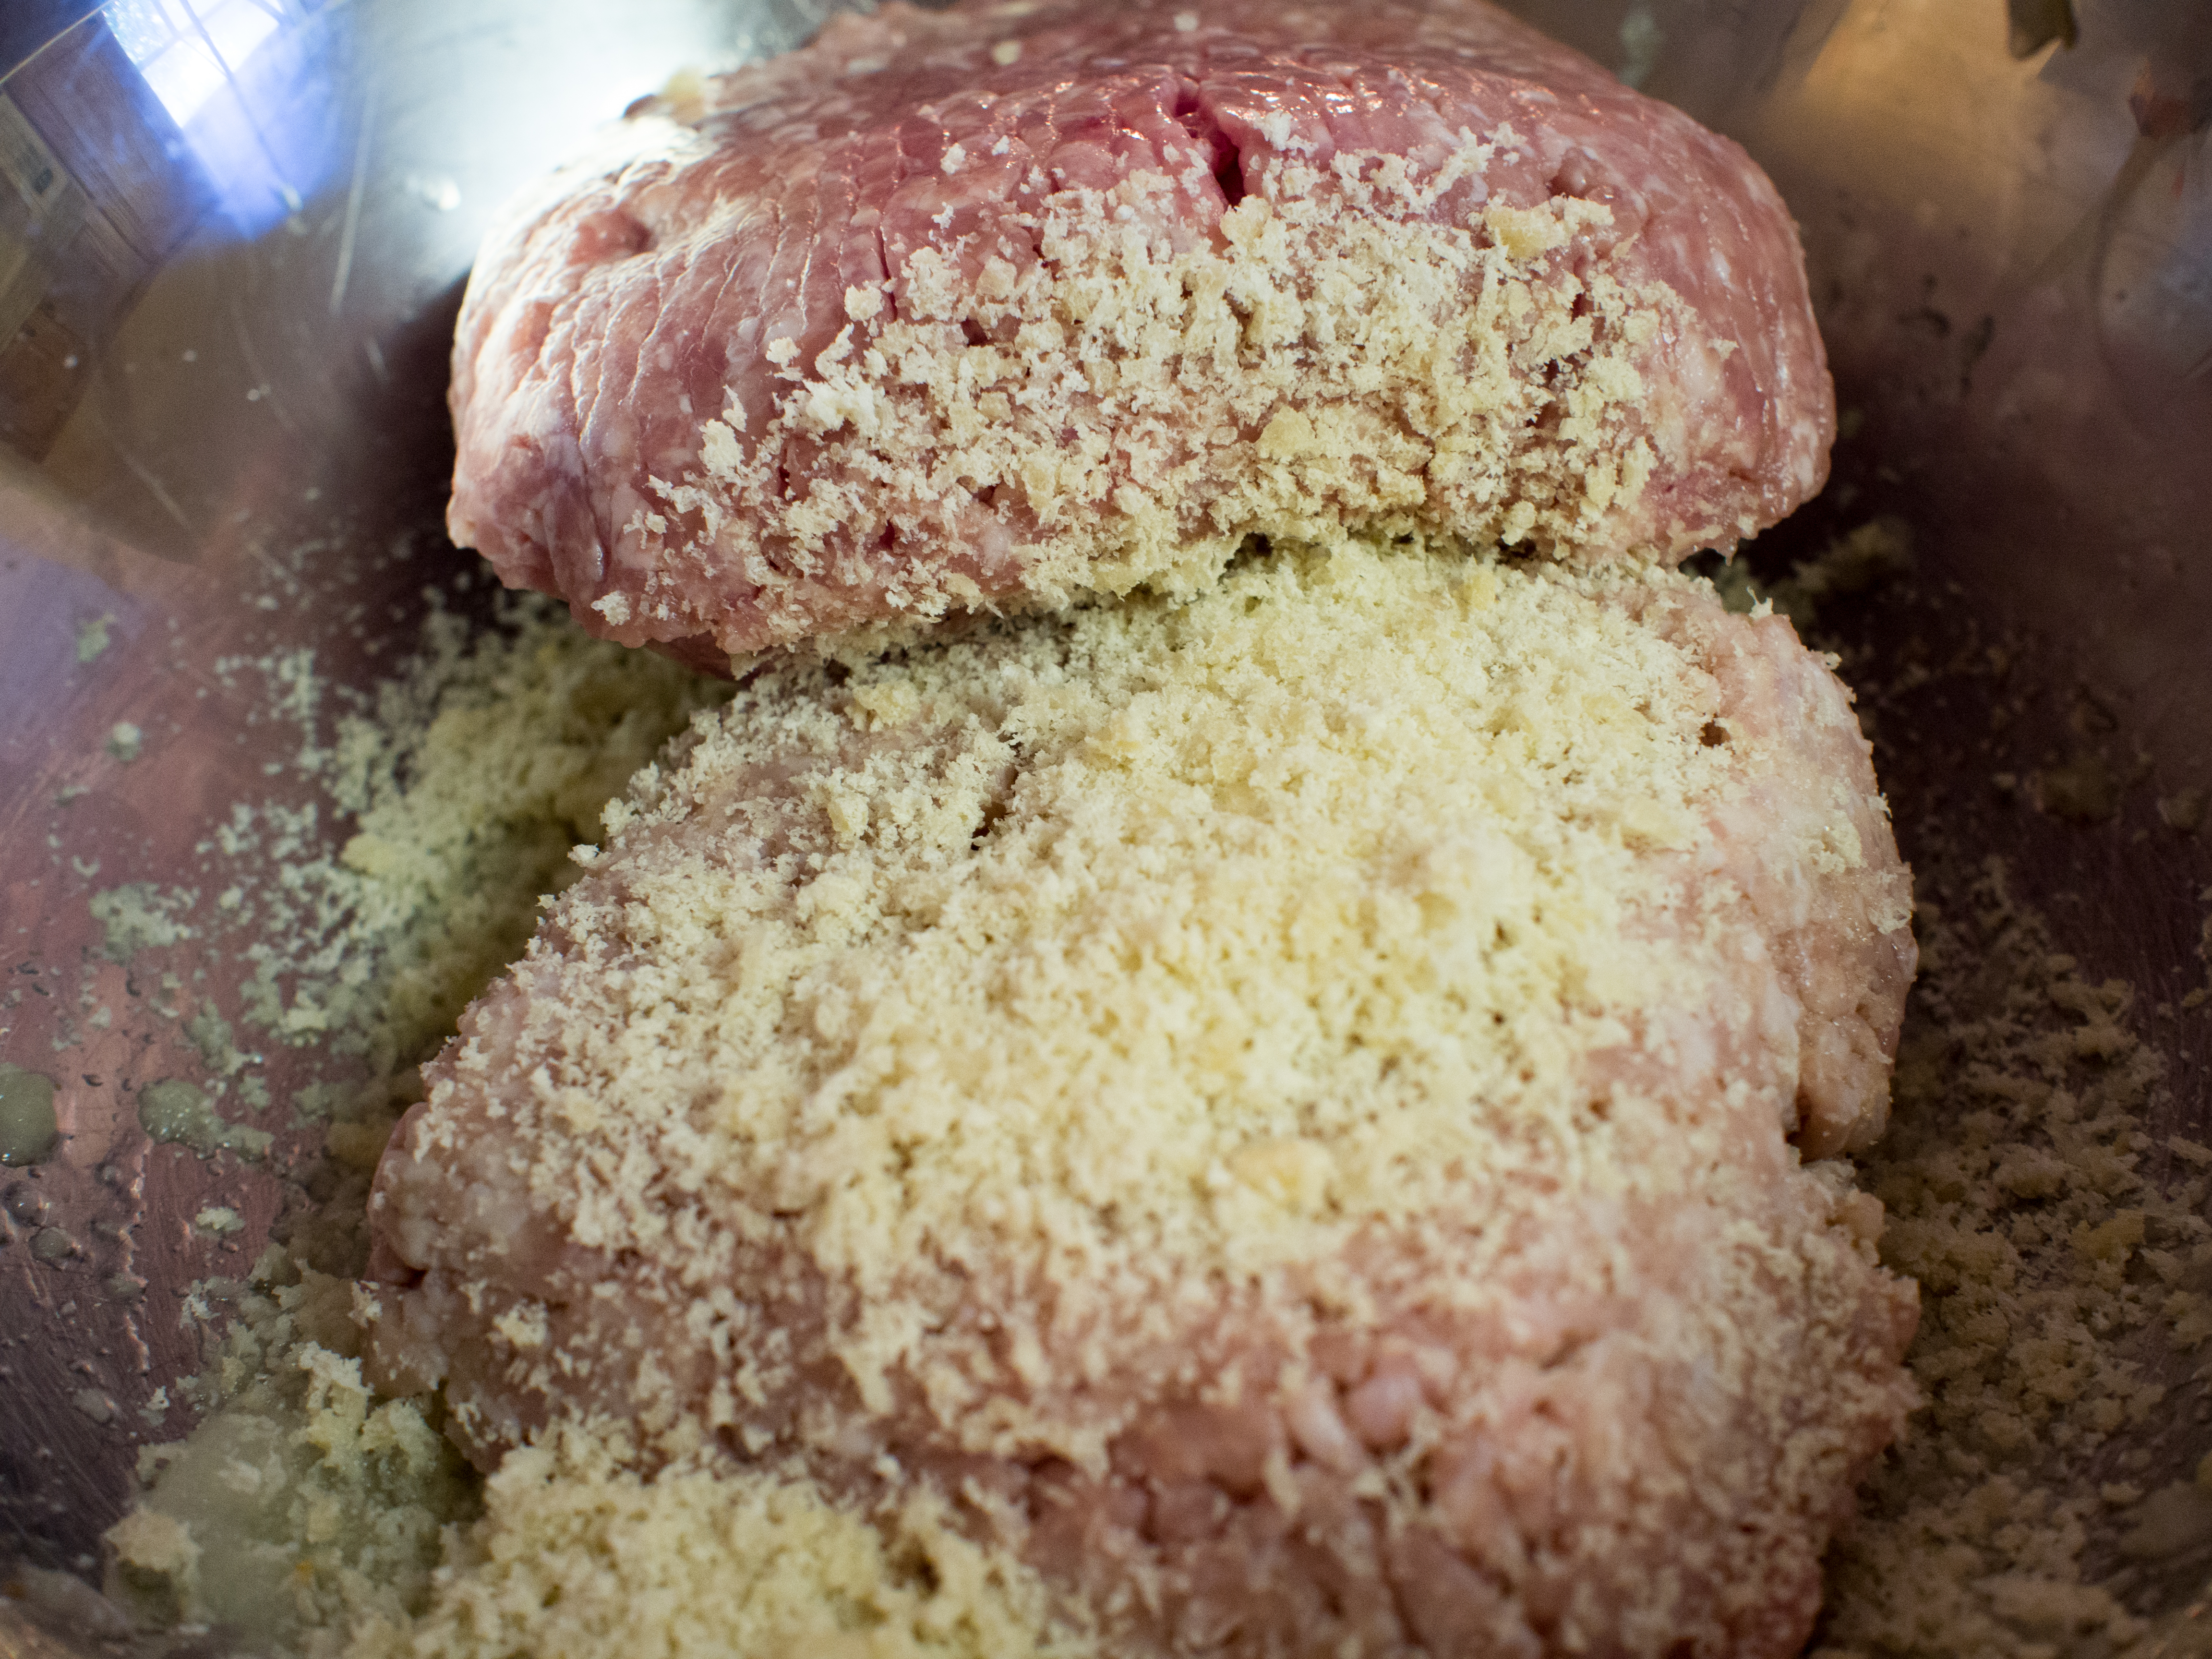
1/2 cup bread crumbs
1/2 cup all purpose flour
1/2 cup seltzer water
1/2 teaspoon allspice
Salt and Pepper to taste
1/4 cup butter
Brown gravy (optional)

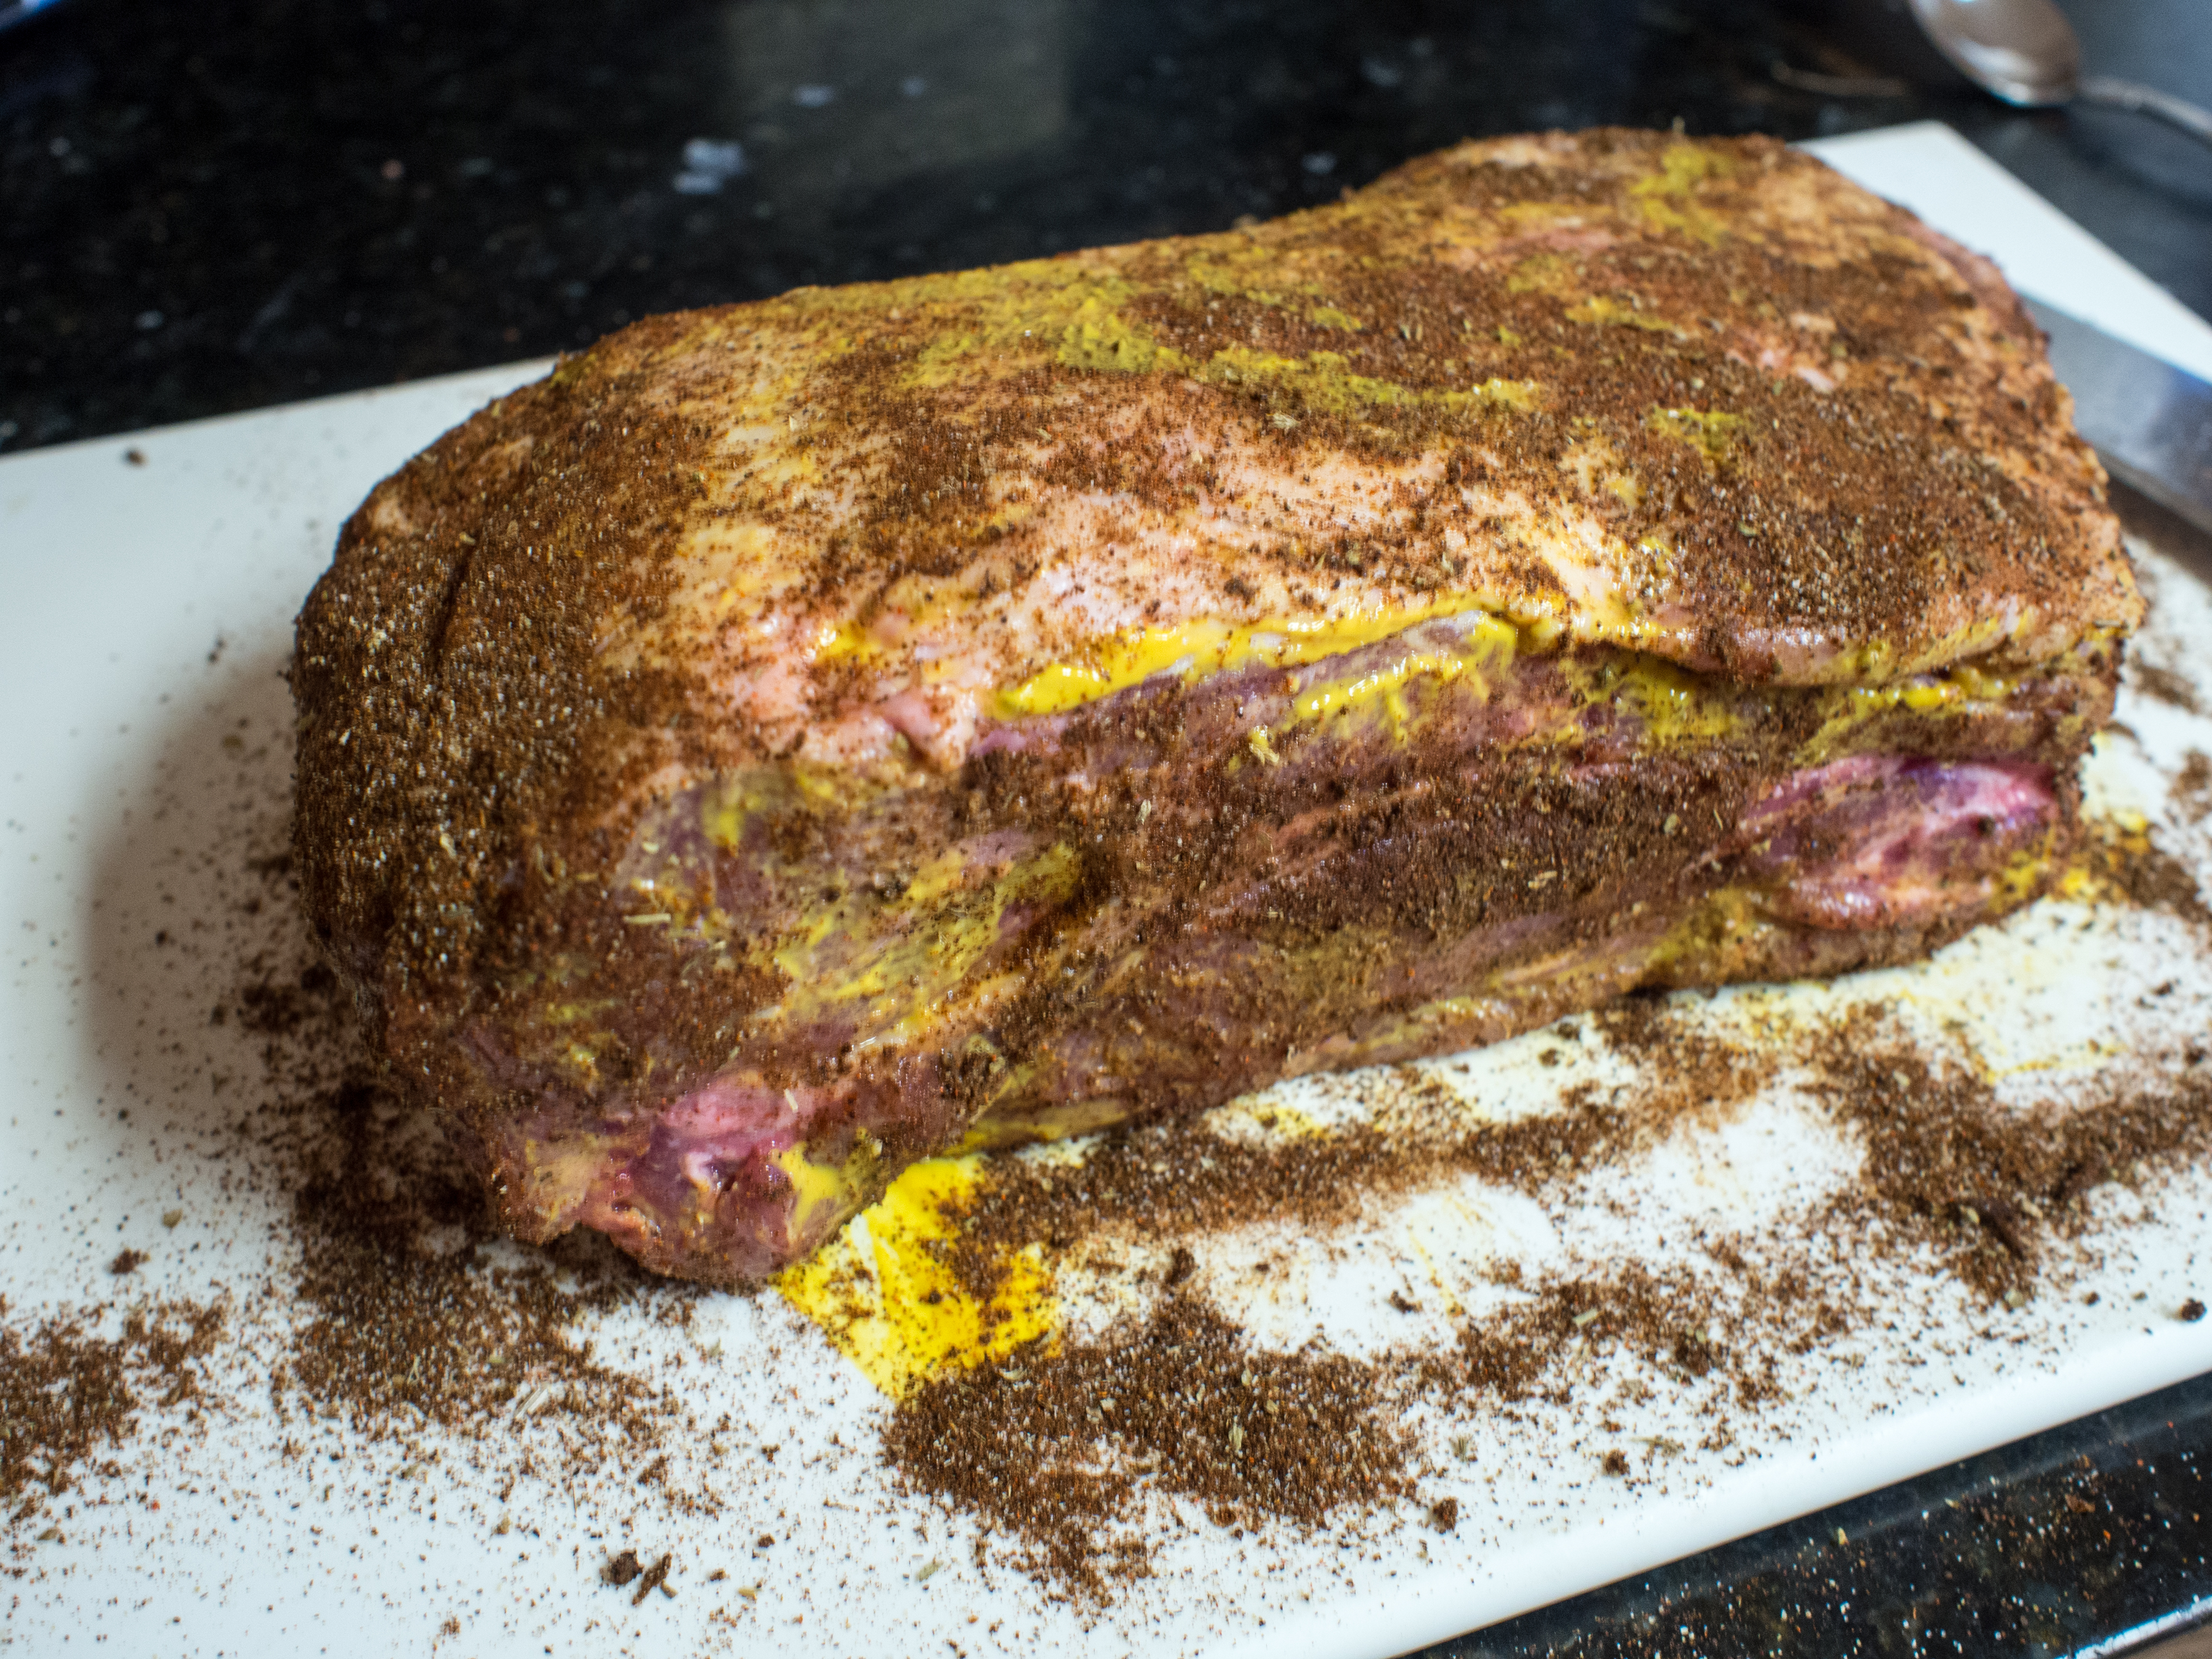
Mix together the onion, pork and veal until well combined. Forget all of the admonishments about overworking the meat for similar dishes. Stir the milk, eggs, bread crumbs, and flour into the meat mixture until well incorporated. Stir in the seltzer water, allspice and salt and pepper. Mix should be moist and more wet than a traditional meatloaf, but it should not be so overly wet as to lack consistency. Additional breadcrumbs or flour may be called for if the mixture is too wet. Refrigerate for about 30 minutes.

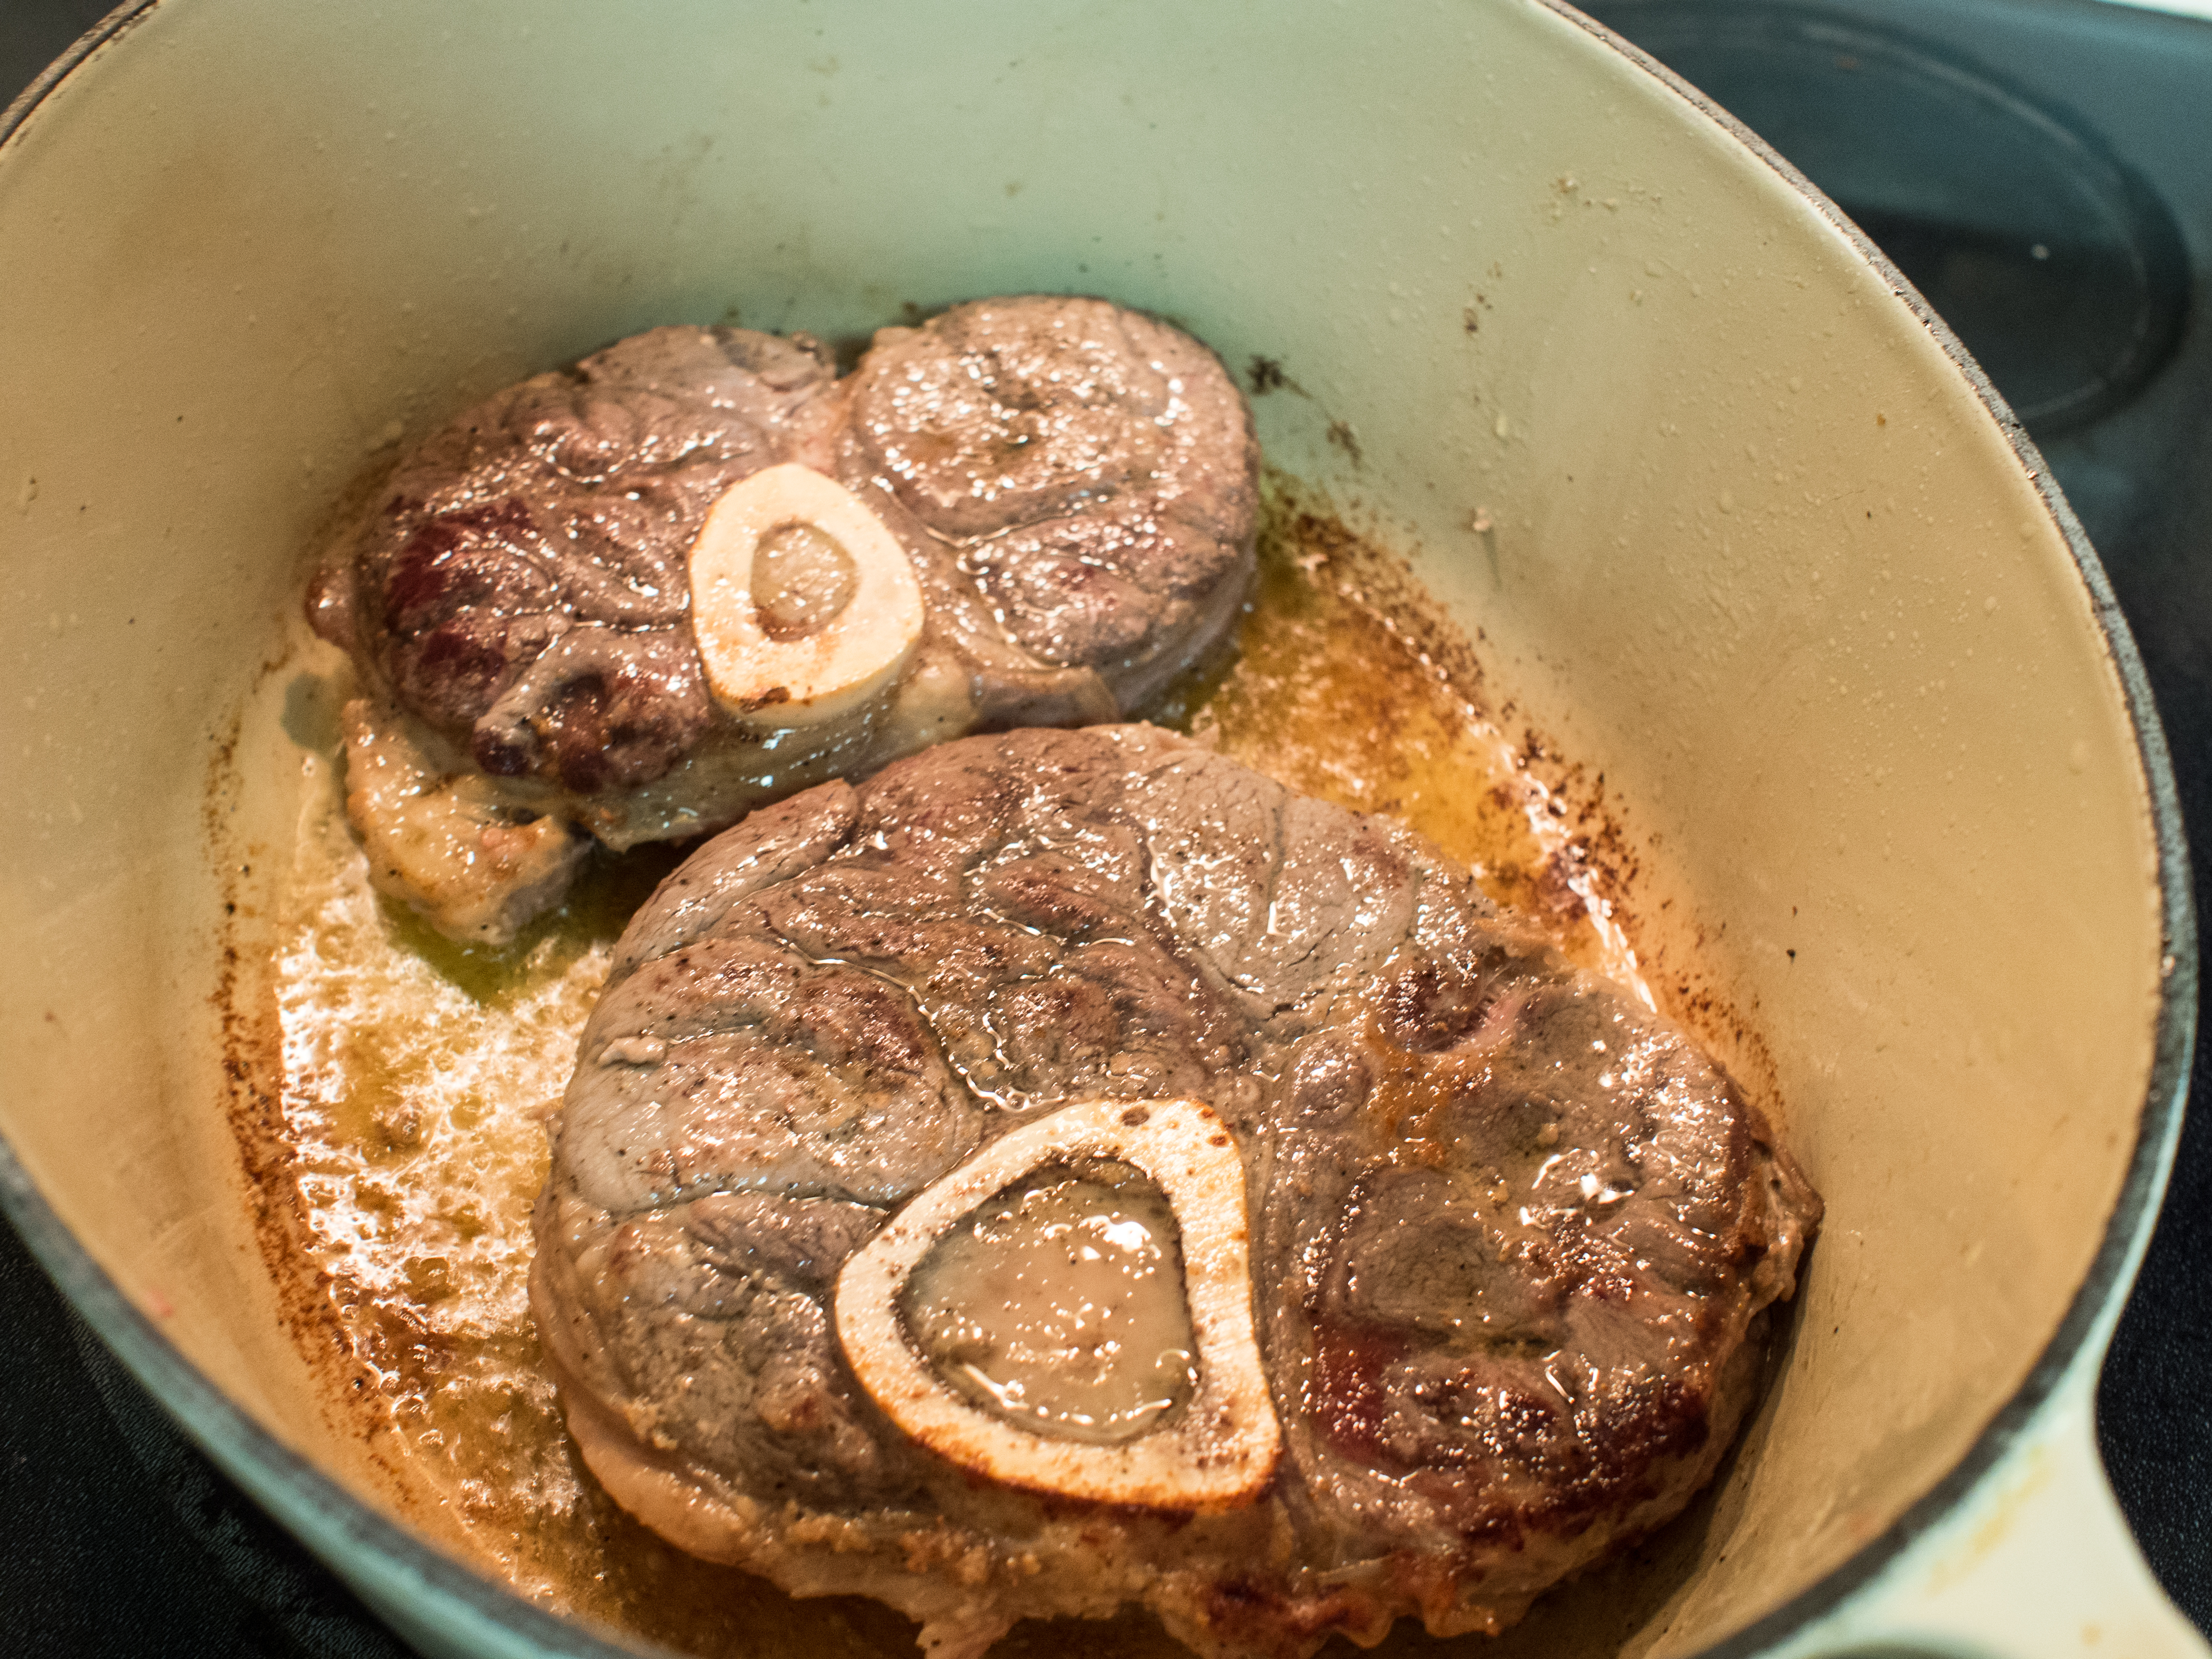
Heat the butter in a heavy bottomed skillet. Using a large spoon, pull oval shaped meatballs out of the mixture and fry in the butter, turning when well browned. Do not crowd the pan, or the meatballs won’t develop a nice brown crust.   Remove meatballs when cooked through and set aside.

For the optional gravy:  add 1/4 cup chopped onion to the leftover butter remains in the pan.  Sauté until translucent.  Add a tablespoon (or so) of flour and brown. When the flour reaches a nice color for gravy, add beef or chicken stock slowly, while whisking, until you get the gravy consistency you want.  Add salt and pepper as needed.

Grating an onion

The kids and I did this in rotations. The tears were flowing mightily!!

frikadeller frikadeller frikadeller rodkaal

Not color enhanced!

Not color enhanced!

Frikadeller and Rodkaal

Lagniappe

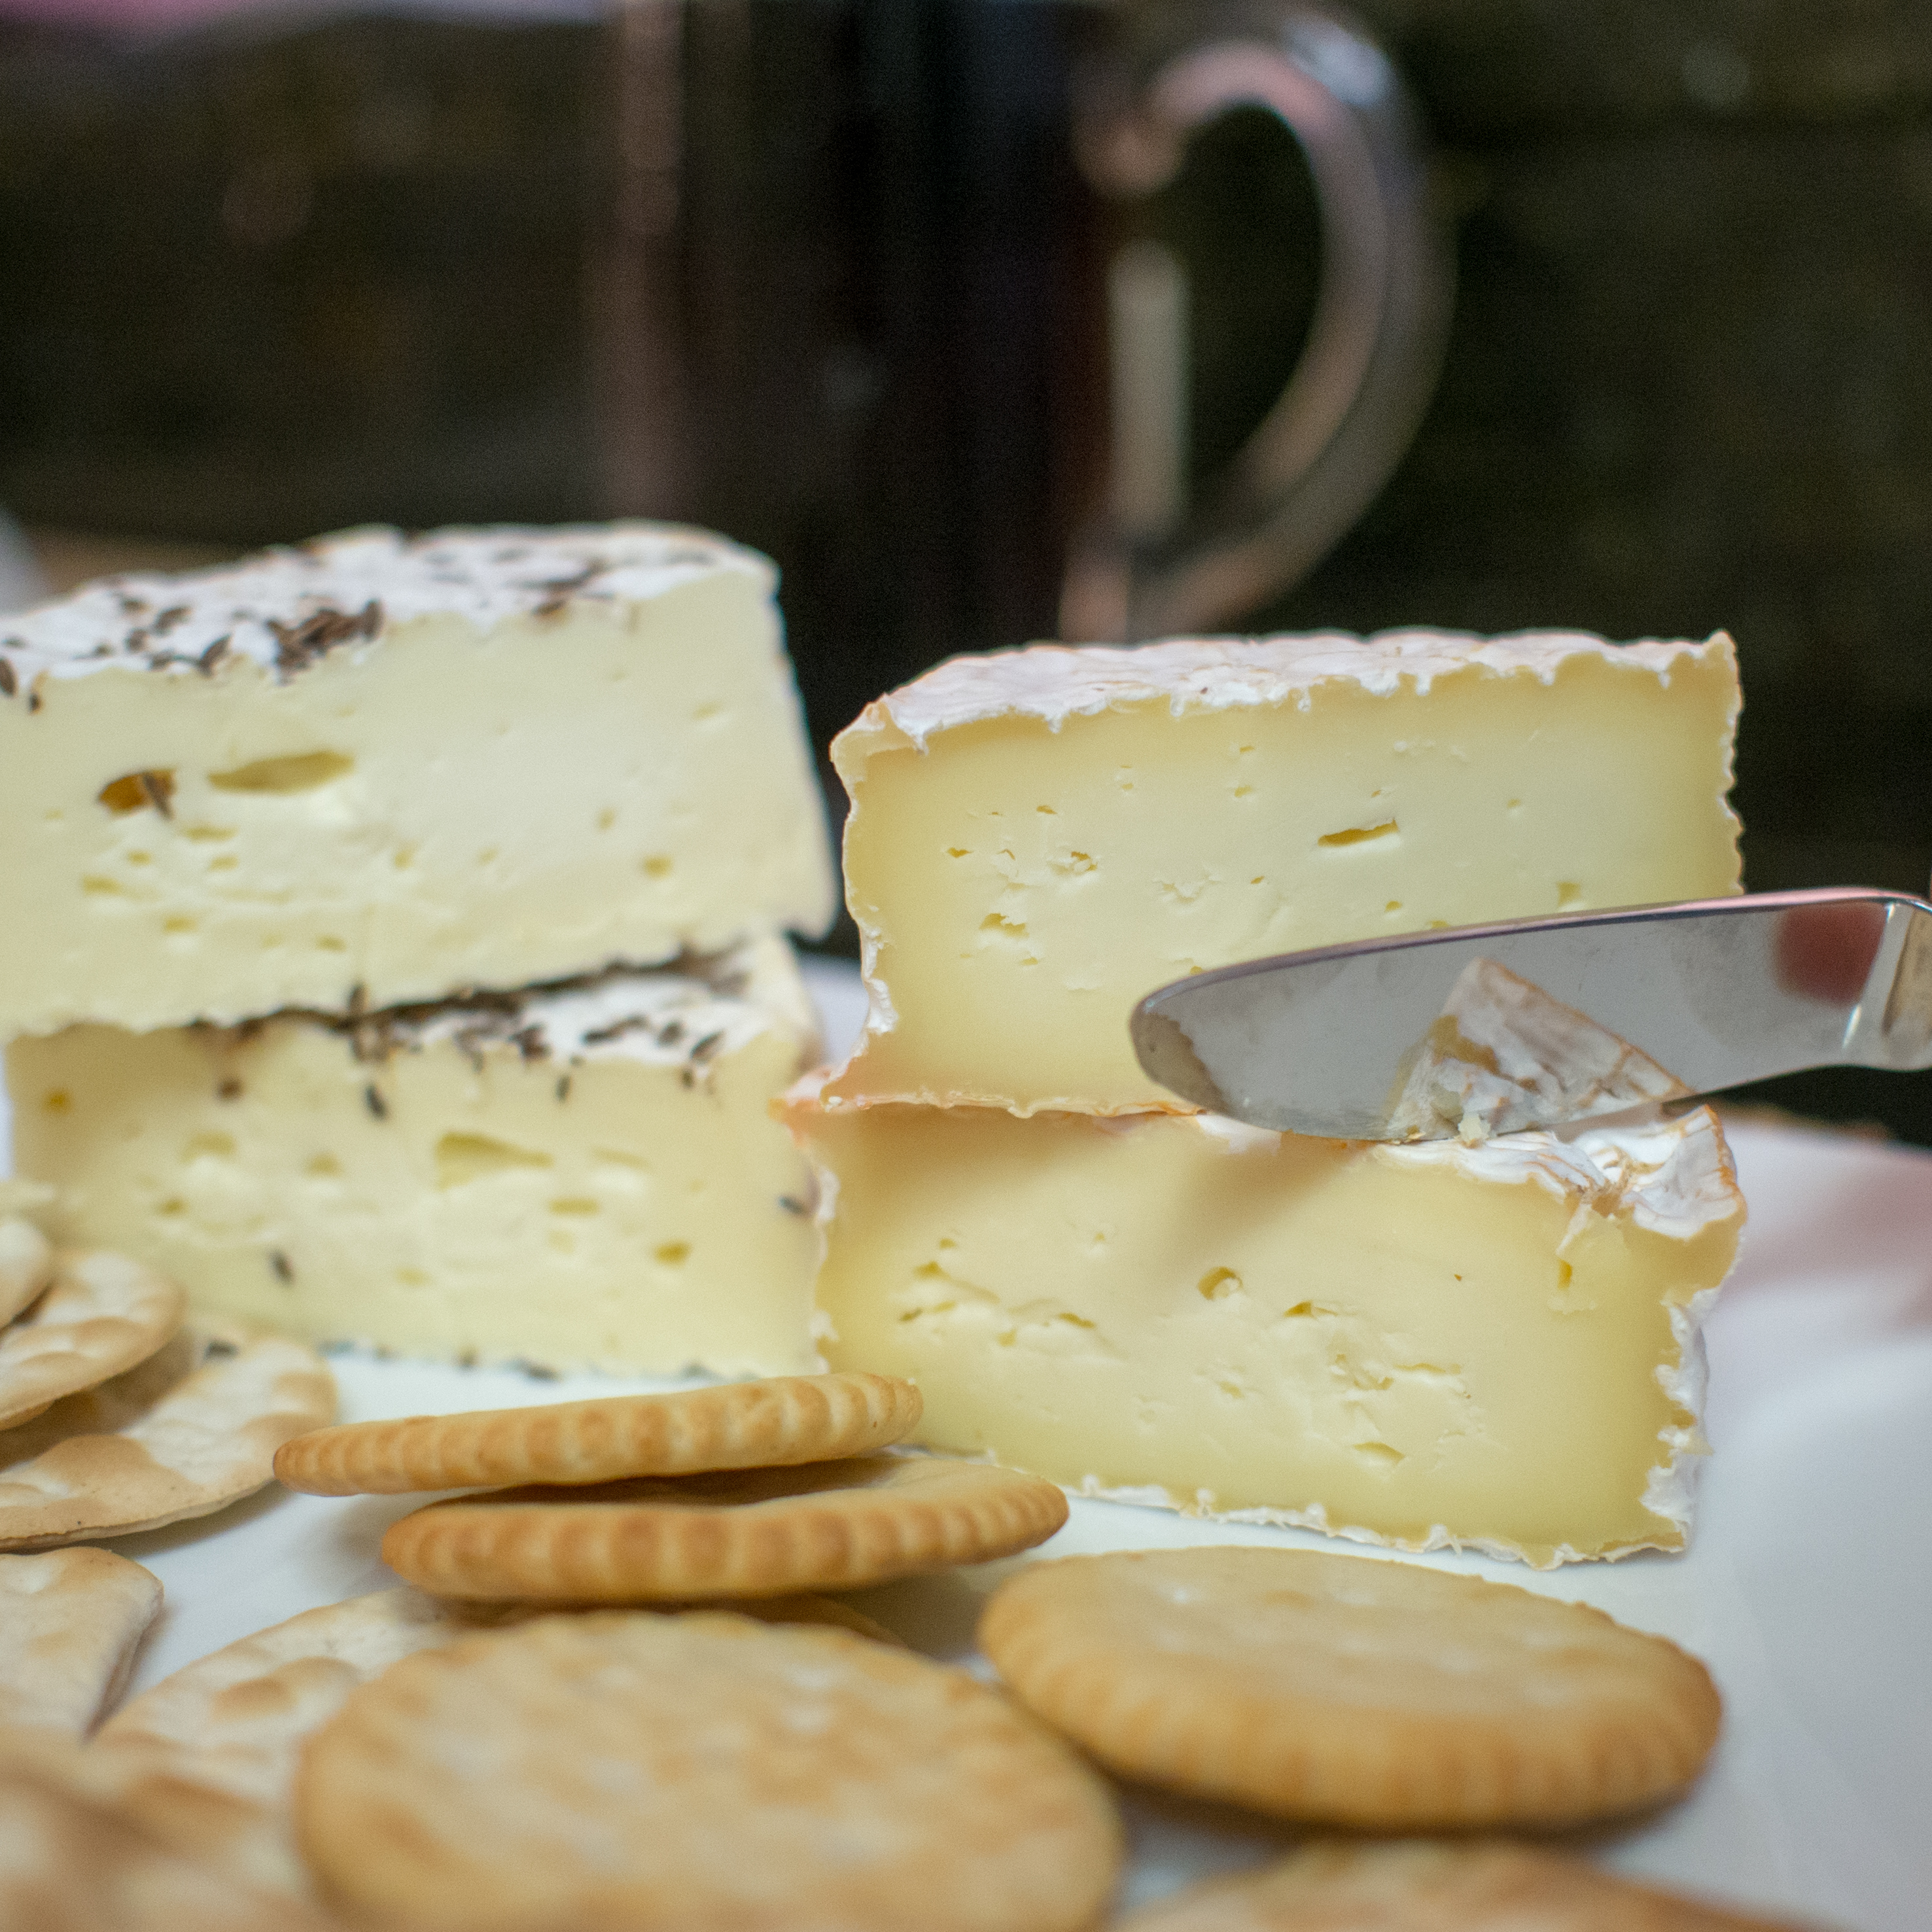
As an aside,  I received some wonderful Danish cheese from the sponsors of this post and the North Festival, Unika by Castello.   I am under no obligation to mention this in my sponsored post.  However, the cheese was amazing and why shouldn’t I say so?  From the literature that came with the cheese, it’s no entirely clear that normal folks can get this cheese at their local cheesemonger.  But, if you happen to see it, grab it.  The two types of cheeses I received were Gnalling and Krondild.  The Gnalling, a slightly harder cheese with an orange-tinged rind was very popular, especially among the kids.  It’s smooth and rich with a slight bite.  The Krondild was a really interesting, dill studded cheese.   Dill pickles are among my most favorite things in the world.  LOVE them.  This cheese combines a rich, creamy cheese with the lovely taste of dill.  Amazing with charcuterie.

Swag cheese

Learn more about Nordic cuisine at the NORTH Festival 2013 in New York City. This post is a collaboration between the blogger and NORTH Festival 2013.